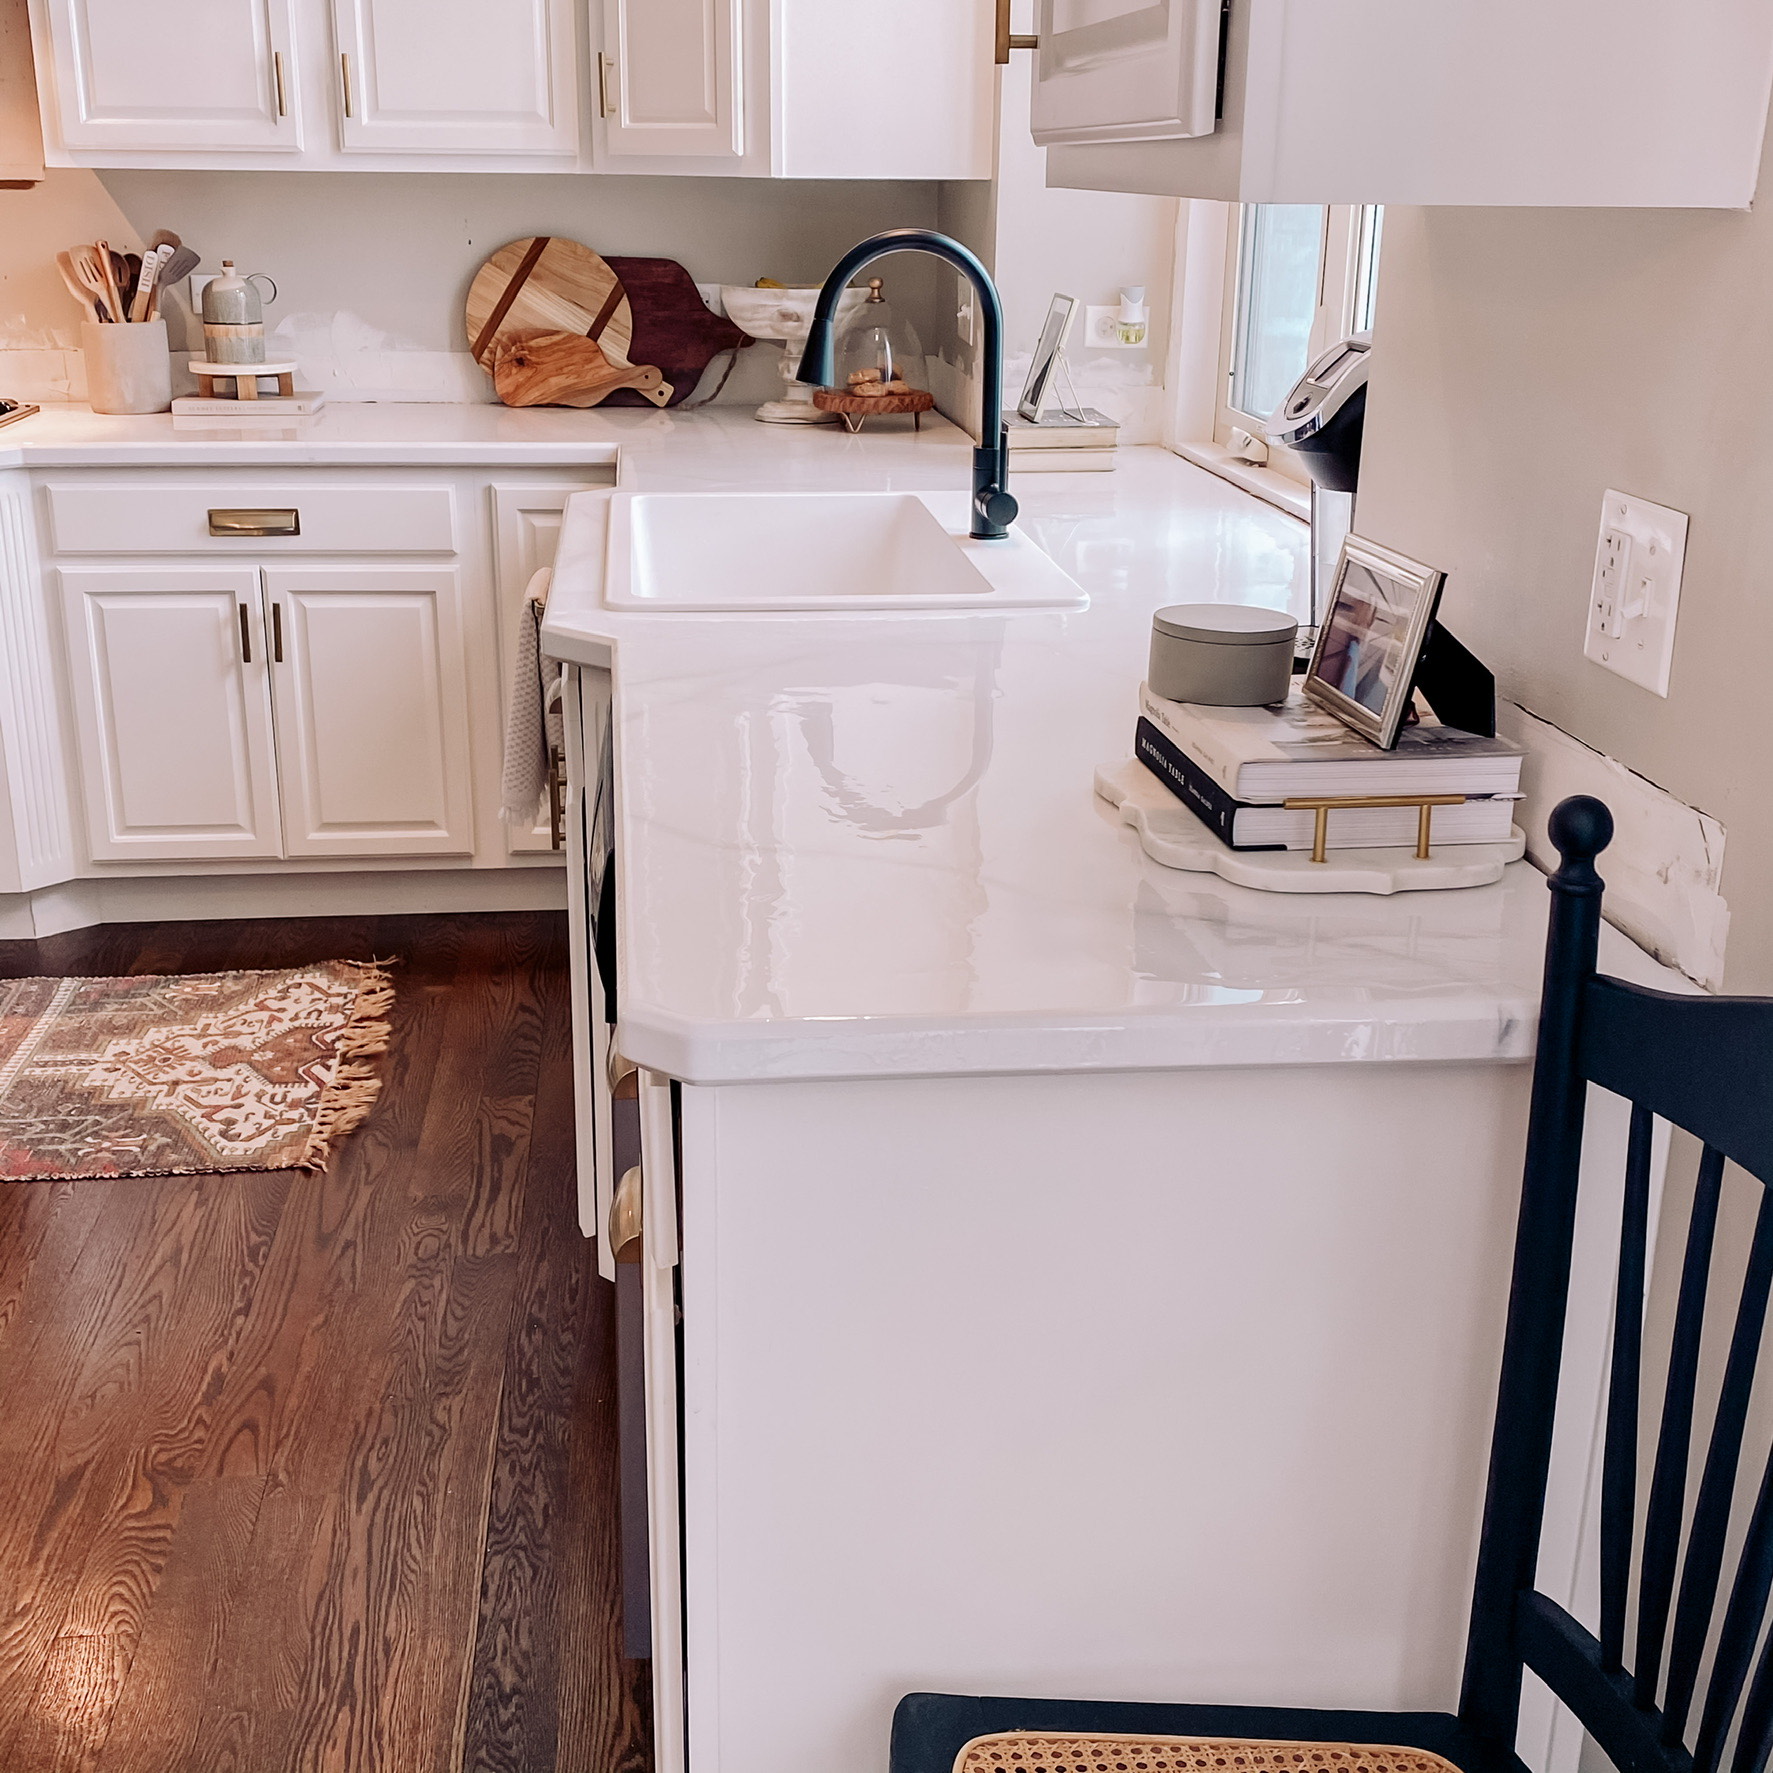
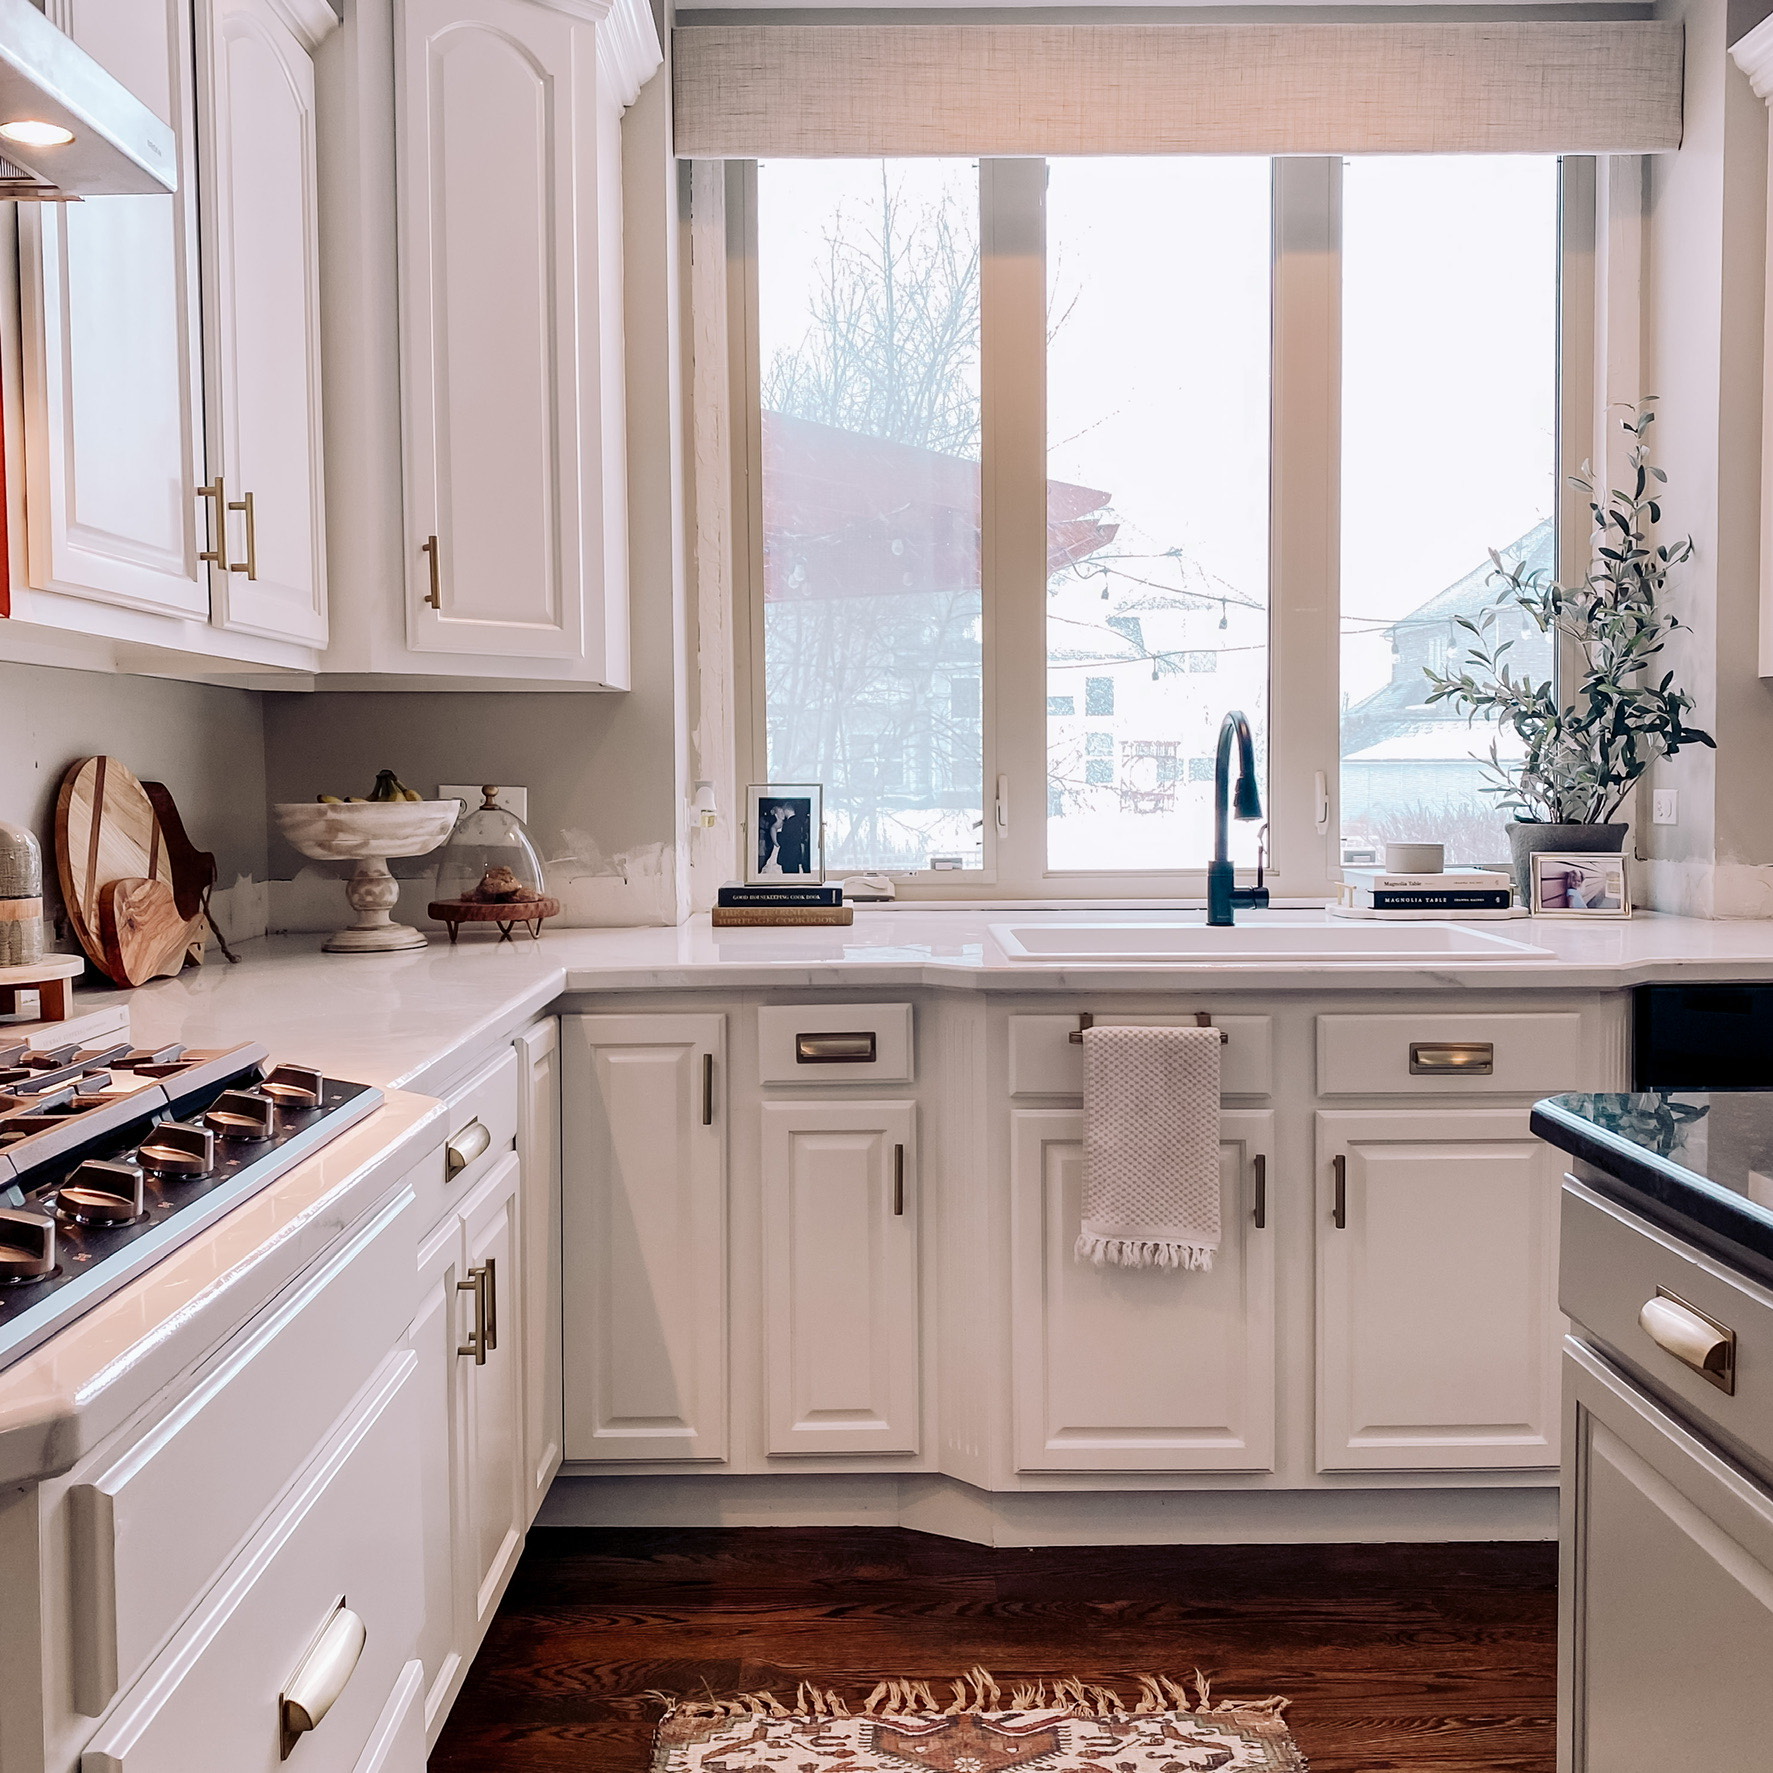
DIY marble countertops: How to get the marble look for a whole lot less
This DIY marble countertop process calls for chalk paint and epoxy.

It has been said that the average person spends a total of three years of their lives in their kitchen. That’s probably why kitchen improvements are so popular. But along with sought after, kitchen updates can also be quite spendy.
Never fear! Enter: the wonderful world of DIY, and today we are talking about a kitchen DIY project that will take yours from drab to fab! If your home is anything like mine, then you moved in with a run of the mill, builder-grade countertop. Ours happened to be laminate. It was fine. Livable, and it did the job that a countertop should do, but I knew that our kitchen had more potential than just “fine.”
I also knew, however, that I didn’t want to spend the money required for the beautiful marble countertops that I was eyeing. So, like many of the projects in my home, I decided to DIY some countertops, and in this case, I was aiming for a faux marble finish. Nervous? I sure was. But I knew that whatever I ended up with would definitely be better than the pinkish/lavender laminate that my kitchen was sporting at the time. So, I got to work on my research.
After perusing the internet to find others who had ventured down this path, I came up with my game plan, and I was about as confident in it as I could be for someone that was about to paint their countertops. I decided to use an epoxy kit for this project, and the rest of the supplies were as follows.
DIY marble countertops: Materials
- White chalk paint
- Gray chalk paint
- Foam roller
- Small paint brush
- Sponge
- 220 grit sandpaper
- Tack cloths
- Plastic drop cloths (I prefer the ones with the tape already attached)
- Buckets
- Epoxy kit
- Plastic squeegee
- Heat gun
DIY marble countertops: Directions
Here's how I tackled our DIY marble countertops.
Step 1: Prep the space
Now that we have all of our supplies on hand, we are ready to prep. Preparation for projects is a necessary evil, and I highly recommend that none of the preparation steps are skipped for this one. The first thing that I did was remove our sink and our cooktop. This step is not completely necessary, but we were replacing ours, so we removed them.
Next, we taped all of our lower countertops off. I wanted to make sure that there were absolutely no cabinets exposed, in case the epoxy dripped down. After that, I cleaned my countertops, and then cleaned them again. And again. It is absolutely essential that your countertops are free from any dust, dirt, or grime. Any of those things can affect how your paint will stick. Once everything was sufficiently prepped, I was ready to move on to the fun stuff.
Get small space home decor ideas, celeb inspiration, DIY tips and more, straight to your inbox!
- Keep reading: 10 kitchen DIYs you can do to update your space this weekend
Step 2: Paint the countertops white
Painting those countertops is next, and I started with dumping some of the white chalk paint right onto my counter and spreading it around with the foam roller. You read that right. No need to waste paint by using a paint pan when you can just dump it right on, am I right?! If you don’t already know, chalk paint adheres really well to most surfaces, and so sanding the countertops beforehand isn’t necessary.
I rolled until the counter was covered in white, and I added as many coats as necessary so that the countertop beneath was no longer visible. In my case, I did four coats. I probably could have gotten away with three, but I wanted to play it safe. Another nice trait of chalk paint is that it dries relatively quickly, so you could easily get all of these coats done in 24 hours.
A post shared by Liz | DIY & DESIGN (@misslizdidit)
A photo posted by on
Step 3: Add the veining
Once the countertops were painted white, it was time to add the “veining” with the grey chalk paint. There were a few methods that I found online for this, but here is what worked best for me: I dipped my small paint brush in water first, and then chalk paint, and VERY lightly ran it along the counter in whatever direction I thought would look natural. It helps to have a photo of marble countertops to look at so that you have an idea of where you’re heading.
I found that if I held the end of the brush loosely, the brush would kind of run along naturally, and I ended up with a natural looking vein. My best piece of advice would be to not try too hard. Let the brush do the walking, and remember- you can always paint over it with white again if you want. Once I had a line that I liked, I would take a damp sponge and blend the line in with the white. A little more gray with the small paintbrush, a damp sponge to blend the outside lines, a little more gray… and so on and so forth. I repeated this process until I found that my veining looked natural. There isn’t a right or wrong way to do this. It is really personal preference, and takes some time to get used to, but playing around with it and practicing helps a lot.
Step 4: Sand
After all that blending and adding of texture with the sponge, the edges of the veins will have some texture, so I went ahead and sanded around the edges to smooth them, and also took the sandpaper to any of the white countertop that seemed rough. Now, since you are sanding, you will want to make sure that you wipe down the surface with your tack cloth when the sanding is complete. You absolutely do not want any particles of dust on the countertop when you add the epoxy.

Step 5: Add the epoxy
And speaking of epoxy … Now, for the moment we have all been waiting for. This part was by far the part that made me the most nervous. I felt that I only got one chance, and while that is true, I will say that it ended up being a lot easier than I anticipated. I really worked myself up for nothing.
The directions for the epoxy will be on the kit that you choose, but most will involve mixing two parts together (that’s what the buckets are for) and stirring sufficiently until an epoxy material is formed.
Once you have your mixture, it is really as easy as pouring it on the countertop and spreading it around with the squeegee. I did try a variety of tools for this step, and I found that the plastic shower squeegee worked the best.
Don’t stress too much about getting it completely smooth. The epoxy kits are self-leveling, and for the most part, as long as the countertop is covered, it will level itself out. My method of choice was to start with a couple of feet at a time, pour some epoxy on the counter, squeegee around and let it waterfall off the sides (this is where all that plastic comes in), and continue until your countertop is covered. That’s it. I promise it isn’t as hard as it seems.
Step 6: Pop air bubbles with a heat gun for a smooth surface
Once everything is all covered, you will notice that small bubbles will form in the epoxy. While a lot of them will work themselves out, a heat gun is a great way to bring the stubborn air bubbles to the surface. I also tried a hair dryer and a blow torch (yep, I did that), and I found that the heat gun worked the best, by far. Just be careful with your cord and be mindful of leaning over the counter.
Another thing that you will notice is that as the epoxy levels, small drips will form under the lip of your counter. For the next 20-30 minutes, I recommend taking a plastic knife or rubber spatula to smooth them out when they form, so that they don’t harden that way.
Ok, there you have it- easy right? I realize that it is a lot of information, and I realize how intimidating it might seem, but having done this project myself multiple times, I can assure you that anyone can do it. Do I have real marble countertops now? I sure don’t. What I do have is thousands of extra dollars in my pocket that I saved by doing this project. I’ll take that any day!
About our expert
Liz Hartmann is a mom, lover of all things DIY, and creative thinker who chronicles her home renovation adventures on her blog, Miss Liz Did It. She's DIYed everything from faux marble countertops and shiplap walls, to woven headboards and bunk beds. Follow her on Instagram at @MissLizDidIt.