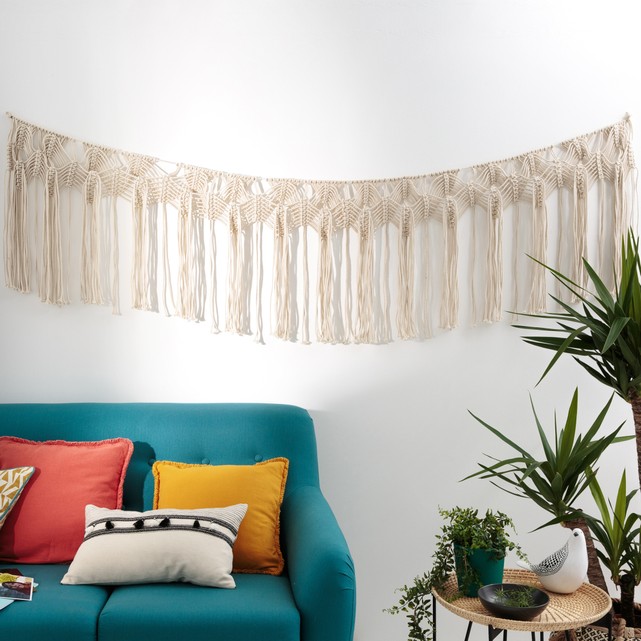

Macramé, aka that woven, knotted textile you have been seeing all over Instagram for the past few months, has clearly made a comeback, shedding its fussy '70s wall-hanging skin, and transforming into a more subtle, boho-vibe, Pinterest-worthy interior trend. Best part about macramé is that you can do it yourself on the cheap. So don that velvet kaftan, get the incense burning, and follow these basic steps from Wool Couture to learn how to macramé...
We have loads more crafty DIY ideas over on our craft hub page so be sure to check those out too.
How to macramé a lark's head knot
This is the most simple knot going but you will need to know it if you want your macramé masterpiece to hang from a dowel or a ring (we have also seen branches being used for an even more organic vibe). See this as basically like the 'casting on' of macramé.
1. Start to macramé
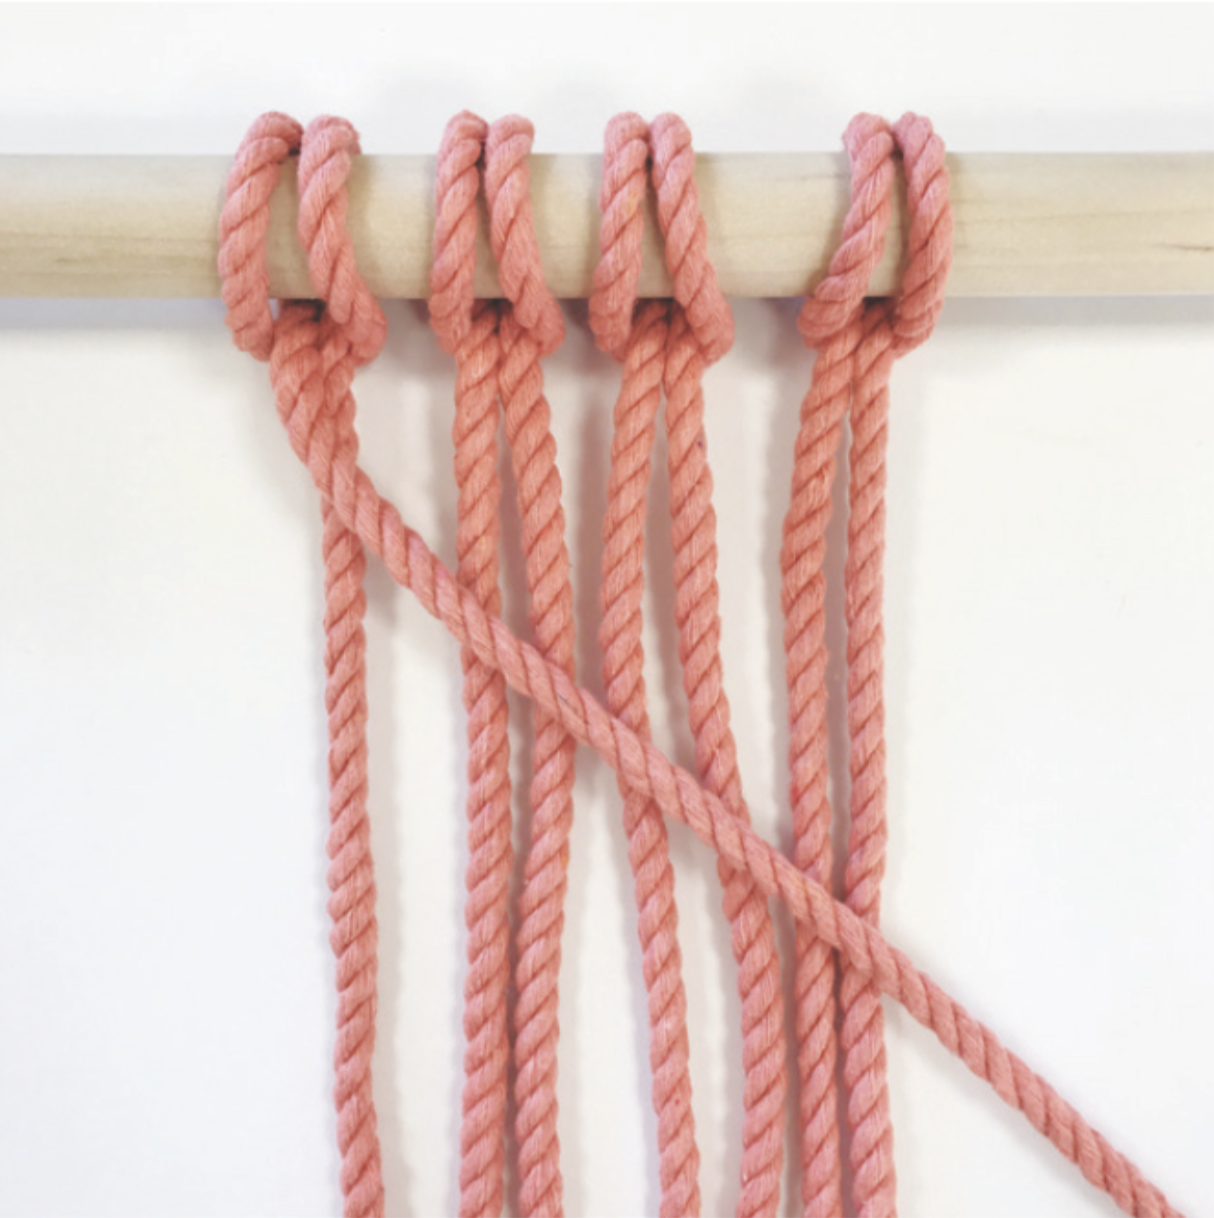
Fold your rope in half and place the centre loop behind your hanger or pole.
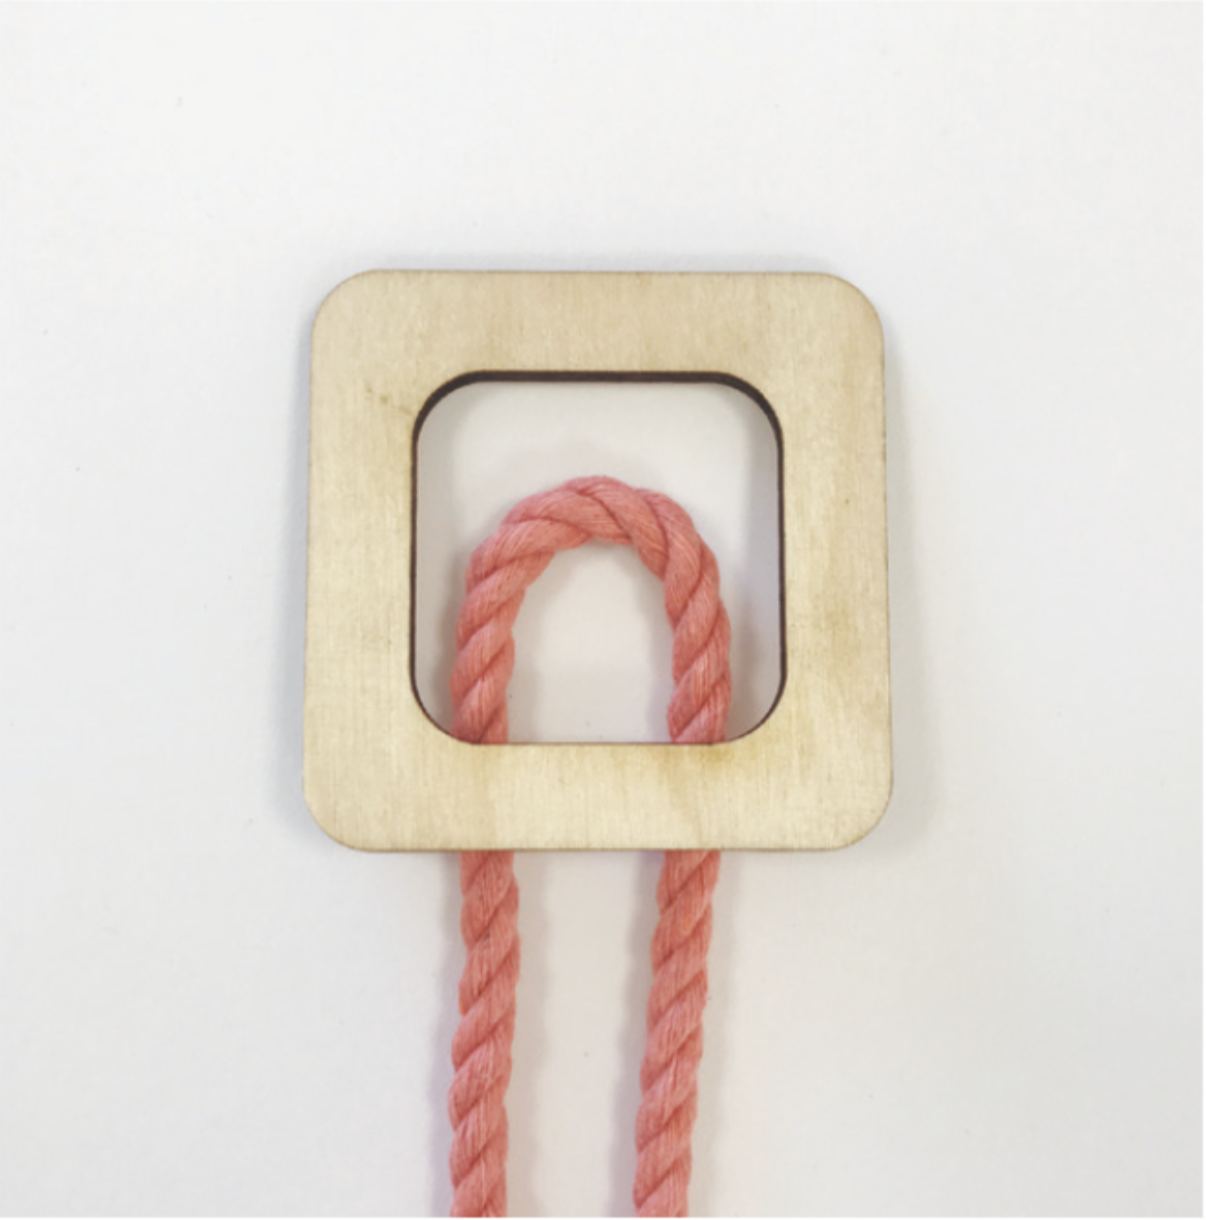
2. Pass the ends through the loop
Take the two ends of the rope and pass through the centre loop.
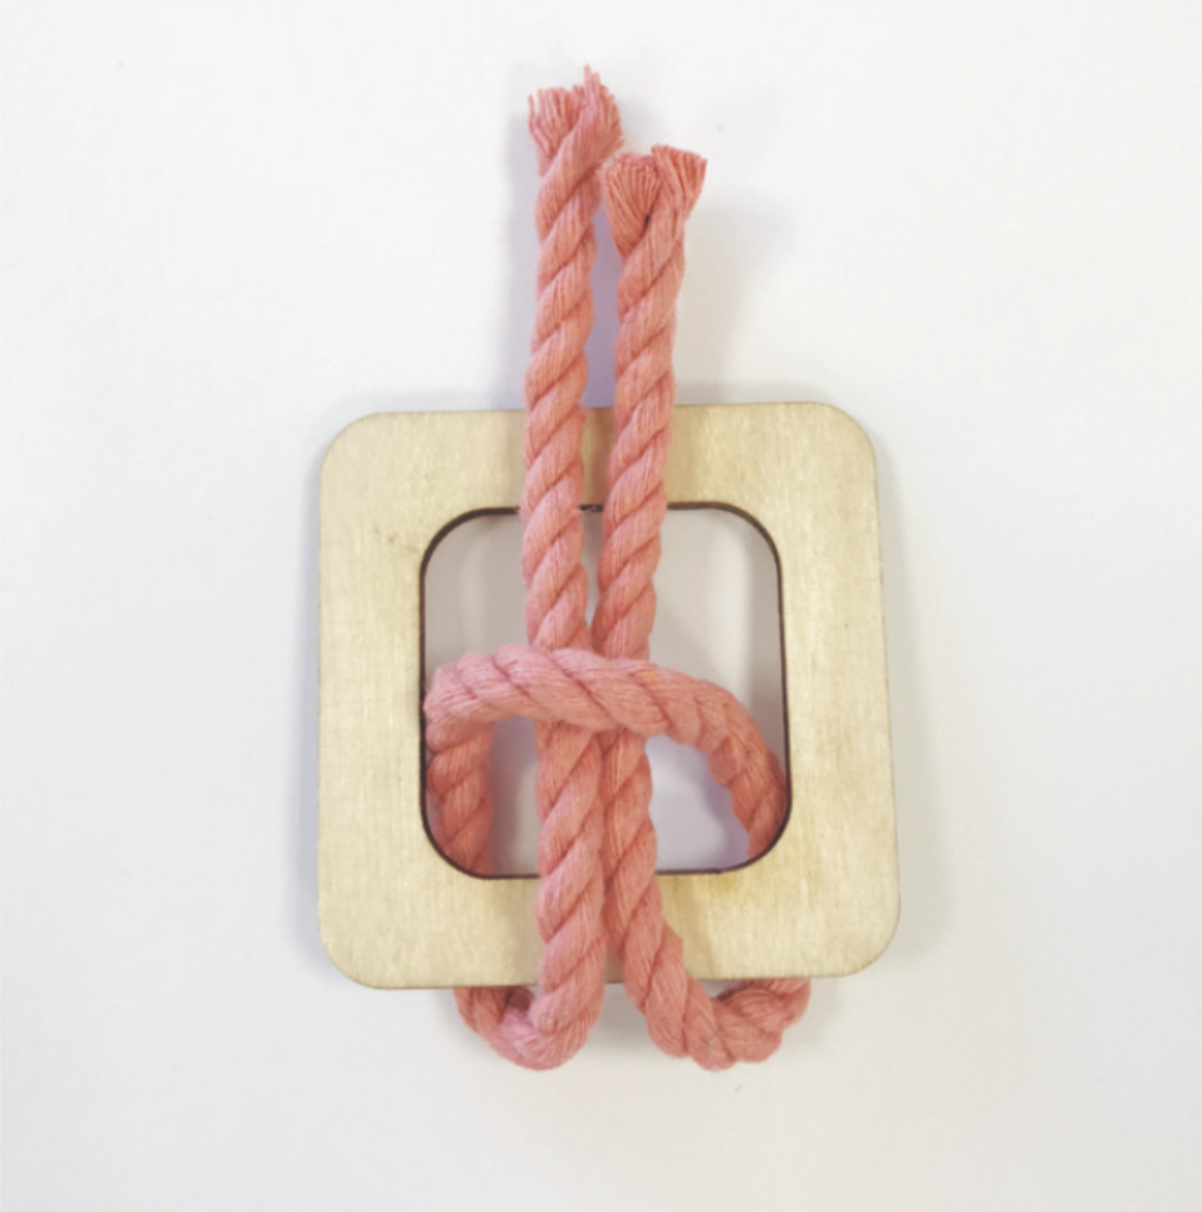
3. Complete the macramé knot
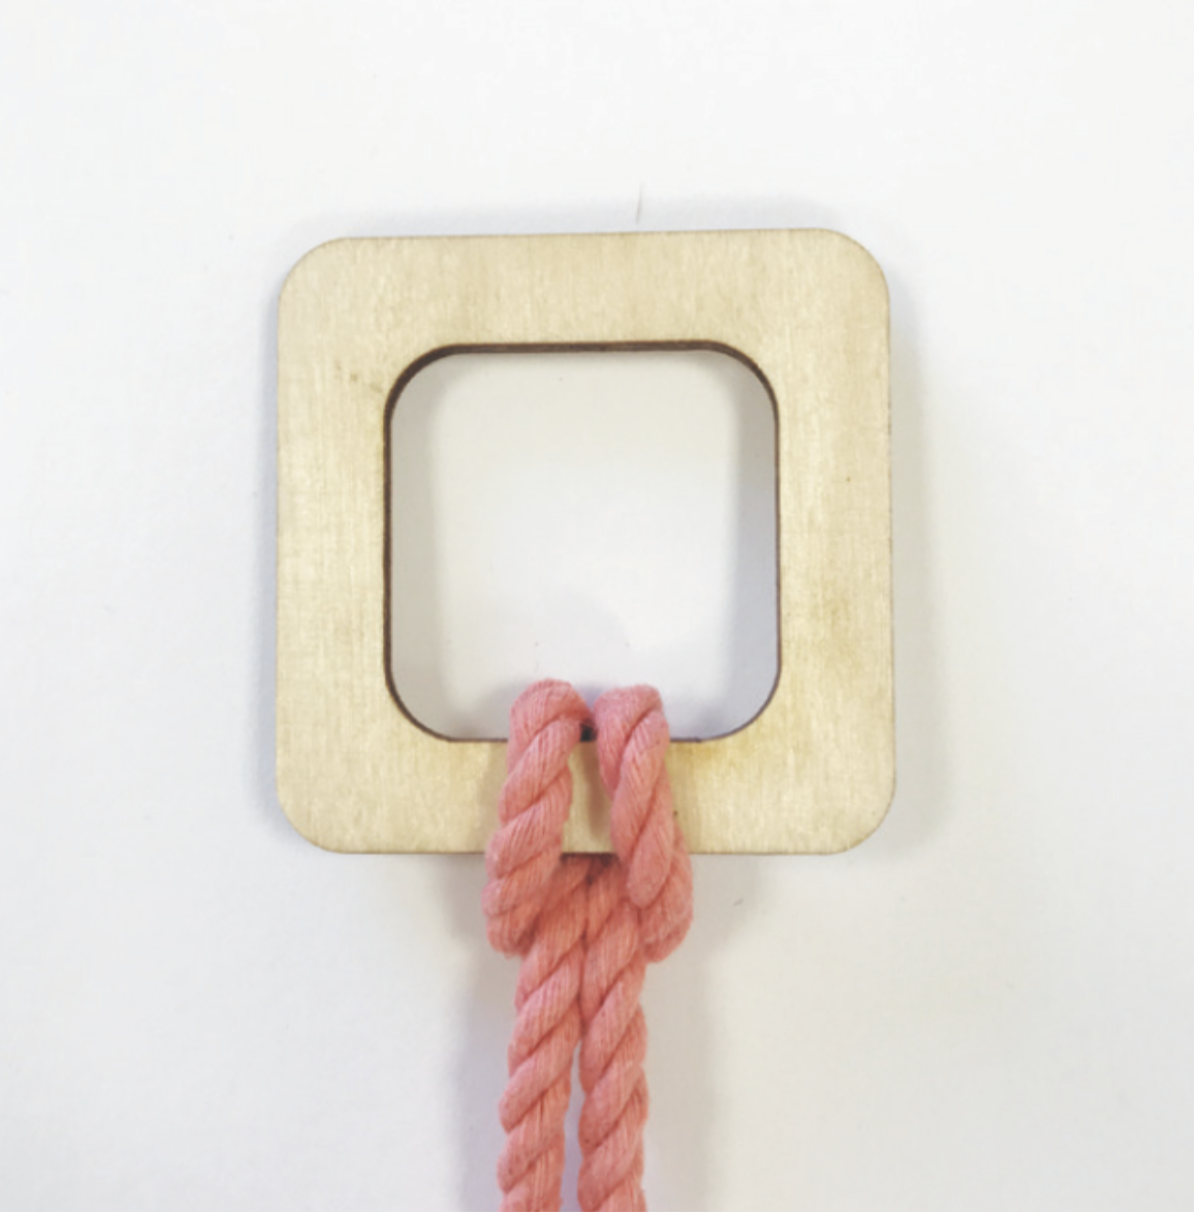
Pull the rope tight to complete the knot. The top image shows what the knot should look like from the front, the bottom image shows what it looks like from the back.
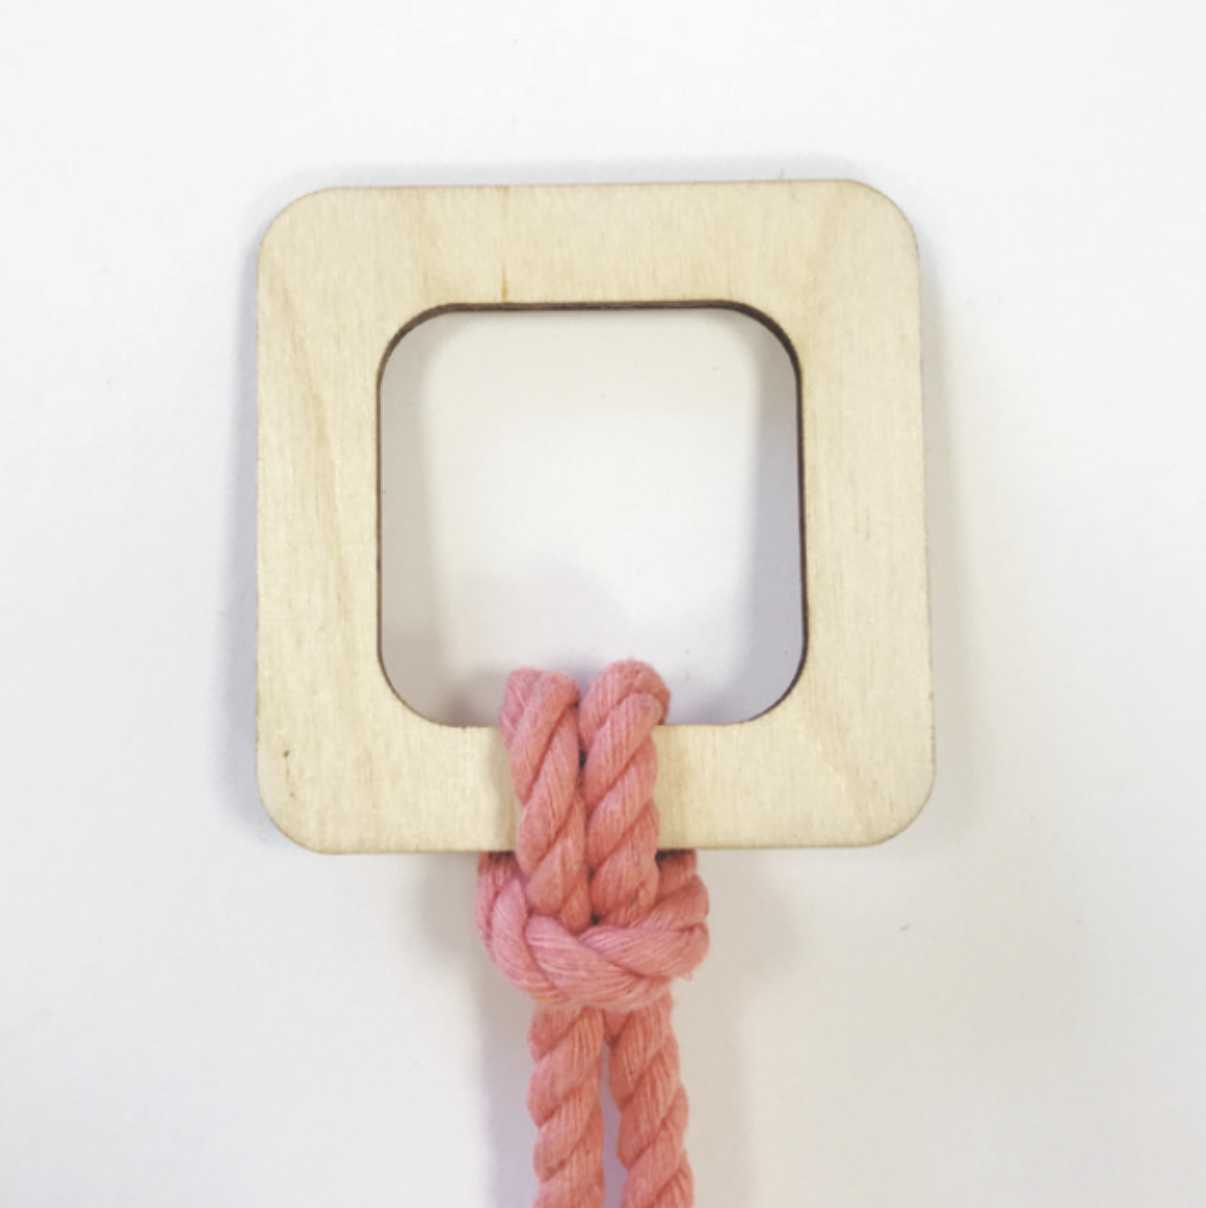
How to macramé a square knot
A square knot is what the bulk of most basic macramé wallhangings are made from, so once you master this one you can cover every wall in woven rope if you fancy.
1. Start a square macramé knot
To make a square knot you require two pieces of rope, individually attached using a lark head heat knot. Take rope A over the two centre ropes and under rope B.
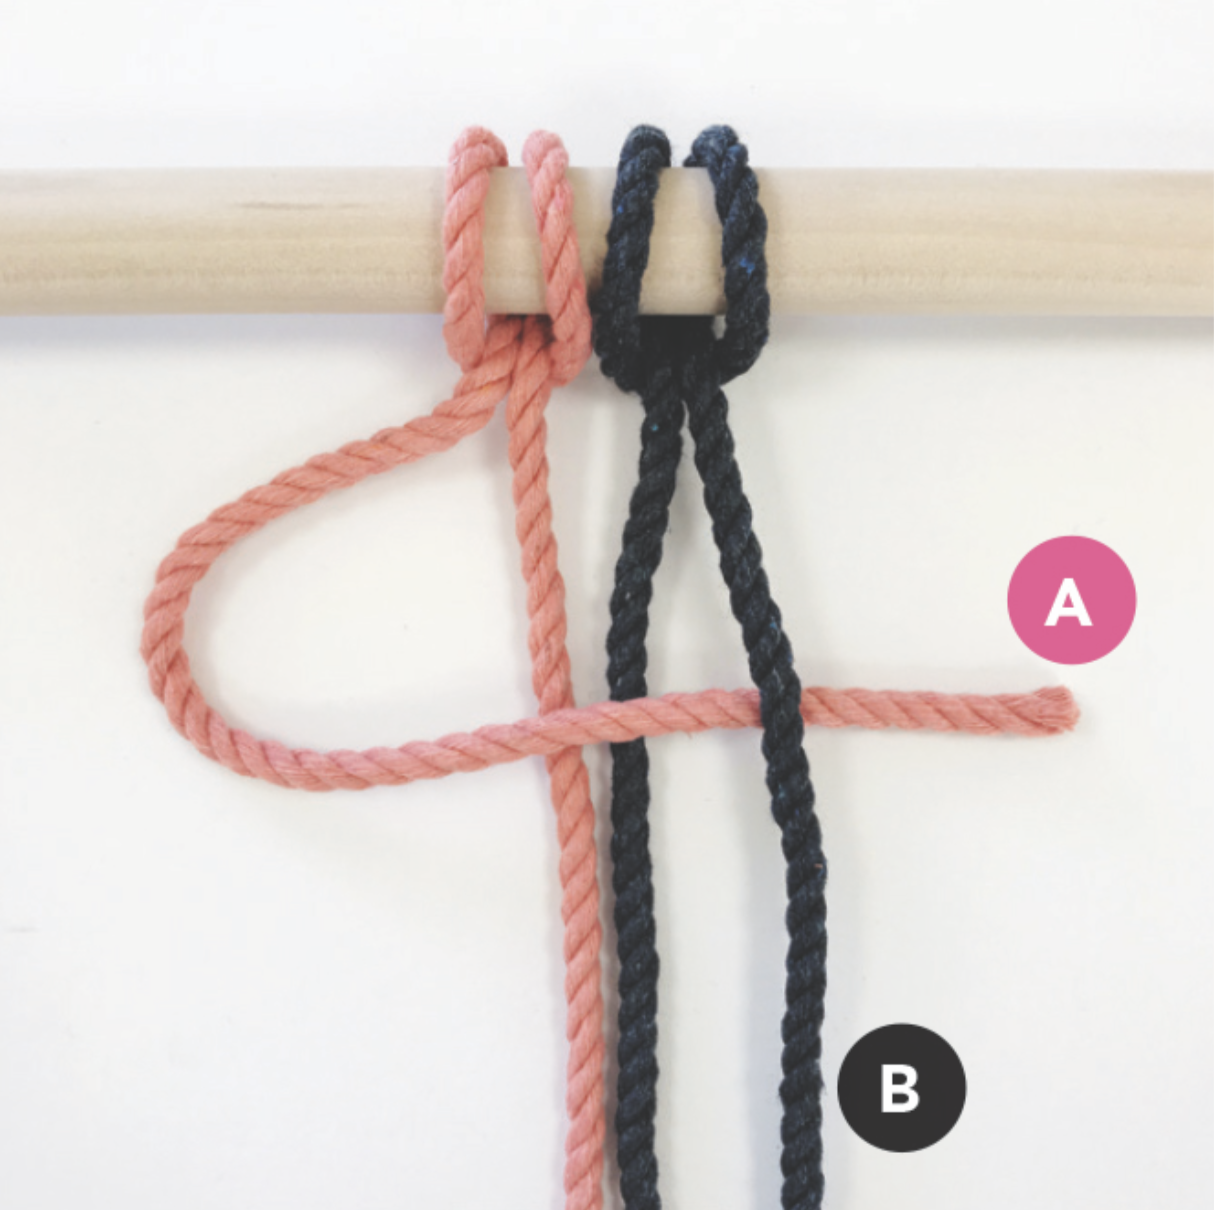
2. Connect the macramé loops
Take rope B behind the two centre ropes and and through the loop created with rope A.
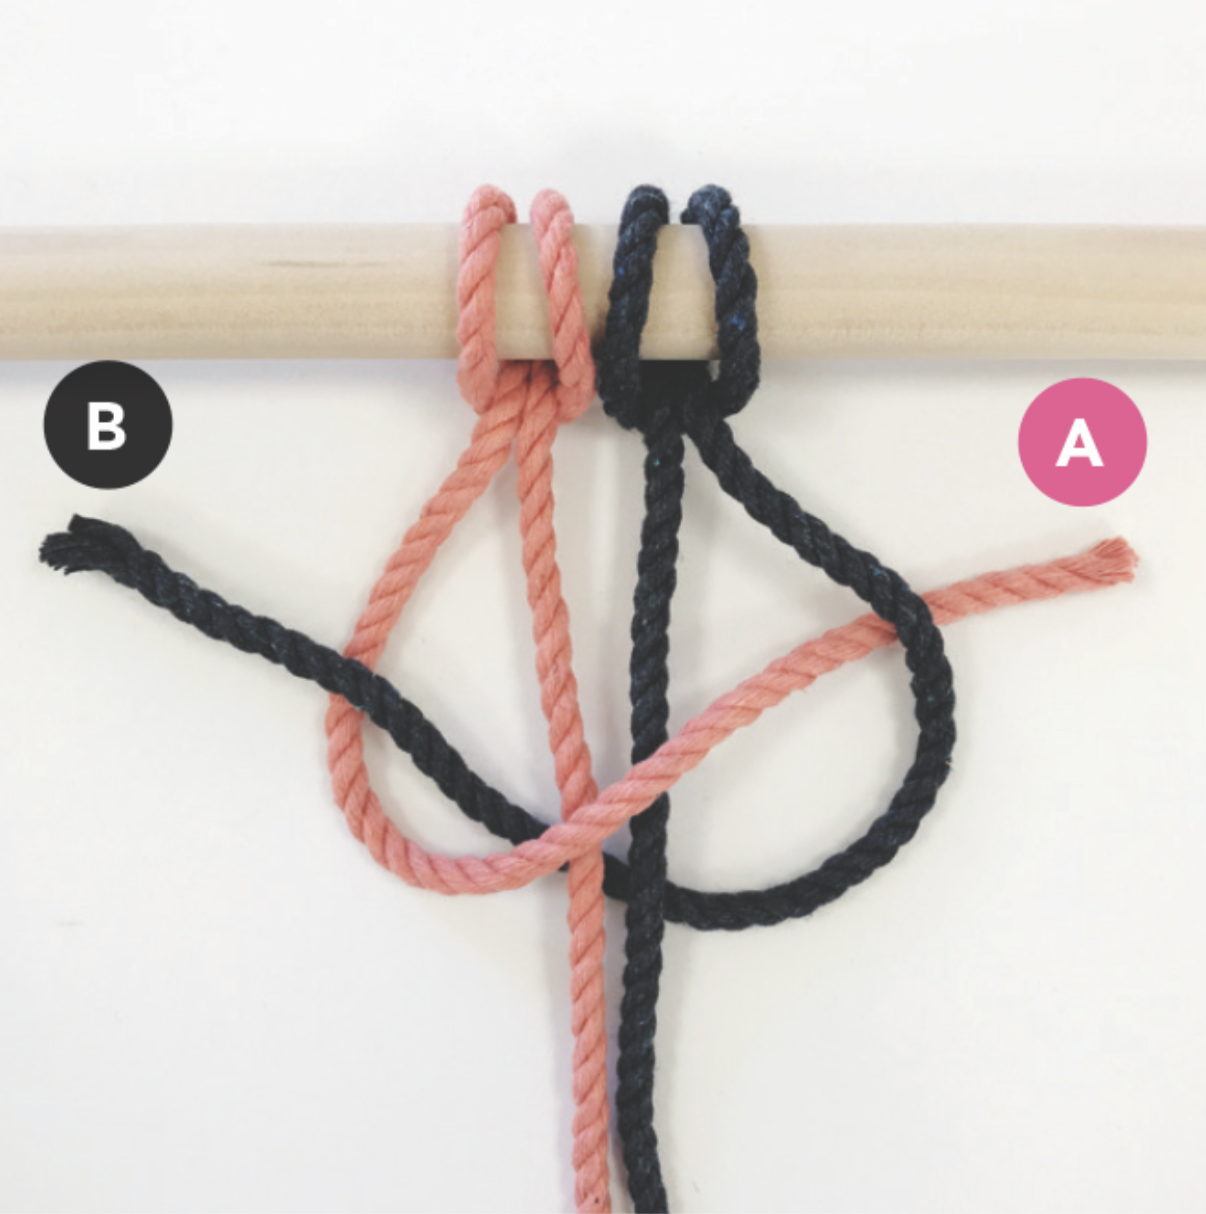
3. Begin the macramé knotting
Now take rope A over the two centre ropes and under rope B.
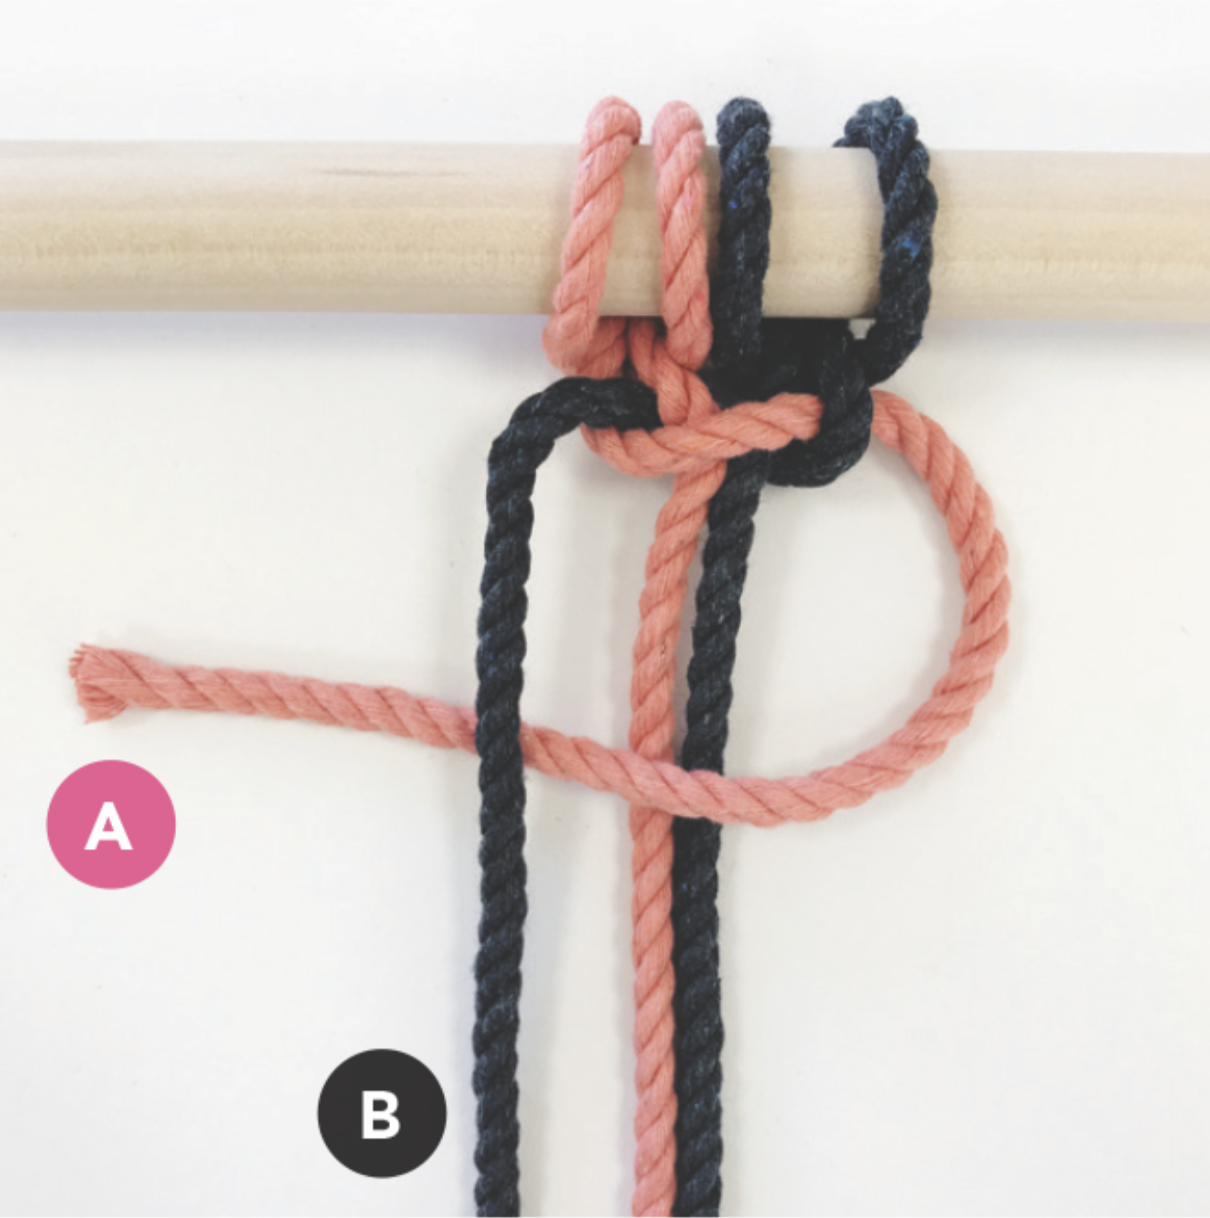
4. Tighten the macramé knot
Take rope B behind the two centre ropes and and through the loop created with rope A. Tighten the knot and that's your square knot complete.
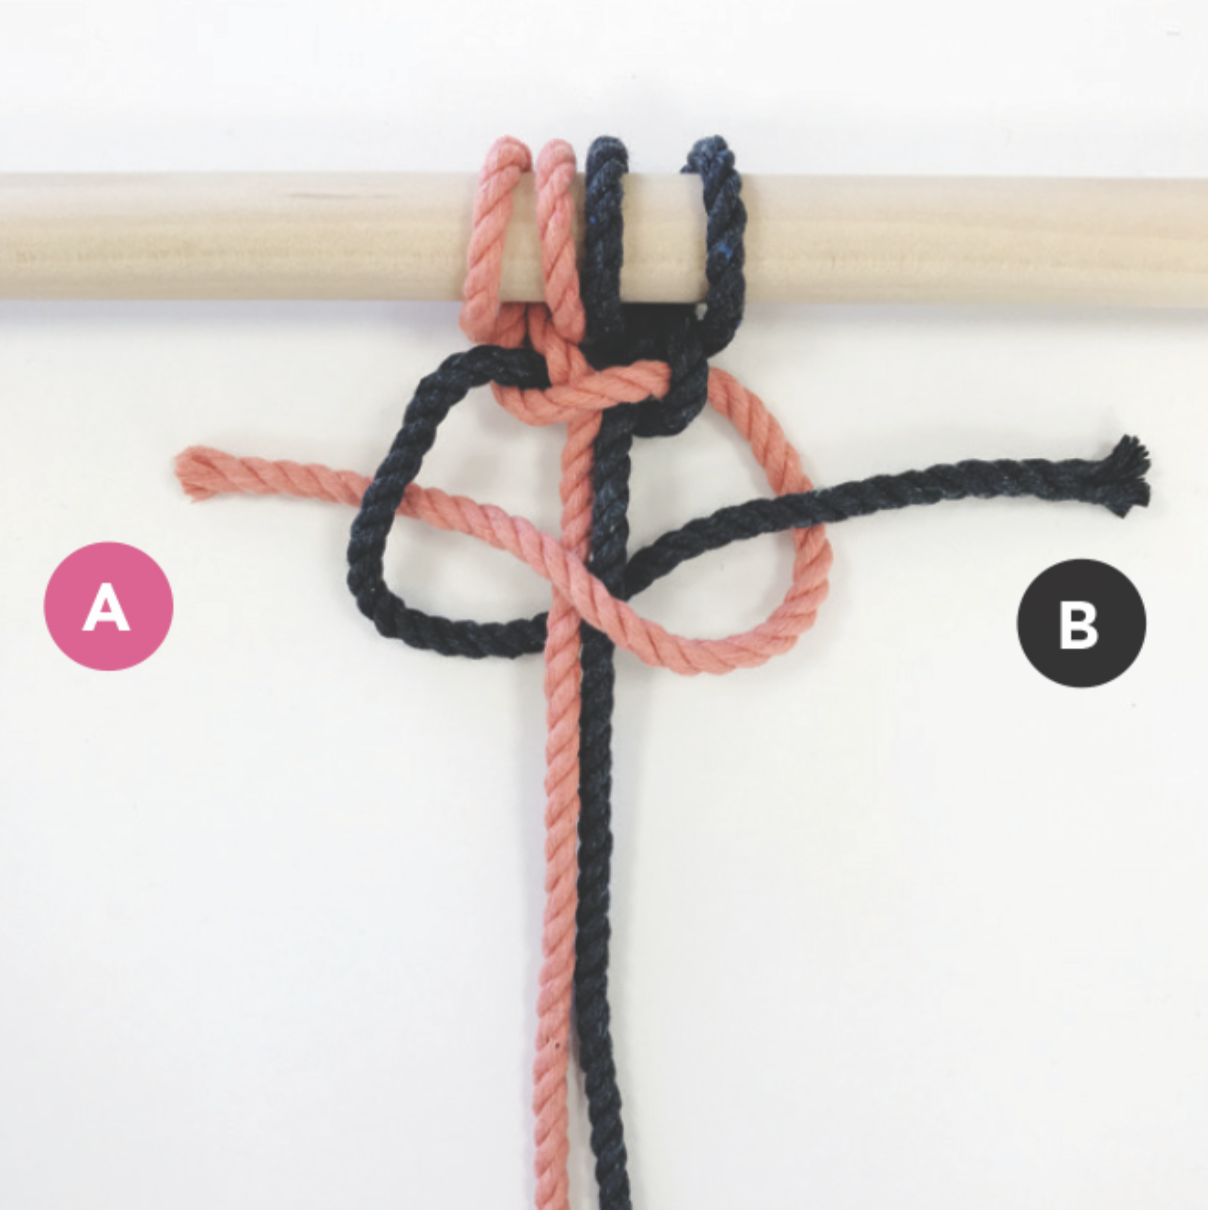
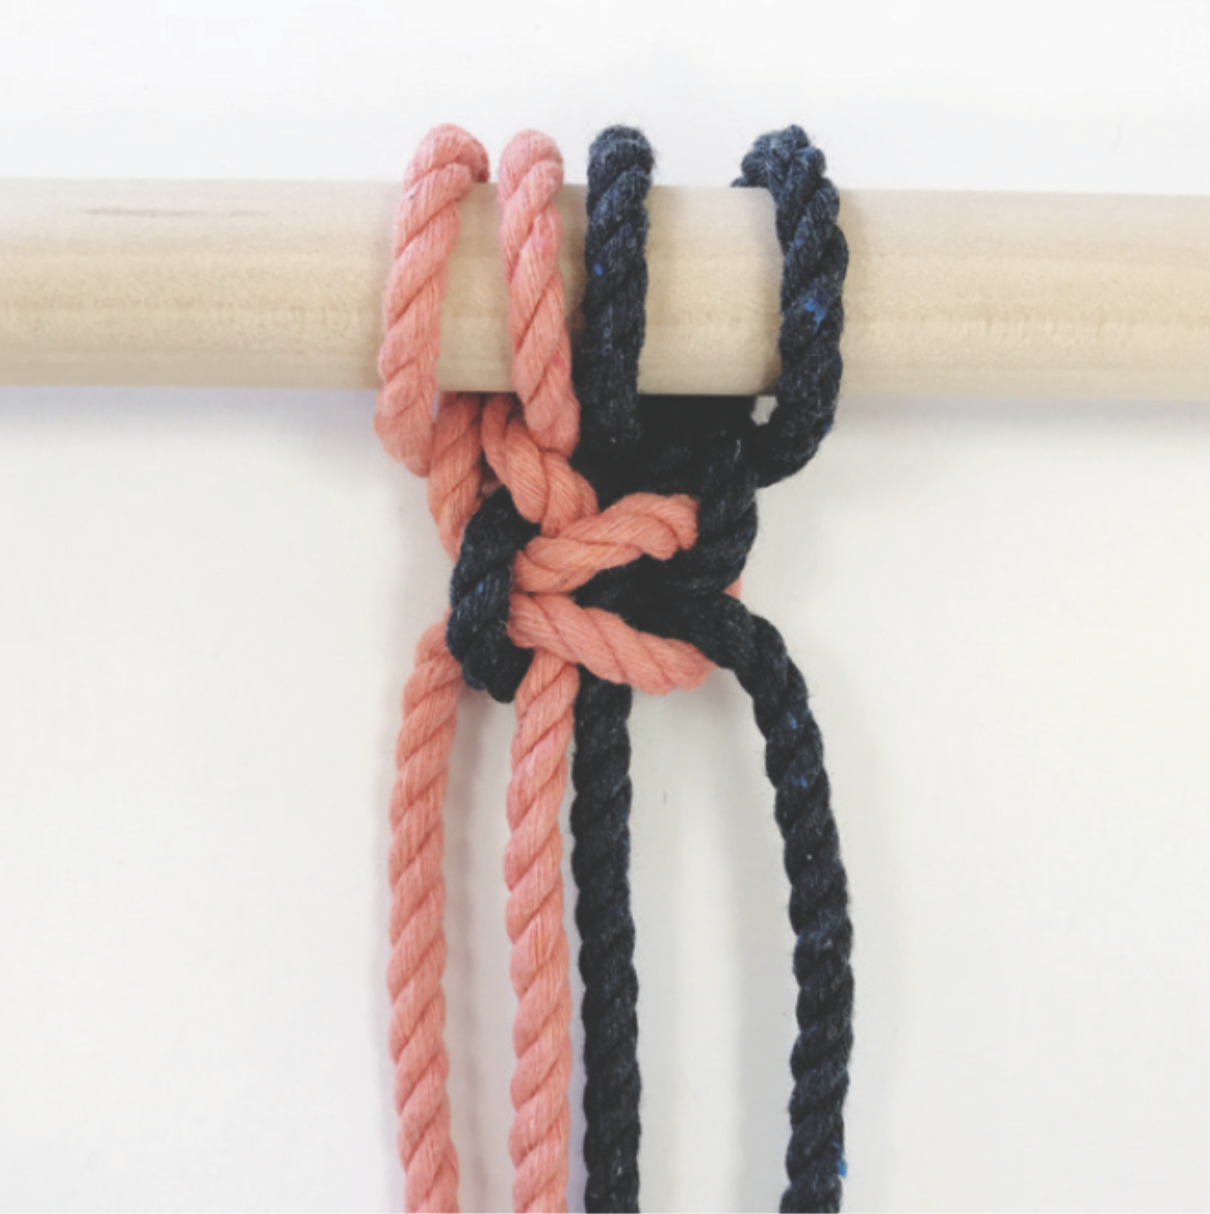
5. Repeat the macramé knots
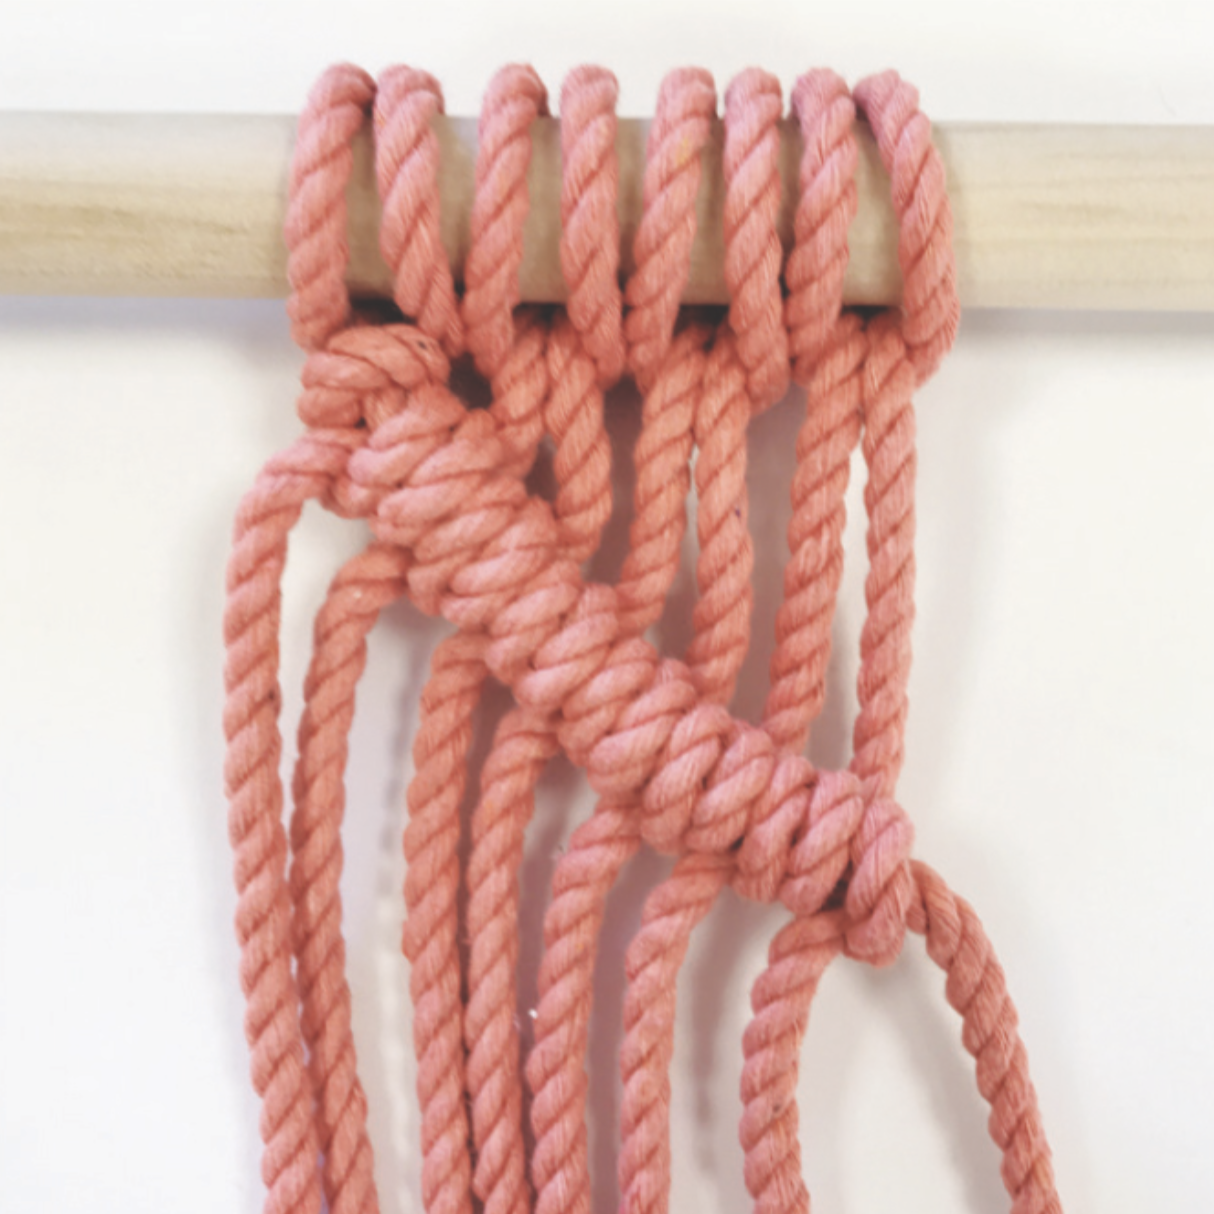
If you keep repeating these square knots you will get something like this...
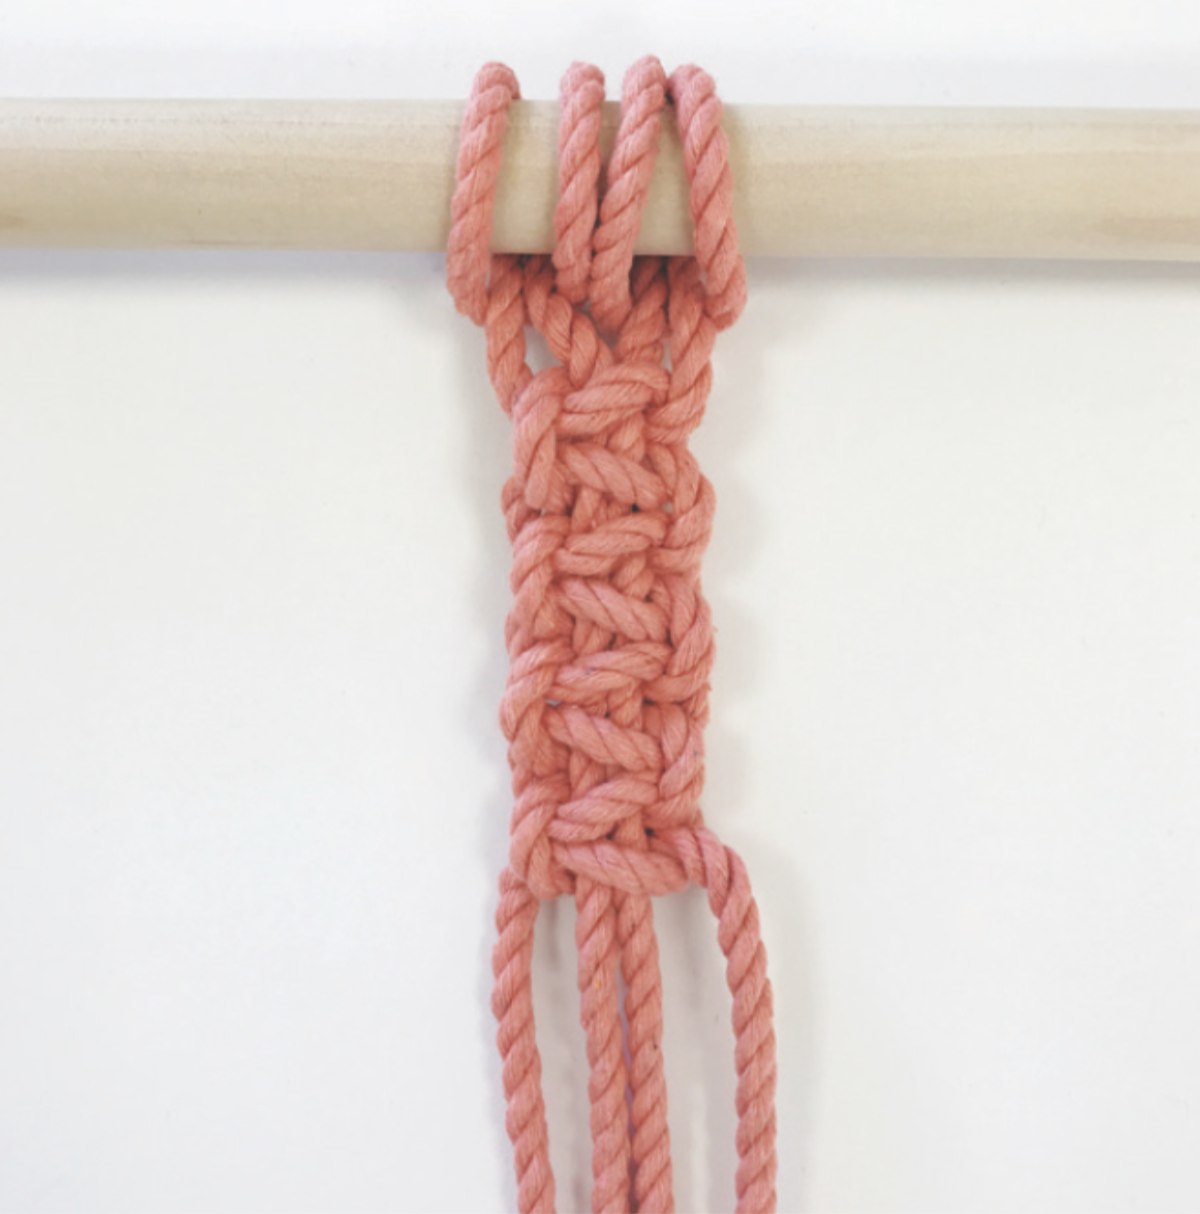
You can change up how many square knots you do on each row. So this is what you would get if you did two square knots on the first row, one on the second, and then back to two again on the third.
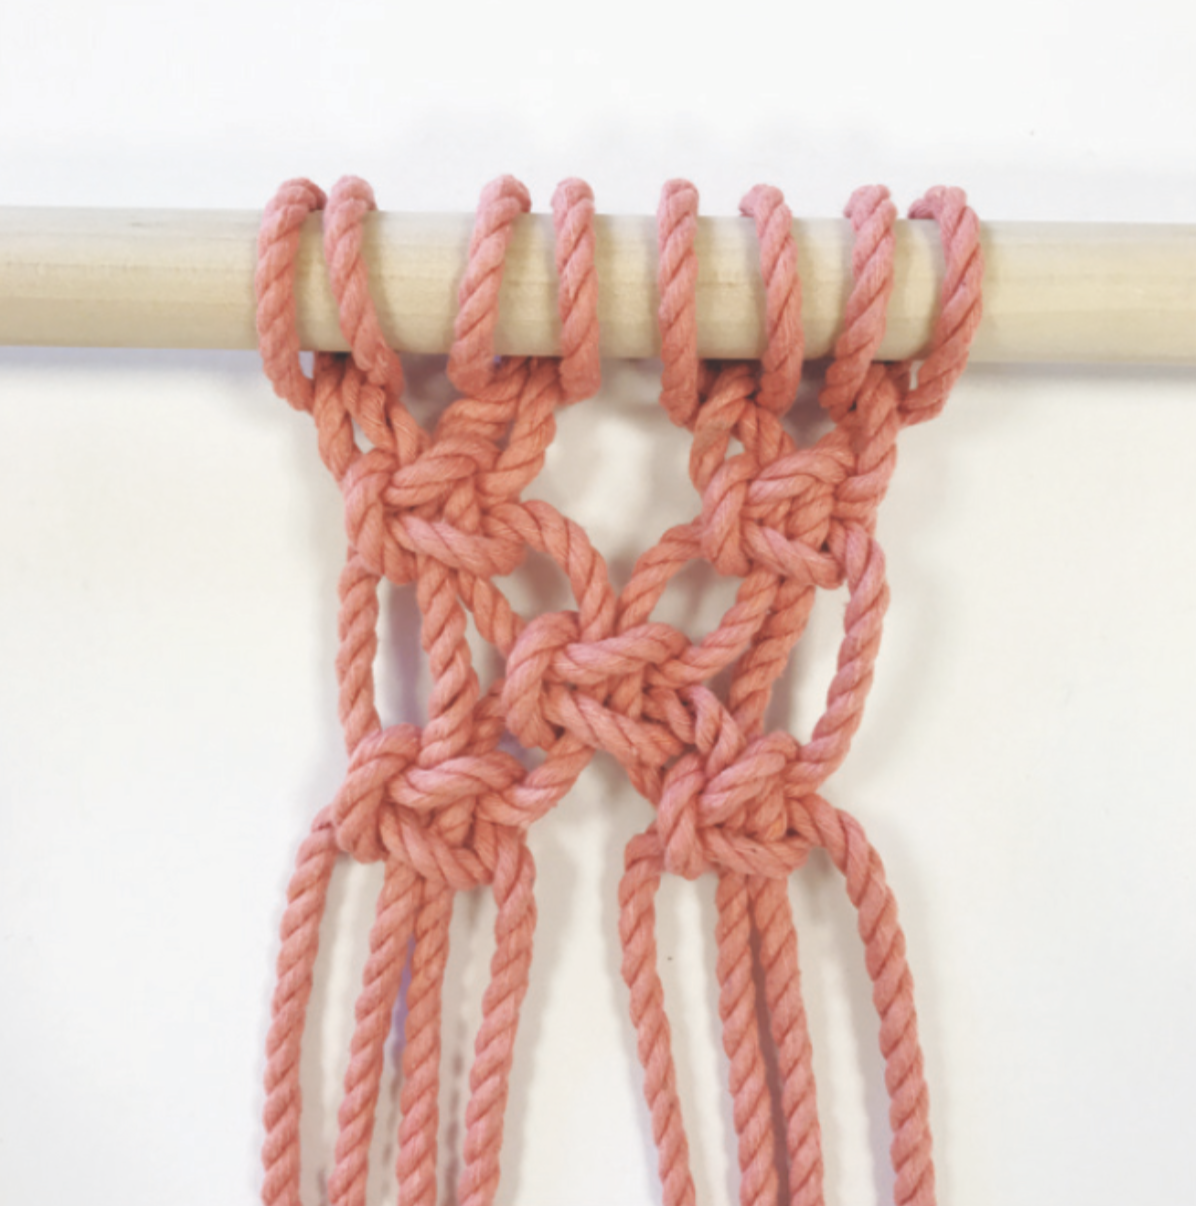
How to macramé a half knot
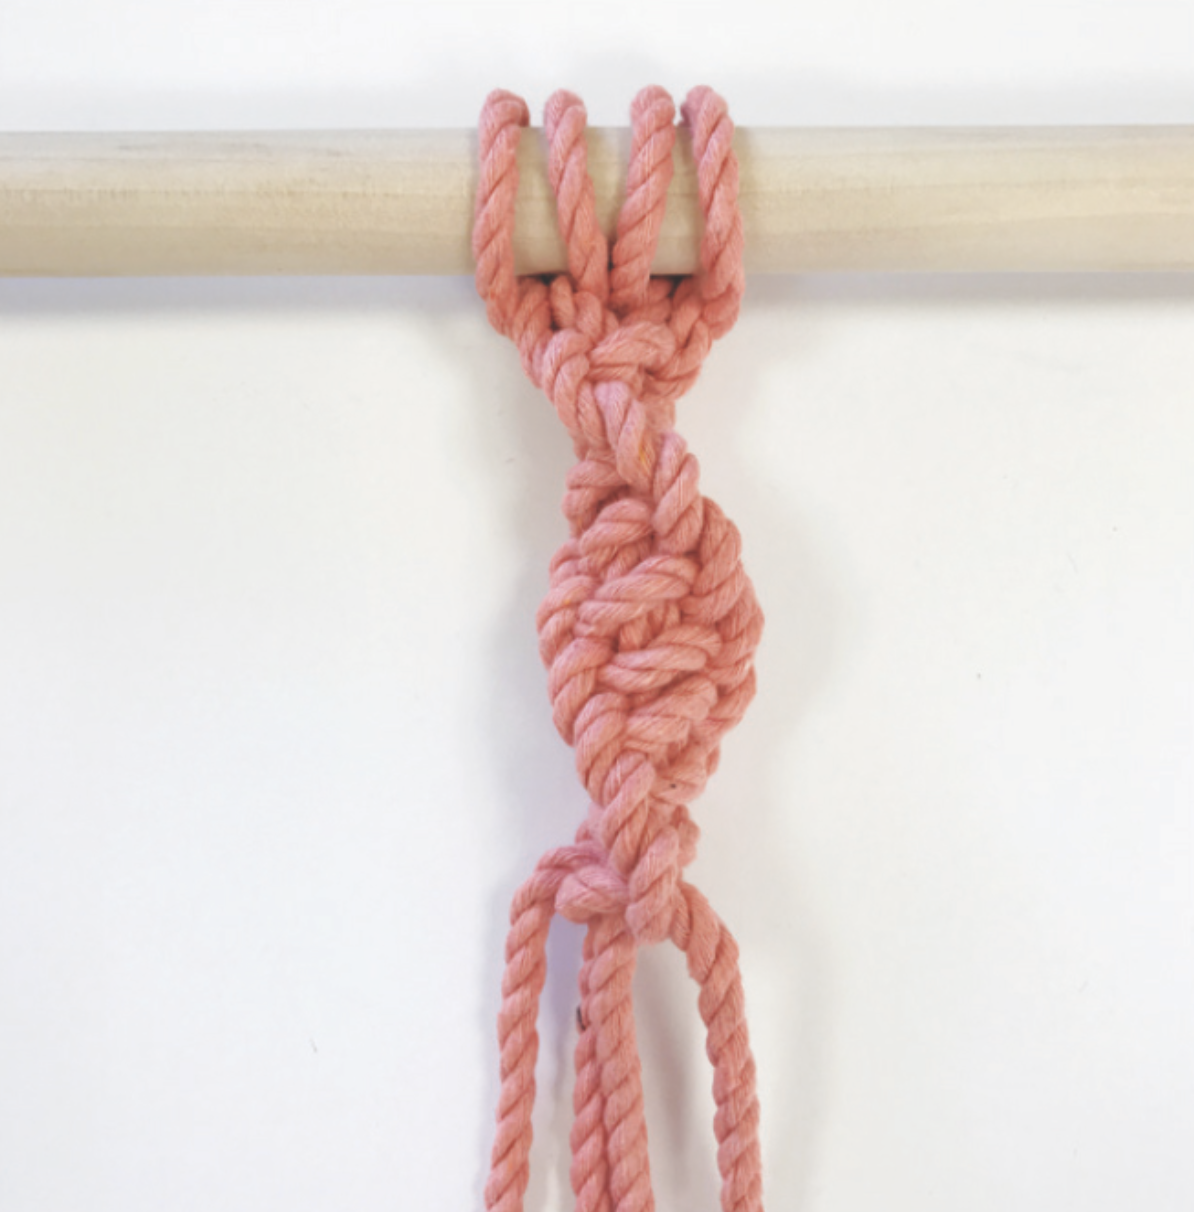
A half knot is used if you want to create a sort of spiral effect, just see the below images for a better description.
1. Cast on
After 'casting on' with your lark's head knot, take rope A over the two centre ropes and under rope B.
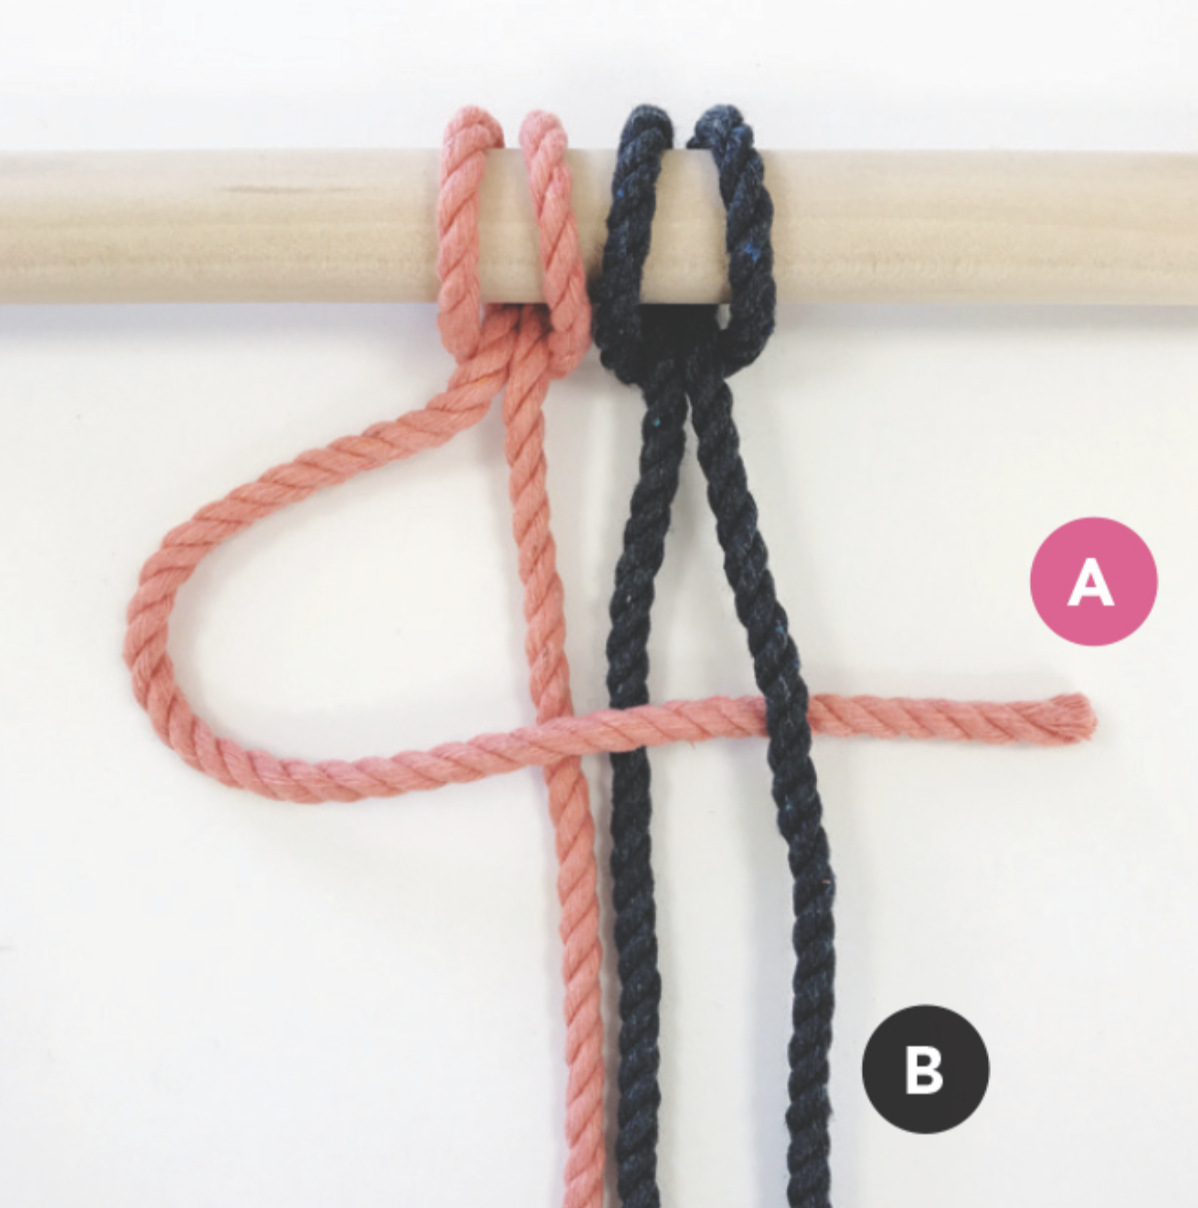
2. Loop through
Take rope B behind the two centre ropes and and through the loop created with rope A.
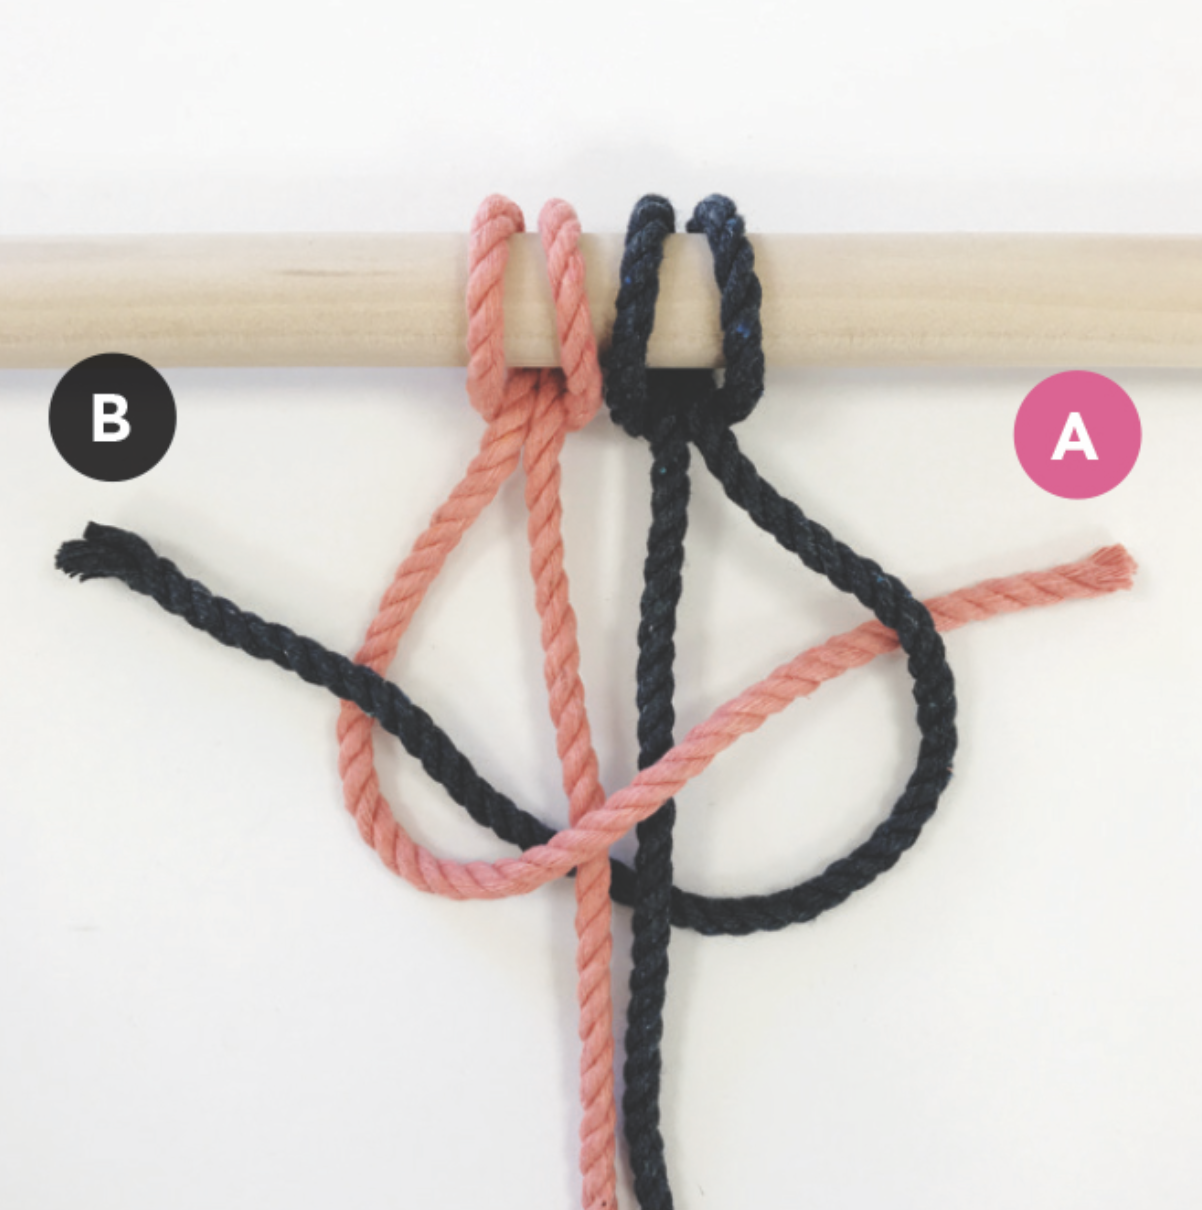
3. Repeat to create the macramé spiral
Then just keep repeating steps one and two until you start to see the spiral forming...
How to macramé horizontal clove hitch knots
This knot is used if you want to create a sort of solid line of rope, again probably best you just revert to the pictures to see the effect.
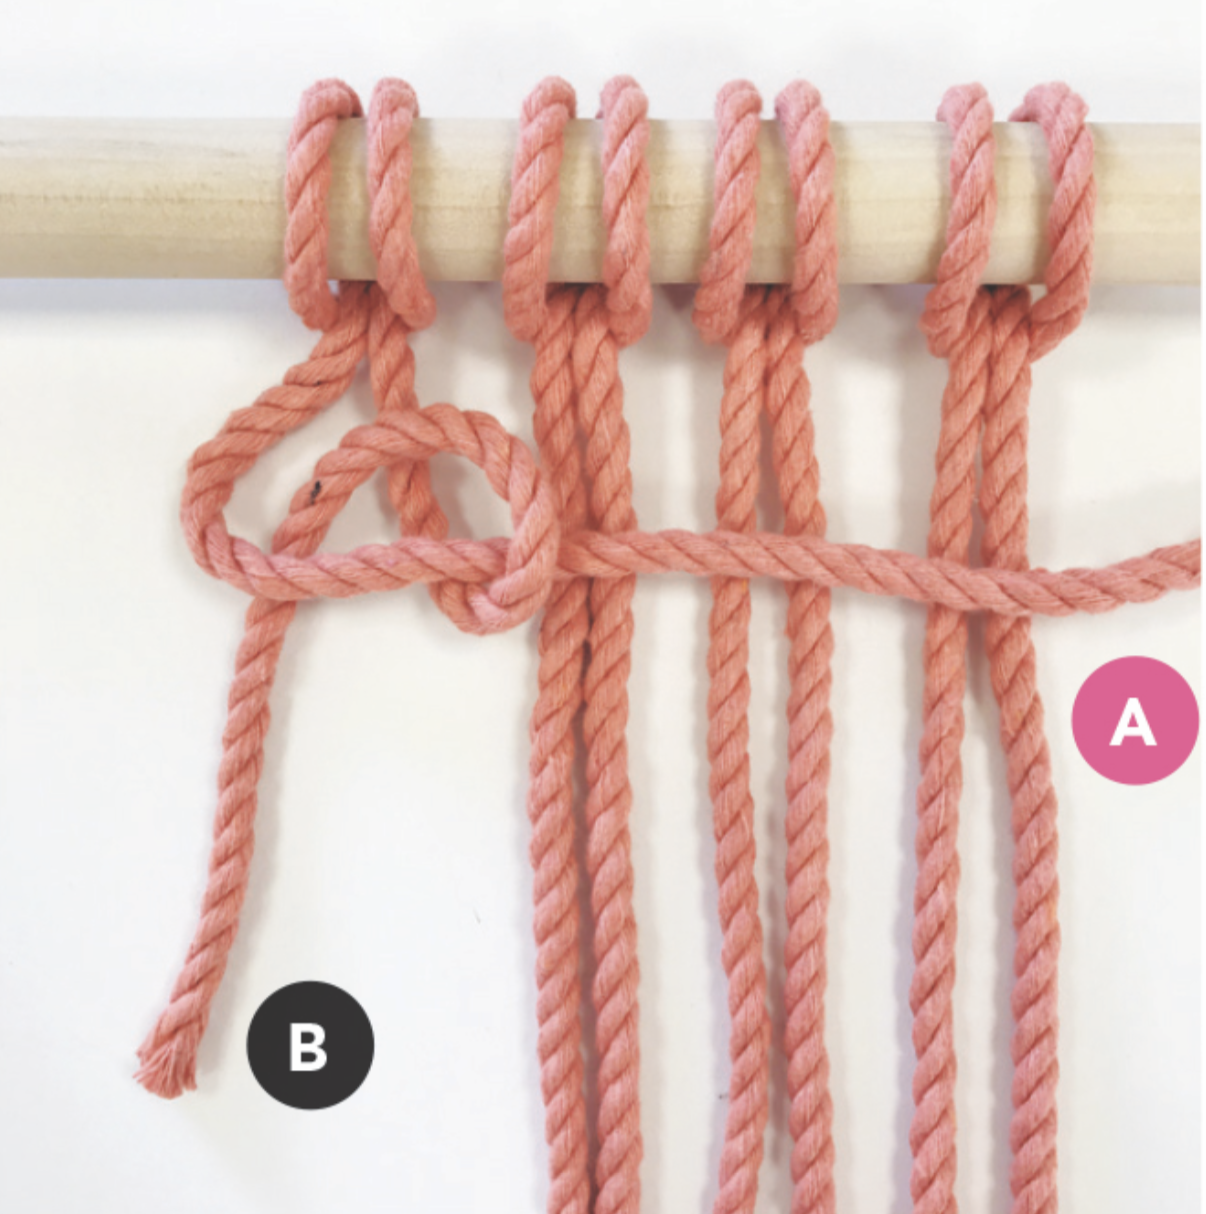
1. Line up four macramé knots
Lay rope A across rope B and the other ropes that are included in the pattern.
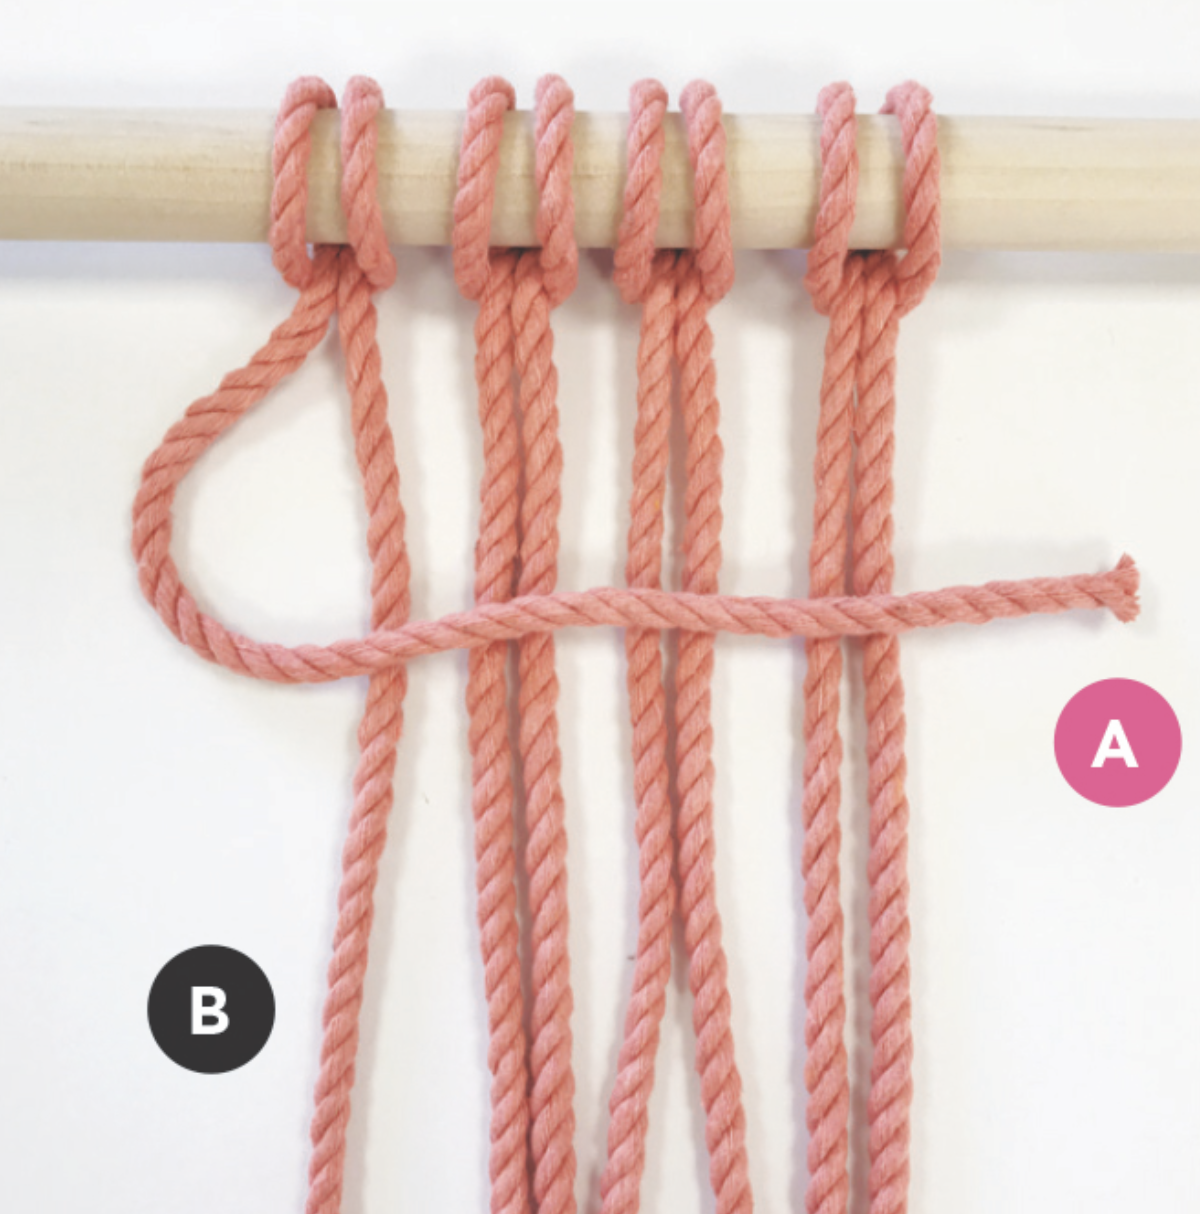
2. Start to connect the knots
Take rope B behind rope A and pull tight.
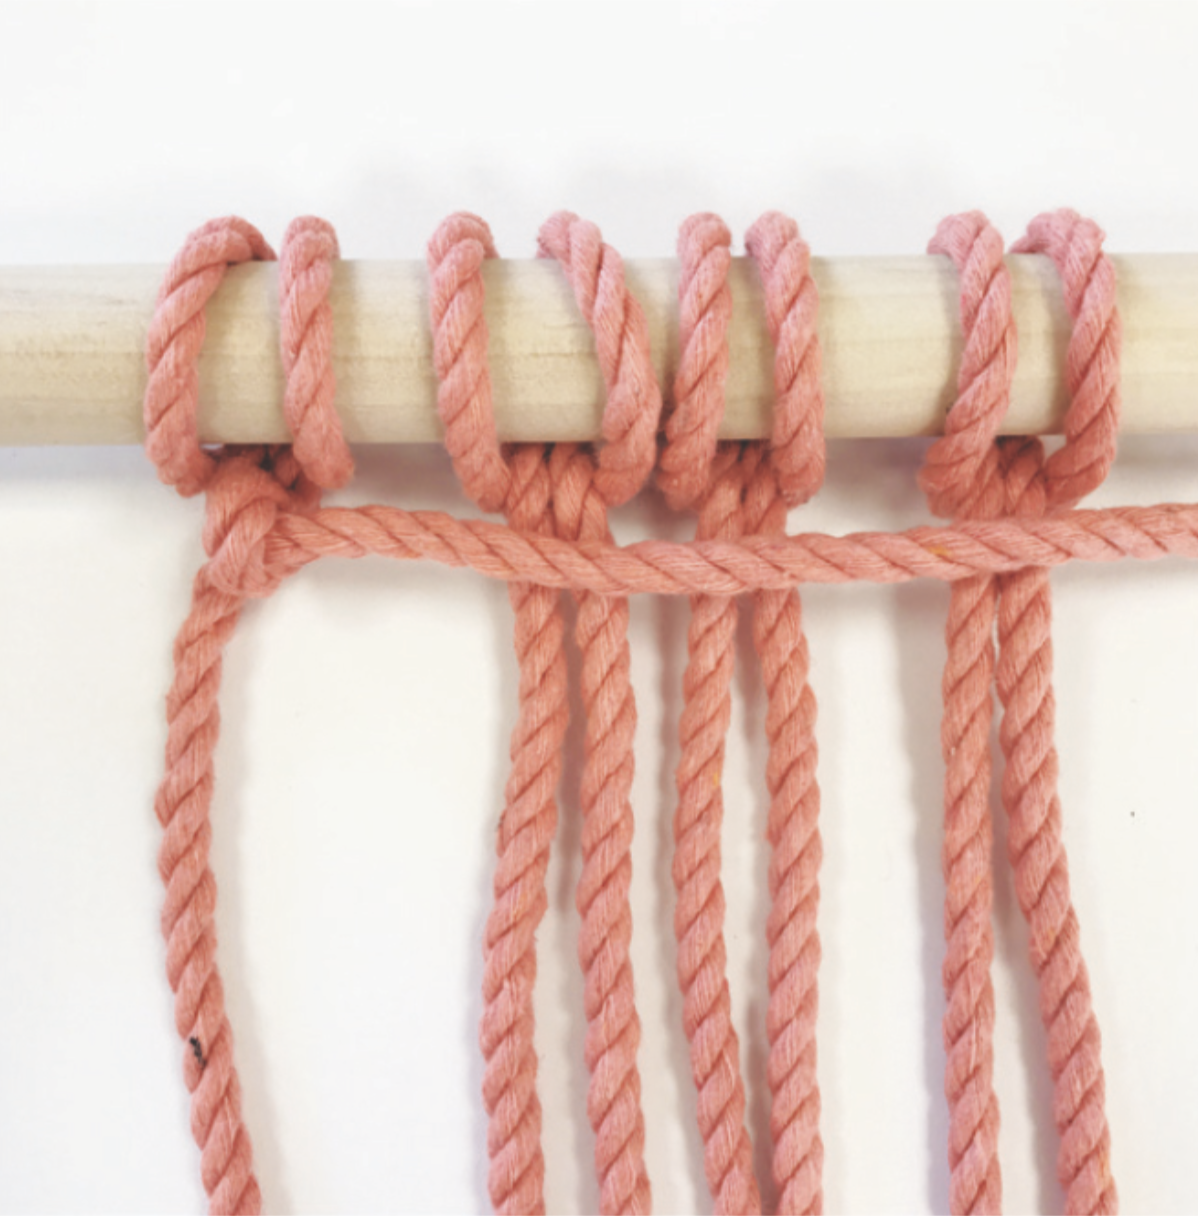
3. Repeat to complete the horizontal clove hitch
Repeat step two again, taking rope B behind rope A and pulling tight. You have now completed the horizontal clove hitch with the first rope. Now keep repeating these steps with every other strand of rope that is in the pattern.
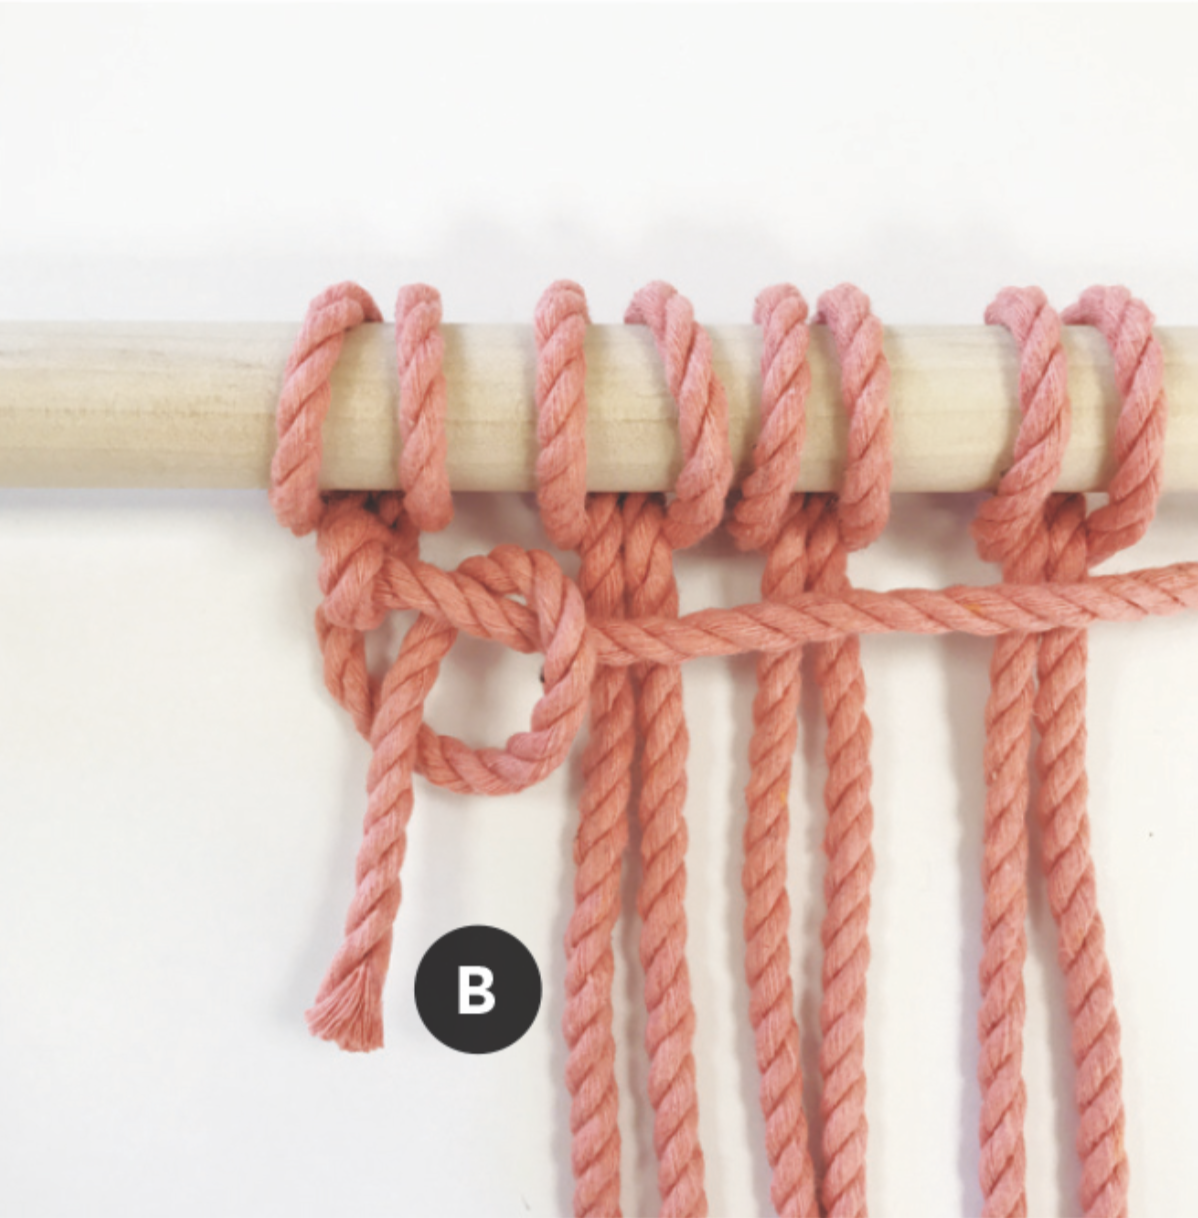
4. Complete the row
Now repeat steps two and three with every other strand of rope that is in the pattern and at the end of the row your pattern will look like this...
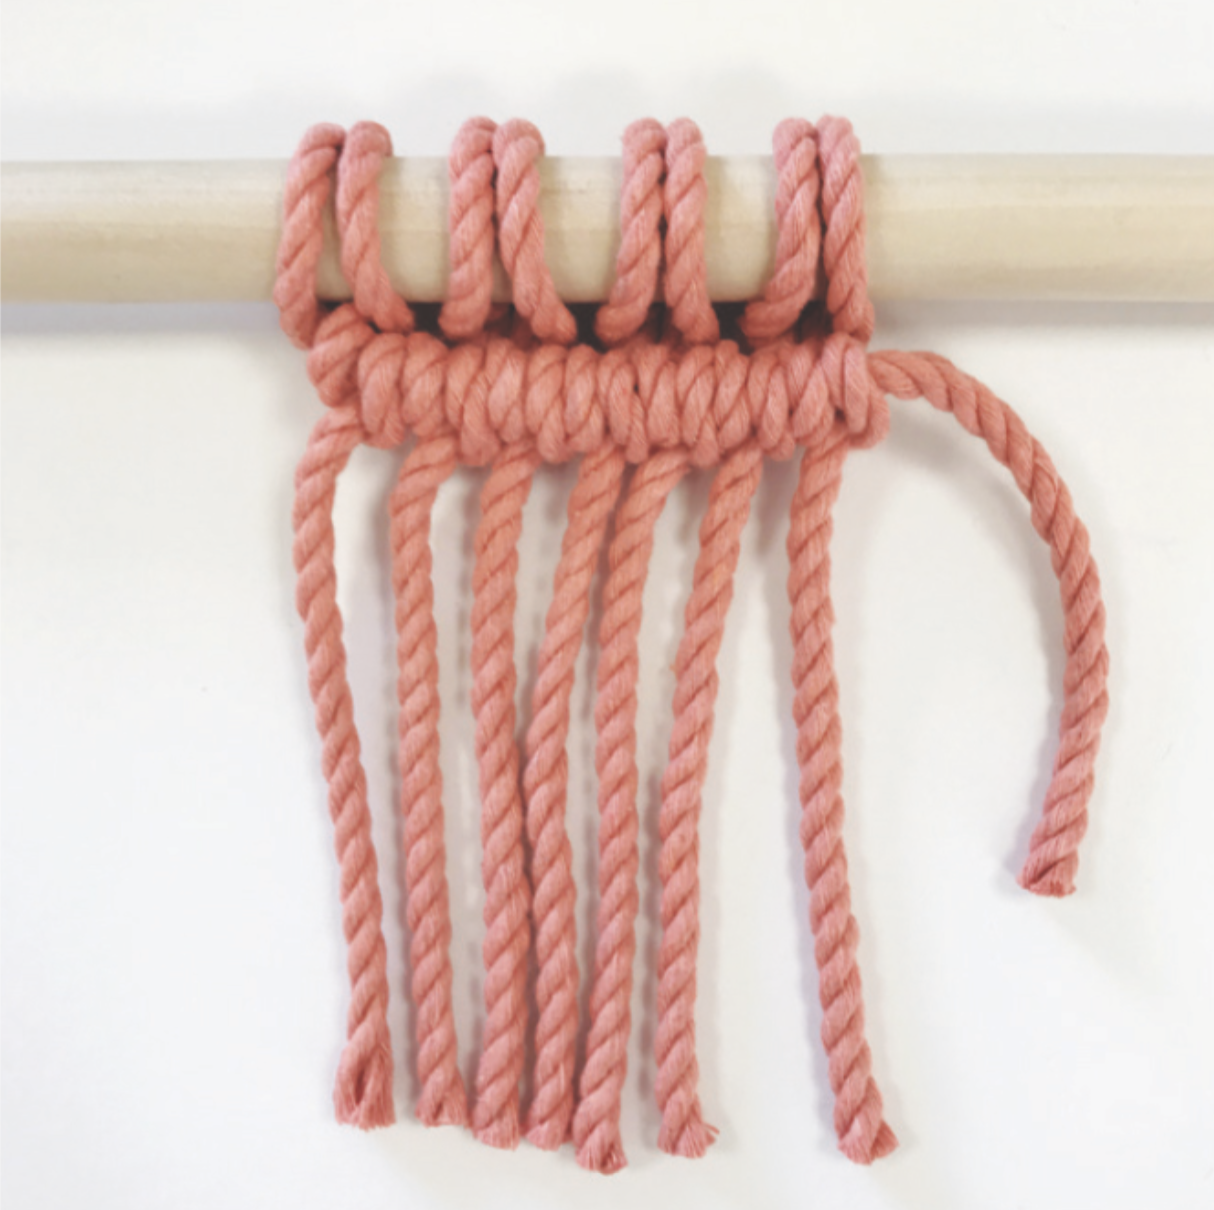
Top tip: If you're working from right to left, just take cord A from the right-hand side and mirror the knots that you have just learnt.
How to macramé diagonal clove hitch knots
The diagonal clove hitch is exactly the same as the horizontal clove hitch, you just hold rope A at a diagonal angle and follow the instructions for the horizontal clove hitch.
Read more inspiring craft ideas...
Join our newsletter
Get small space home decor ideas, celeb inspiration, DIY tips and more, straight to your inbox!
Hebe joined the Real Homes team in early 2018 as Staff Writer before moving to the Livingetc team in 2021 where she took on a role as Digital Editor. She loves boho and 70's style and is a big fan of Instagram as a source of interiors inspiration. When she isn't writing about interiors, she is renovating her own spaces – be it wallpapering a hallway, painting kitchen cupboards or converting a van.
-
 This colourful home makeover has space for kitchen discos
While the front of Leila and Joe's home features dark and moody chill-out spaces, the rest is light and bright and made for socialising
By Karen Wilson Published
-
 How to paint a door and refresh your home instantly
Painting doors is easy with our expert advice. This is how to get professional results on front and internal doors.
By Claire Douglas Published
-
 DIY transforms 1930s house into dream home
With several renovations behind them, Mary and Paul had creative expertise to draw on when it came to transforming their 1930s house
By Alison Jones Published
-
 12 easy ways to add curb appeal on a budget with DIY
You can give your home curb appeal at low cost. These are the DIY ways to boost its style
By Lucy Searle Published
-
 26 DIY headboards you can make in just a weekend
These quick and easy DIY headboard ideas will refresh your bedroom in just a few hours
By Hebe Hatton Published
-
 How to make a teepee: an easy no-sew DIY
Use these easy steps to find out how to make a teepee and you'll have a space to entertain the kids that's also a super stylish addition to your home
By Jasmine Gurney Published
-
 5 invaluable design learnings from a festive Edwardian house renovation
If you're renovating a period property, here are 5 design tips we've picked up from this festive Edwardian renovation
By Ellen Finch Published
-
 Real home: Glazed side extension creates the perfect garden link
Louise Potter and husband Sean's extension has transformed their Victorian house, now a showcase for their collection of art, vintage finds and Scandinavian pieces
By Laurie Davidson Published