

As much as we love the traditional festive door wreath, we also adore the idea of a Christmas ribbon wreath. They're popularity is increasing and they're a great way to add beauty to your front door or use in your wall decor. Bubble wreath designs have a lovely form to them and they make great gifts! You can make this using mesh but I love the look of ribbon personally. The best part is that you can make a wreath this this yourself for a fraction of the cost of purchasing one! And not only do you save money, but you can also customize the ribbon colors to your preference.
Much like when you're making a foliage Christmas wreath, you only need a few items to make a ribbon wreath. And, you can find all of them at your local craft store like Hobby Lobby, Michael’s or online at Amazon.
We've designed two Christmas ribbon wreaths for you to DIY – which will you choose?
1. All the festive feels with classic red
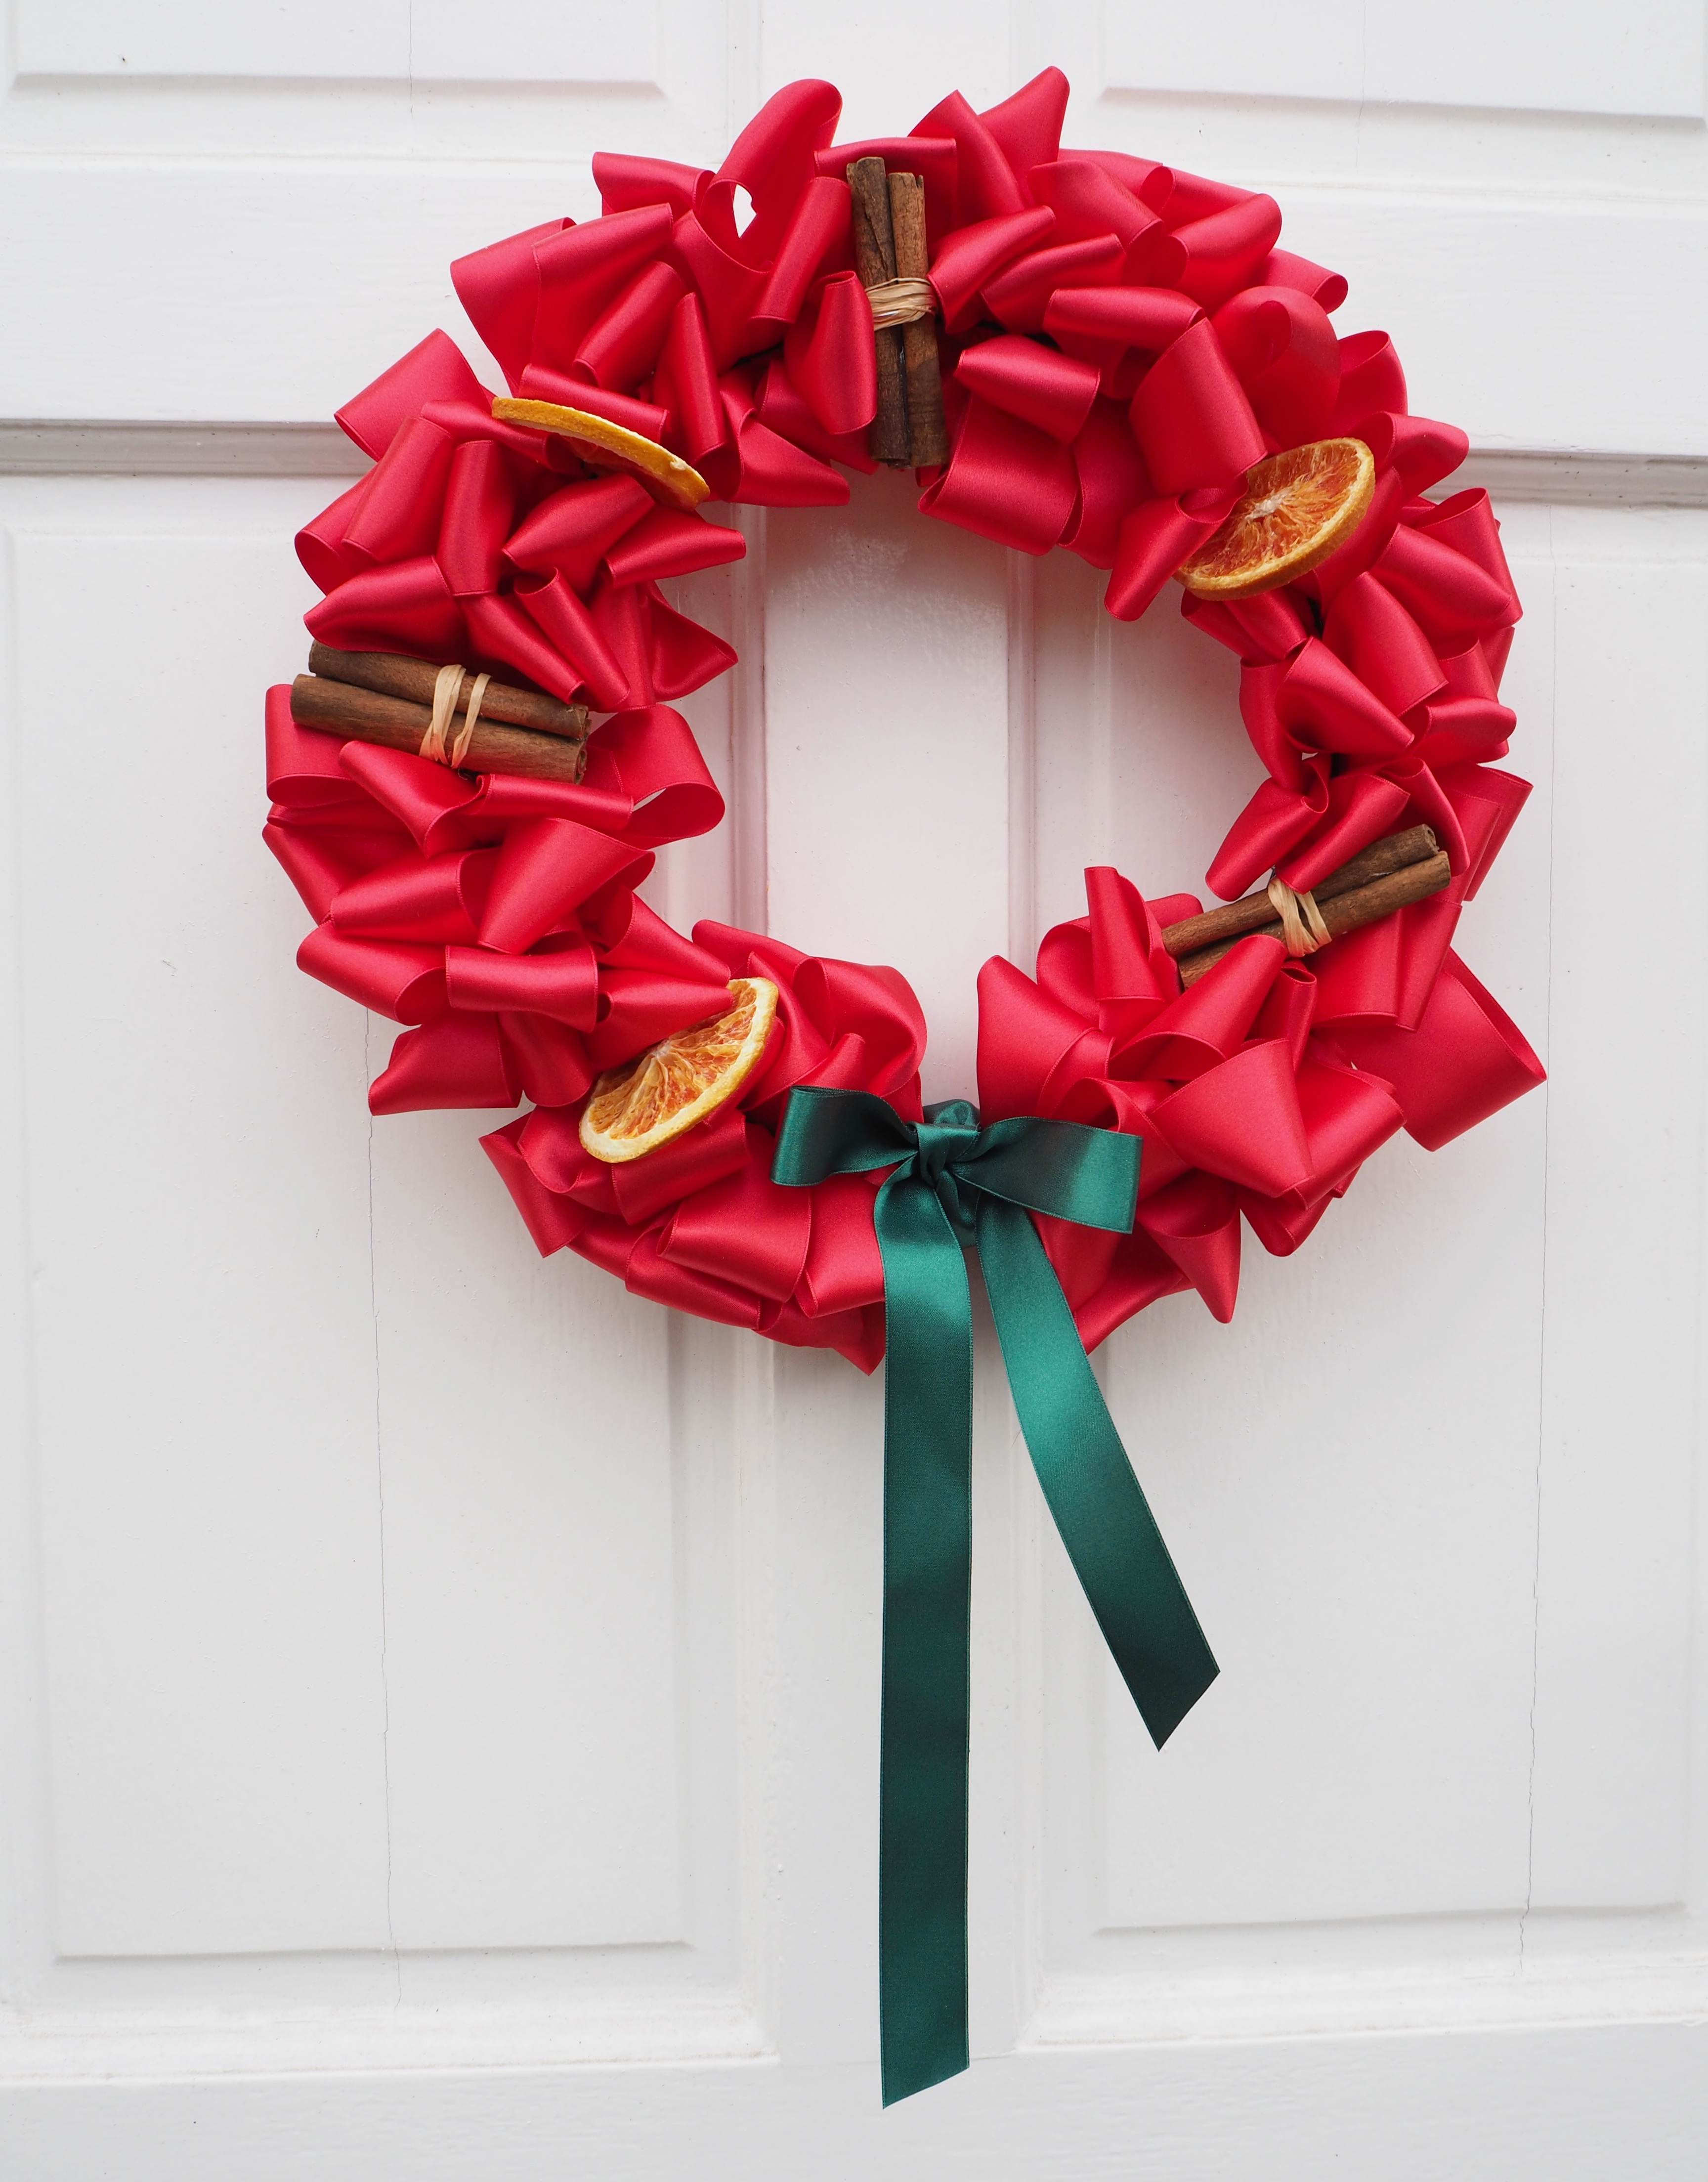
You can't beat a classic red and green wreath whether it's real or faux. Follow our step by step below on how to make this beautiful Christmas ribbon wreath.
You'll need:
- a roll of 4 inch red ribbon, we used 20 metres (22 yards)
- a wreath ring, we used a 16 inch
- scissors
- Christmas dried fruit pieces
- cinnamon sticks
- contrasting ribbon for a bow and for hanging
- florist wire for wiring dried fruit pieces
1. Attach your ribbon

Tie your ribbon to the inside of your wreath ring, within one of the four sections, and make sure your reel of ribbon is underneath the ring.
2. Make your first loop

Move the knot to the start of one of the four sections and push the first loop through, we make ours approximately 2 inches high.
3. Add more loops

Twist the ribbon once and repeat through the next two sections of the wreath ring.
4. Start a new row and repeat

Twist again and start the next row in the middle section, then the inside one, and then the outer section. Always twist the ribbon once before looping. We did 8 rows per section of the wreath ring.
5. Complete the wreath ring

Keep going until they’re all full, cut the ribbon and fasten at the back.
6. Attach your cinnamon sticks

You can get pre-wired cinnamon sticks – they are easy to place as you simply decide where to attach them and twist the wire. If you have simple cinnamon sticks, use ribbon to tie two together and use wire around them to attach to the back of the wreath ring. We used three for this size ring.
7. Wire your dried fruit

Whether you make your own dried fruit pieces or buy them already dried, you will need to wire them for the ring. Take one piece of florist wire and place it as shown above. Then twist once below the fruit slice. Attach it to wreath ring and twist the wire at the back to fasten. Add as many as you like! Your Christmas ribbon wreath is complete, all you need to do now is decide whether to hang it inside or out.
2. Green and cream plaid Christmas ribbon wreath
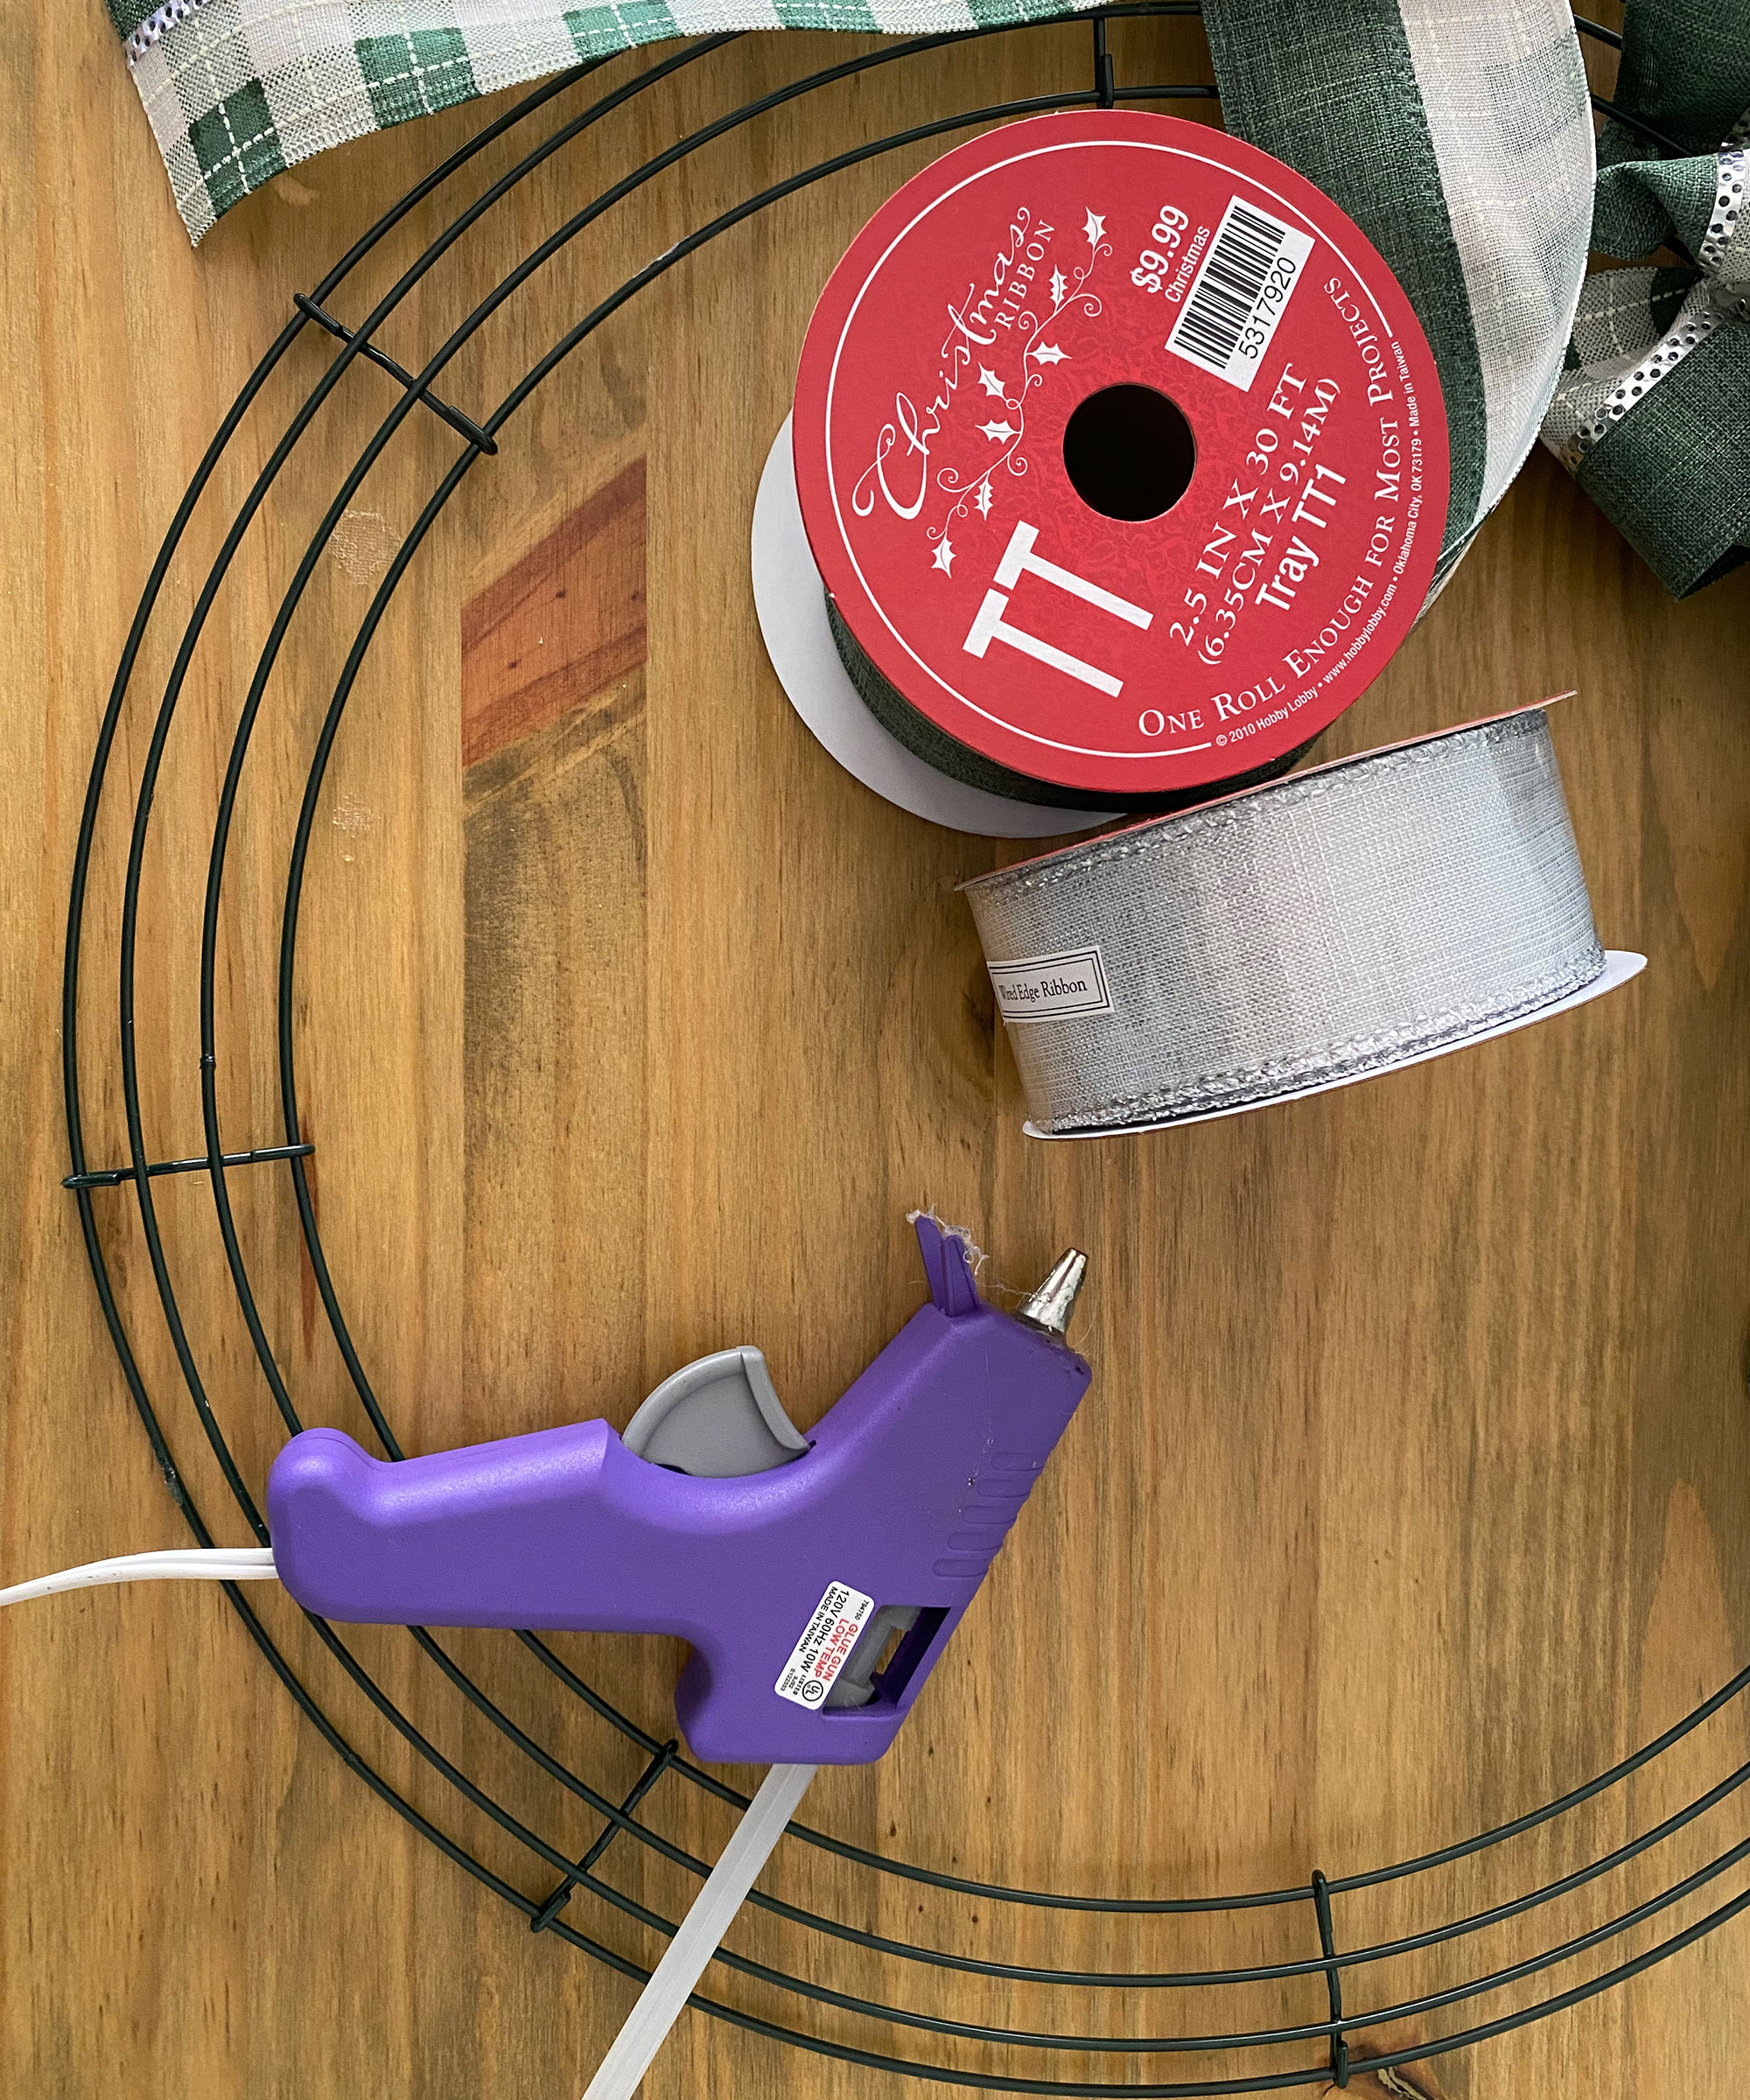
For this DIY ribbon wreath, I chose a green and cream plaid ribbon with a silver embellishment down the center. To accentuate the embellishment in the plaid ribbon, I chose a silver ribbon to use with it. You can mix and match ribbons according to the look you want. I used two spools of 30 foot ribbon for a total of 60 feet. If you want your wreath to look more full you can use a third spool. Here's a full list of supplies:
- 16” wire wreath frame – these 16" green wire frames from Royal Essentials are good
- 2-3 30’ spools of ribbon – this trad red plaid one from Amazon is a nice option
- Hot glue gun
- Scissors
1. Start working on the outside of the frame
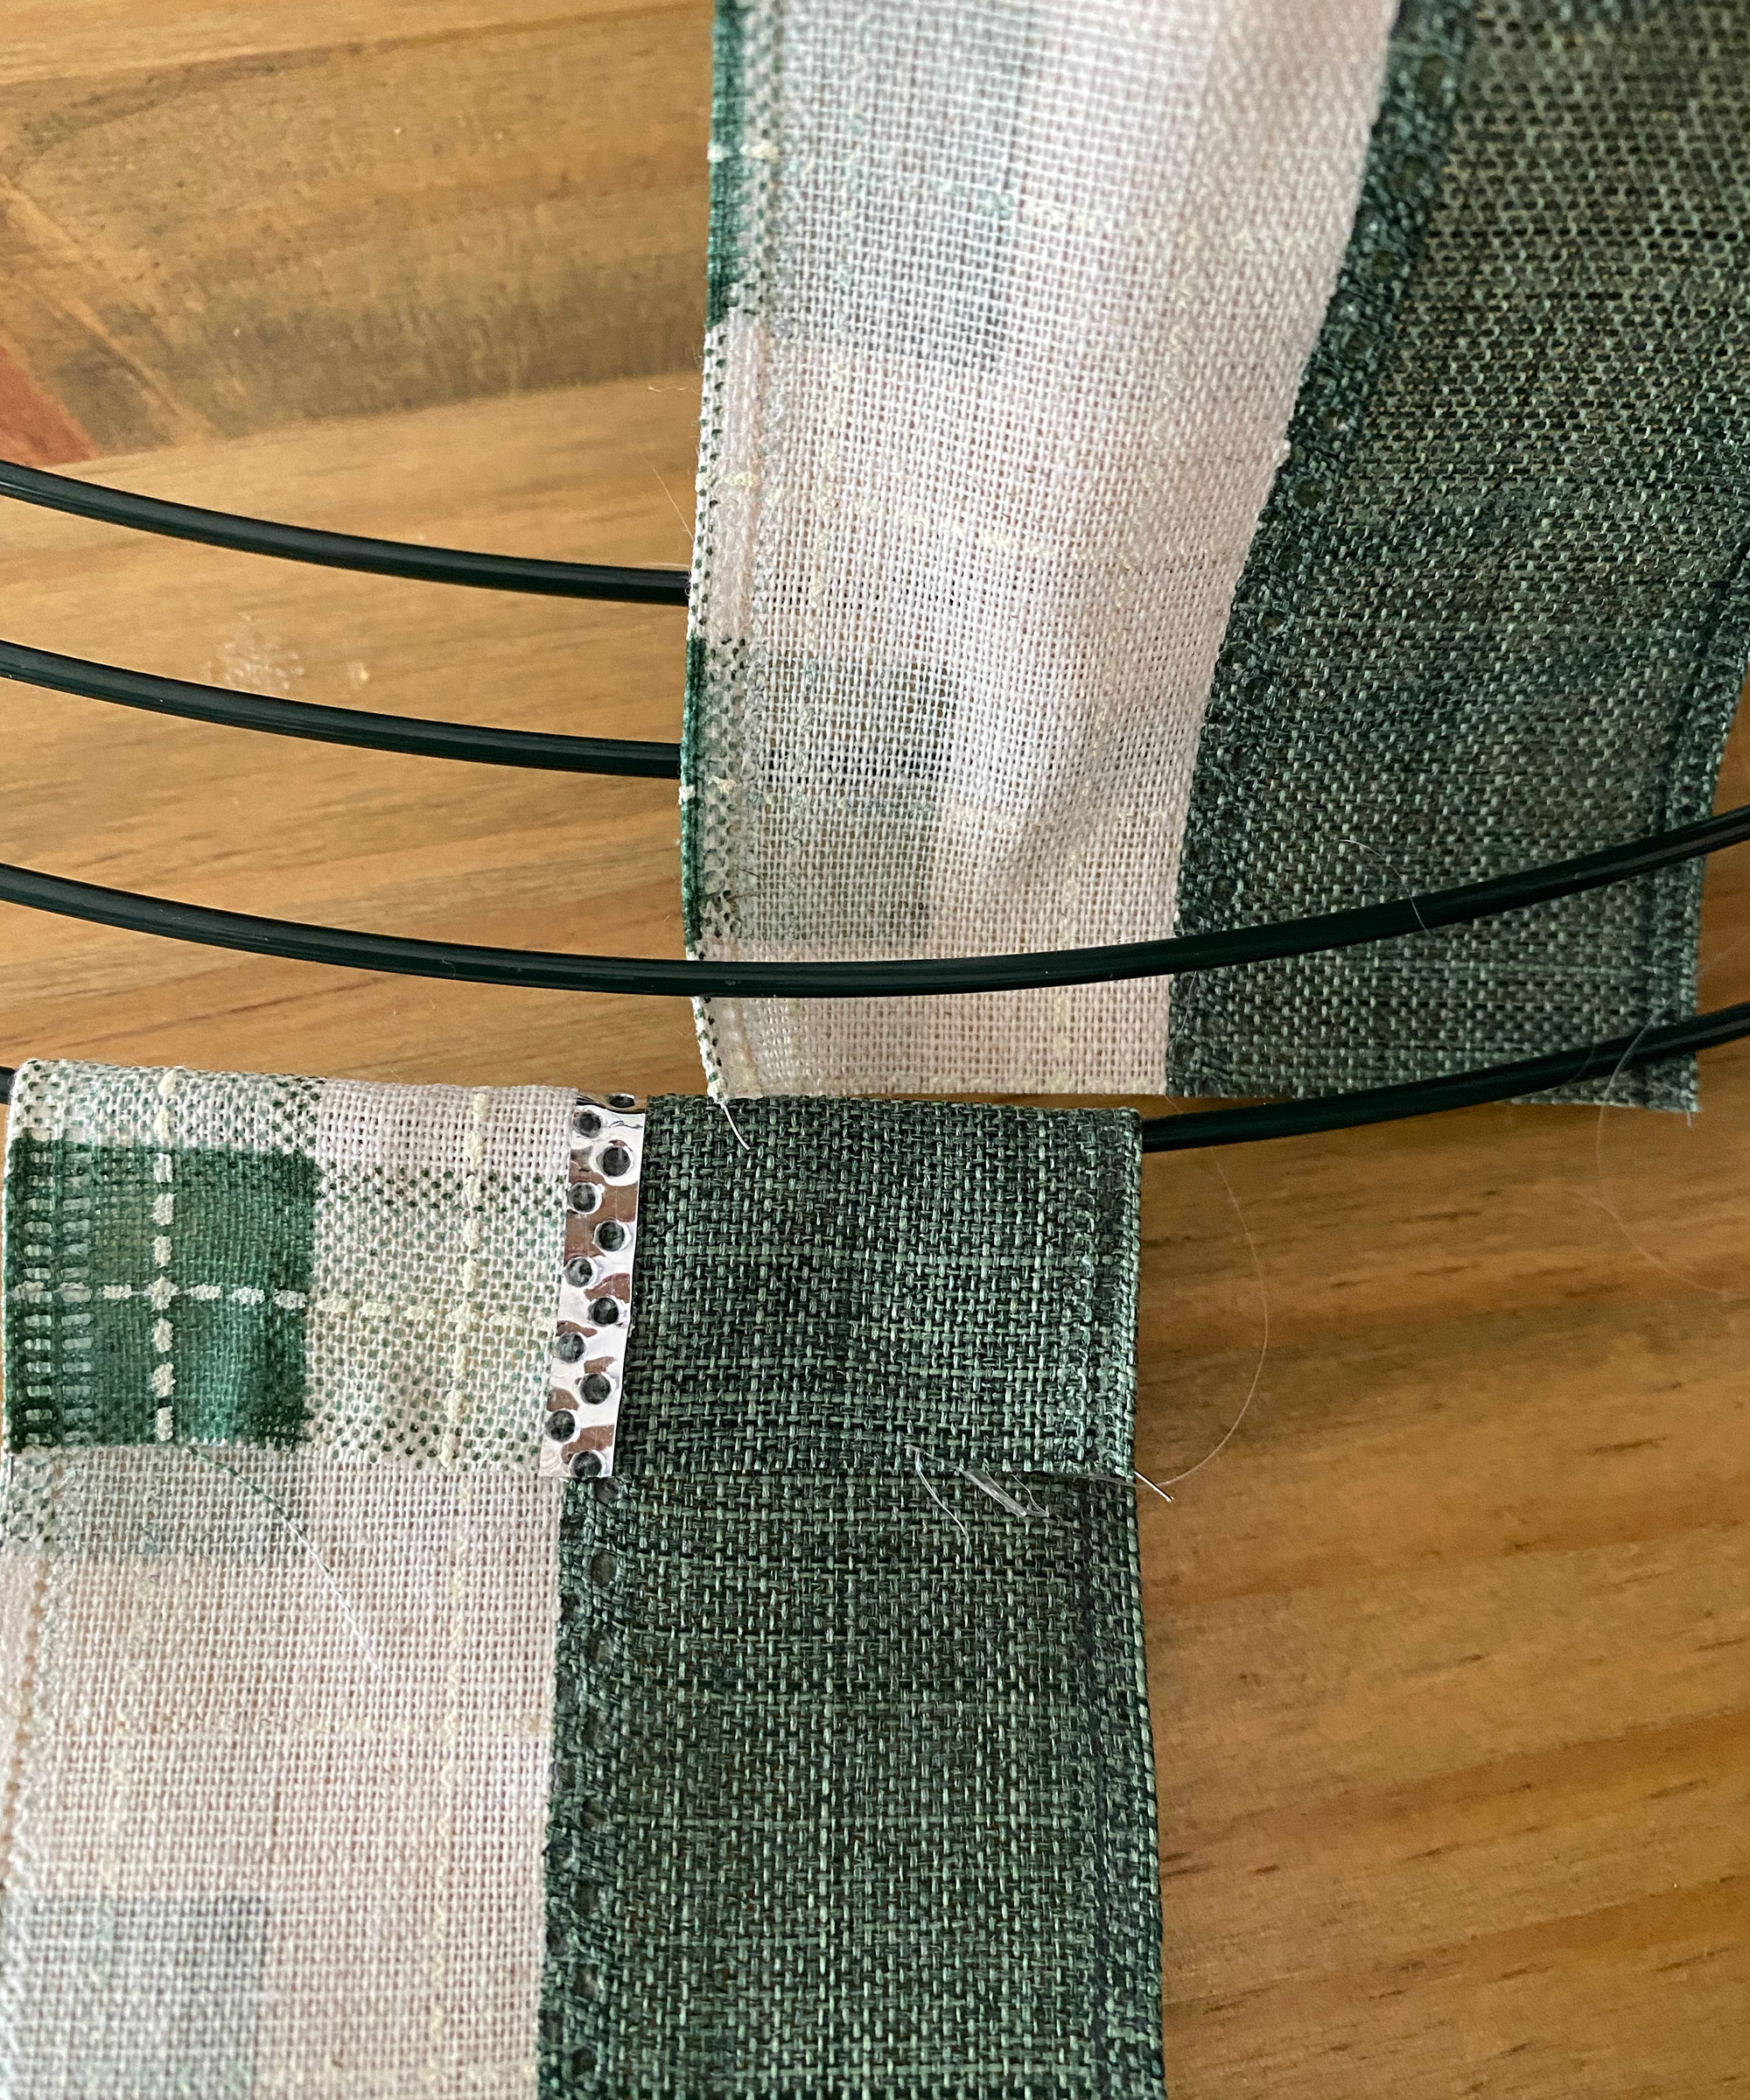
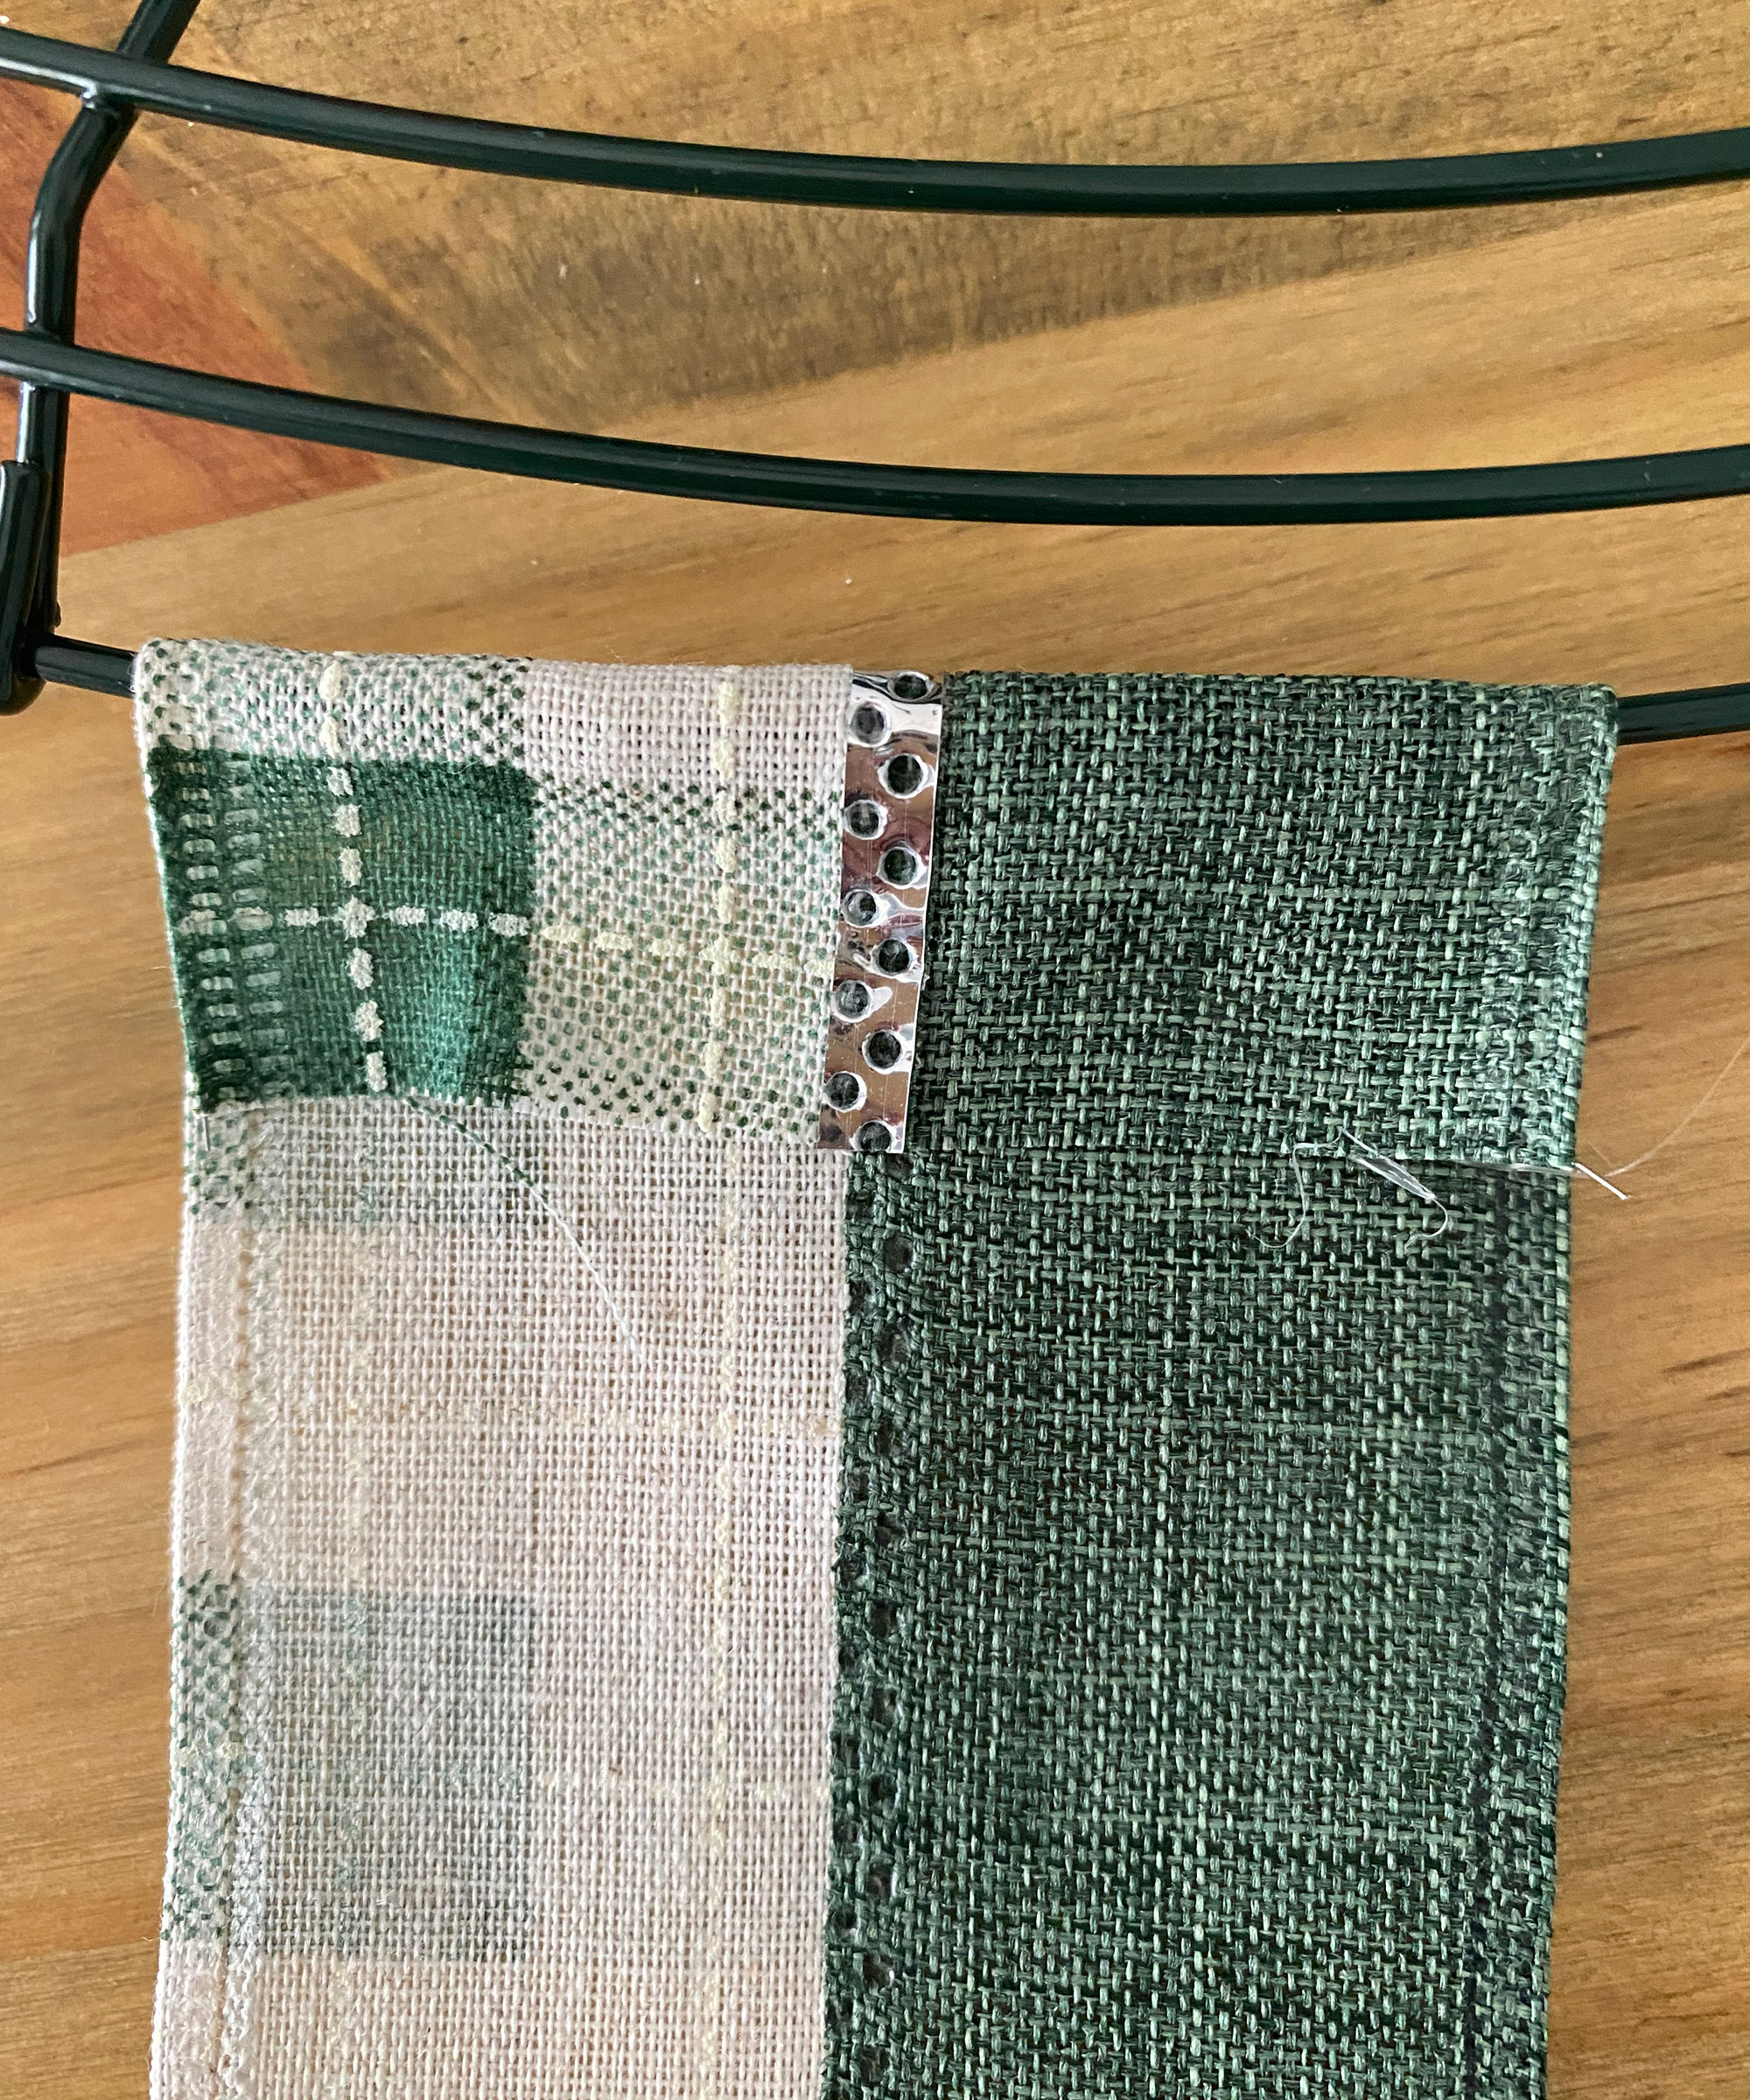
Start by cutting off a length of ribbon from the spool. Working on the outside wire of the wreath frame, slide the ribbon underneath about an inch, apply a line of hot glue along the top width and fold over to secure.
2. Create your first loop
Loop the ribbon over and through the second wire on the wreath, leaving a loop of about 3 - 4 finger widths.
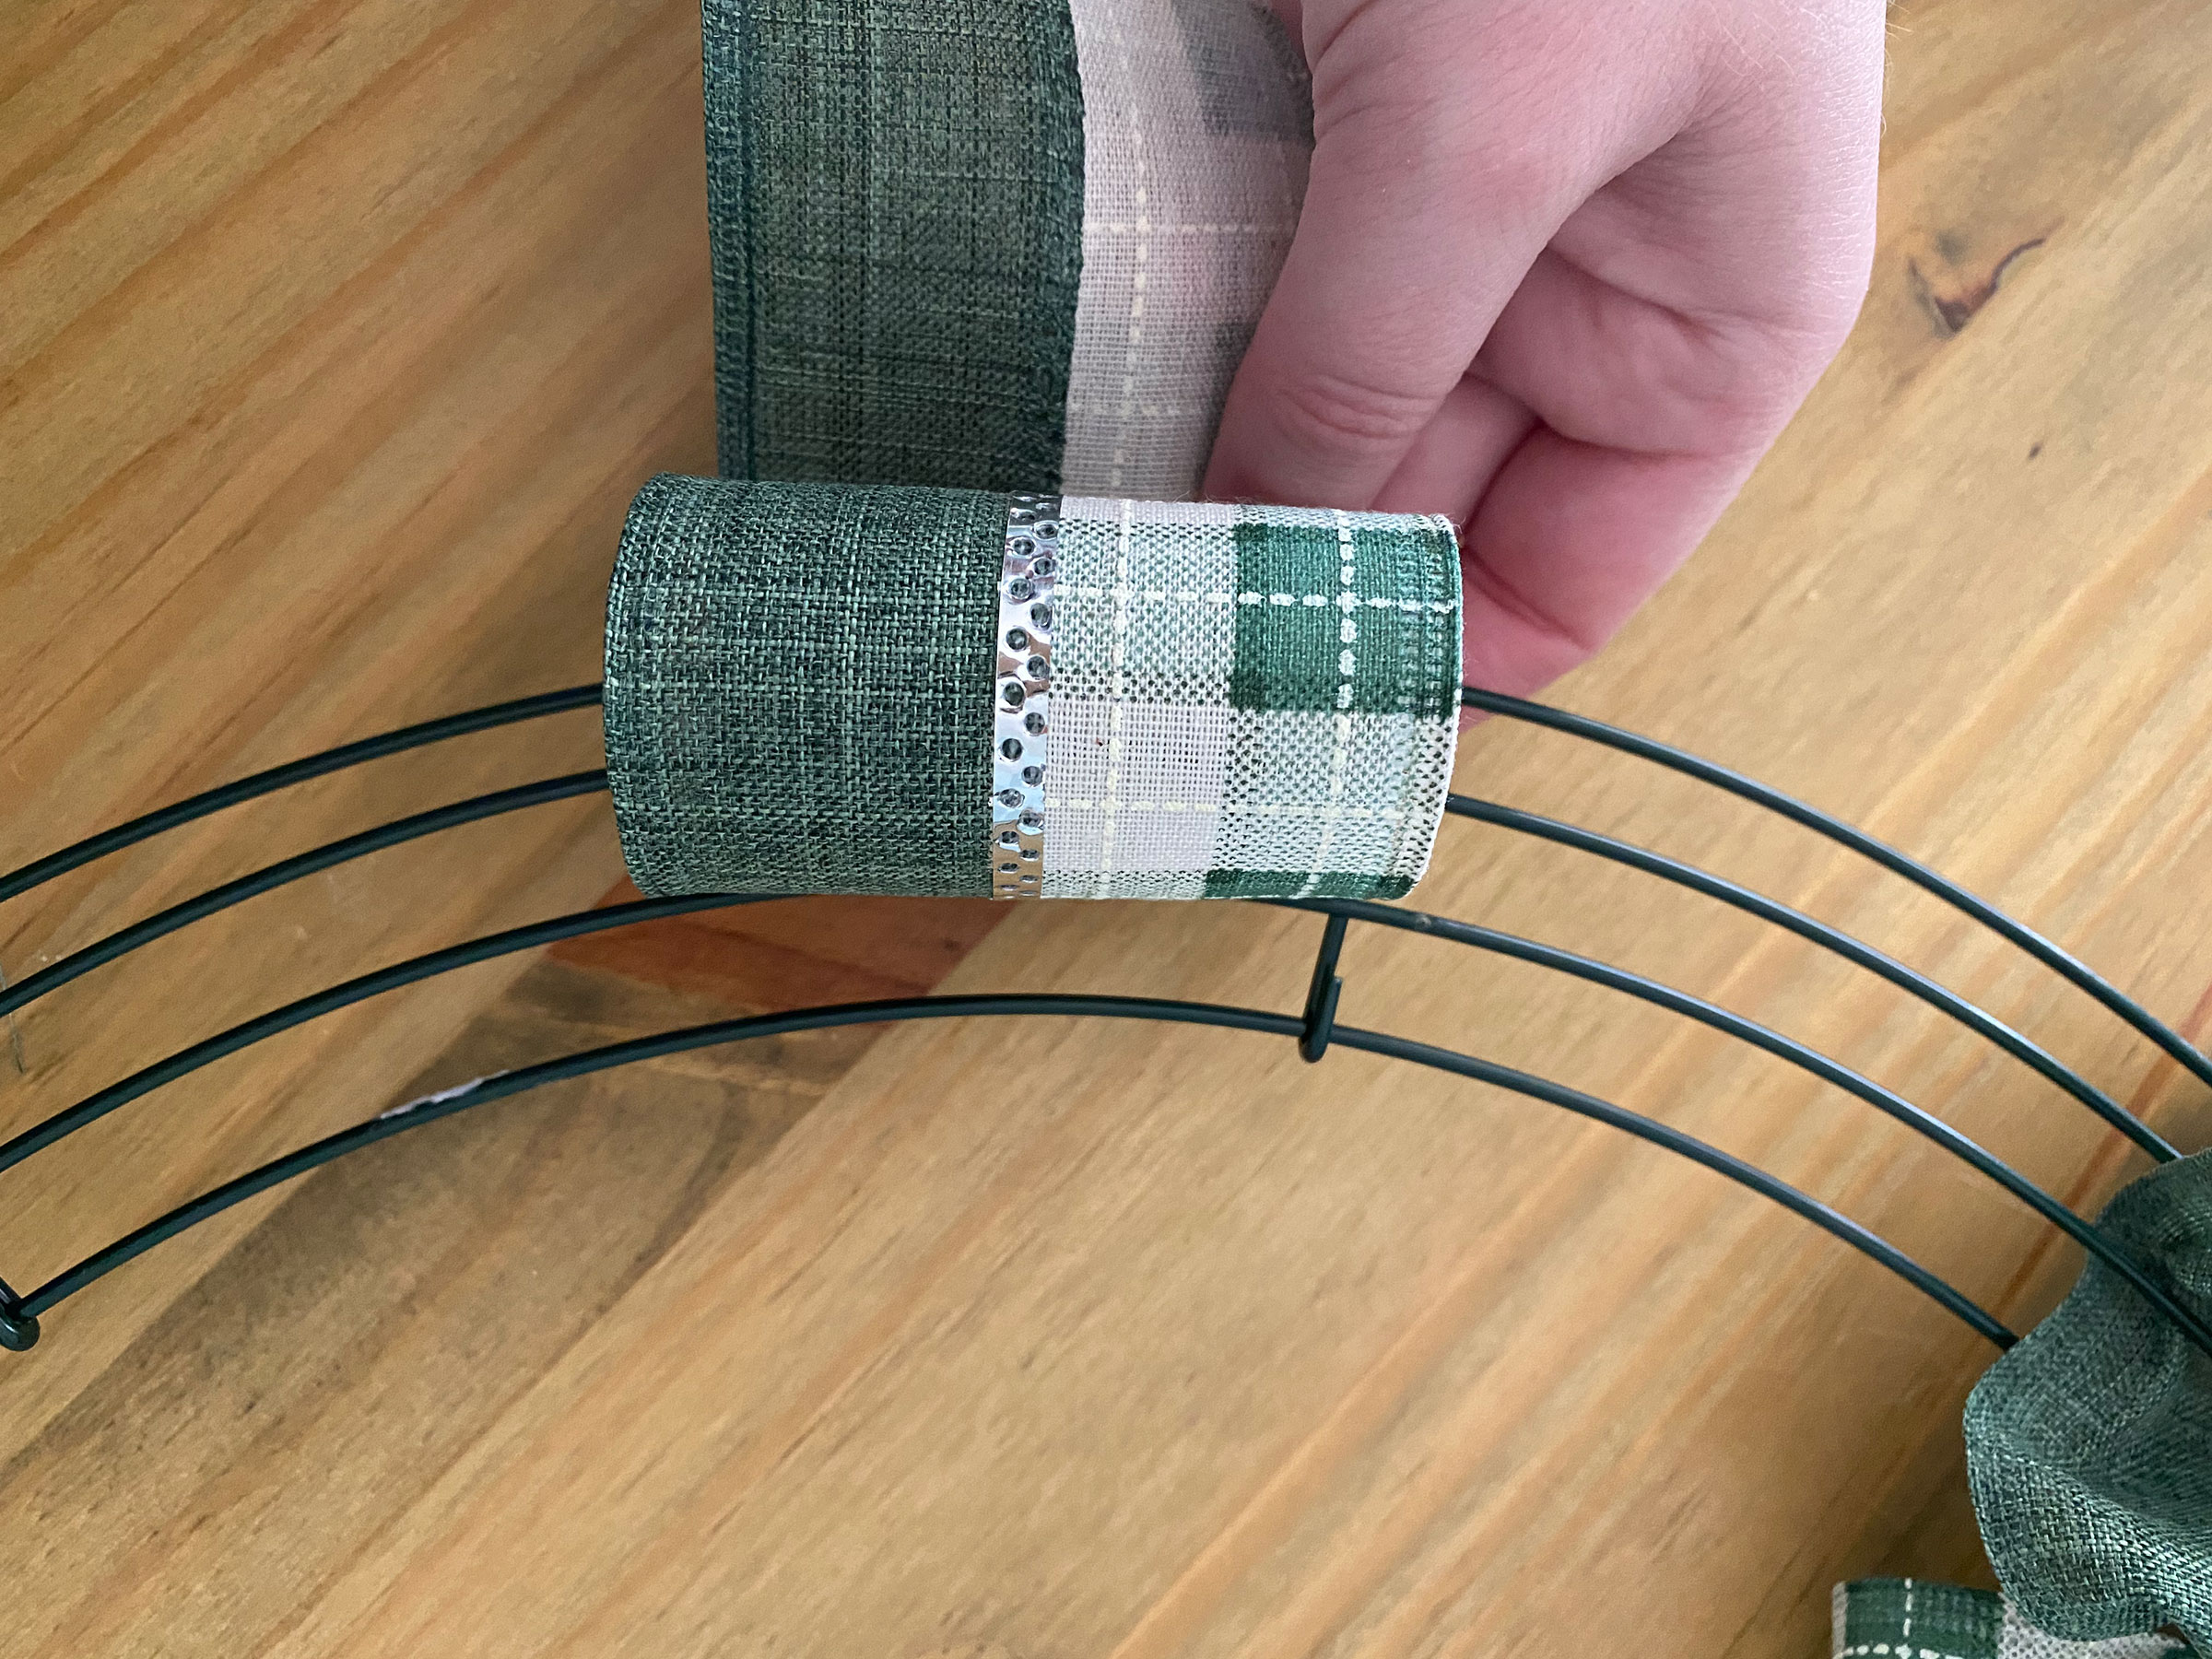
3. Move onto the next
Push a section of the ribbon up between the third and fourth wire to create another loop.
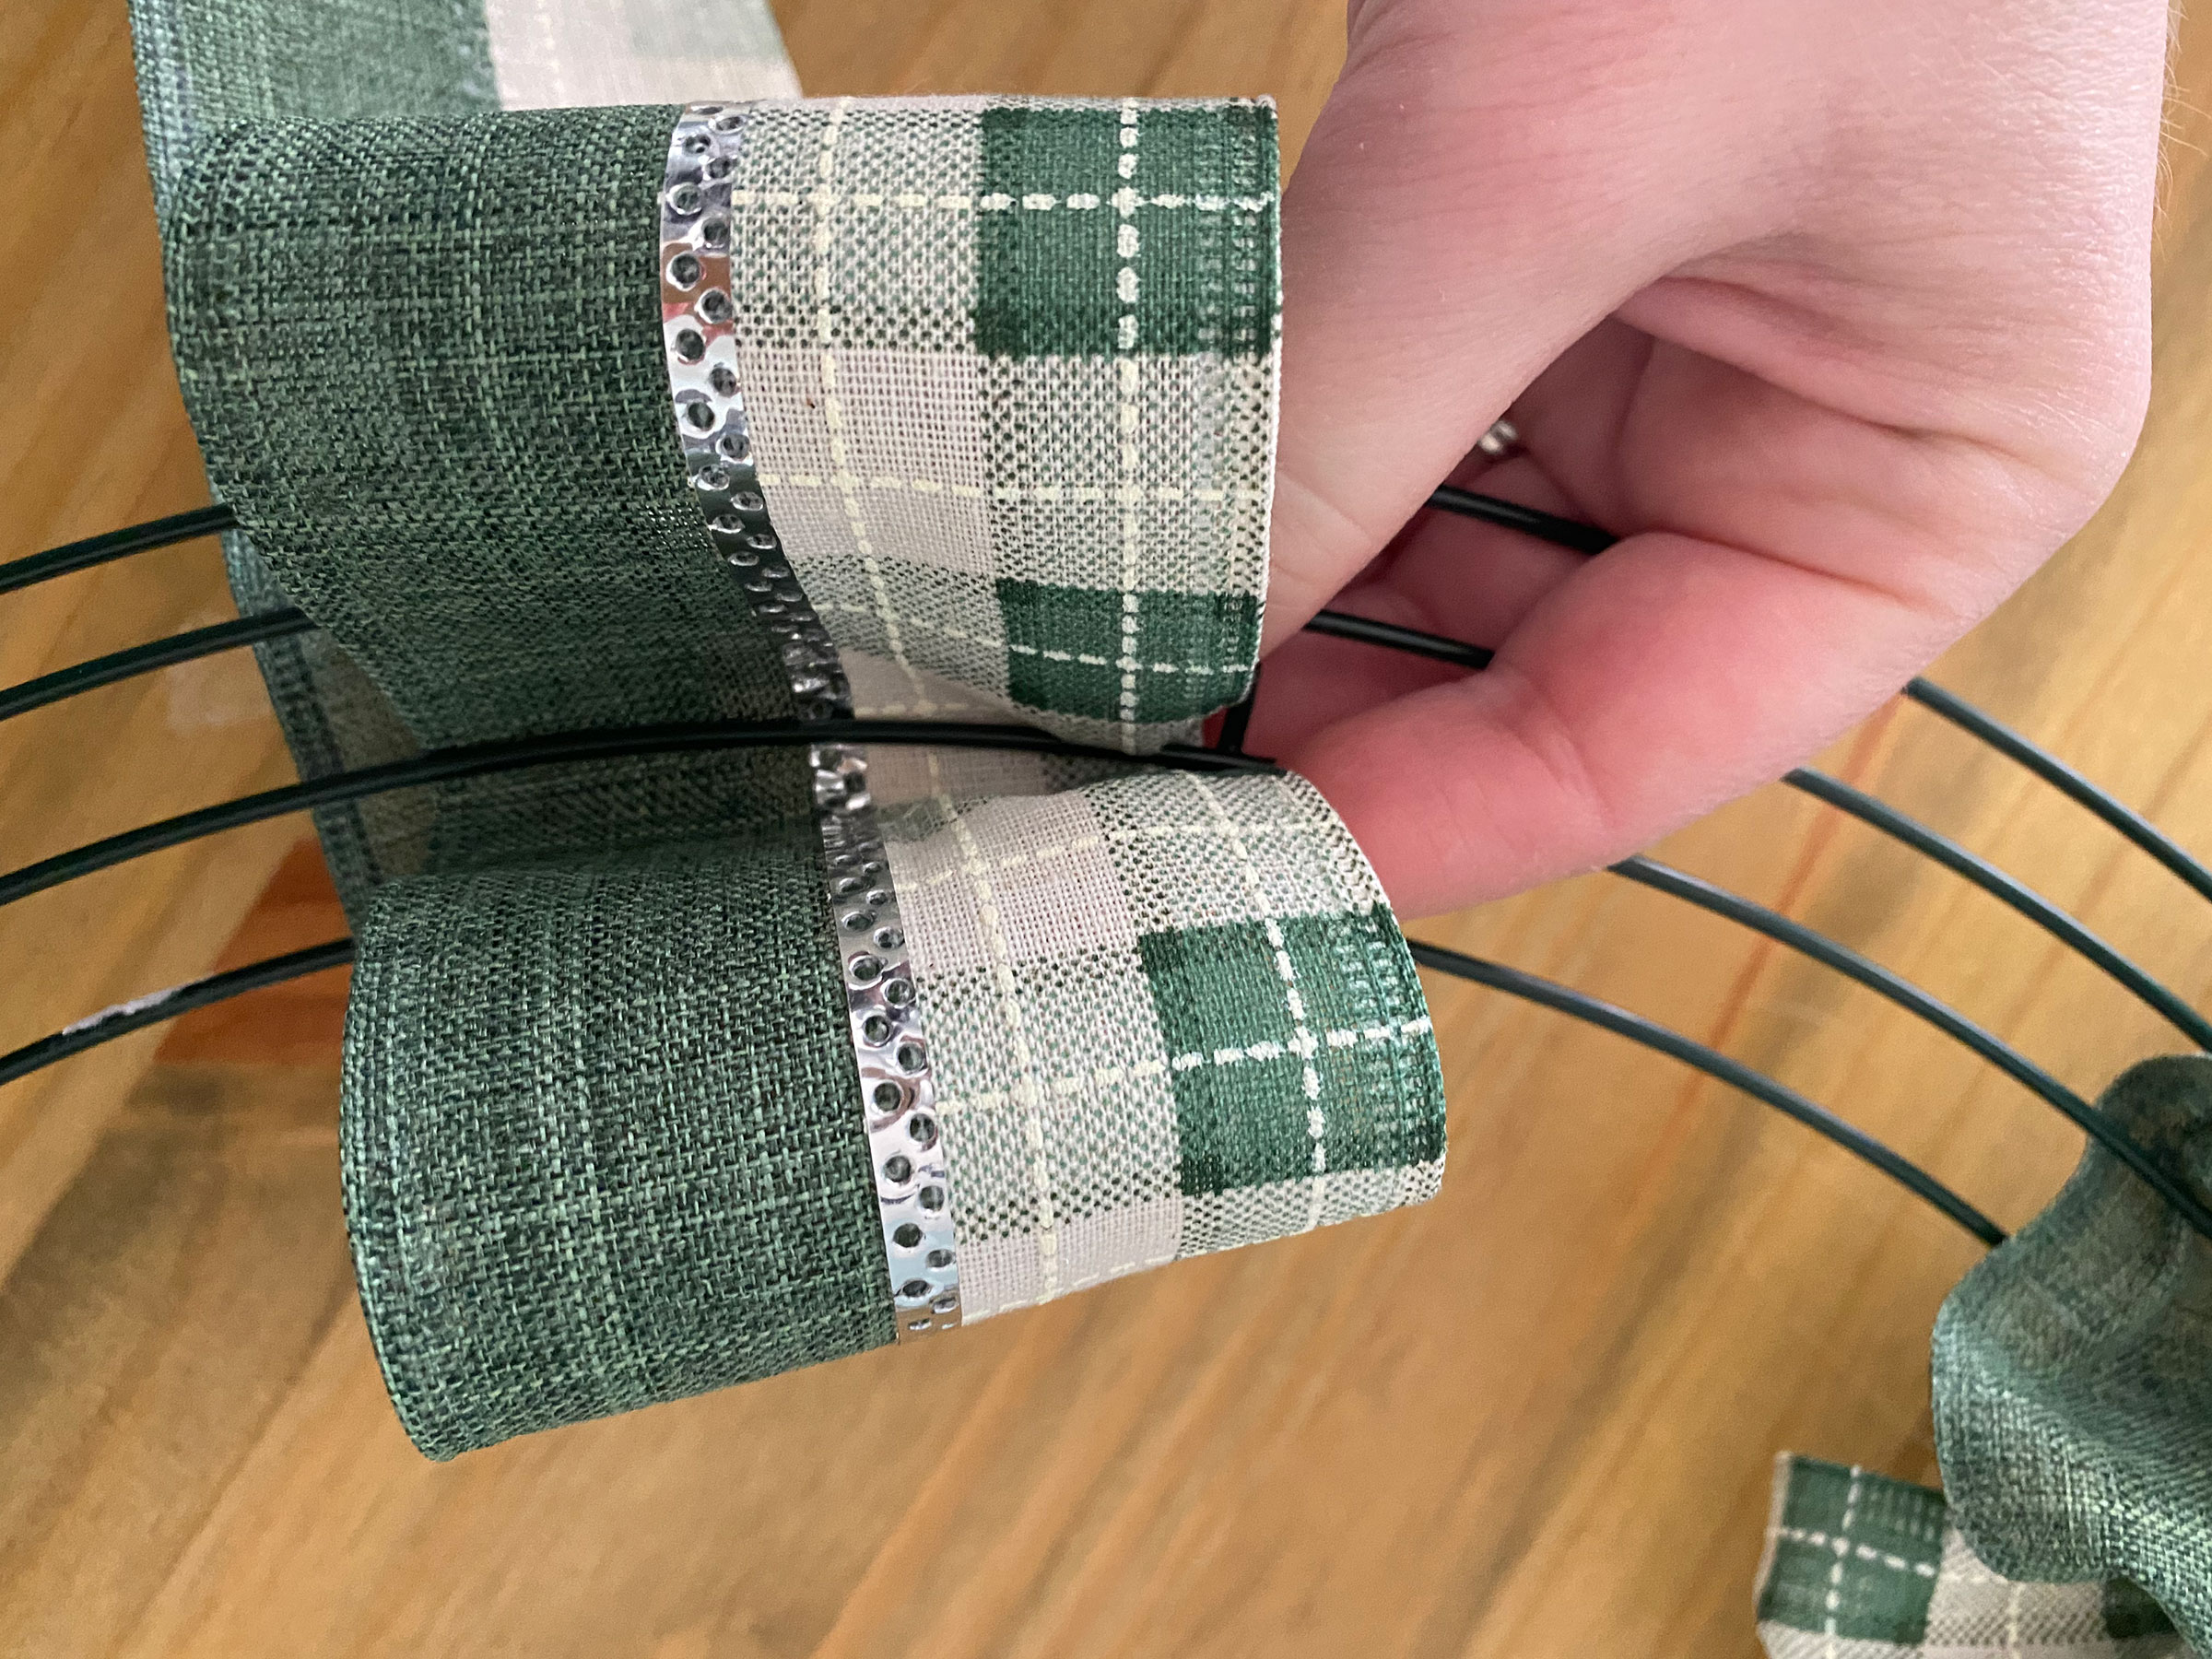
4. Twist, loop and push through the ribbon
Twist the ribbon and loop over and through the inner wire. Push a section of ribbon up between the two middle wires.
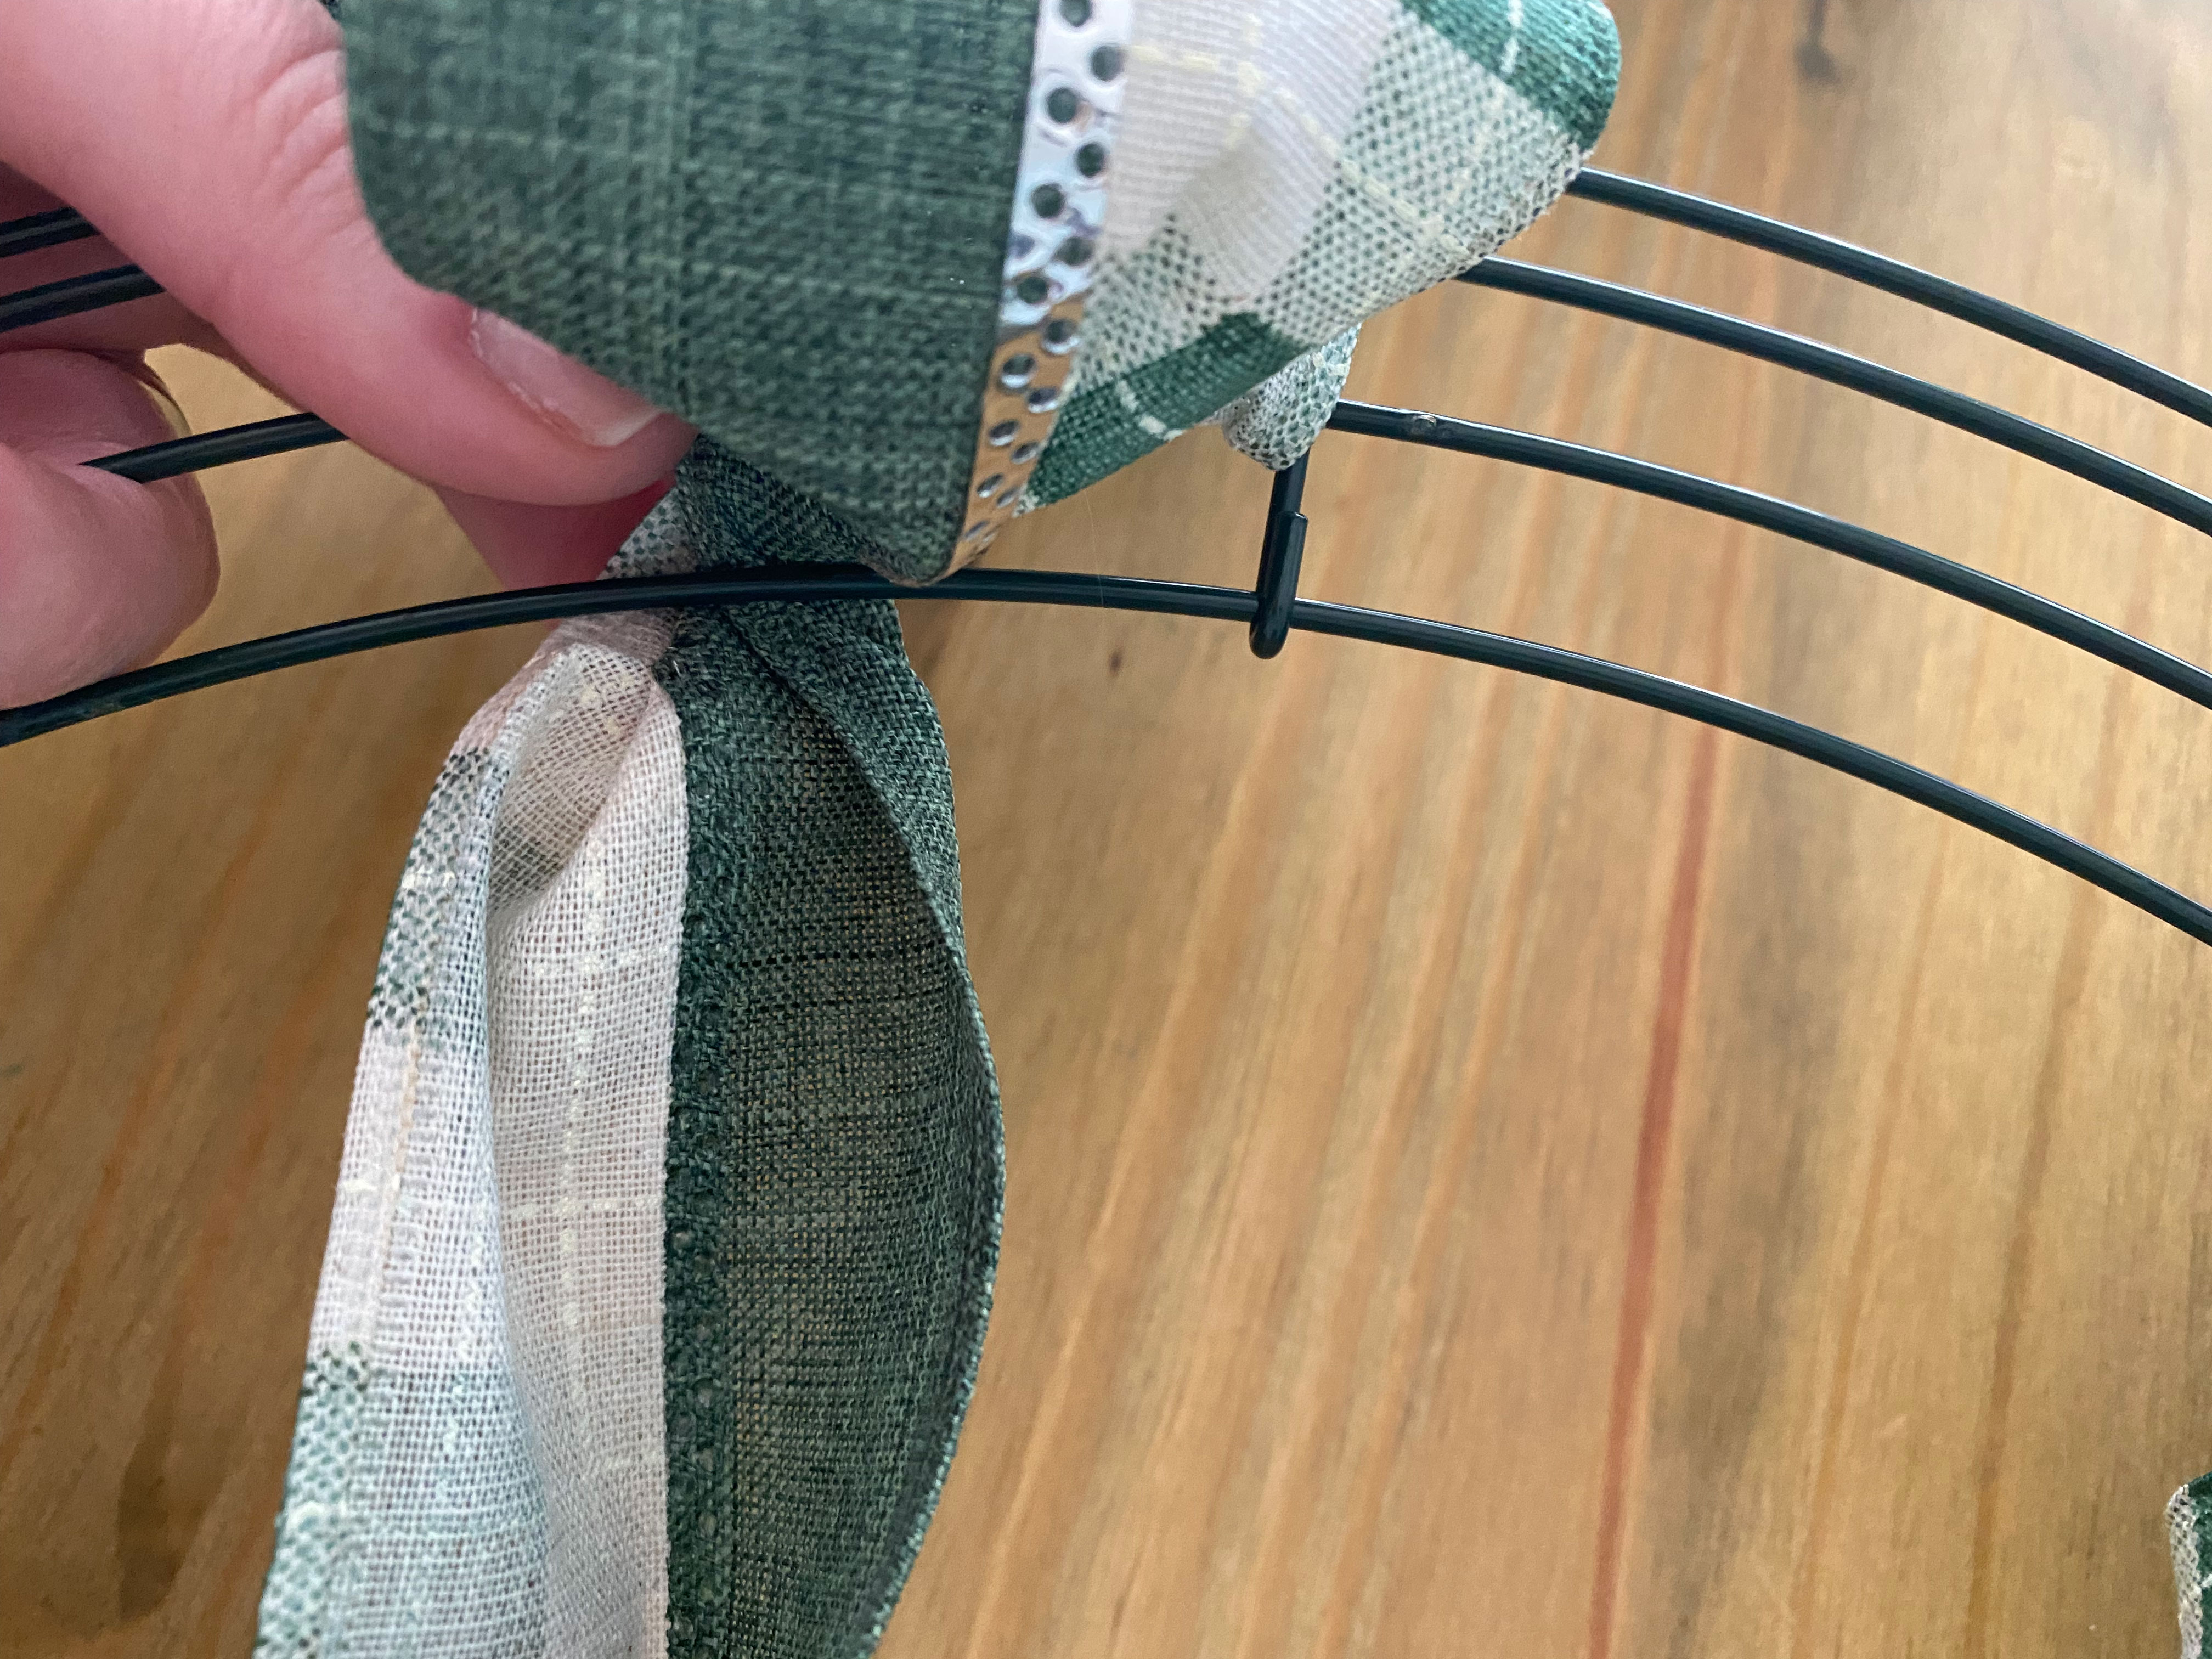
5. Repeat
Then repeat with the next section. Twist the ribbon and loop over and through the outer wire.
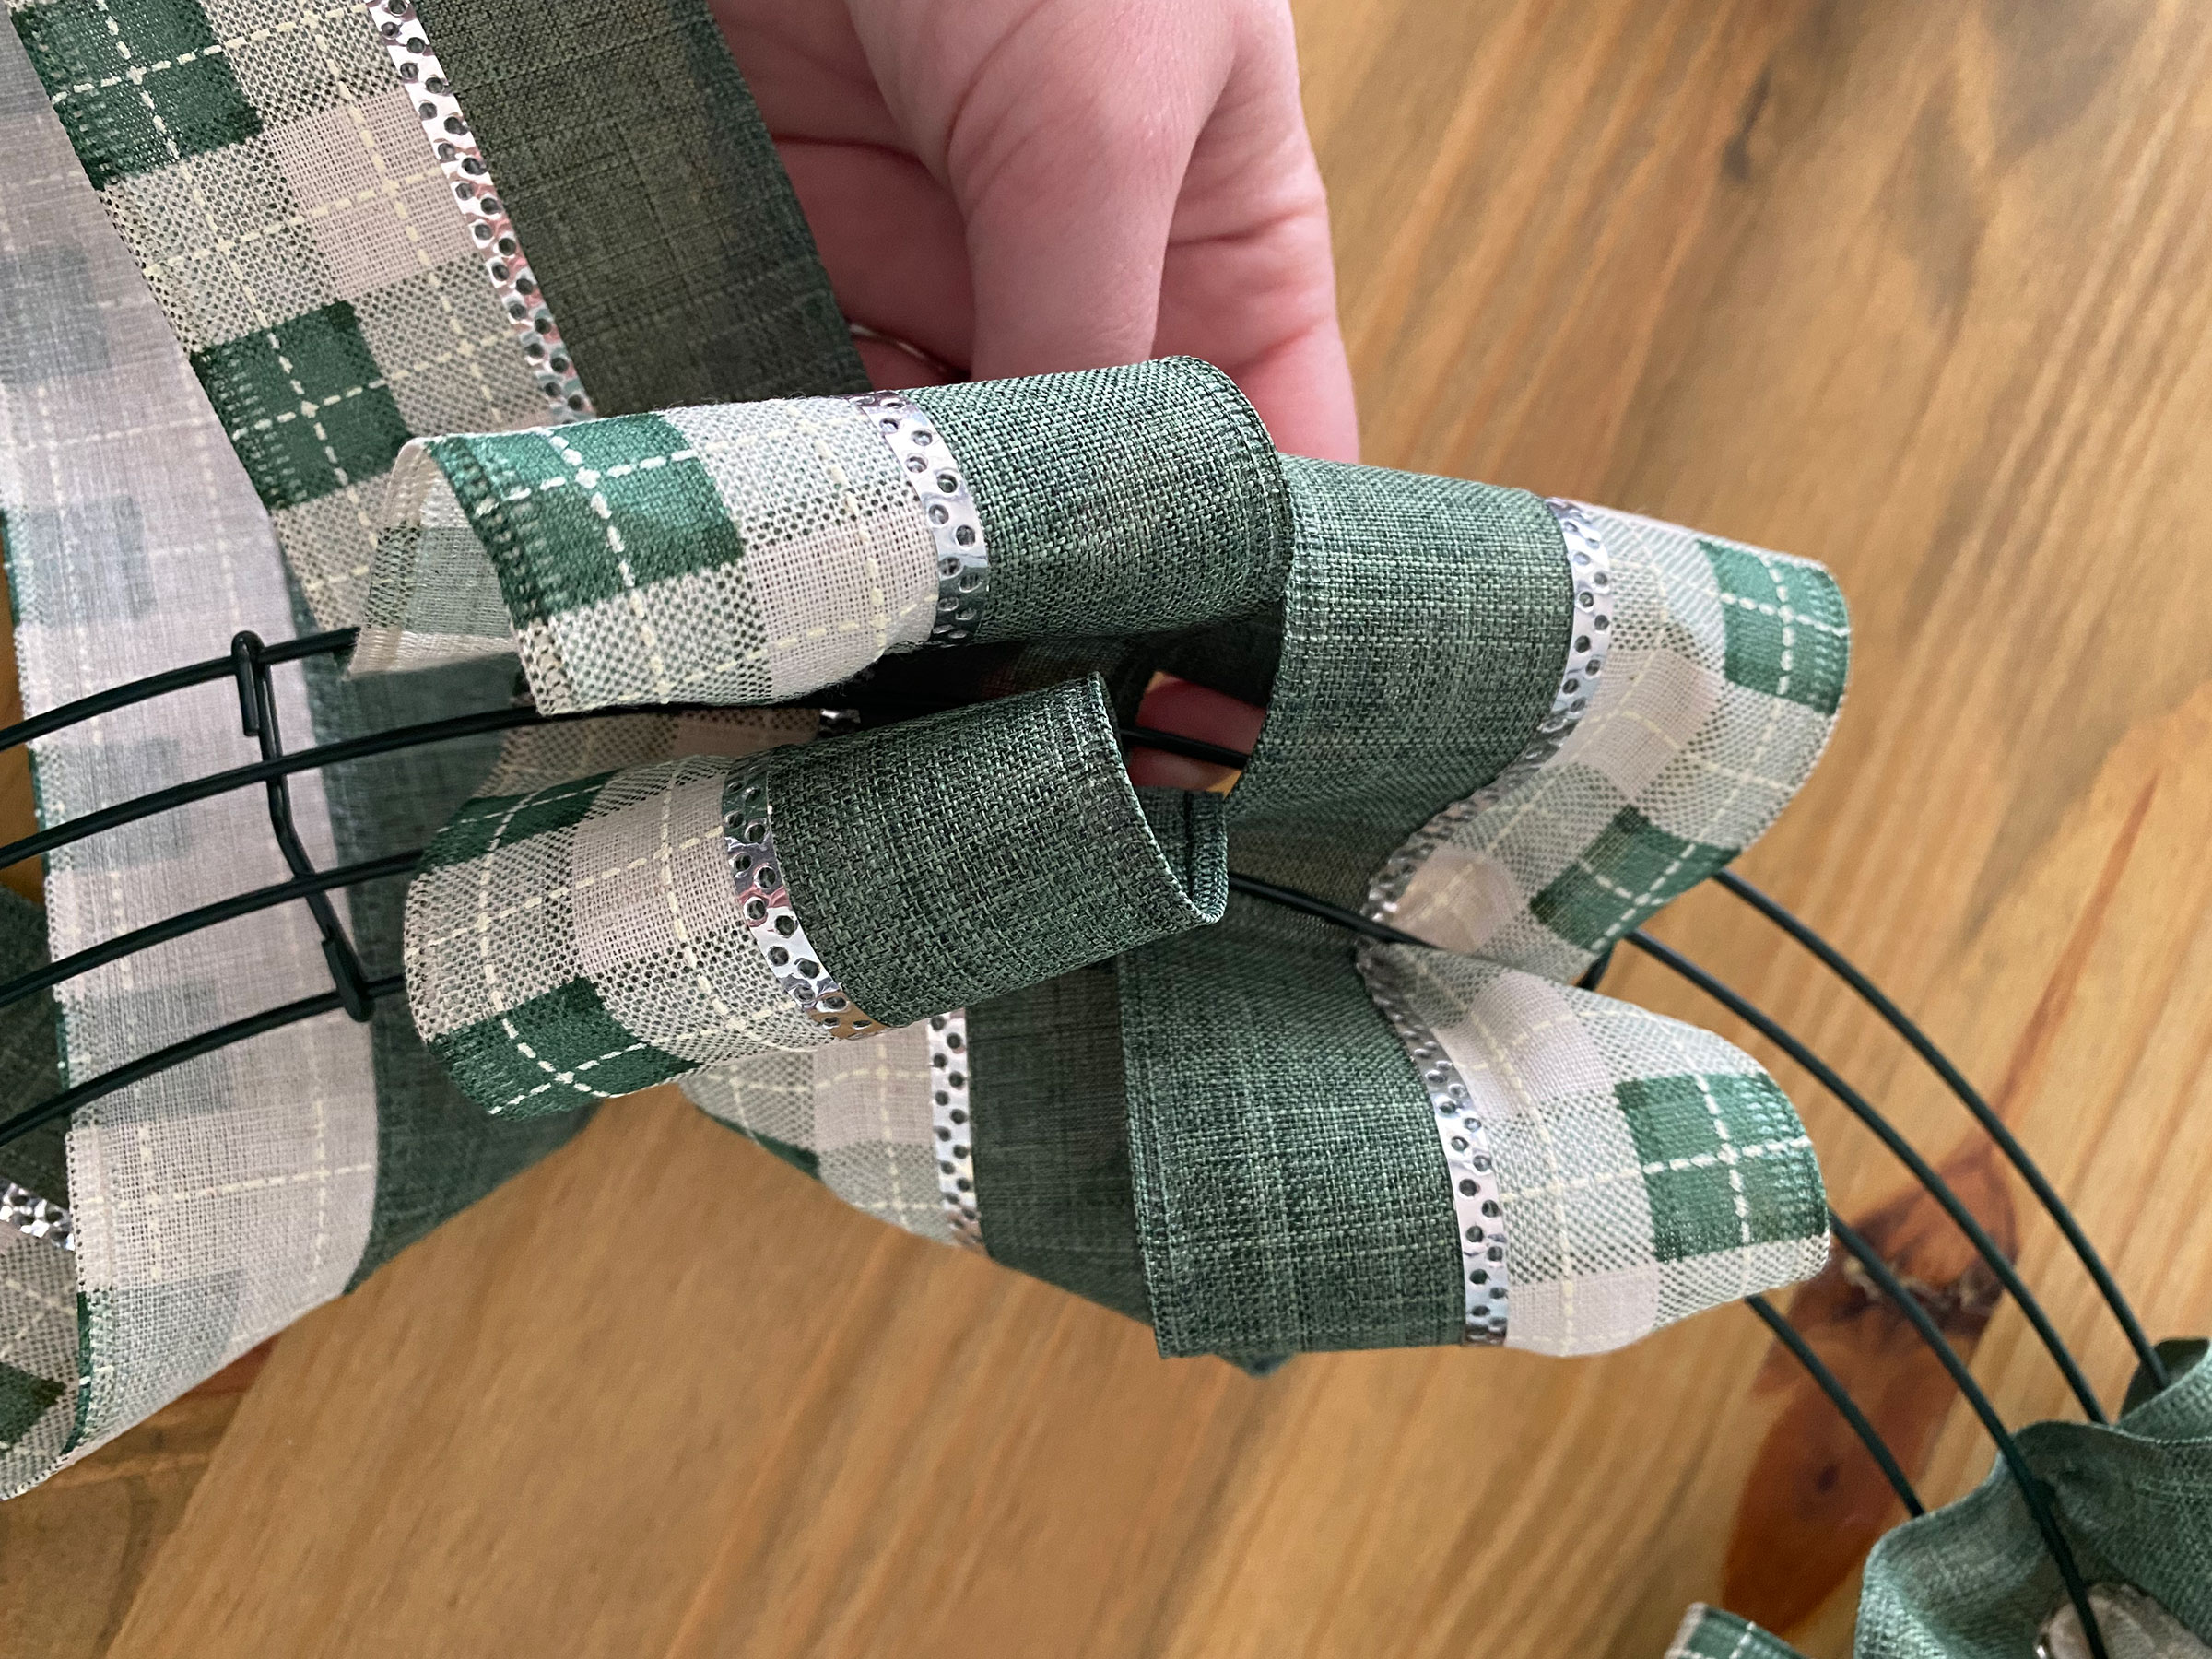
Continue this process, bunching the ribbon as you go to cover the wire frame and give the wreath a full look.
6. Keep it tidy as you move around the wreath
When you come to the end of your first piece of ribbon, hide the end on the backside of the wreath and glue to secure it. Then cut another length of ribbon and repeat the process moving all the way around the wreath.
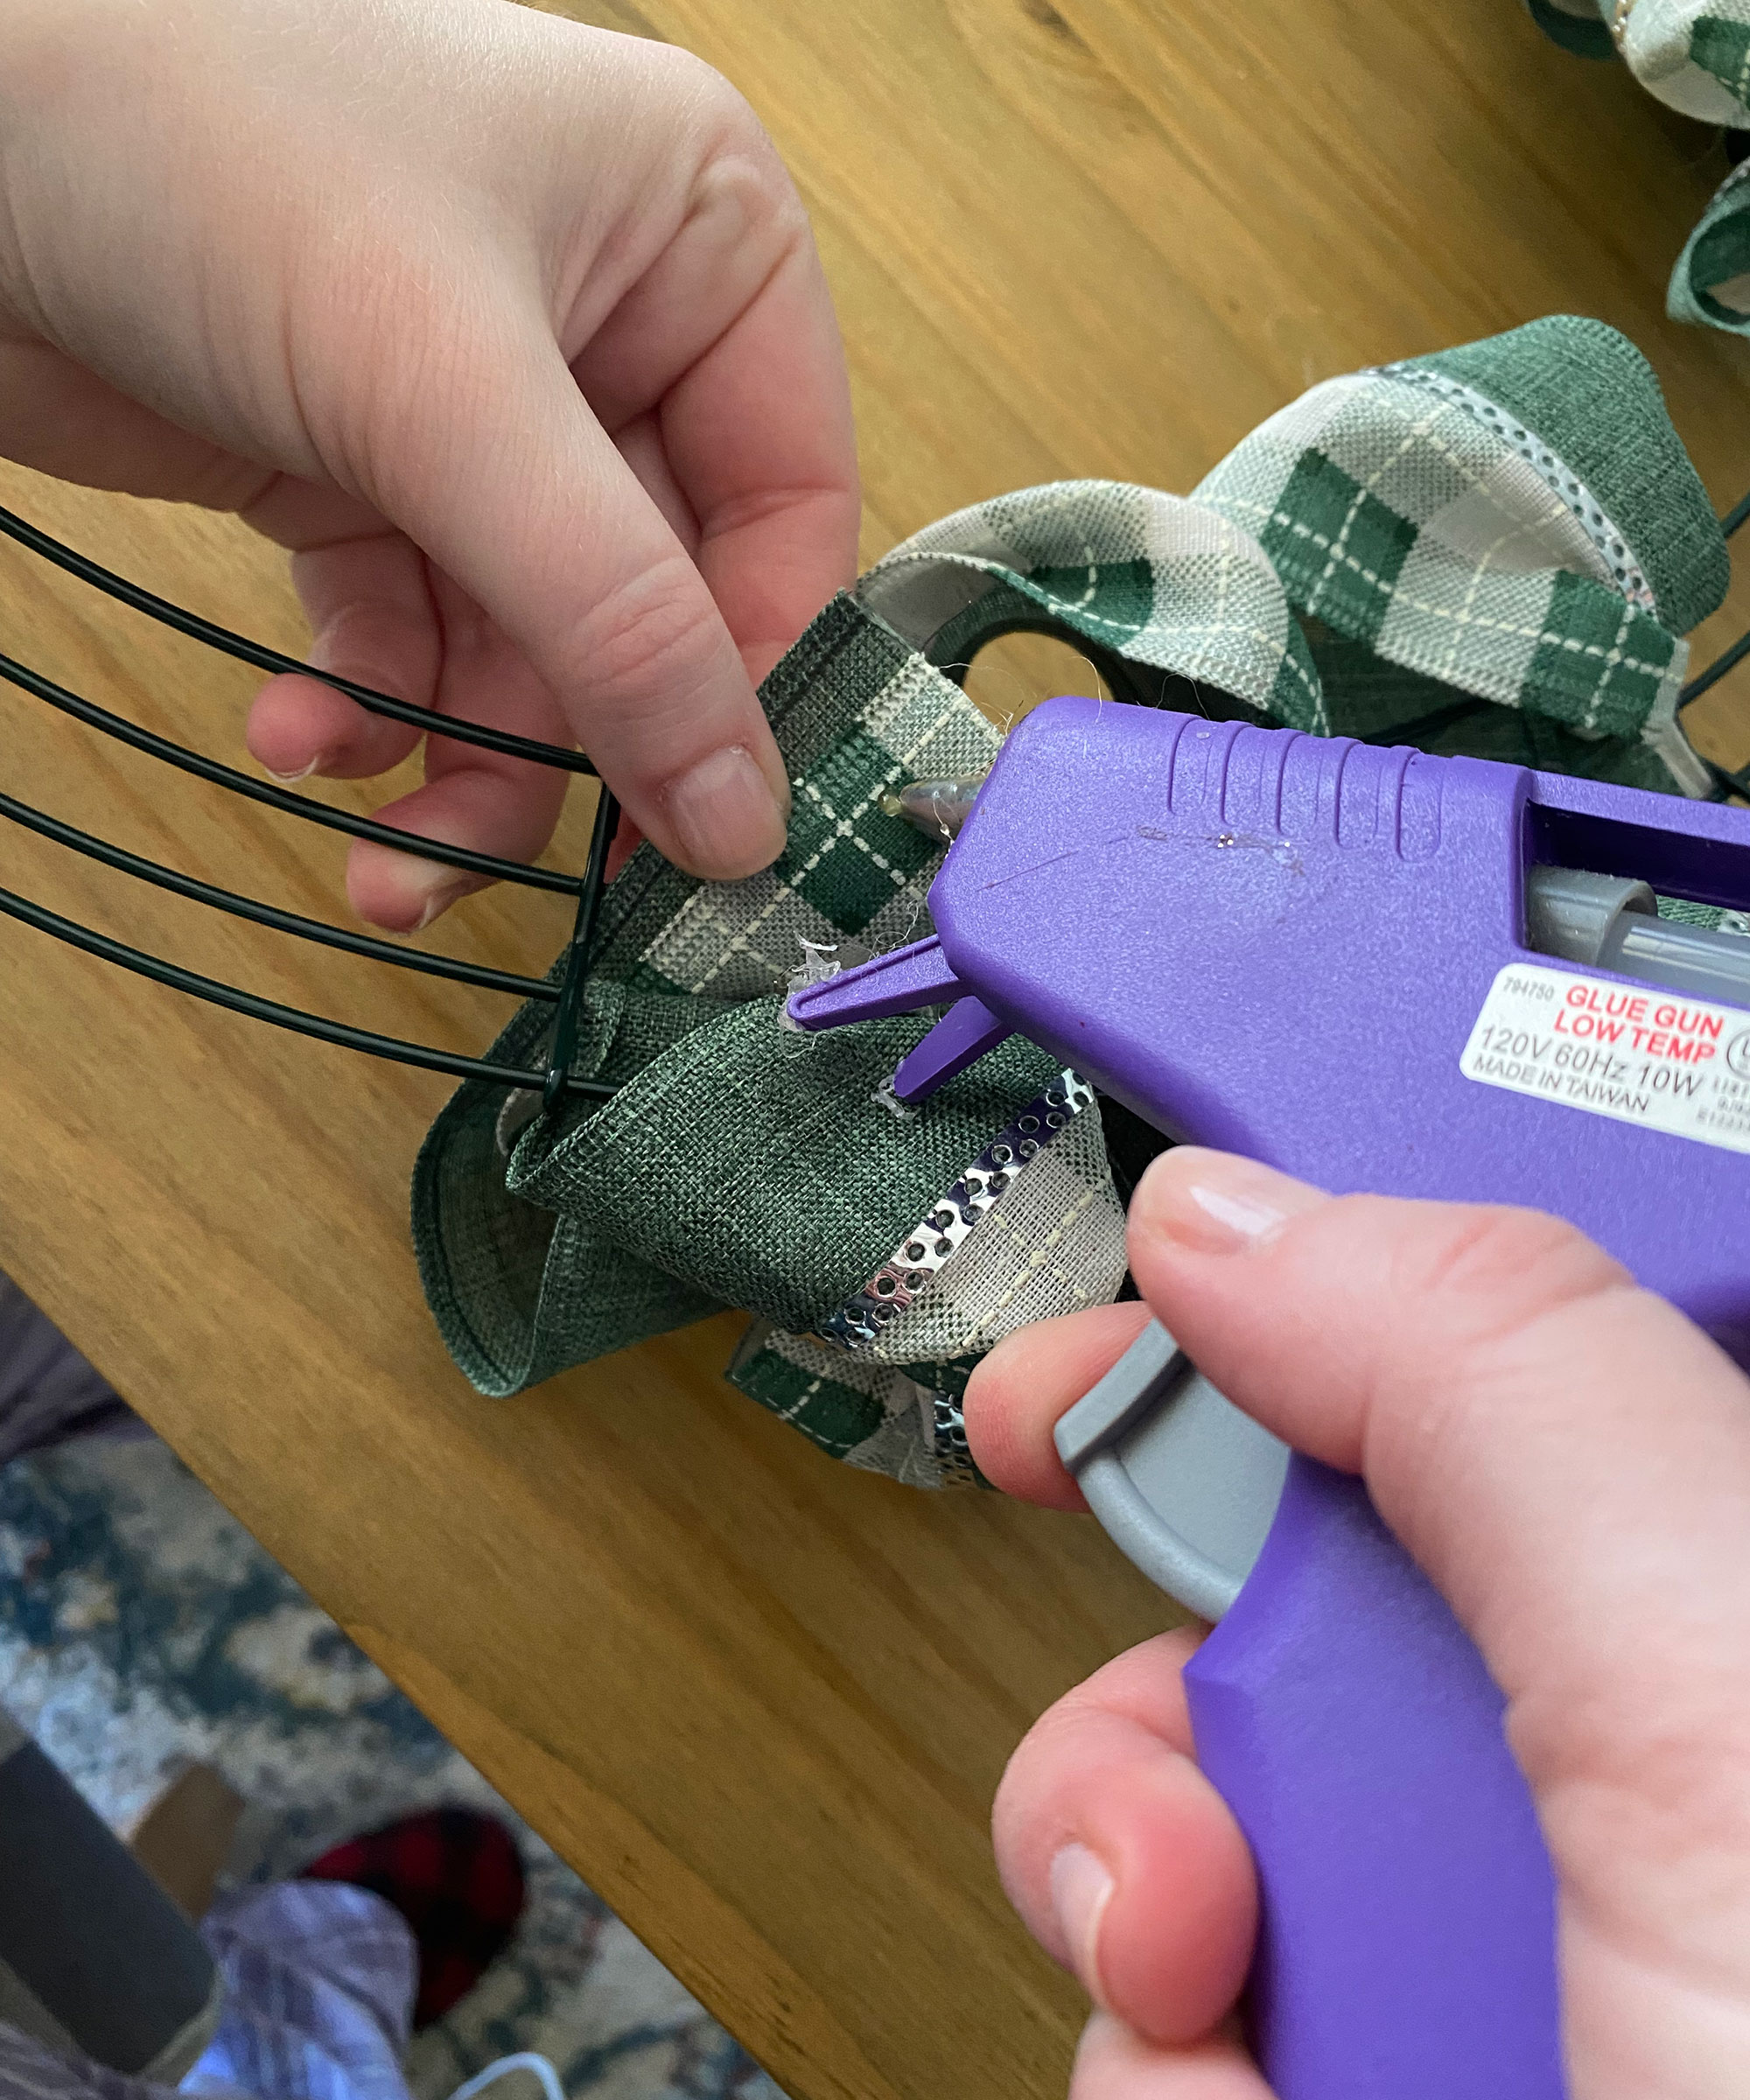
7. Fluff the wreath
Once you’ve finished the final section and secured the last end of ribbon on the back side of the wreath with hot glue, you’ll want to fluff your wreath and make sure none of the wire is showing.
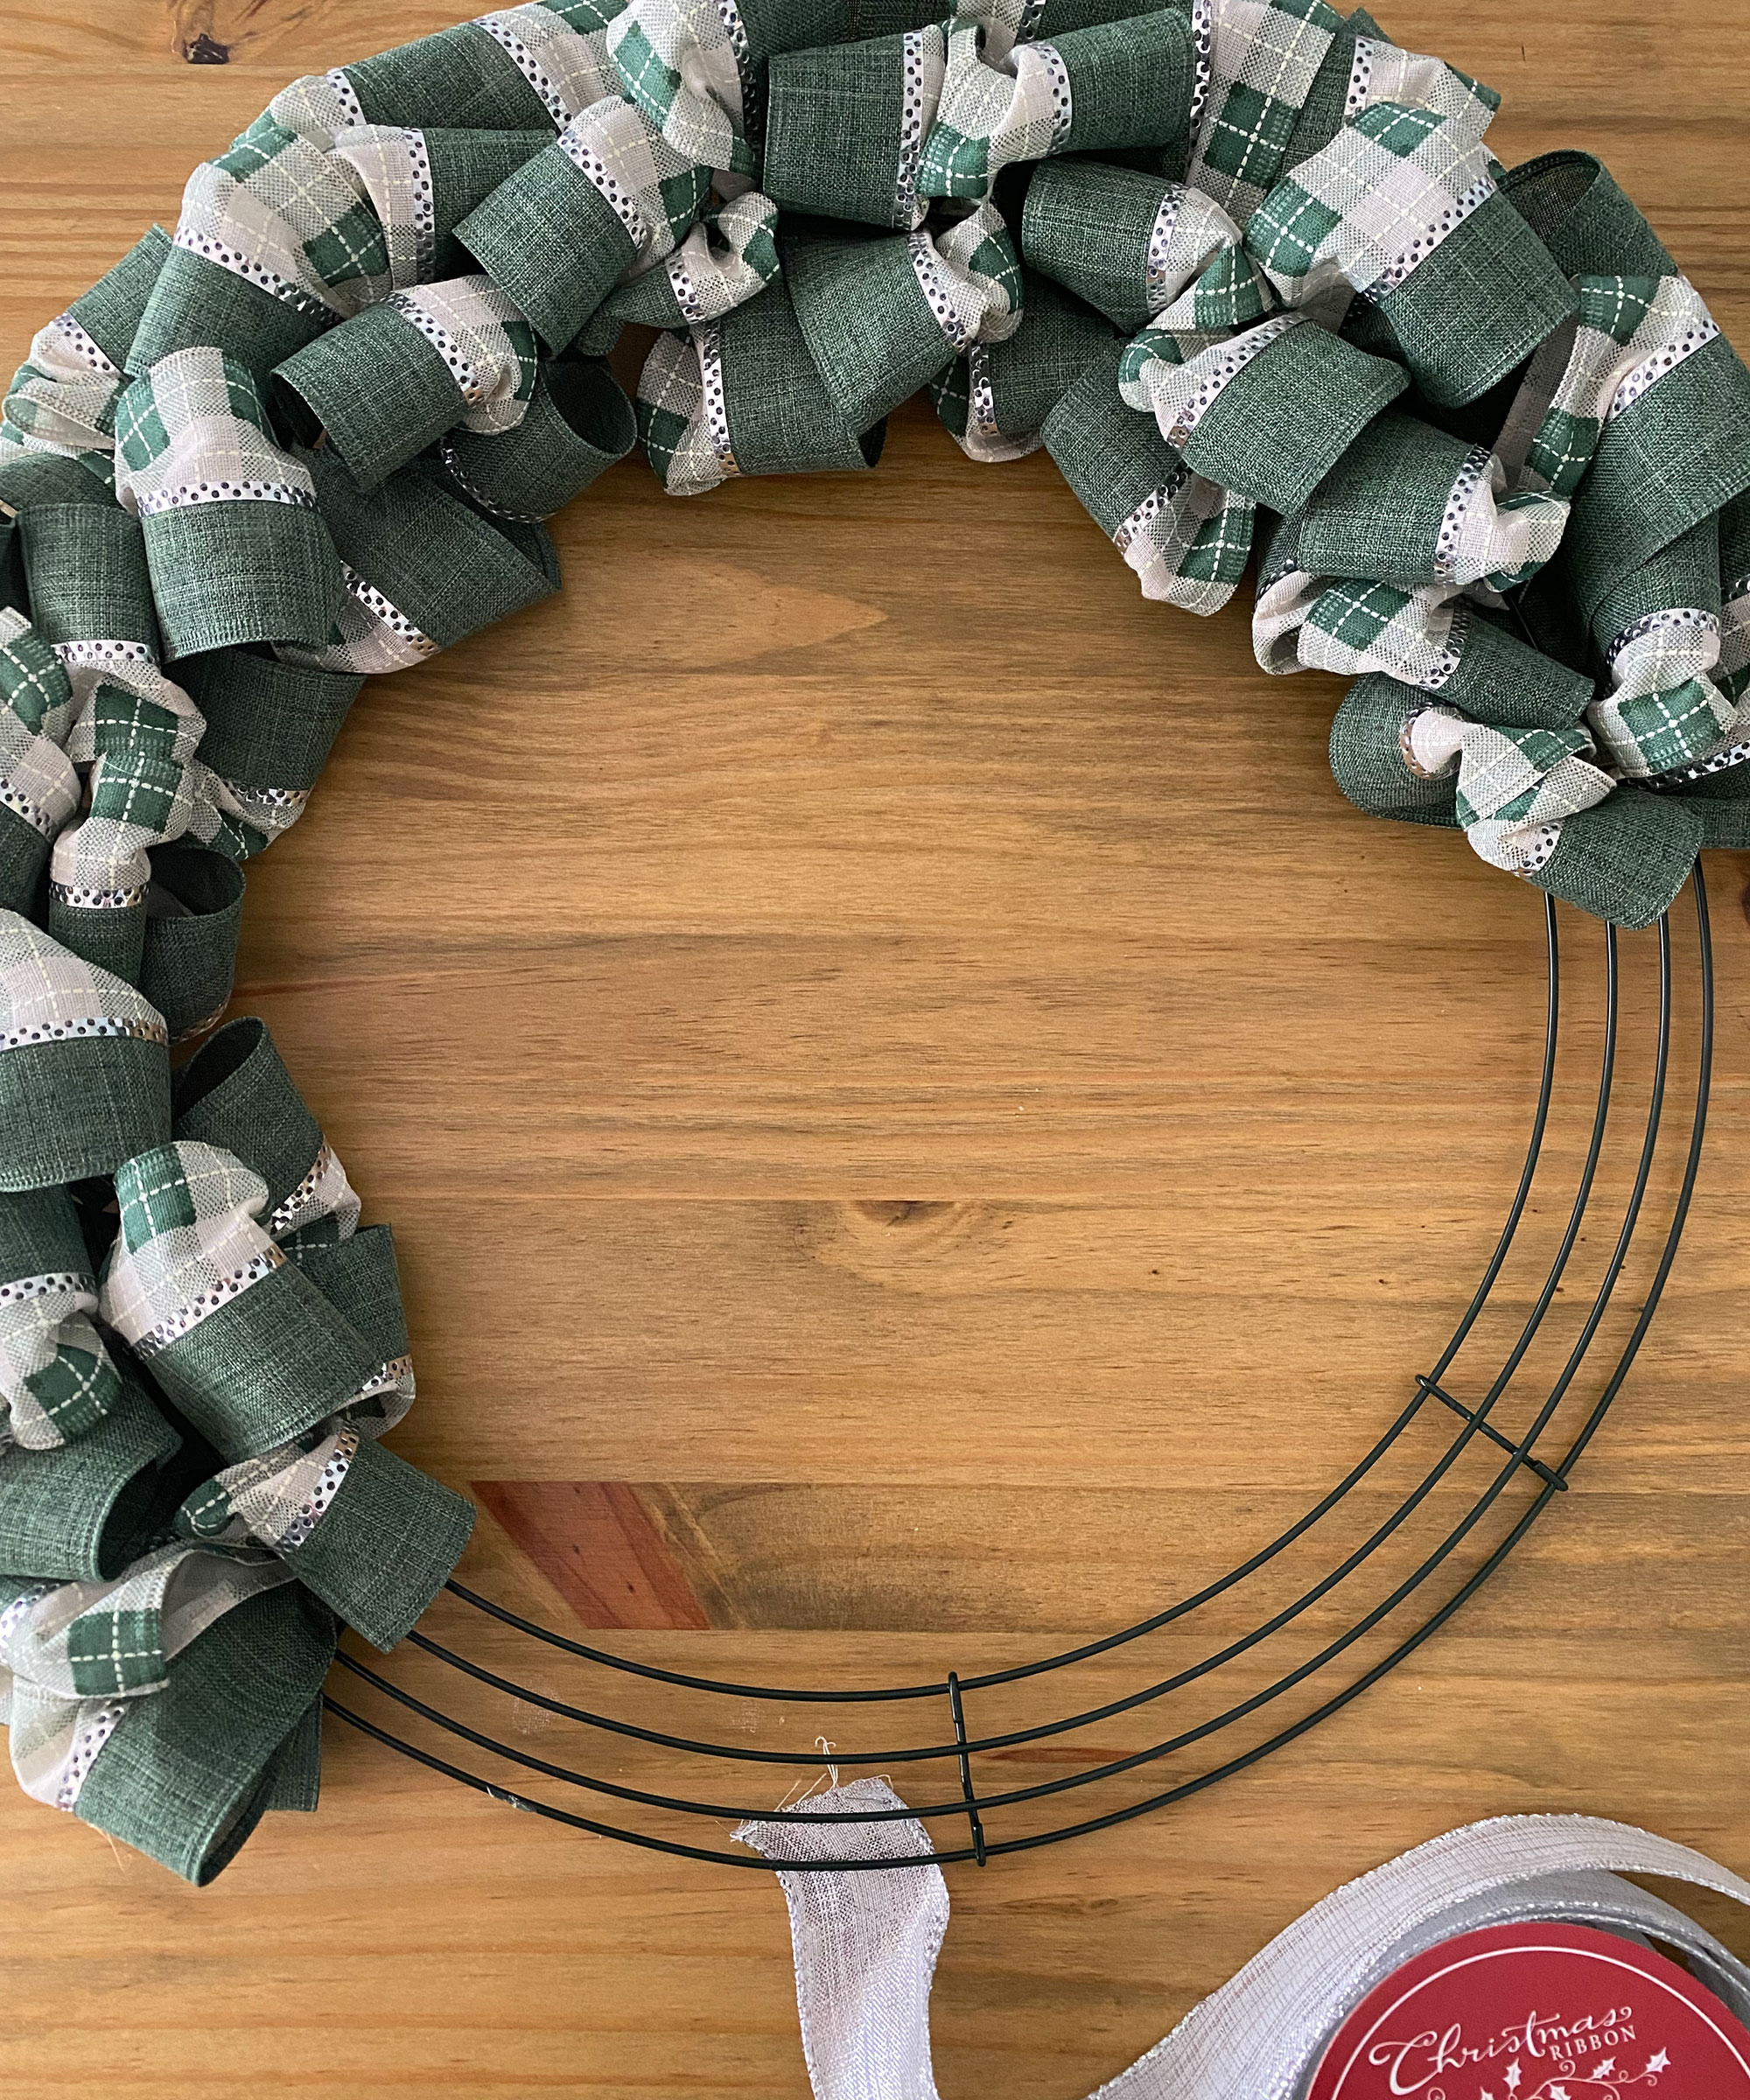
8. Choose an embellishment
At this point you can choose to leave the wreath as is or add some embellishment like some floral sprigs or a bow.
9. To make a bow for the ribbon wreath
Add this to your repertoire of Christmas crafts why don't you:
To make a bow, layer the ribbon on top of itself, moving back and forth until you have three loops on either side. The bow should be approximately 6” - 8” long, leaving enough on either end to hang down. Cut a 4” piece of ribbon and wrap around the center of your layered bow and secure with hot glue.
10. Attach your bow and hang
Attach the bow to the wreath using floral wire or hot glue. Now your DIY ribbon wreath is ready to hang on a door or mantel!
Tip: To reuse your wreath over and over, choose a neutral color for the base of your wreath and change out the bow or embellishment with the seasons!
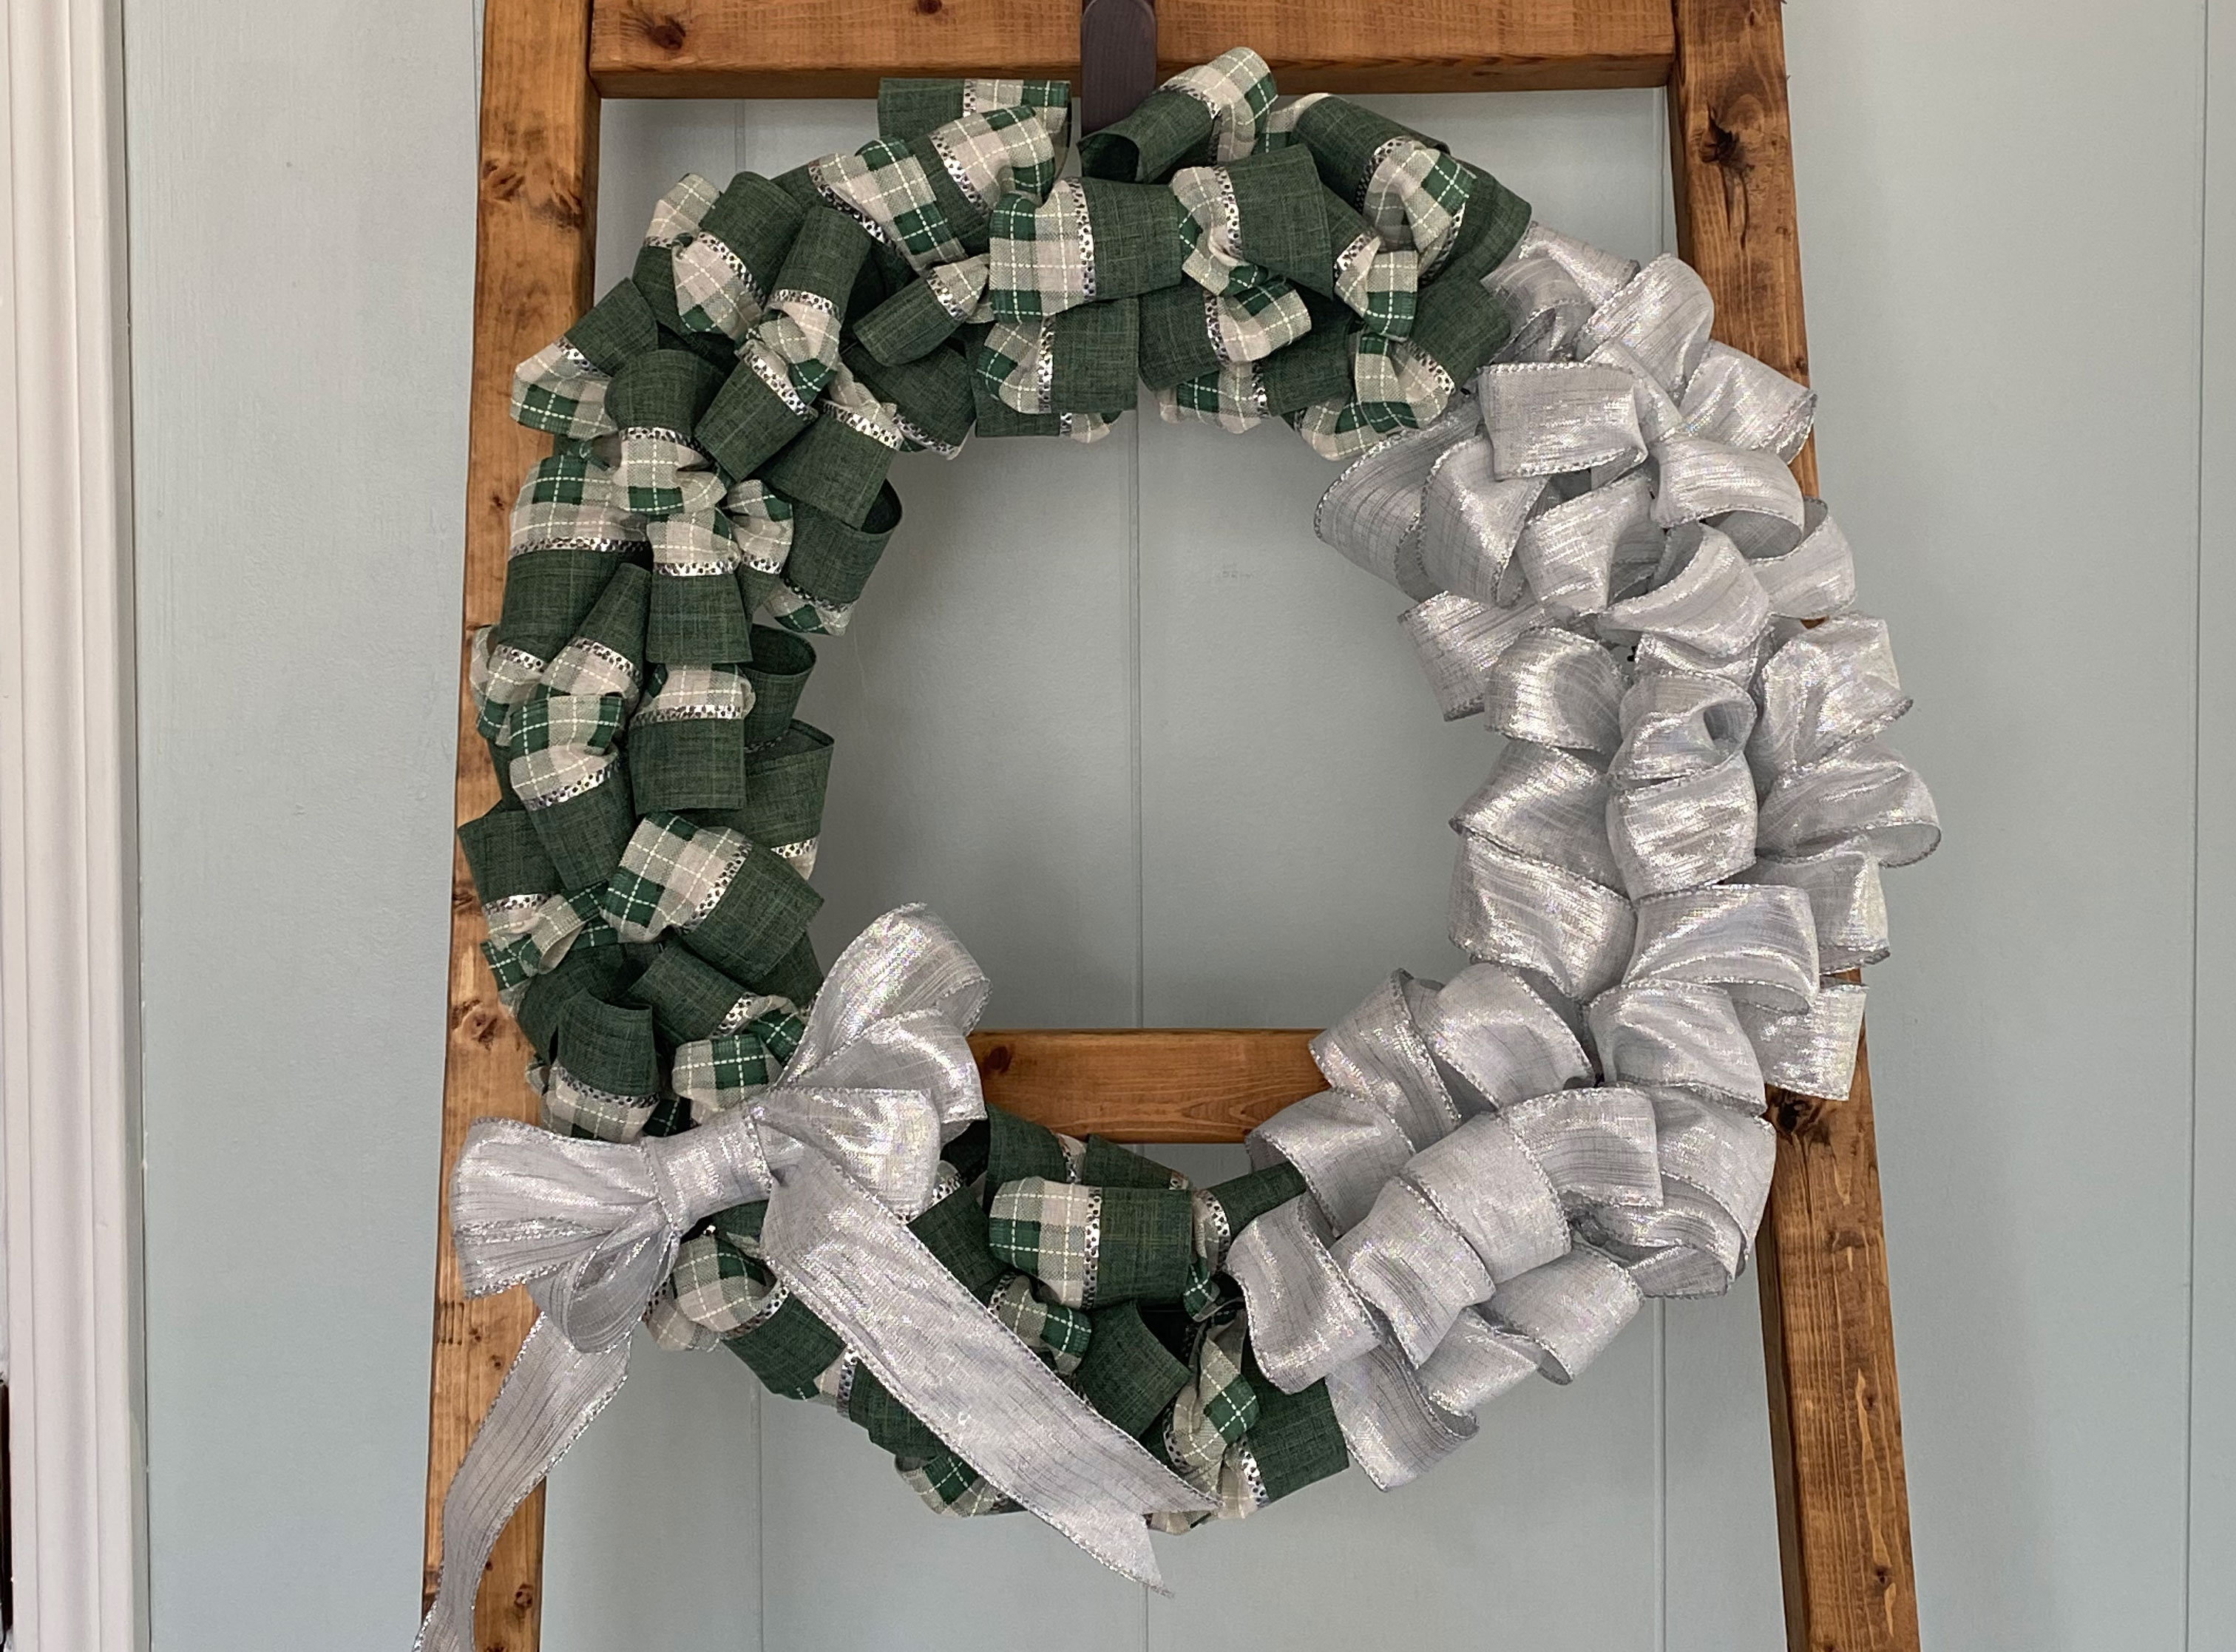
For this project I spent $9 on ribbon and $4 on the wire wreath frame for a grand total of $13! It only took about an hour from start to finish and now I have a beautiful wreath to display in my home.
Sure, you can buy a great Christmas wreath but if you've left it super last-minute and if the good ones are gone, I'd just DIY!
Join our newsletter
Get small space home decor ideas, celeb inspiration, DIY tips and more, straight to your inbox!
Dori Turner writes blog posts and feature articles on affordable design and DIY from her home in the heart of Oklahoma. She has a passion for teaching others how they can transform their home on a budget.
-
 How to host Christmas in a small space —7 tips from design pros
We asked designers how to host Christmas in a small space, and they've mapped it all out with these 7 fabulous tips
By Danielle Valente
-
 This TikTok Christmas tree hack is perfect for small space dwellers
We spoke to crafter Emma Villaneda about her TikTok Christmas tree hack and how to do it
By Danielle Valente
-
 Yikes! A sleep psychologist reveals the Christmas lights to avoid if you want some shut-eye
A sleep psychologist reveals the best and worst Christmas lights for sleep and how to adjust accordingly
By Danielle Valente
-
 6 cottagecore Christmas decorating ideas that will give you the warm and fuzzies
Our edit of Cottagecore Christmas decorating ideas will show you how to cozy up your space for the holidays
By Danielle Valente
-
 4 white Christmas decor ideas and how to style them to perfection this holiday season
Our edit of white Christmas decor ideas — and tips from interior designers — will make you ditch the red and green
By Danielle Valente
-
 How to decorate for Christmas according to your star sign — let the cosmos help find your holiday style
We spoke to the experts about how to decorate for Christmas according to your star sign
By Danielle Valente
-
 5 renter-friendly Christmas decorating ideas that are perfect but not permanent — here's how to style them
Renter-friendly Christmas decorating ideas that you'll love and your landlord will appreciate
By Danielle Valente
-
 How to decorate a small bedroom for Christmas — five clever ways to add a festive feel to your sleep space
Our edit reveals how to decorate a small bedroom for Christmas so that your space is festive and cozy
By Danielle Valente