

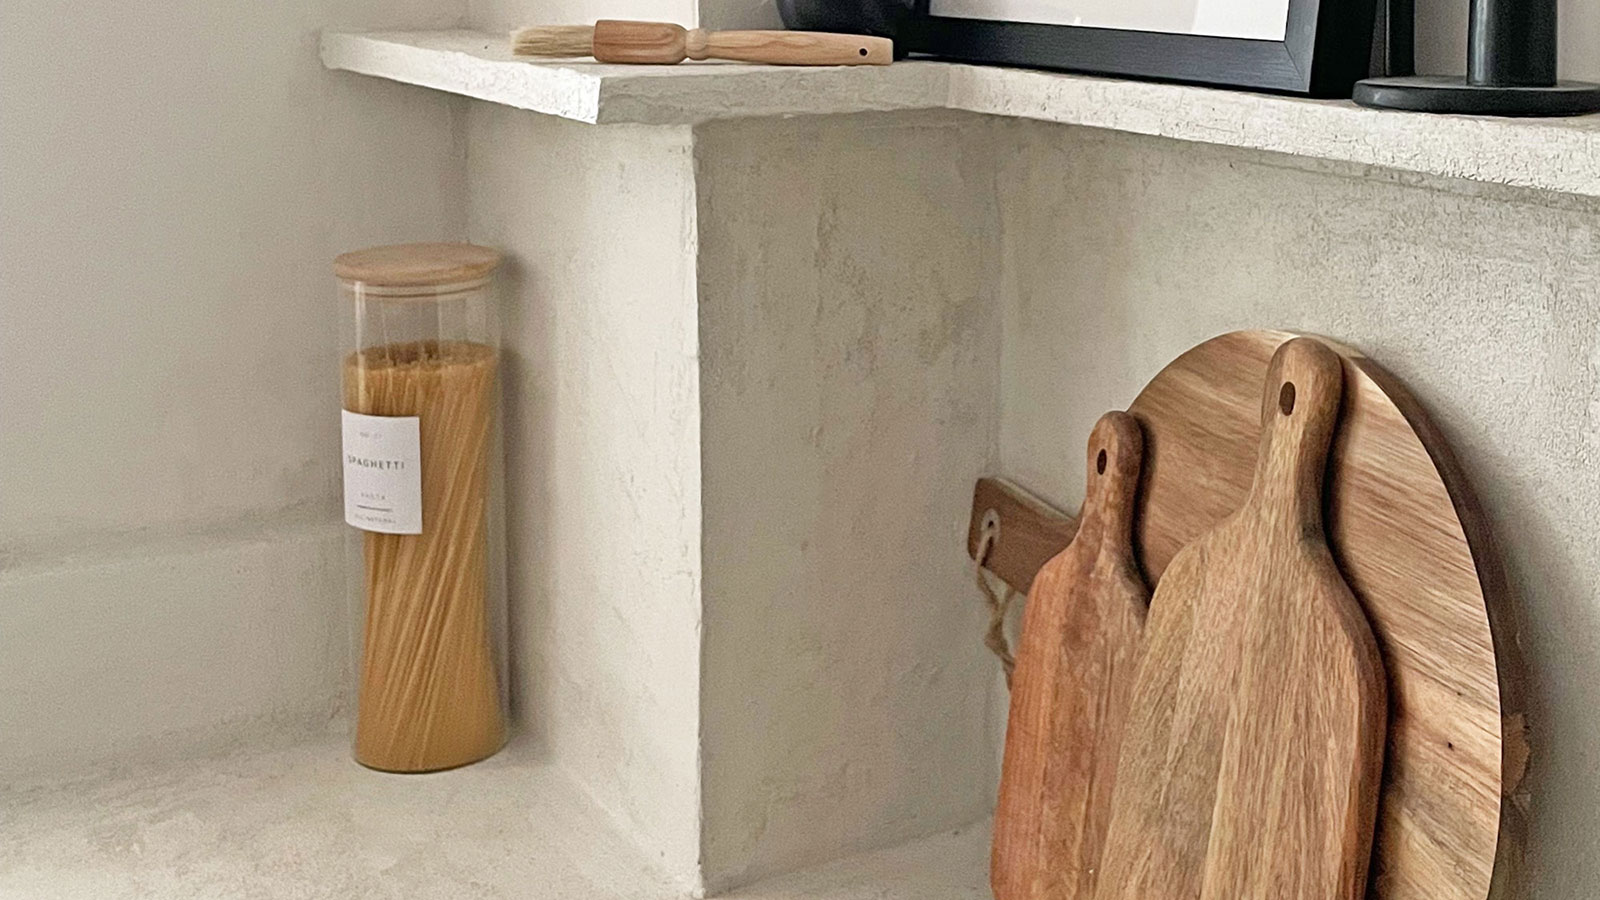
You might want to learn how to microcement over tiles if you want to give your kitchen or bathroom a modern makeover.
I've asked interior designers for their top tips on microcementing over tiles, and it turns out it is super easy, but preparation and careful application are key. The gorgeous result will make the extra time taken totally worth it.
If you're looking for DIY projects you can do at home for an impactful result, microcementing your tiles could be worth trying.
How to microcement over tiles
If you're looking for brilliant ways to use microcement in your home, going over your tiles is a fabulous way to add sophistication when making over your space.
The interior designers I've talked to about it have recommended useful products to help you do this. Wherever possible, I've curated highly-rated buys from trusted retailers. I've also put together a microcementing essentials kit, in case you want to get started ASAP.
The prices below were correct at the time of publishing this article.
Step one: Prepare the area meticulously

Make sure the space is as prepared as it can be. Microcementing is a commitment — once you start cementing, there isn’t any going back so having a good base to work from will bolster results.
“It’s a good idea to ensure the existing tiles are intact, thoroughly clean, and grease-free,” says Nick Chatzigeorgakis, interior designer at Intrabuild. “Loose tiles should be re-secured or replaced, and a thorough scrub with a heavy-duty degreaser [such as the highly-rated Heavy Duty Citrus Degreaser Cleaner Concentrate from small biz DU-MORE is available on Amazon] is essential to remove any dirt or residual substances."
Once cleaned, Nick recommends applying a bonding primer tailored for microcement, such as the Mapei Eco Prim Grip from Amazon. It enhances adhesion and is mildew resistant which is handy for high-humidity areas such as kitchens and bathrooms.
Step two: Apply the base coat

From here, you can apply the microcement to your tiles, starting with an initial base coat and letting that dry completely.
“I recommend applying the first coat using a trowel,” says Priyanshi Jain, interior designer and founder of Pixels & Spaces. “This layer should not be perfect, but should cover all the tiles initially.”
Good-quality trowels don’t need to be expensive — for example, the Canshen Stainless Steel Cement Trowel from Amazon is under $20, comes with a finishing tool, and is made from rust-resistant stainless steel.
It’s also a good idea to keep tools clean throughout the process.
“A bucket of water and a sponge should be used continually to prevent the microcement from hardening on the tools,” Nick adds.
Step three: Add the finishing coats

Once you’ve got your base down, you can carry on adding cement over your tiles for a sleek and polished look.
“Apply one or two more thin layers of micro cement to make sure each layer is smooth and free of any trowel marks,” says Priyanshi.
She says that each layer should be thinner than the last, and to take extra care with each one to make sure you create a smooth finish.
“Lightly sand using fine-grit sandpaper between the coats if necessary to get rid of any imperfections, and be gentle to avoid creating any grooves on the surface,” she adds.
You can just use plain sheets to do this, such as the 3M Aluminum Oxide Sandpaper from Walmart. It can be cut to your preferred size and is made from aluminum oxide mineral, which is great for sanding wood, painted surfaces and metal.
Step four: Apply sealant

Once you’ve applied your cement coats, you''ll need a sealant on top.
Nick explains, “For finishing, use a high-quality sealant such as polyurethane or epoxy. Apply at least two coats to ensure protection against stains and moisture, which prolongs the lifespan of the microcement.”
He says that this sealing step not only secures the surface, but also gives it a polished look.
If you’ve microcemented over tiles in your home, you’ll want to find one that’s fast drying, such as the Varathane Water-Based Ultimate Polyurethane from Amazon that comes in a variety of finishes and is scratch-resistant.
Step five: Leave to dry

So, you’ve learned how to microcement over tiles — yay! Now all there’s left to do is leave your microcement to dry.
“Make sure the space is well-ventilated to aid drying times and reduce fume inhalation,” Nick suggests.
If you’ve incorporated this into your kitchen ideas, open windows and turn on your range hood. Similarly, if you’ve used this in your bathroom ideas, switch on the extractor fan.
Microcementing essentials kit

Size (in.): H11.8 x W2.9
Made from: Aluminum
Price: $7.90
Investing in a good-quality trowel is smart, as you don't want to be mid-way through microcementing your tiles and find it breaking. This trowel has an ergonomic design that reduces hand and wrist fatigue, resists rust, and won't snap while you're applying material onto your wall.

Size (in.): H4.25 x W0.25 x L7.75
Made from: Plastic
Price: $3.48
Get a lovely, even finish on your microcemented surface by using this handy little smoothing tool. It's comfortable to hold for long periods of time, which is ideal if you're using this idea in a large space. It's also just the right shape for getting into tricky corners.

Size (in.): H11.02 x W4.33
Made from: Wood, polyester
Price: $6.66
If your tiles are embossed or detailed, I advise using a paintbrush like this one to create a smooth surface. If you're using microcement for decor like vases or pots for indoor plants, it's also ideal for making these look silky and soft. As well as cement, the brush can be used with glues, adhesives, and paint removers.
Learning how to microcement over tiles is so easy that you’ll want to carry on doing it around the rest of your house.
“From my experience, these detailed steps ensure a durable and visually appealing microcement finish over existing tiles,” Nick finishes by saying.
Finished with tiles and want to move onto your kitchen counters? Learning how to microcement kitchen worktops may also come in useful.

-
 10 stylish ways to use microcement in your home and garden
See our favorite ways to use microcement in your home with our DIY ideas. See how to style kitchens, bathrooms, and living rooms with this crafty material
-
 20 bedroom wallpaper ideas that will add personality to your sleeping space
Inspiring bedroom wallpaper ideas will bring print, colorful designs and good vibes to your sleeping space.
-
 The most meaningful gift is a personalized painting from Paint Your Life
Gift a special someone a customized and handpainted painting done by a talented artist.
-
 14 best mural design ideas
Love wallpaper but fancy something with more of an impact? Try a mural, they work in any room and can create a stunning focal point
-
 How to choose the best wall tiles
Tiles will protect kitchen and bathroom walls from splashes – and finish your scheme in style. Select the right tile design with our unmissable advice


