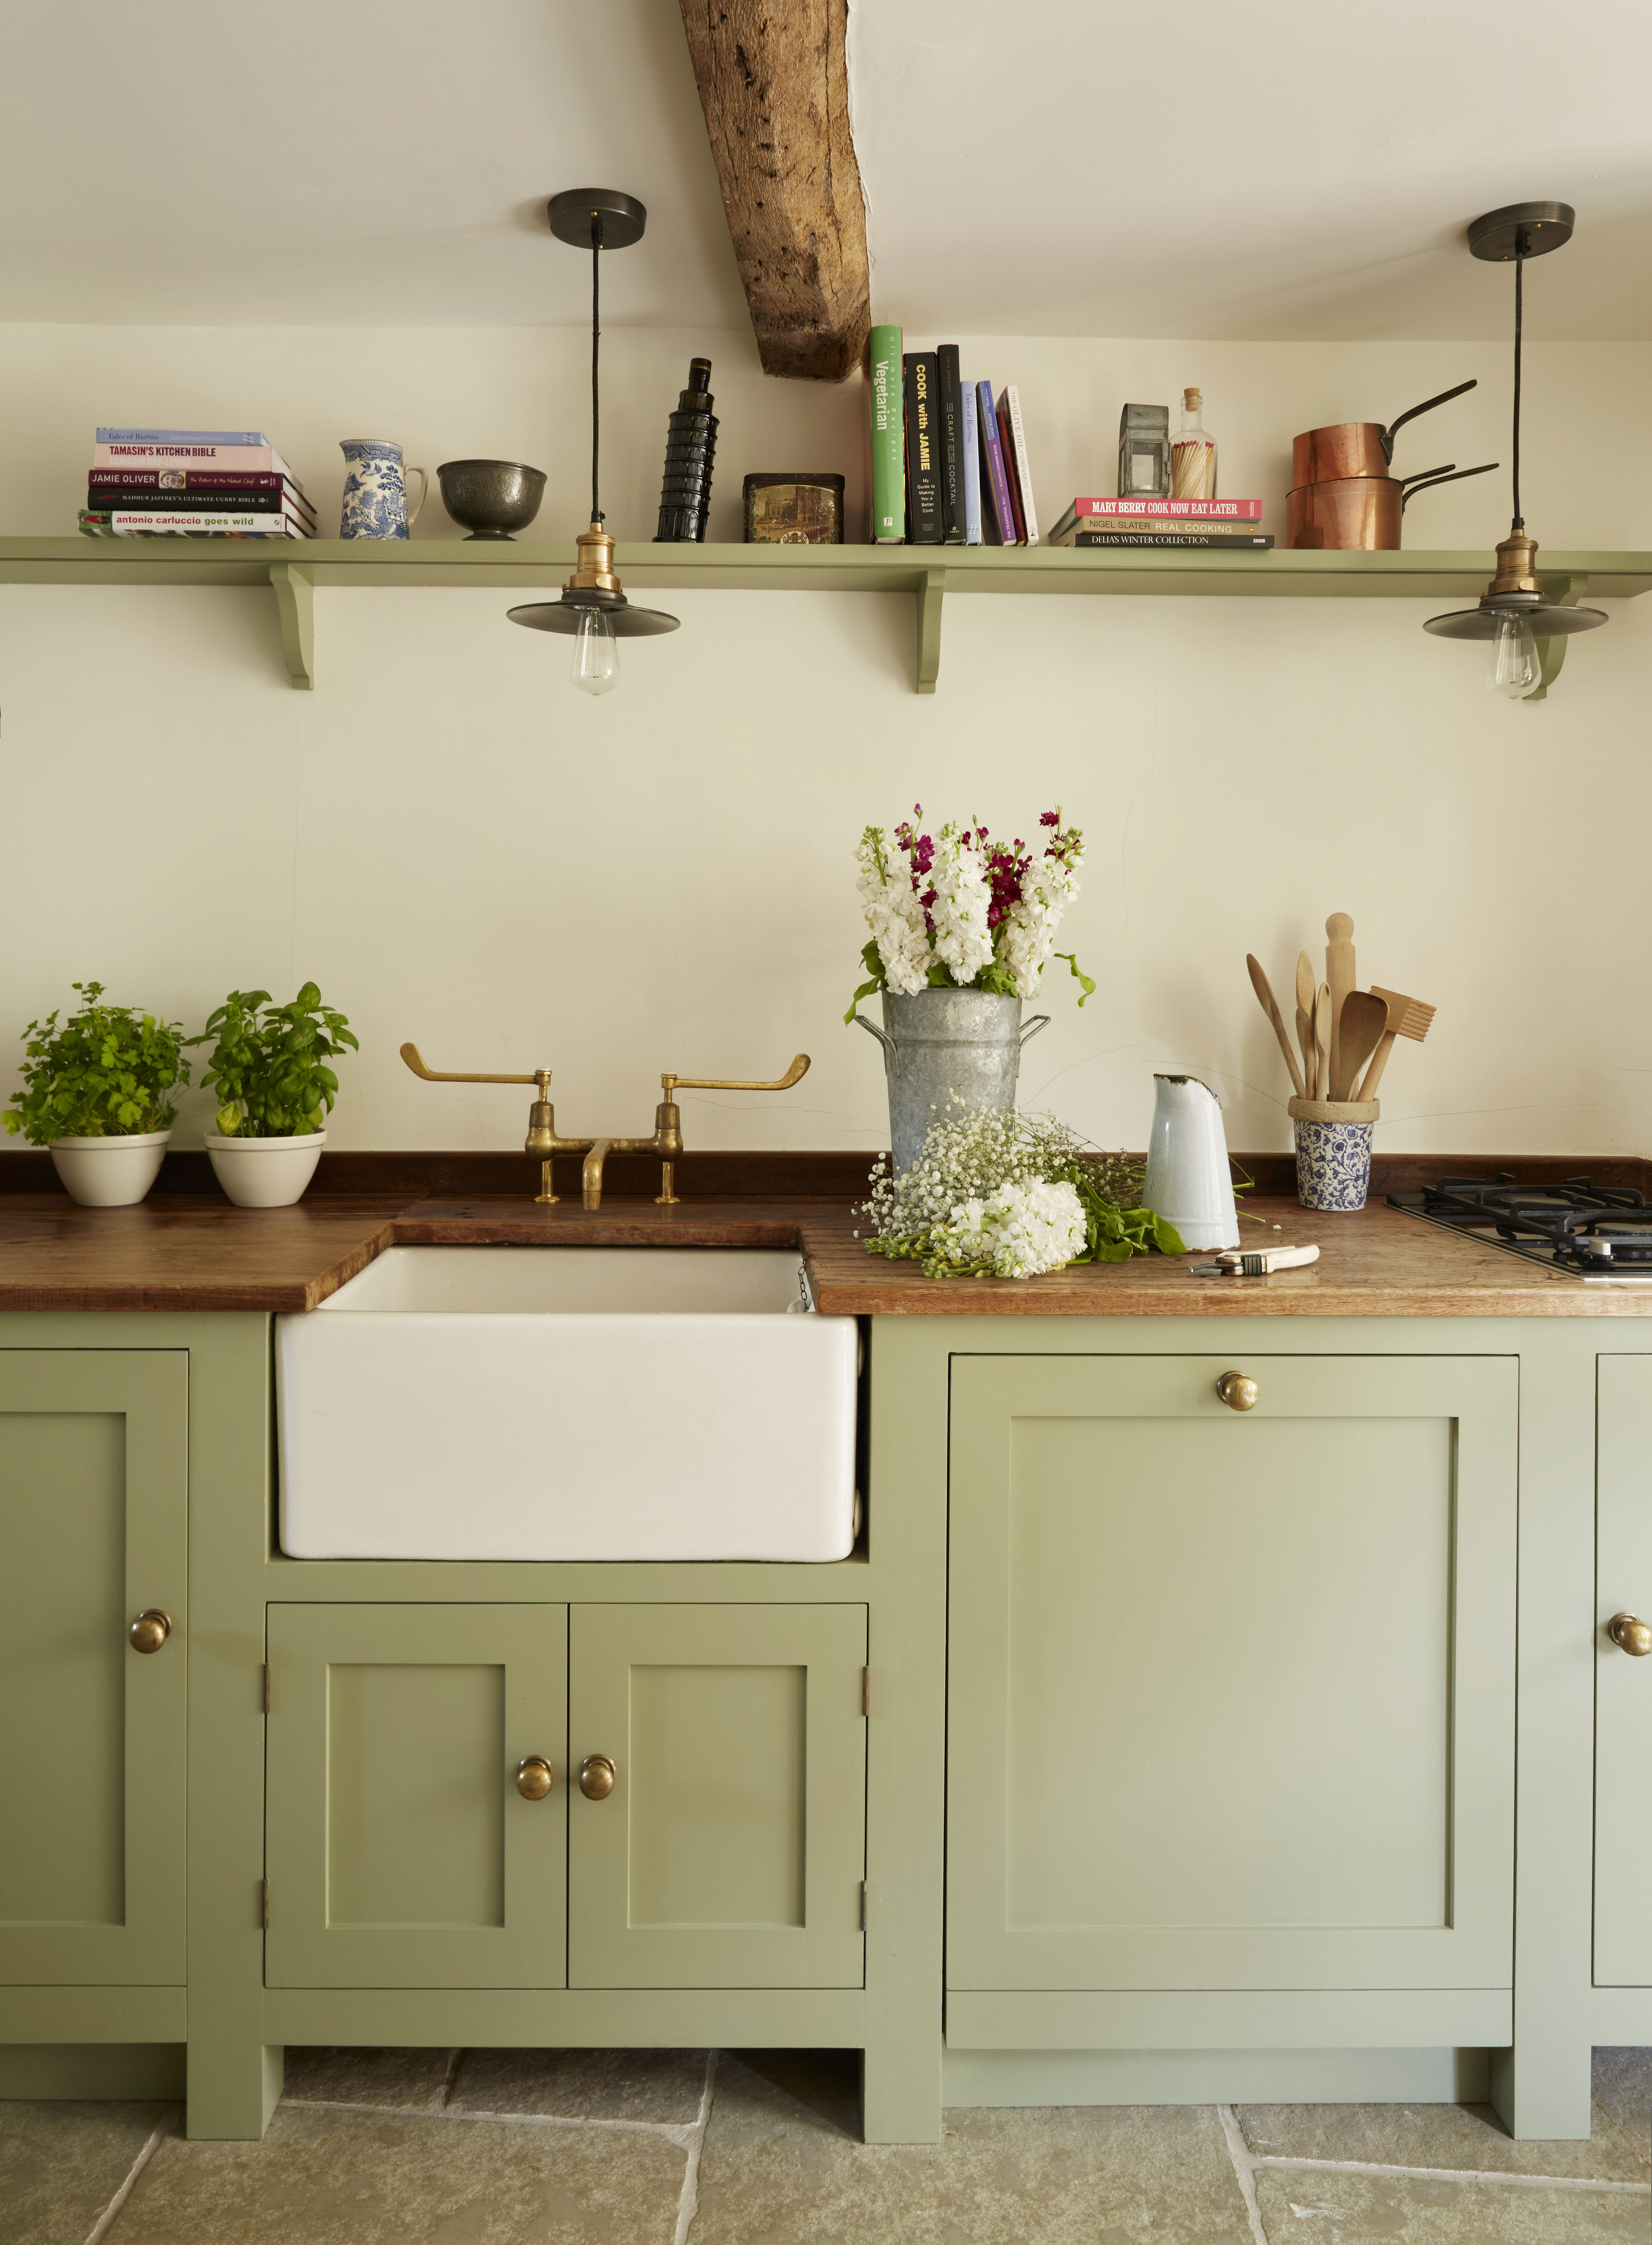
Enamel sinks look beautiful in period homes, but they can lose their lustre and appeal over time. Which is when it helps to know how to restore an enamel sink. Here, we show you how to.
Find more DIY how-tos, hacks and advice on our hub page.
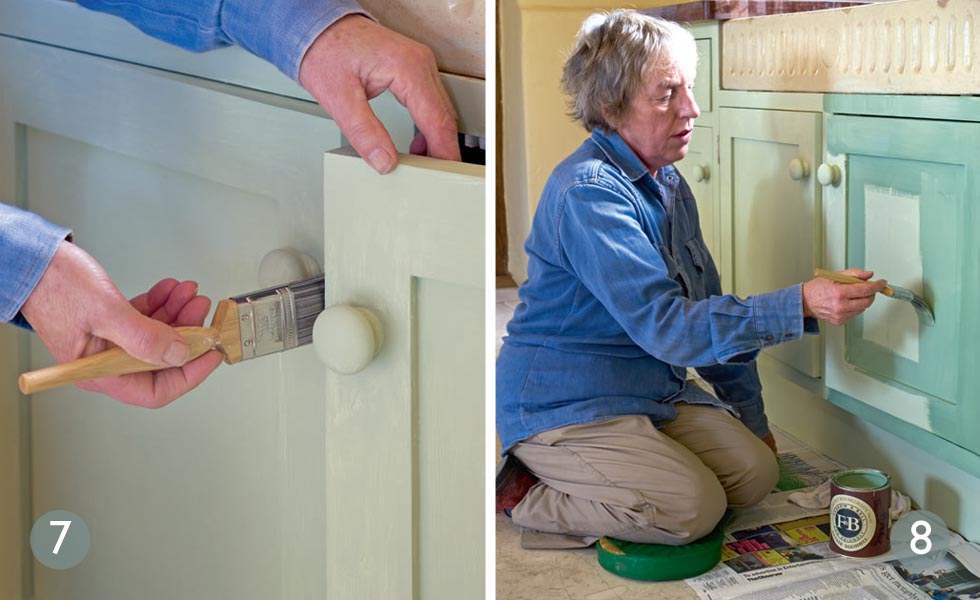
The original enamel had been given a coat of paint, but it was the wrong kind of paint. Claypaint can’t be wiped clean, and in no time at all the doors were streaked and stained.
To clean the failed paint away our DIY expert Helaine Claire experimented with various stiff brushes and a variety of scourers together with warm soapy water. She advises to mop up the water as you scrub as liquid left to pool on the surface may warp the wood and raise the grain. This in turn creates an unpleasant furry effect that will spoil the finish.
Once scrubbed, the woodwork was wiped over with clean water, then mopped with dry cloths to absorb the moisture. Allow the wood to dry slowly and naturally – don’t use a hairdryer or a portable heater as this may cause the timber to split or distort. Once the surface is completely dry, rub it over with fine glasspaper, going with rather than against the wood grain to make a smooth surface for the new coating of eggshell paint, which is eminently wipeable.
For cleaning purposes we prefer using natural products whenever possible, so opt for elbow grease and the simple household solutions that our grandmothers would have used before the advent of modern miracle sprays. We chose Farrow & Ball’s water-based Breakfast Room Green Estate Eggshell paint for the cupboard doors by Farrow & Ball. The Danish oil for the sink drainer was supplied by Liberon.
You will need:
- Work gloves
- Cloths
- Scraper
- Scourers
- Scrubbing brush
- Bicarbonate of soda
- Cream of tartar (both from supermarket baking section)
- Small bottle hydrogen peroxide (from a chemist)
- Salt
- Lemon or lime juice, or pickling or white vinegar
- Danish oil plus brush or cloth
1. Clean up the ceramic sink
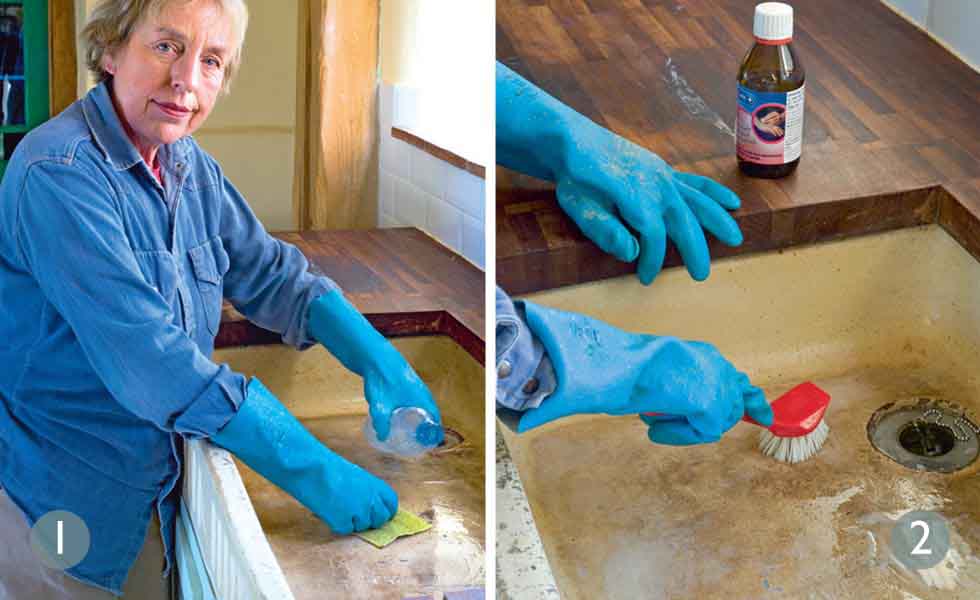
The stained ceramic sink is in a sorry state. Make up your own cleaner by stirring 1 tbsp of bicarbonate of soda into half a pint of water. Use a bottle and shake to mix. This works best if the sink is still warm from washing up – apply with a cloth and rub away stains. For stubborn stains, apply and leave for an hour or two.
2. Remove tannin stains naturally
Tea bags and vegetable peelings can cause ugly staining if left in the sink. Rather than using chloride bleach to remove stains, put in the plug, pour in some hydrogen peroxide and leave overnight. Environmentally kinder products such as this take longer to work than chemical equivalents that give instant results.
3. Dissolve limescale from taps
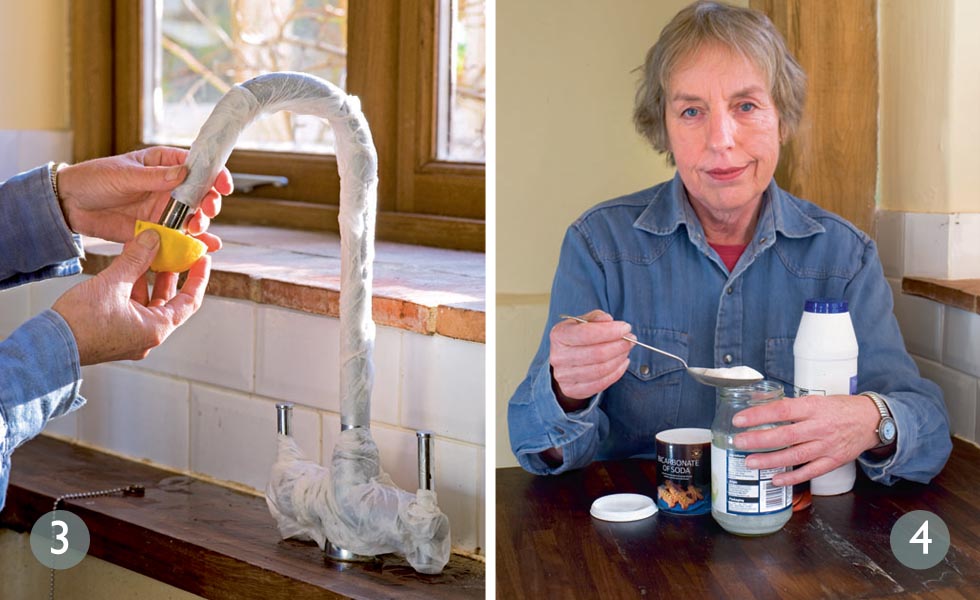
Limescale on stainless steel taps can be removed with lemon or lime juice or vinegar*. Squeeze juice or vinegar on to kitchen paper and wrap it round the taps, then twist half a lemon on to the tap spout, tying it with a cloth if necessary. Leave this overnight to do its work of dissolving encrusted limescale.
4. De-grease the sink waste pipe
Harsh drain cleaners should be avoided, particularly if you have a septic tank. Make your own by mixing 4 tbsp salt, 4 tbsp bicarbonate of soda and 1 tbsp cream of tartar, then pour down the sink followed by half a pint of hot water. Do this every week and it will stop odours and keep the pipe free flowing.
5. Prepare wooden drainer for oiling
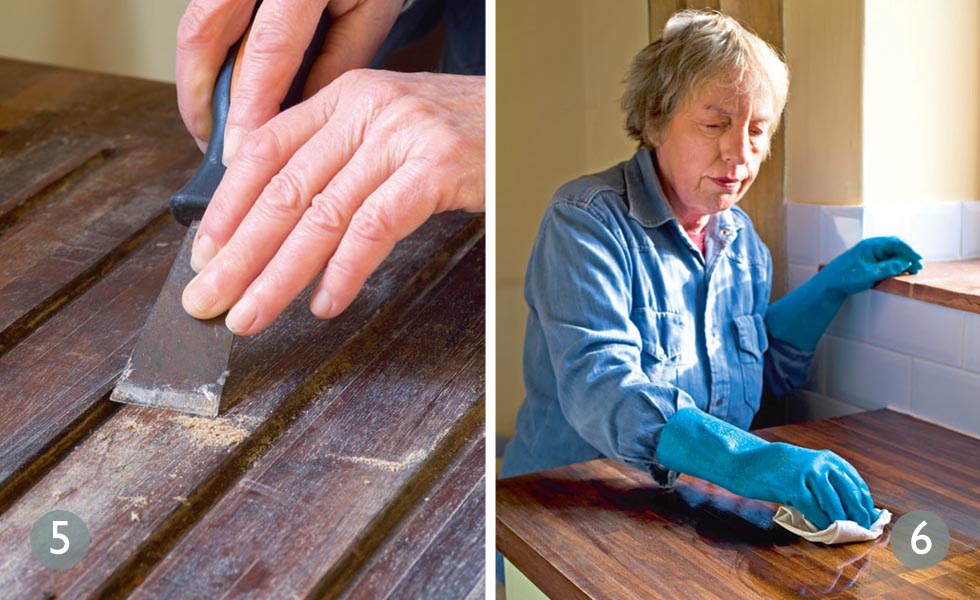
Wooden draining boards demand constant care. Mop up any spills on the surface straight away to prevent the wood warping or cracking. To deep clean, scrape away dirt and grime, then scrub with warm water. Rinse, wipe up excess water and rub with a dry cloth. Allow to dry before applying a new coat of Danish oil.
6. Apply a new layer of Danish oil
Danish oil should be applied monthly to protect the drainer wood and keep it looking good. Store the oil in a warm place overnight and apply in a heated kitchen so that it penetrates well. Apply the oil liberally and rub in with a cloth. To avoid a tacky finish wipe away any oil remaining on the surface after 20 minutes.
7. Apply undercoat to the woodwork
Always choose the right type of paint to match use and location. Woodwork in a kitchen needs to be finished in a durable, wipeable paint. Gloss can be used, but an eggshell or satin finish is more sympathetic to a period home. First apply an undercoat of wood primer to achieve an effective, durable finish.
8. Repaint cupboard in a new shade
Wait four hours for the undercoat to dry, then apply two coats of eggshell or satin finish paint. Load the brush generously or use a roller. For a professional finish lightly sand the dry paint with fine glasspaper between coats (allow at least four hours). Wipe with a damp cloth to pick up dust before applying the next coat.
*If your taps have a special finish please check with the manufacturer before applying vinegar
More easy DIY projects:
Join our newsletter
Get small space home decor ideas, celeb inspiration, DIY tips and more, straight to your inbox!
-
 This colourful home makeover has space for kitchen discos
While the front of Leila and Joe's home features dark and moody chill-out spaces, the rest is light and bright and made for socialising
By Karen Wilson Published
-
 An IKEA Billy bookcase hack inspired this cute media wall DIY
This cute DIY was inspired by an IKEA Billy bookcase hack and brought a ton of symmetry to an otherwise basic media wall space.
By Camille Dubuis-Welch Published
-
 This oversized headboard looks designer, and takes 5 steps to DIY
Super simple to DIY, this oversized headboard will give your bedroom space all the designer vibes you could dream of.
By Claire Douglas Published
-
 How to paint a door and refresh your home instantly
Painting doors is easy with our expert advice. This is how to get professional results on front and internal doors.
By Claire Douglas Published
-
 How to install and style a floating shelf
Installing a floating shelf can add instant design interest to your home. Dress yours with artwork, houseplants, and books for the perfect finish.
By Camille Dubuis-Welch Last updated
-
 DIY transforms 1930s house into dream home
With several renovations behind them, Mary and Paul had creative expertise to draw on when it came to transforming their 1930s house
By Alison Jones Published
-
 How to tile a backsplash: a DIY guide for beginners
Knowing how to tile a backsplash will make a big difference to the look and function of your kitchen. DIY to save on the cost of calling in a professional.
By Emily Shaw Published
-
 Get free tickets to the London Homebuilding & Renovating Show at the ExCeL
Get FREE tickets worth £36* to the London Homebuilding & Renovating Show, ExCeL, 30 September - 2 October 2022.
By Camille Dubuis-Welch Published