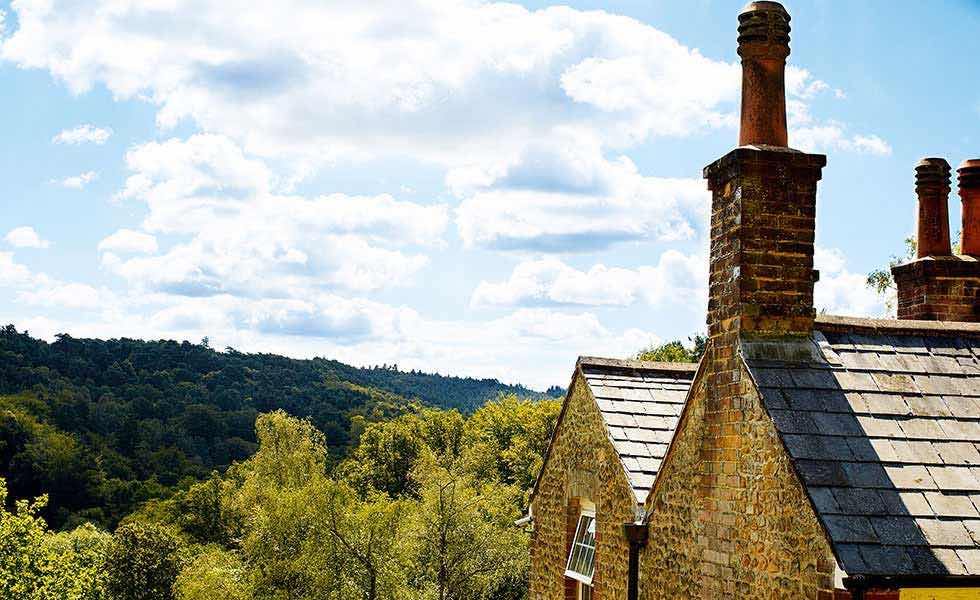
Generally the highest point on a building's roof, chimneys are important architectural features but often suffer from neglect, despite having the potential to cause disastrous fires and major damage should parts of the masonry come loose and fall off the property.
Convinced? Read on to find out more about maintaining your chimney.
This feature is an edited extract from the Victorian & Edwardian House Manual by Ian Rock, published by Haynes. Ian Rock is a chartered surveyor and director of survey price comparison website rightsurvey.co.uk
Why maintain a chimney?
The flue within a chimney conducts poisonous smoke and gases away due to the warm air from the fire rising, creating an upward draught or draw. For this to happen, it must be clear of blockages, the fireplace opening must be the right size, the room must have sufficient ventilation and there must be no downdraught from outside.
Is your chimney safe?
Before using a chimney for the first time, check it’s safe and in good working order. Always burn dry, well-seasoned wood to avoid tar deposits collecting within the flue.
Chimneys that are used must be professionally swept regularly and carbon monoxide and smoke alarms should be installed and tested monthly. Chimney repairs involve working at height, so necessitate the use of scaffolding and are generally best left to a builder who has an understanding of old buildings.
Chimney construction
Even in parts of the country where stone was the traditional building material, the Victorians often used brick for chimneys, as it is better able to withstand intense heat.
Chimney pots perform a very practical purpose in improving efficiency by raising the height of the chimney without the need to build excessively tall and bulky stacks. This helps to prevent down-draughts and smoky fires, which can still be a problem today where properties are overshadowed by tall nearby trees, roofs, hills or high-rise buildings.
Pots were secured in place into the upper chimney brickwork and bedded in thick layers of mortar, or ‘flaunching’. Victorian chimneys were commonly built into the party walls of terraces and semi-detached houses as very wide structures containing multiple flues. As well as being economical to construct, this helped insulate them from the cold.
Flues, which comprise the internal space enclosed by the chimney brickwork, were lined internally with a layer of lime render, or ‘parging’, to protect the masonry and prevent smoke escaping through any gaps in the mortar joints.
What materials are used to build chimneys?
Brick, stone and slate: Separately and in combination, these materials are used to build the chimney stack and to form the mid-feathers or withes, the internal divisions between flues from different fireplaces.
Lime: Mortar and renders made from lime allow for flexibility and expansion, both important factors in chimneys. Some chimneys are finished internally with a coat of lime plaster or ‘parging’ to provide a smooth, leak-free lining.
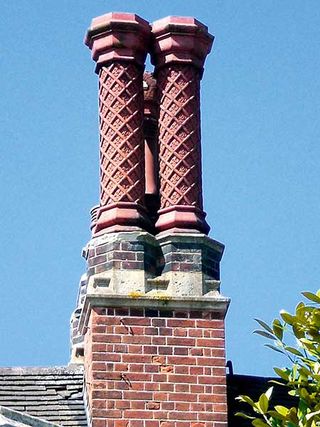
Terracotta: Chimney pots made of terracotta often terminate chimneys, sometimes providing a decorative flourish.
Dealing with chimney defects
Exposed for well over a century to the worst the British weather can throw at them, and under attack internally from intense heat and chemical erosion, many chimney stacks are now in need of a little TLC. There are a number of defects that can afflict old chimneys, but as scaffolding is a major part of the cost of repairs, it can make sense to have any roof works carried out at the same time.
Check the flue
The airtightness of a flue is essential for the safety of the building and its occupants. Any form of combustion may result in carbon monoxide, which has no smell but has the potential to kill.
- Test the flue using a smoke pellet, available from fireplace shops or plumbers' merchants.
- If problems are suspected, call in a specialist to survey the flue internally using a video camera.
- Consider having the chimney lined. Flexible stainless steel flue liners are recommended for older buildings as these cause minimal damage to the chimney and can be removed in the future.
- Remember that relining a flue must be carried out in accordance with building regulations.
Deal with a leaking roof and chimney stack
Damp patches and brown water stains on upstairs ceilings, chimney breasts and internal walls are commonly the result of leaks around the edges of chimney stacks where they meet the roof. Victorian houses sometimes had flashings made from cheaper zinc or just thick strips of mortar, which are prone to cracking.
Here's how to repair a leaking roof and chimney stack:
- Durable, long-lasting lead is the best form of weatherproofing around these joints;
- Defective junctions between stacks and roofs, or walls, should be stripped and covered with new lead flashings cut into a stepped pattern, tucked into the mortar joints, and pointed up;
- Avoid cheaper modern GRP (glass-reinforced plastic), short-life tapes or cement strips;
- Where flashings have come loose they can be refixed into existing joints with fresh mortar, or a new stepped line cut into the side of the chimney and the flashing fixed into the groove and sealed.
Dealing with damp penetration in chimney breasts
A small amount of rain entering an open chimney pot is to be expected and is normally harmless, soaking into the internal chimney brickwork. Originally the flow of hot air from fires below would facilitate evaporation, but in disused flues rain can reach further down, where it mixes with old soot, potentially seeping through to the plasterwork.
Where flues have been protected with modern flue liners, rainwater that was previously soaked up may run straight down the new liner forming puddles in the fireplace. Damp in fireplaces can also be caused by condensation from burning unseasoned logs.
How to prevent damp in your chimney:
- Check junctions between the roof and the chimney to ensure flashing and mortar is sound;
- Ensure back gutters behind chimneys are clear;
- Consider fitting a raincap or cowl to the chimney to prevent rain entering the flue;
- Chimneys serving inglenook fireplaces may be topped by flagstones raised on bricks;
- Avoid totally blocking an unused flue as residual ventilation is needed for it to remain dry.
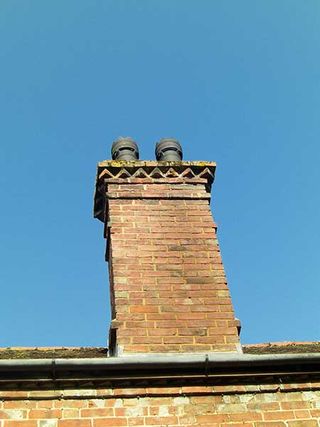
Tall, thin chimney stacks are more prone to condensation forming in the flues
Dealing with cracked or damaged brickwork or render
Exposed chimney masonry can erode, sometimes resulting in small patches of the brickwork outer face dropping off. Rendered stacks are especially at risk as small cracks tend to develop as the masonry repeatedly heats and cools, allowing water to penetrate and freeze, loosening the render.
Chemical erosion from acidic gases inside the flue is another cause of damage. Any resulting gaps in joints can allow fumes to seep into the house. This is especially dangerous where gas fires have been installed in old fireplaces without first fitting a flue liner, as they can be a source of deadly carbon monoxide.
How to repair damaged chimney brickwork:
- Cut out and replace any severely damaged brick or stonework, although the odd ‘spalled’ brick isn’t necessarily an issue;
- Any badly eroded old mortar joints will need to be repointed;
- In extreme cases where cracking or erosion is advanced enough to threaten structural problems, the stack will need to be taken down and rebuilt using a suitable sulphate-resistant mortar;
- Defective render can be hacked off and made good with a fresh coating;
- Installing a flue liner should prevent erosion internally.
Fixing leaning and unstable chimneys
It’s not unusual for old chimneys to have a slight lean but in most cases they will still be stable. A structural engineer can confirm whether a lean is beyond acceptable tolerances. The cause is usually due to a combination of external wind pressure and persistent dampness and frost action on one side of the stack, exacerbated by chemical attack inside the flue on the cold side causing uneven movement.
Thinner chimneys built on outer walls are generally most at risk. On rare occasions movement may be a result of incompetent structural alterations, such as removal of chimneybreasts or poorly undertaken loft conversions.
How to deal with a leaning chimney:
- Stacks can sometimes be stabilised with stainless-steel straps or traditional ‘stay bars’;
- Where leaning is severe, at least partial rebuilding may be necessary, or stacks may need to be taken down to below roof level or entirely rebuilt;
- To prevent existing movement getting worse, strengthen the stack by repointing eroded mortar joints and installing a flue liner.
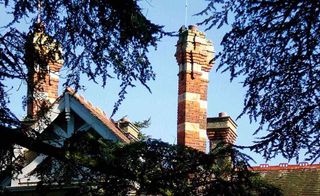
Damaged pots and flaunching
Replacing a chimney pot
Where original chimney pots have been removed, it is normally possible to source replacements online, from salvage yards, or at garden centres, where they are frequently sold as outdoor ornaments.
Over time the mortar flaunching at the base of the pots can eventually start to crack and disintegrate. Despite the weight of the pots, there is a risk that storm-force weather could then displace them. Using binoculars, look for signs of frost erosion and flaking, or cracks and damage on the surface of the pots.
Fixing a damaged chimney pot and flaunching:
- Take down and replace broken pots, if possible with matching reclaimed ones;
- Secure unstable pots by repairing any damaged brickwork and flaunching, and also check the condition of any TV aerial fixings and, if possible, relocate them to the loft;
- Cut out and replace any very loose flaunching.
How to deal with thatched roofs and chimneys
Embers and sparks from chimneys along with defects to the stack itself are a significant cause of thatch fires.
How to avoid thatch fires:
- Take care lighting and tending fires or stoves;
- Use only dry, well-seasoned wood and run at optimum temperature;
- Ensure a chimney height of at least 1.8m (6ft) above the thatch;
- Avoid spark arrestors as they increase the risk of fire if not properly maintained and cleaned;
- Ensure flue liners are appropriate and check them regularly;
- Maintain the chimney stack and fully overhaul brickwork exposed during rethatching.
Reducing draughts from open fireplaces
Heat loss and draughts through flues when a chimney is not in use can be considerable. A number of products are now available that can be temporarily fitted within the base of the flue. These come in various sizes and include chimney balloons, which are inflated with a pump, chimney umbrellas that open to block the flue, and wool draught excluders that wedge into place. In all cases it is vital to remember to remove them before lighting a fire.
More heating related know-how:
- Underfloor heating: a complete guide
- How to heat your home: from radiators to stoves
- The best wood-burning stoves to buy now
The Victorian House Manual | RRP £17.50 on Amazon
Want to take better care of your period home? This Haynes Manual by Ian Rock is the essential read for any owner of a Victorian (or Edwardian home).
Join our newsletter
Get small space home decor ideas, celeb inspiration, DIY tips and more, straight to your inbox!
Ian Rock MRICS is the chartered surveyor author of eight Haynes Property Manuals, and is the director of the RICS home survey price comparison website Rightsurvey.co.uk

