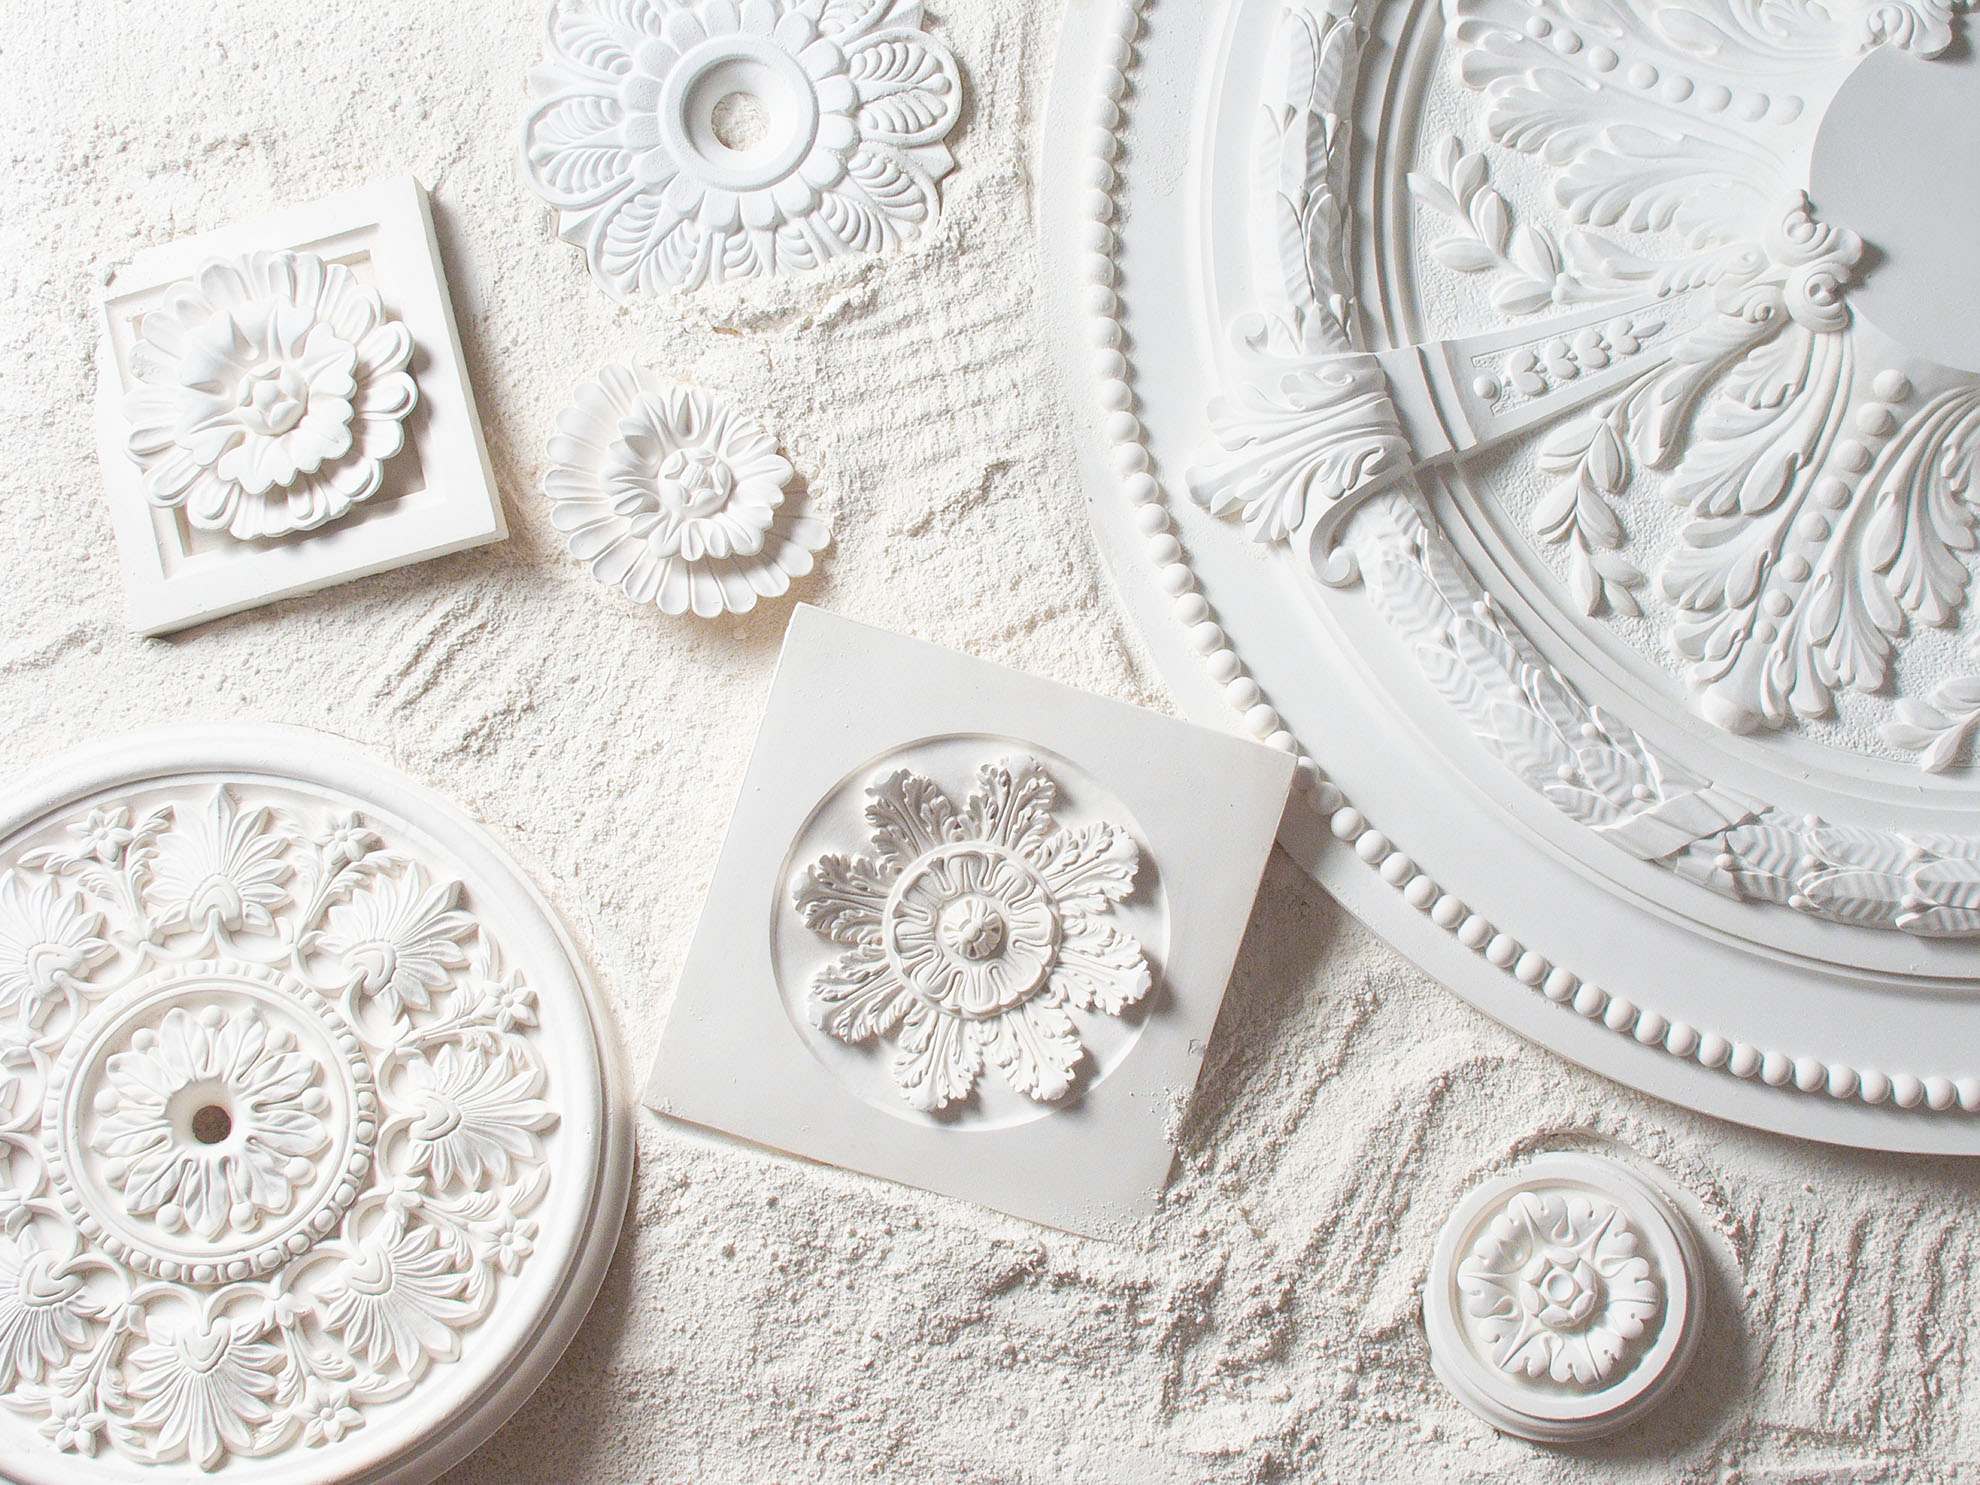
A huge part of the appeal of buying a period property is undoubtedly its original features – fire places, wooden beams, sash windows and, what we are going to focus on here, ornate plaster mouldings.
Throughout the years, mouldings like cornicing, ceiling roses, skirting, dado and picture rails will probably have been smothered with layer upon layer of paint and may have lost some of their finer detailer, but bringing them back to their former glory is a job that any keen DIYer can achieve...
For more advice on all your DIY jobs go and check out our dedicated decorating hub page.
You will need:
- Sponge
- Spray bottle
- Small scraper
- Toothbrush
- Paint stripper
- Stabilising solution
- Paint
- Paint brush
- Cocktail stick
- Heavy-duty gloves
- Goggles
1. Find out what the surface coating is
To test whether the build-up of coating is distemper or paint, spray the plasterwork with plant spray or wet it with a sponge. Leave for a few minutes. If the surface turns grey and softens and can easily be scraped away, then the coating is water-soluble distemper, otherwise you’re working with paint.
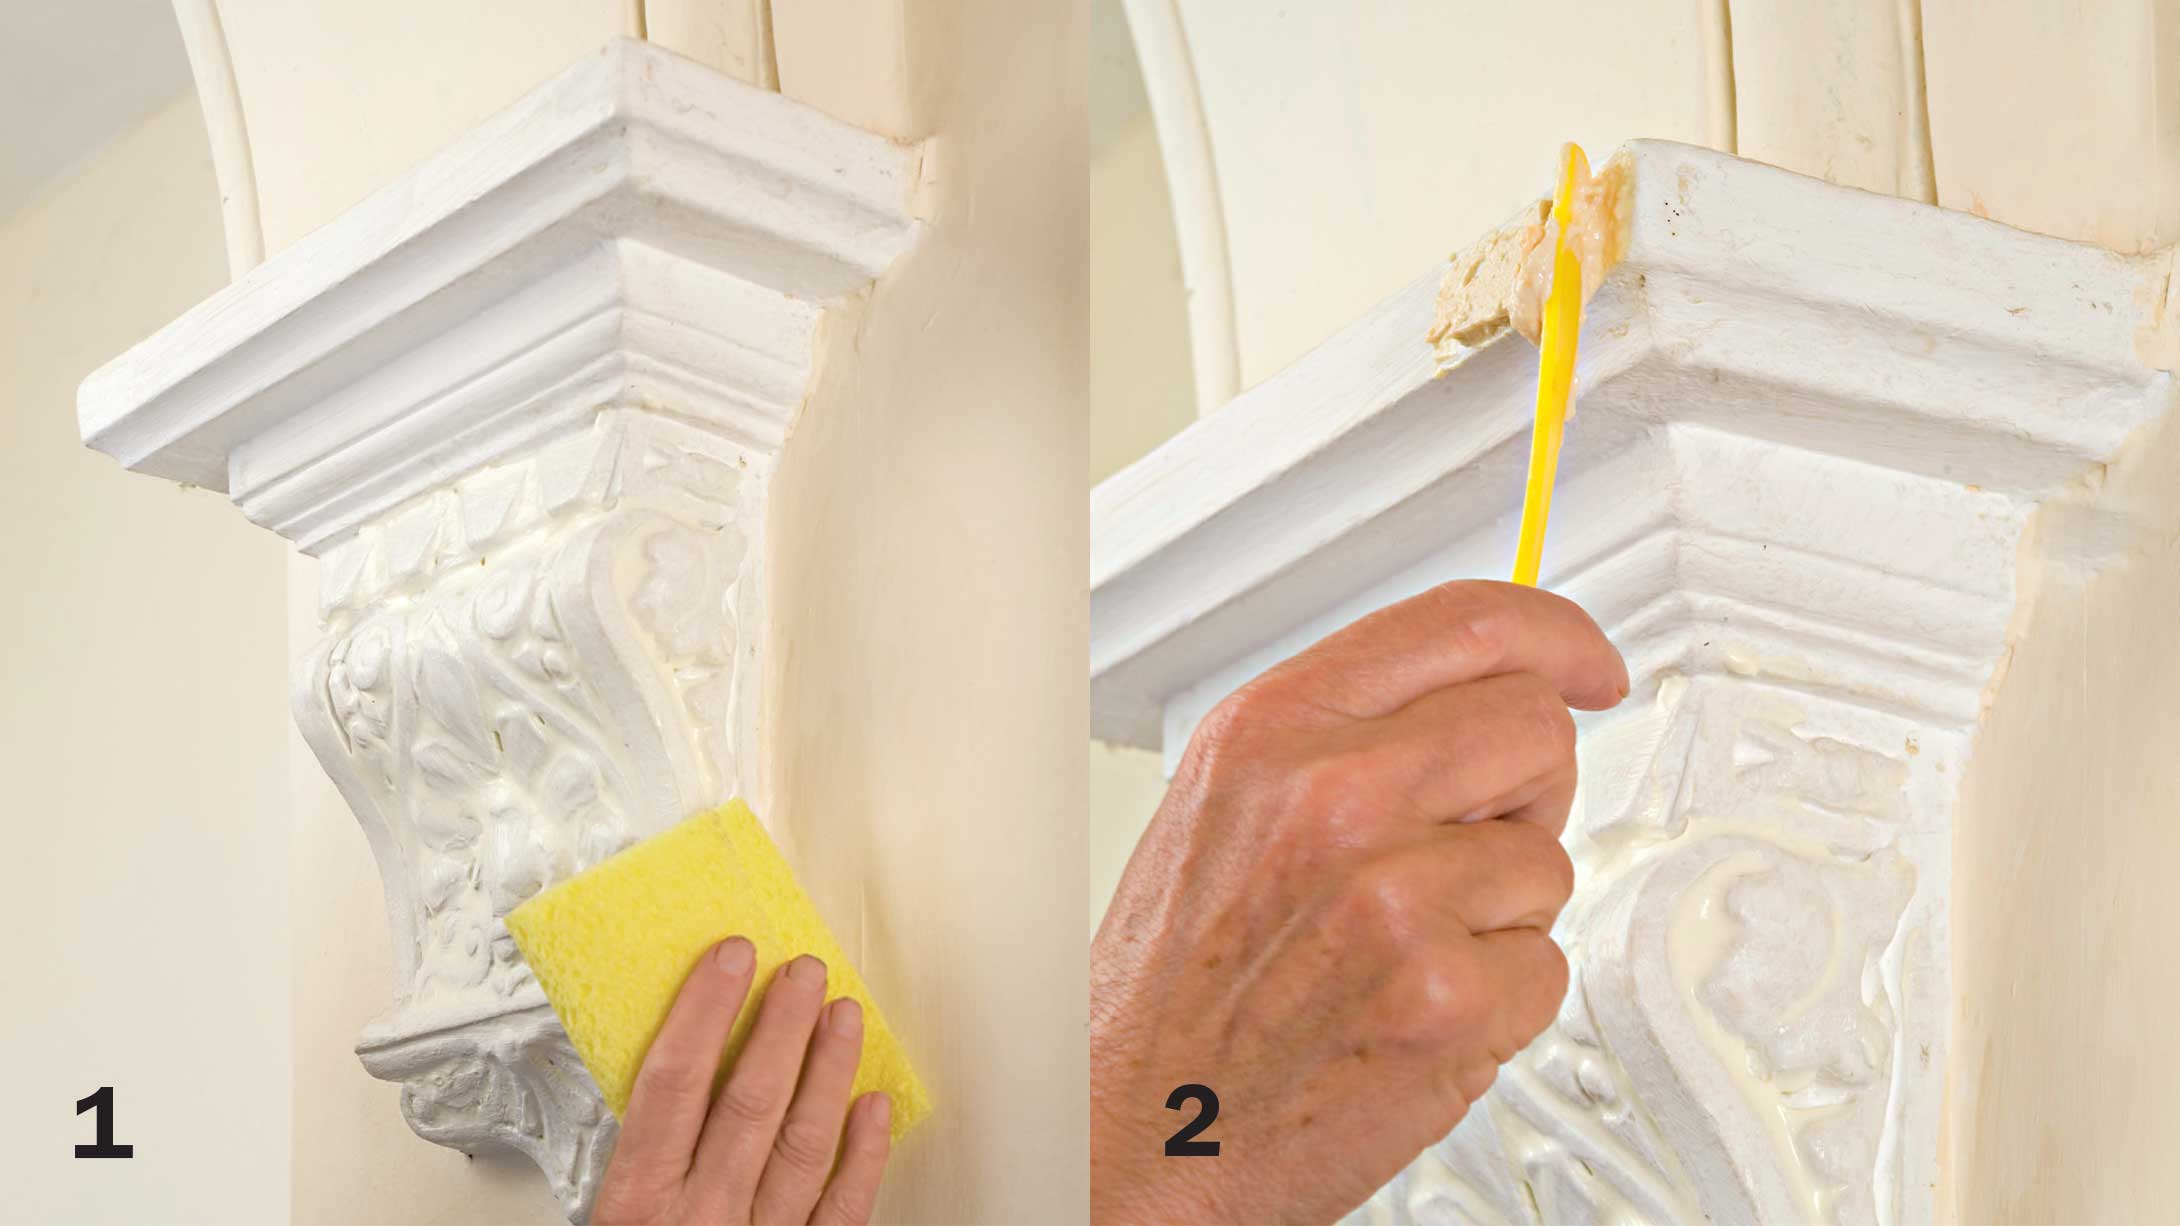
2. Test paint stripper on small area
If the plasterwork has a paint finish, apply stripper to a small test area. Be careful, as many different materials have been used over the years to make mouldings, and some might not be compatible with stripping compounds. In a very old building you could discover an original paint of historical significance.
3. Apply paint stripper
Protect the floor surface below and put on heavy-duty gloves. When tackling cornicing or a ceiling rose, be sure to protect your eyes with goggles. Apply stripper. How thickly it should be applied depends on how thick the coating is that needs to be removed. If very thick, you may need to apply two coats.
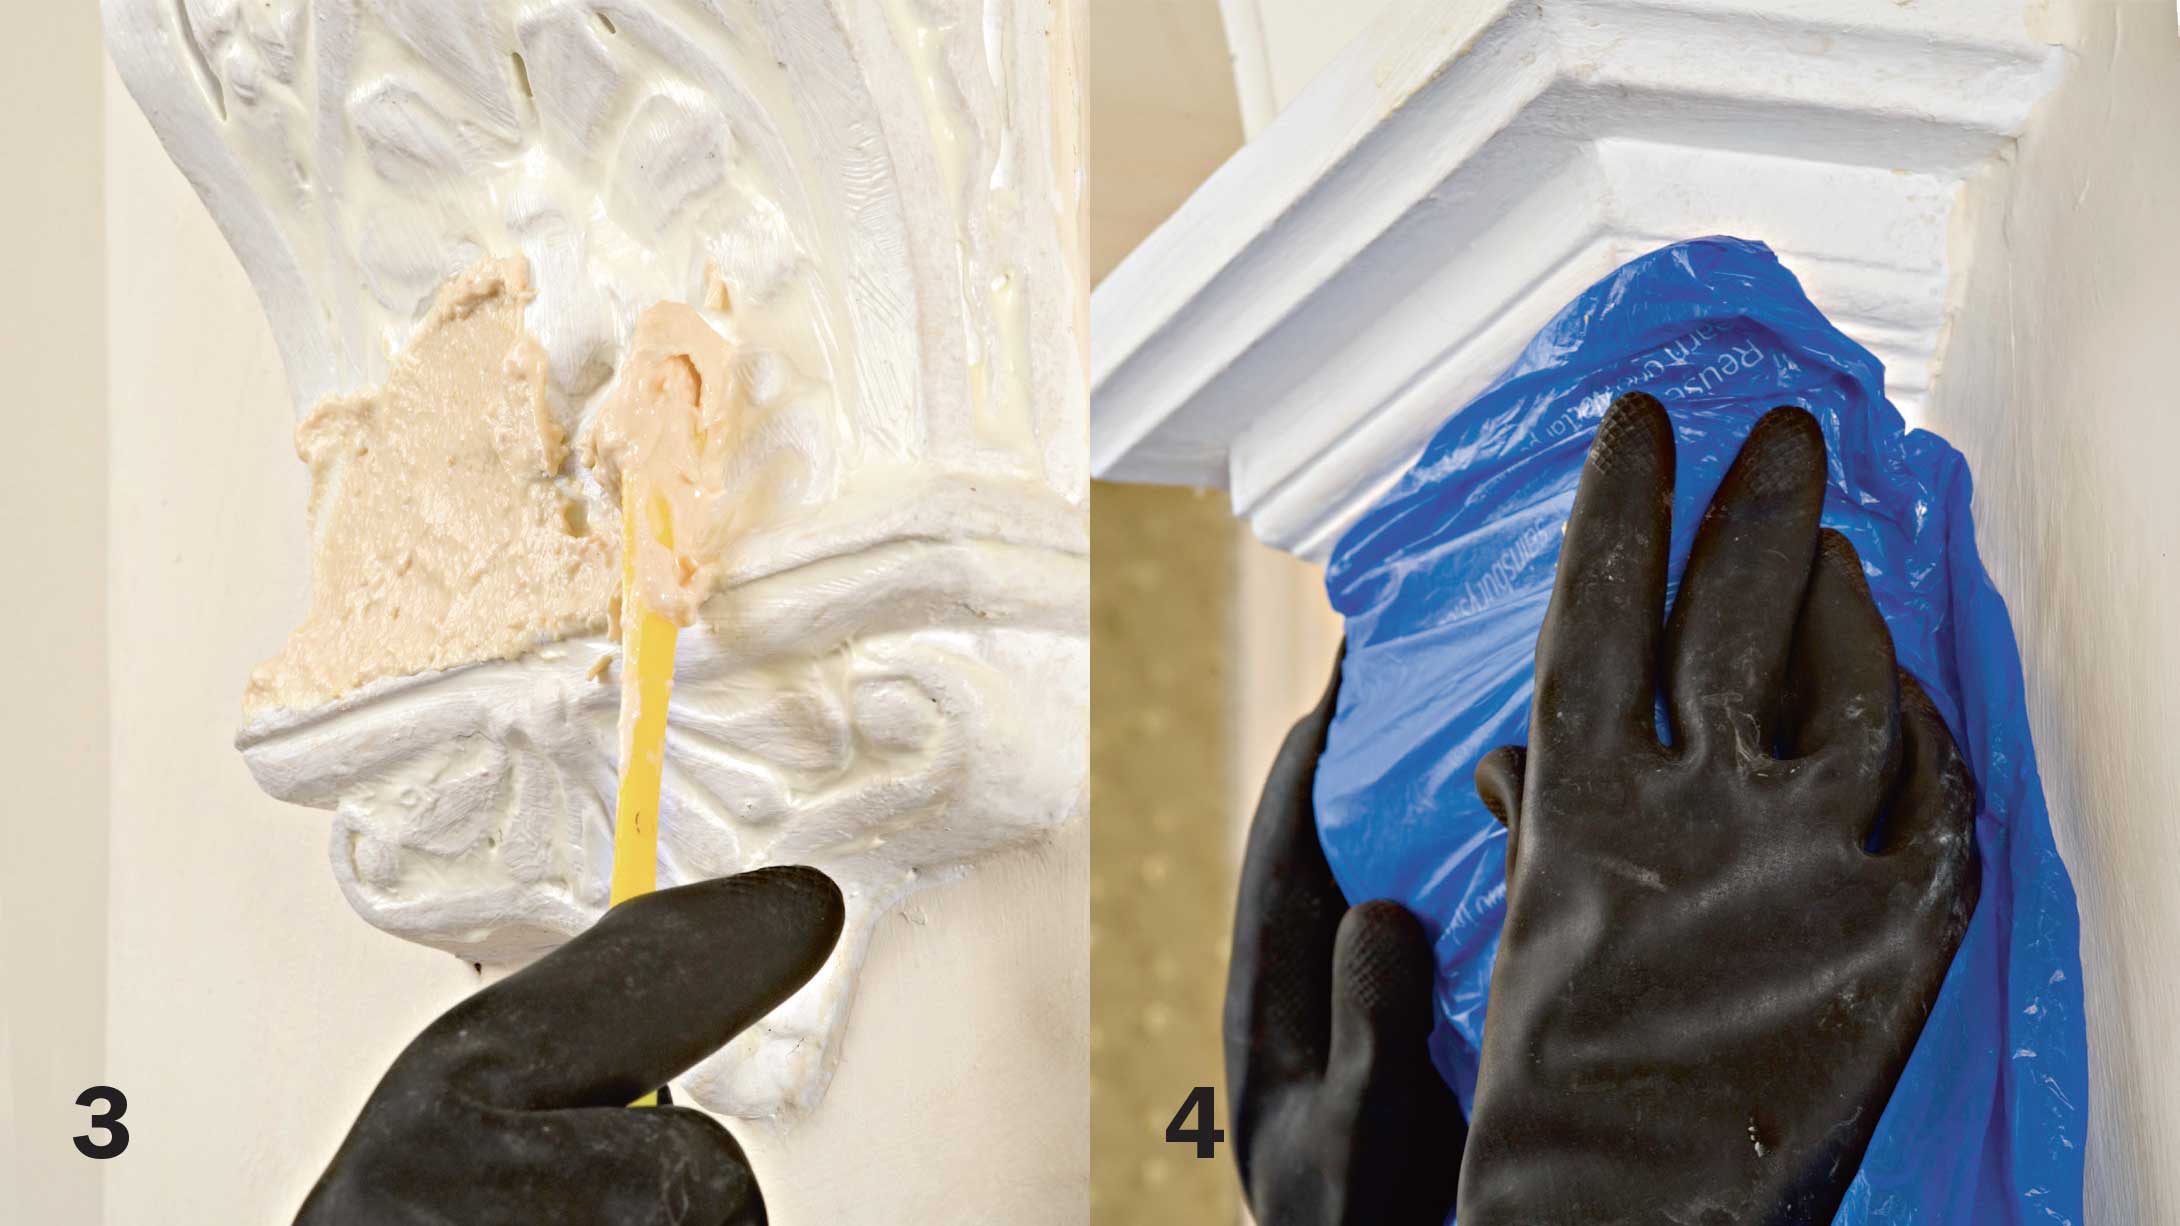
4. Cover and wait for the layers to soften
To prevent poultice stripper drying out, cover the plasterwork with cling film or discarded plastic bags. Leave for any time between a few minutes and several hours, even overnight if the paint is very thick (read instructions). Check from time to time until the stripper has softened all the paint layers.
5. Peel away the softened paint
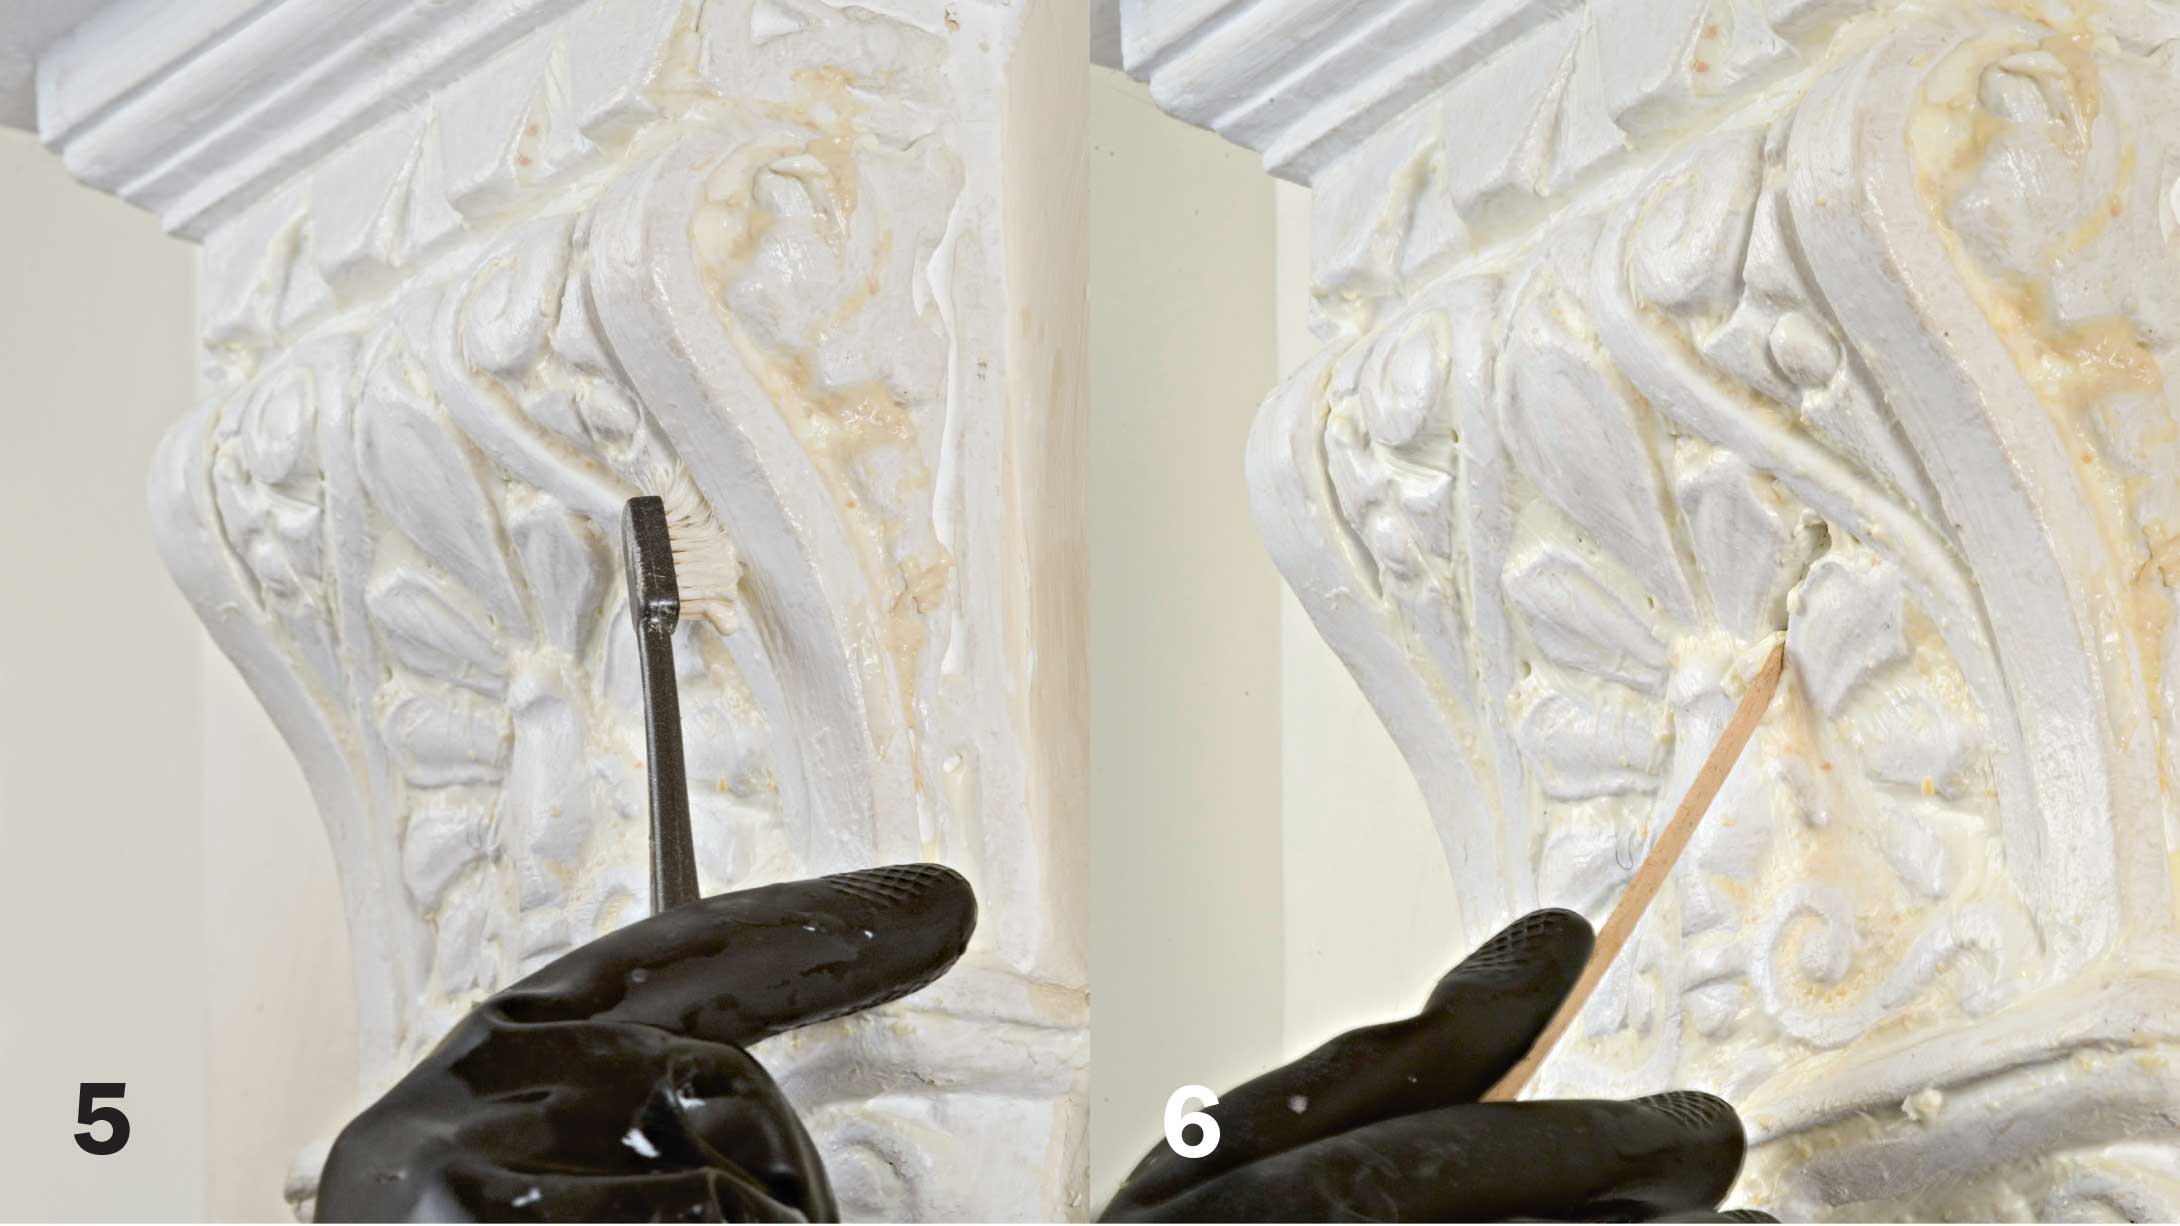
When you are satisfied the paint layers have all softened, peel away the covering. The majority of the stripper and softened paint should pull away from the plaster. Use an old toothbrush to get into recesses. If some sections prove stubborn, you can apply more stripper, cover and again leave to soften.
More from Period Living

Period Living is the UK's best-selling period homes magazine. Get inspiration, ideas and advice straight to your door every month with a subscription.
6. Use small tools for finer details
A cocktail stick is useful for getting into the nooks and crannies and revealing fine detail. Be inventive and raid the kitchen to find other appropriate tools. Always bag up and dispose of the sludgy paint thoughtfully. Old oil paint used to contain a small amount of lead, so should be handled with care.
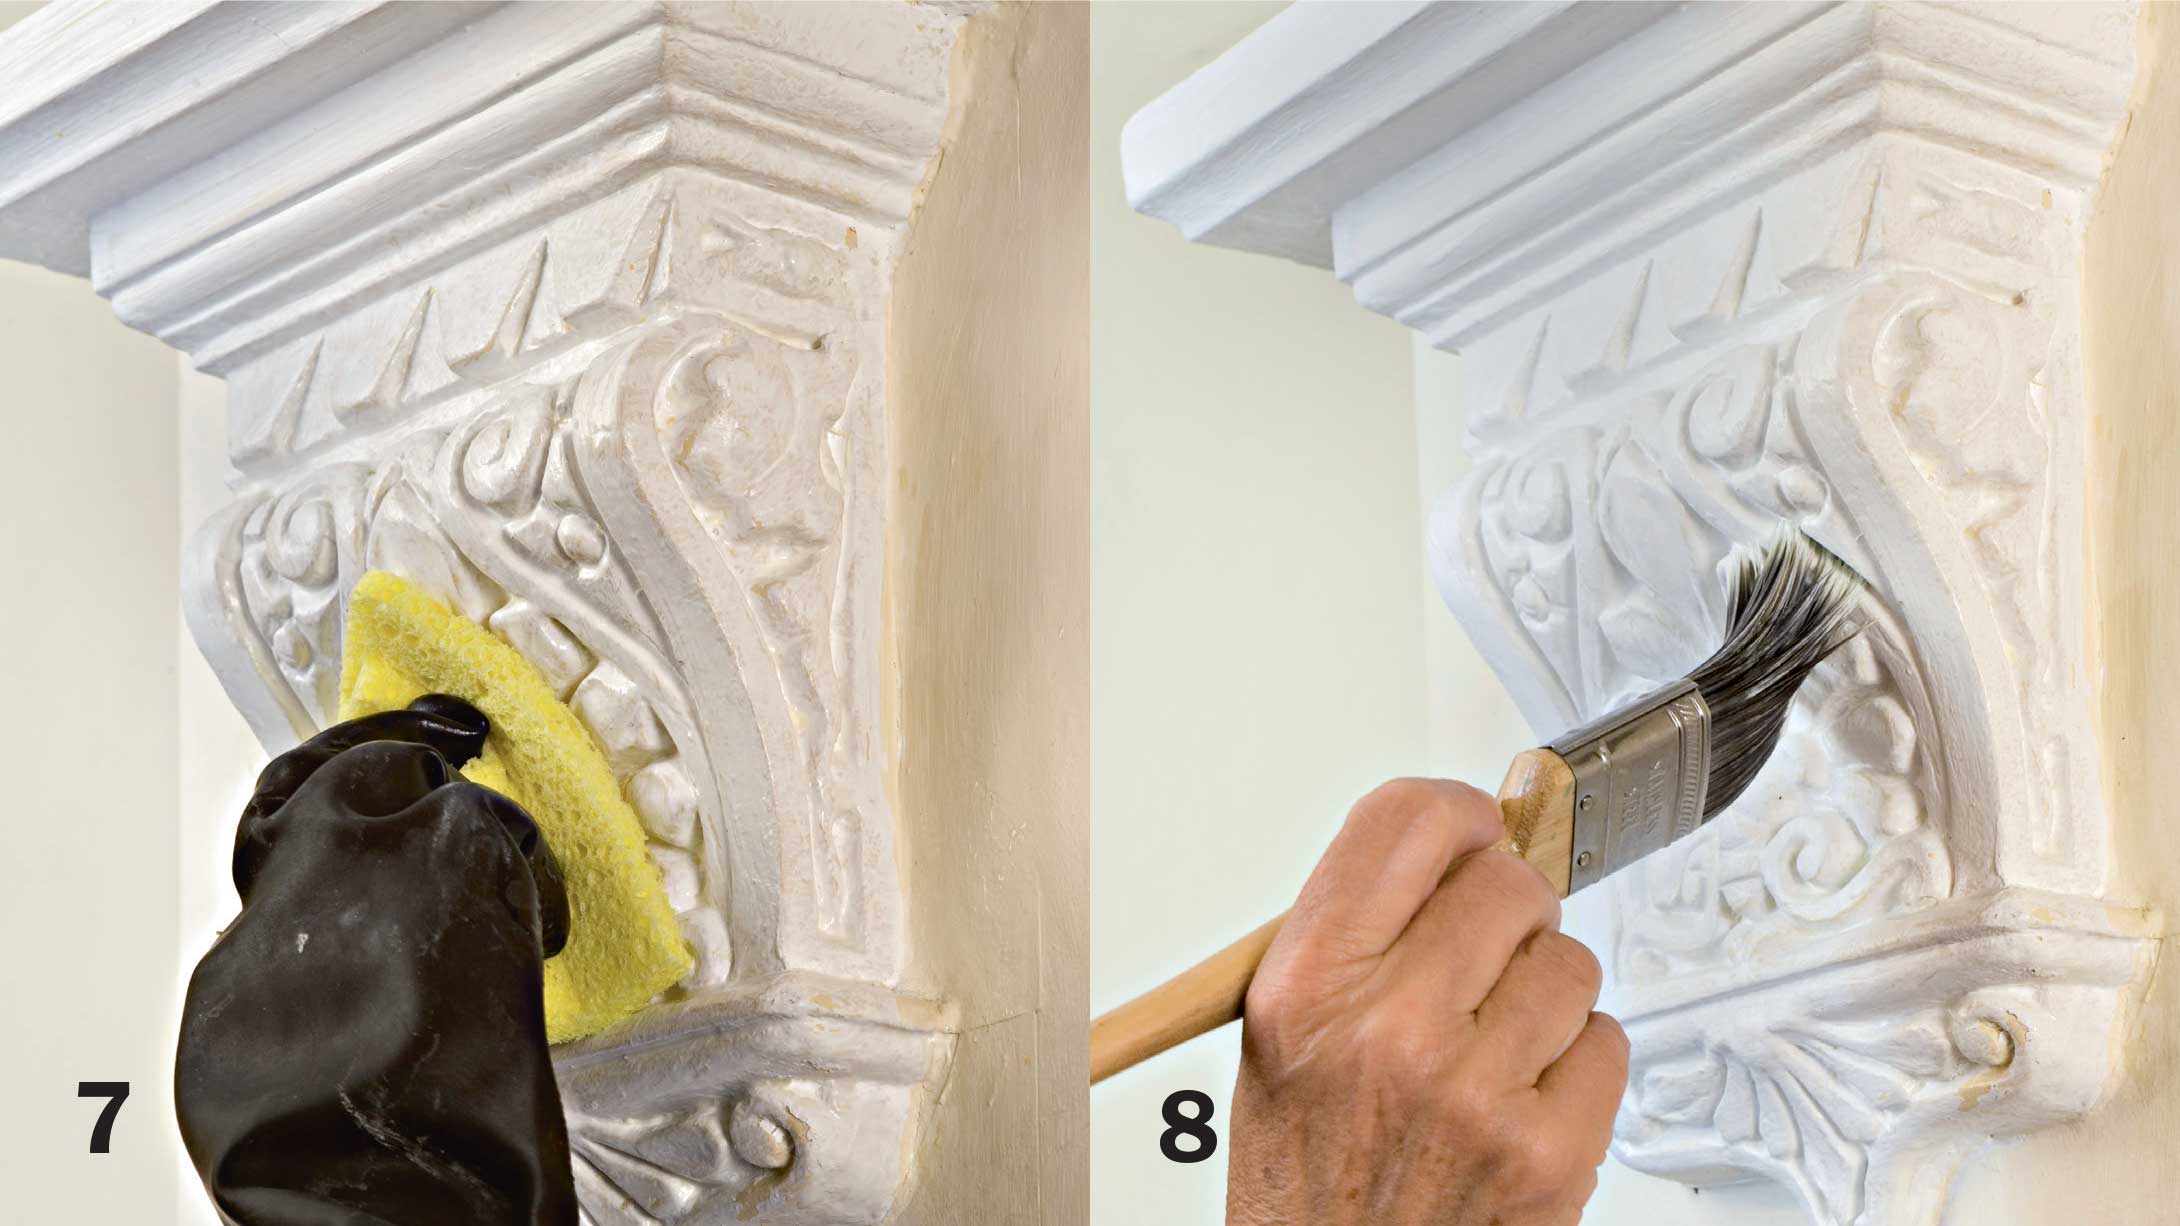
7. Clean the plaster and allow it to dry
Once all of the paint has been removed, neutralise the effect of the stripper by washing the surface with clean water and a sponge. Leave several days before painting to make sure it’s thoroughly dry.
If cracks are revealed, make good with plaster filler. Toupret makes a range of flexible fillers.
8. Add a fresh coat of paint
If the original finish was distemper, apply a coat of stabilising solution to bind any traces remaining before painting the surface.
When choosing a paint, bear in mind that modern paint will not adhere to powdery soft distemper and will soon begin to flake off.
Looking for more repairs and DIY projects?
Join our newsletter
Get small space home decor ideas, celeb inspiration, DIY tips and more, straight to your inbox!
-
 Leaking pipes – common causes and what to do
How to deal with leaking pipes in your home with advice from the experts
By Sarah Warwick Published
-
 Winter home improvements: 11 jobs to prepare your house for the cold months
Prevent potentially costly damage to your property this winter with these simple home maintenance tasks for your house and garden
By Lucy Searle Published
-
 10 essential home maintenance jobs for spring
As the weather warms up, now is the time to give your home some home maintenance and fix any lingering issues that have worsened over winter
By Richard Sexton Last updated
-
 How to repair and maintain metal window and door frames
Properly maintained, metal windows can last for centuries. When protective coatings are neglected, however, corrosion may occur. Here's how to repair your metal door and window frames
By Douglas Kent Published