
Laying a gravel path is one of the easiest parts of garden hardscaping, and even a relatively inexperienced DIYer can lay one. Despite the easy of laying, it's one of the nicest looking features in a traditional garden, blending seamlessly into most planting schemes.
A gravel path has practical advantages, too. Rain will permeate through it and soak away into the soil, so during heavy rainfall there won’t be a problem caused by run-off, when surface water surges directly into an overloaded drainage system. If at a later date you decide to alter the garden layout, a gravel path is easily reversible.
Find more garden ideas on our dedicated page.
Planning your garden path
- Before starting any work, mark out the proposed route with string or marking paint, in a straight or curving shape. Live with this for a while to make sure you have chosen the ideal position, and look at the effect from an upstairs window in the house.
- Gravel must be kept in its place otherwise it can start to look unsightly. Simple timber gravel boards will overcome this, nailed to wooden pegs at one metre intervals, but decorative edges are both functional and attractive.
- A practical gravel path between the front door and the gate will be well used so needs to be on a firm, level base that is preferably wide enough for two people, a pram or a wheelchair. A more frivolous garden path can meander around flower beds to draw you towards hidden corners or a secluded bench (find out how to restore a garden bench in our guide).
How to lay a gravel path on soil
You will need:
- Steel tape
- String
- Spirit level
- Sharp spade
- Rake
- Concrete
- Hardcore (optional depending on quality of soil – see step six)
- Mortar
- Brick trowel
- Gravel or decorative aggregate (allow 40kg per sq m)
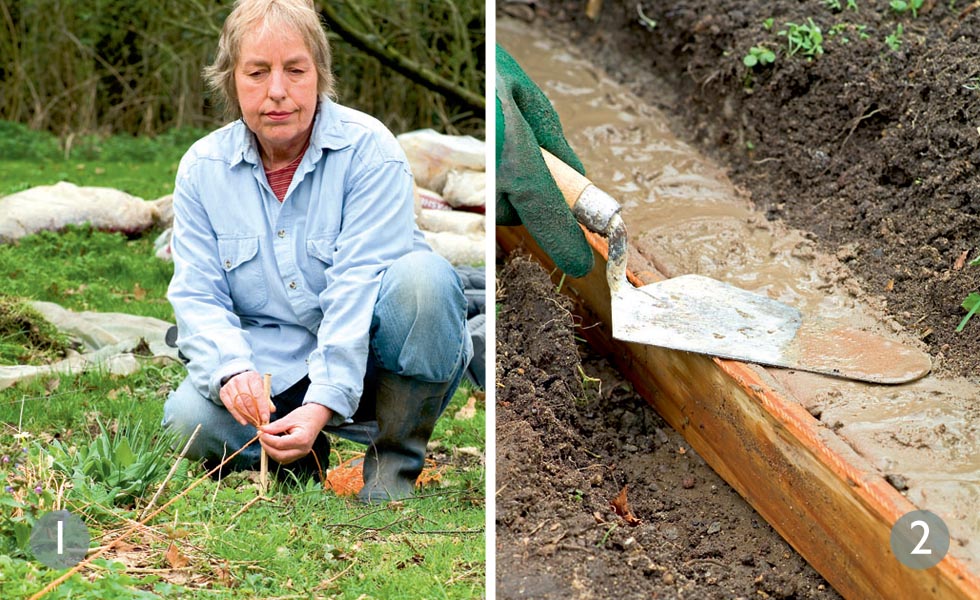
1. Mark out the path
Use a length of hosepipe to firm up a position. If the path runs adjacent to the house ensure it is at least 16cm below the level of the damp proof course. Leave a gap of at least 23cm between walls and path to prevent heavy rain wetting the walls. If the path is curved, choose edging in shorter lengths for a smoother look.
2. Dig an edging trench
The depth of the trench will depend on the soil, the height of the edging and the ‘upstand’ – the difference in height between the top of the edging and the path. Compact the base with the head of a rake. At the bottom of the trench lay a concrete foundation approximately 10cm deep. Smooth with a trowel and check levels.
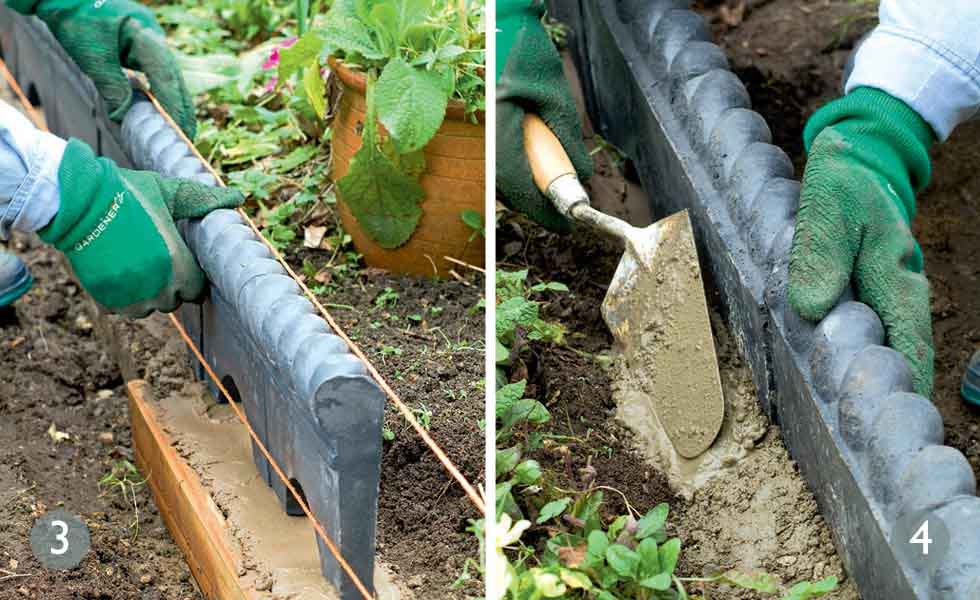
3. Bed in the edging
Once the concrete has set, fix up a string line to guide the top of the edgings. Set up a second line to guide the front edge. Spread an even layer of mortar to bed the edging stones. Allow a gap of about 3mm to 4mm between each one. Cover with plastic sheeting to protect from rain or from drying too quickly.
4. Haunch the edging
Wait for a day or so for the mortar to set then use concrete to ‘haunch’ or support the edging. This is carried out behind the edging stones for up to two thirds of the height. To aid drainage use your trowel to slope the concrete away from the edging. Afterwards, once the soil is reinstated, the haunching will be hidden.
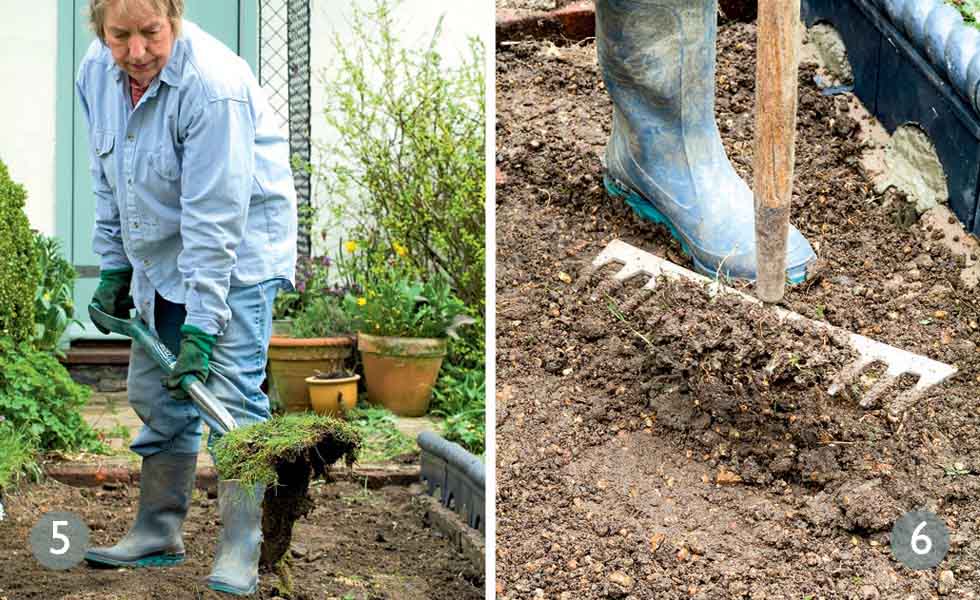
5. Remove turf and soil
Allow the edging to dry sufficiently before tackling the path. Remove grass and soil to a depth of 10cm to 15cm; the depth will depend upon soil conditions. You may even be lucky enough to find the remains of a previous path. Remove grass and all vegetation otherwise this will rot down and cause unevenness in the future.
6. Compact the soil
For narrow paths use the head of a rake or a sturdy piece of wood to firm down the soil. For larger paths use a garden roller or hire a vibrating plate. If the sub-soil is soft add a few inches of hardcore or scalping stone and compact once more. Level with gravel to prevent the hardcore working to the surface as the ground settles.
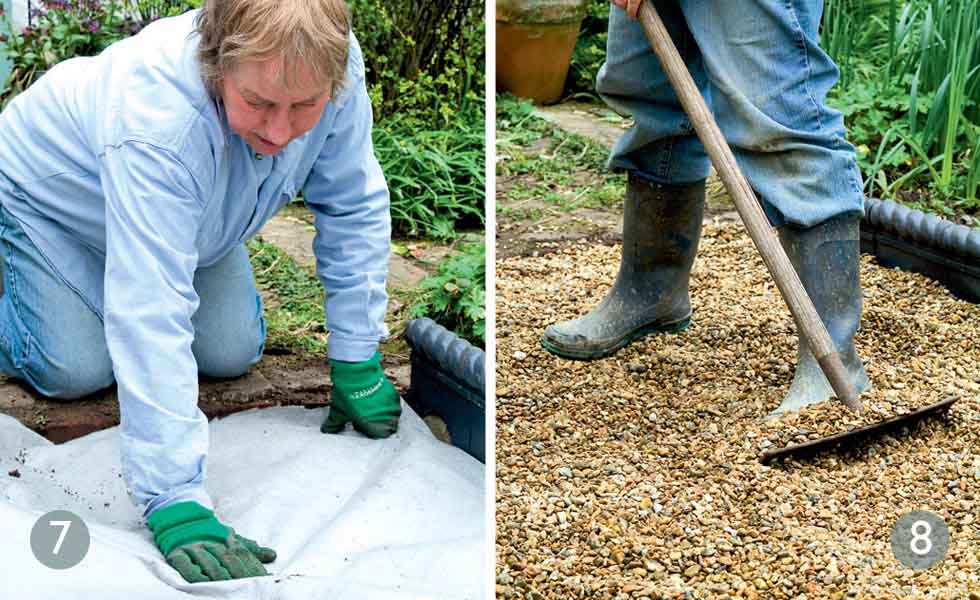
7. Add a weed membrane
Lay a piece of discarded carpet or a layer of permeable membrane, which allows rain to pass through it but will keep the gravel separate from the soil below. It will help to keep the path weed-free, too. Occasionally rake the stones to keep the path smooth and deter any colonising growth.
8. Distribute the gravel
Gravel and decorative aggregates come in a variety of colours from buff to pink and grey. Bear in mind existing landscaping colours when choosing. Smaller sized aggregates look proportionally better on a smaller path. With a rake spread gravel to a depth of 2-3cm evenly on to the membrane.
Choosing aggregate or gravel
Gravel and decorative aggregates are available from builder’s merchants and garden centres. While the smaller grade ‘pea shingle’ or 10mm gravel looks good, it may encourage cats to use the path as a litter tray, in which case a larger grade 20mm size might be preferable. Allow 40kg of gravel per square metre.
Loose gravel is always cheaper than resin-bound gravel, which has epoxy binders added to it to make it stick together. Avoid gravel that says 'resin bonded', as that means it's not permeable; always opt for 'resin bound'. Alternatively, choose self-binding gravel, which has not had the sand and dust removed and therefore binds together, making for a firmer path.
Find out more about choosing gravel to get the best for your garden.
Gravel path maintenance
It is essential to give your gravel path some maintenance to keep the gravel iself evenly distributed and debris free. You'll need a rake and a stiff brush. Start by brushing away any dead leaves or branches that may have fallen on to the path from nearby trees. Then, rake thoroughly to lift smaller bits that may have become stuck in, and redistribute the gravel. Repeat every couple of weeks, or every week during leaf fall in autumn.
More garden inspiration:
Join our newsletter
Get small space home decor ideas, celeb inspiration, DIY tips and more, straight to your inbox!
-
 Impactful landscaping ideas for small backyards that will transform your space — 10 ideas to inspire
From wood paneling and a lick of paint to planters and fire pits, our landscaping ideas for small backyards will refresh your space
By Sophie Warren-Smith Published
-
 The 2024 sustainable landscaping trend is the only one worth trying, gardening pros reveal
Looking for a new landscaping trend to try? We've asked designers for their top one for 2024, plus picked out essentials to help you get started
By Eve Smallman Published
-
 These 6 tropical landscaping ideas will give your space a resort feel
Our tropical landscaping ideas will uplift your backyard with water features, lush plants, vibrant shades, and tactile materials in bright colors
By Sophie Warren-Smith Published
-
 14 lawn edging ideas that will add definition and style to your backyard
Want to neaten up your lawn with lawn edging ideas? From fresh flowers to laidback bricks, we've scouted out materials and styles that look brilliant
By Eve Smallman Published
-
 How to make compost — 8 easy steps gardening pros always use
Learn how to make compost at home in seven easy steps, whether you have a bin or want to create a compost heap. We've asked pros for their top tips
By Eve Smallman Published
-
 Planting ornamental grasses — the best types experts love and how to grow them
We've got you covered on planting ornamental grasses, speaking to experts about what ones to grow, how to grow them, and factors to consider
By Eve Smallman Last updated
-
 "Grotty" terrace is transformed with French flair and Ibiza vibes in the garden
Esther Pillans' tired-looking Victorian terraced house was given a makeover with a touch of Parisian chic
By Ellen Finch Published
-
 How to make a DIY hummingbird feeder using a glass jelly jar
This charming DIY hummingbird feeder is perfect for backyards and apartment balconies alike! Complete with homemade nectar, you can have this project done in under an hour.
By Dori Turner Published
