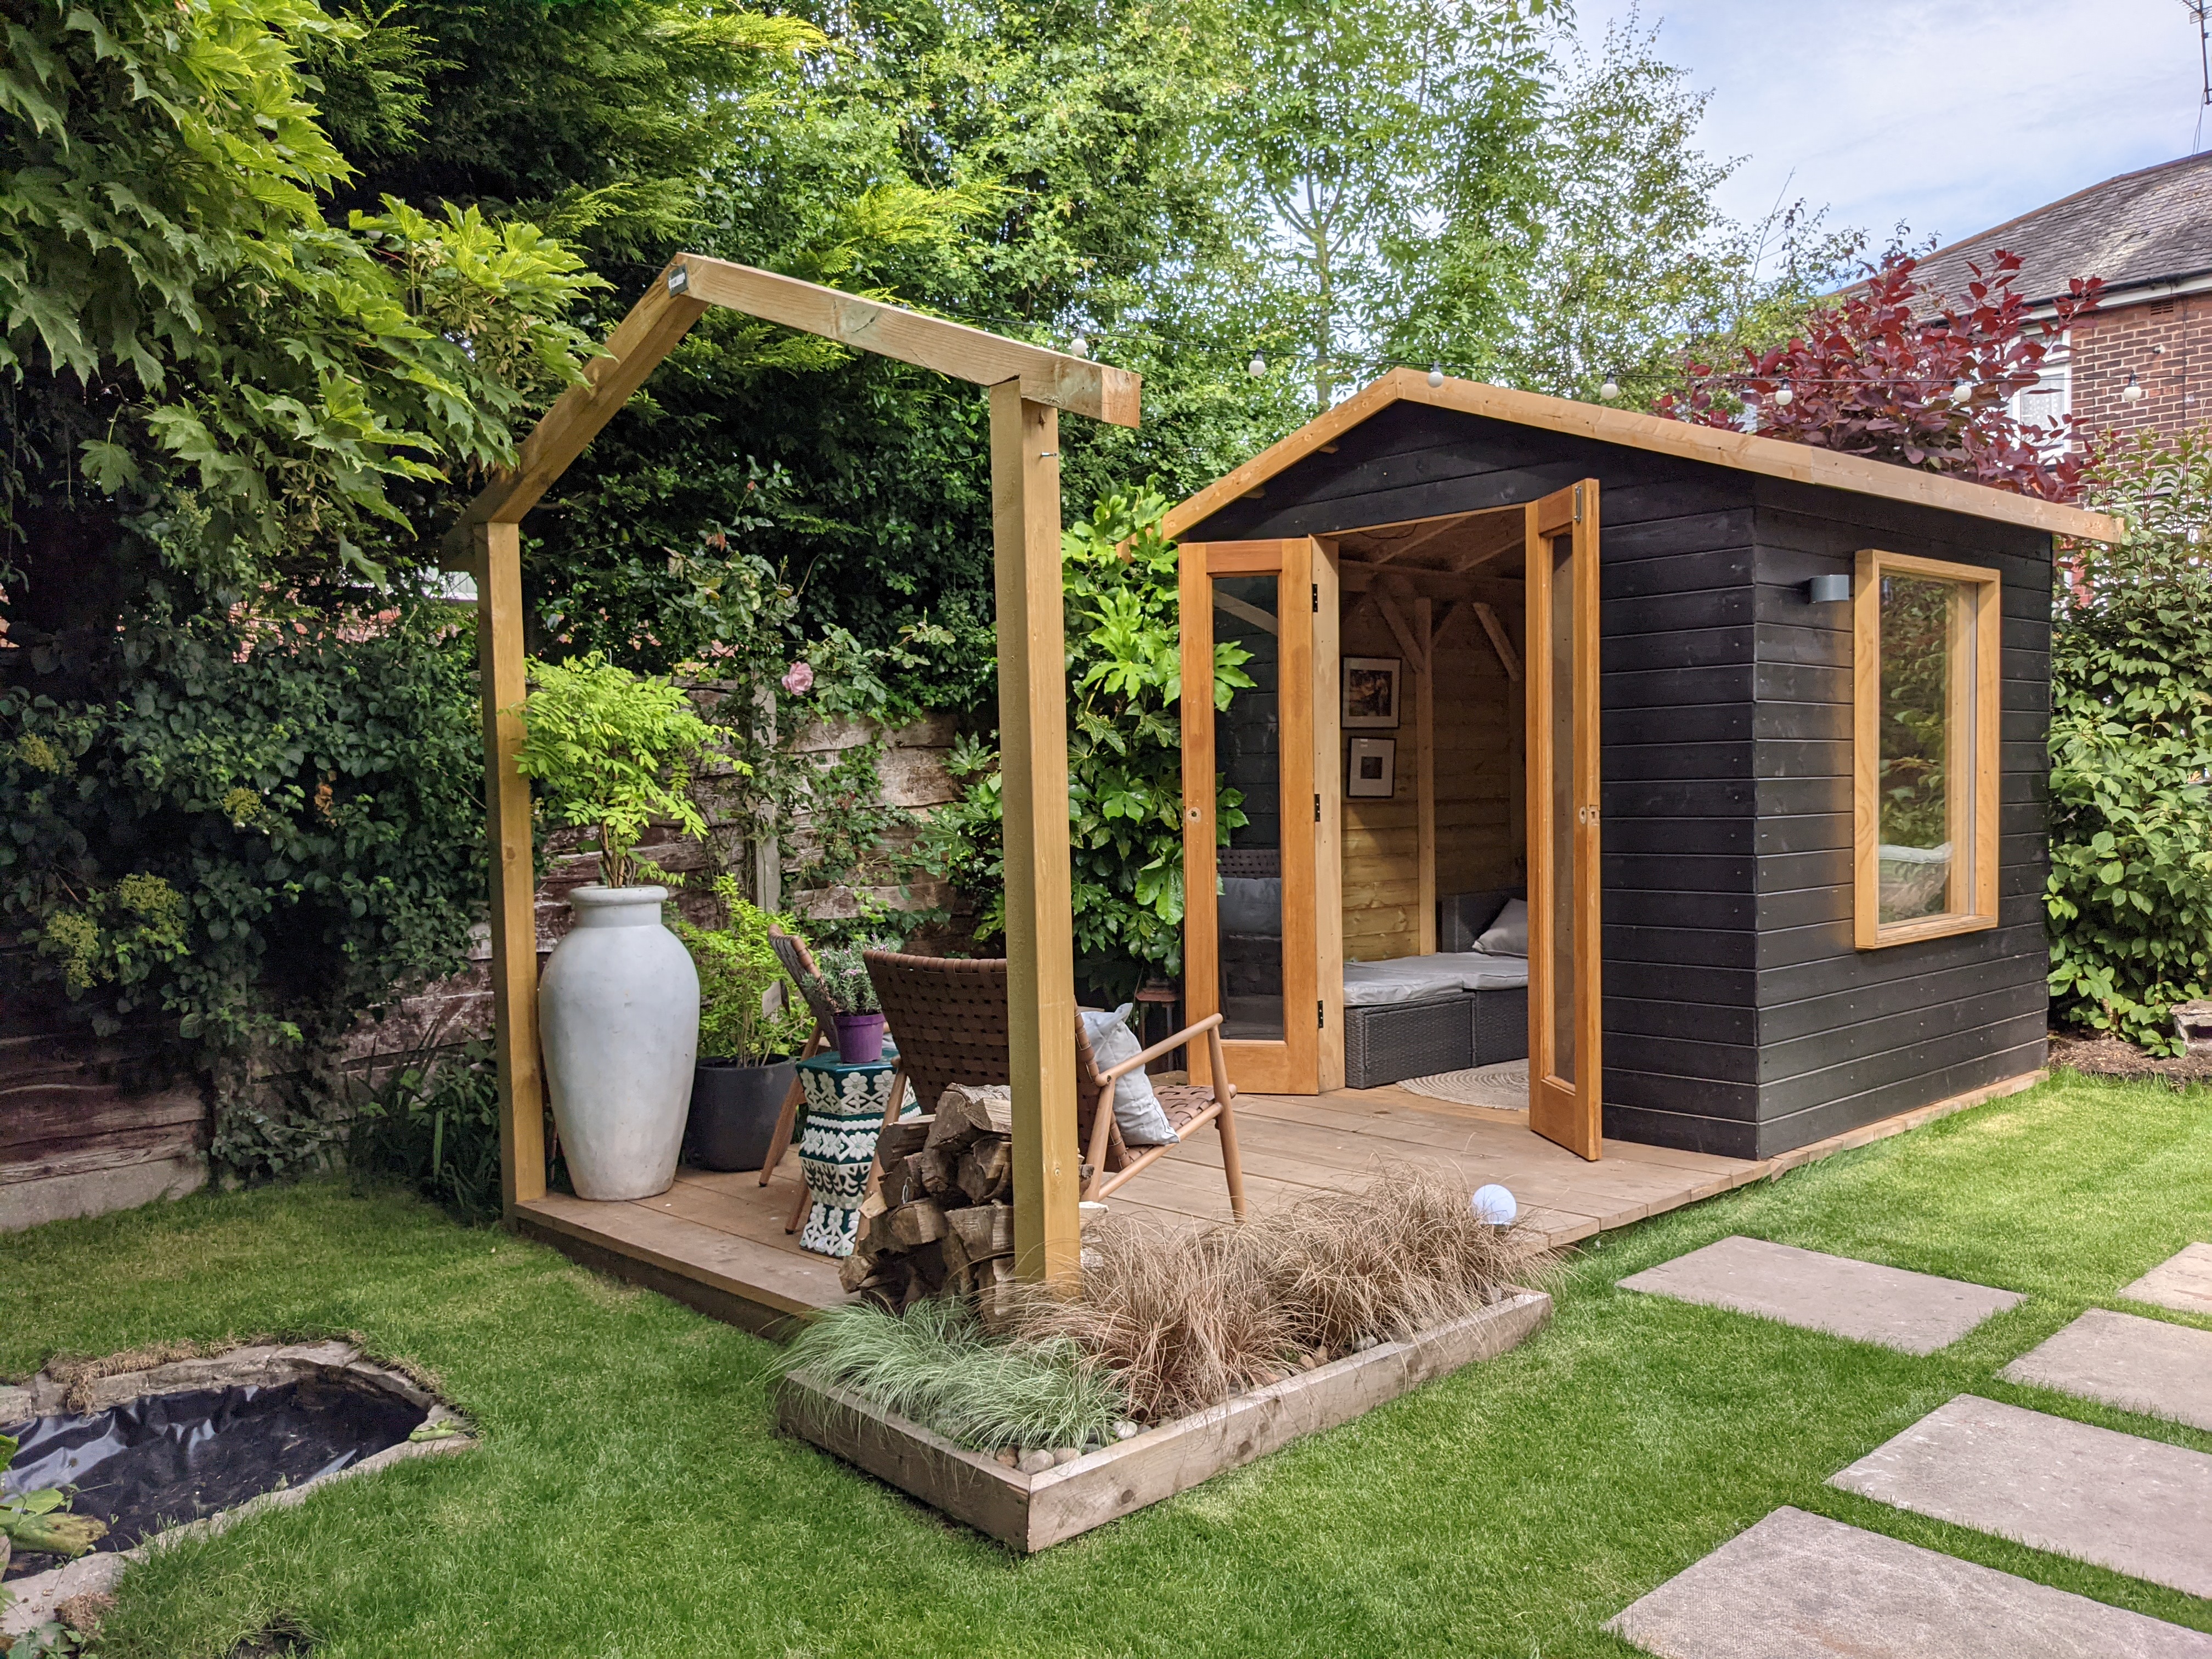

In a recent blog I shared how I created DIY scaffolding board decking. What I didn't share was that half of that decking was allocated to be the floor of our new summer house.
I will be completely honest with you, my partner and I didn’t initially set out to build a summer house, but our designs escalated very quickly and I am so glad we did. We are experienced DIYers at this stage, having renovated two houses, but we were a little apprehensive about the task of building our own summer house from scratch. That being said, we found it quite straight forward! If you're thinking about creating your own summer house, here is how we did it, plus some useful tips we learned along the way.
- Keep reading: 25 summer house ideas
DIY summer house design
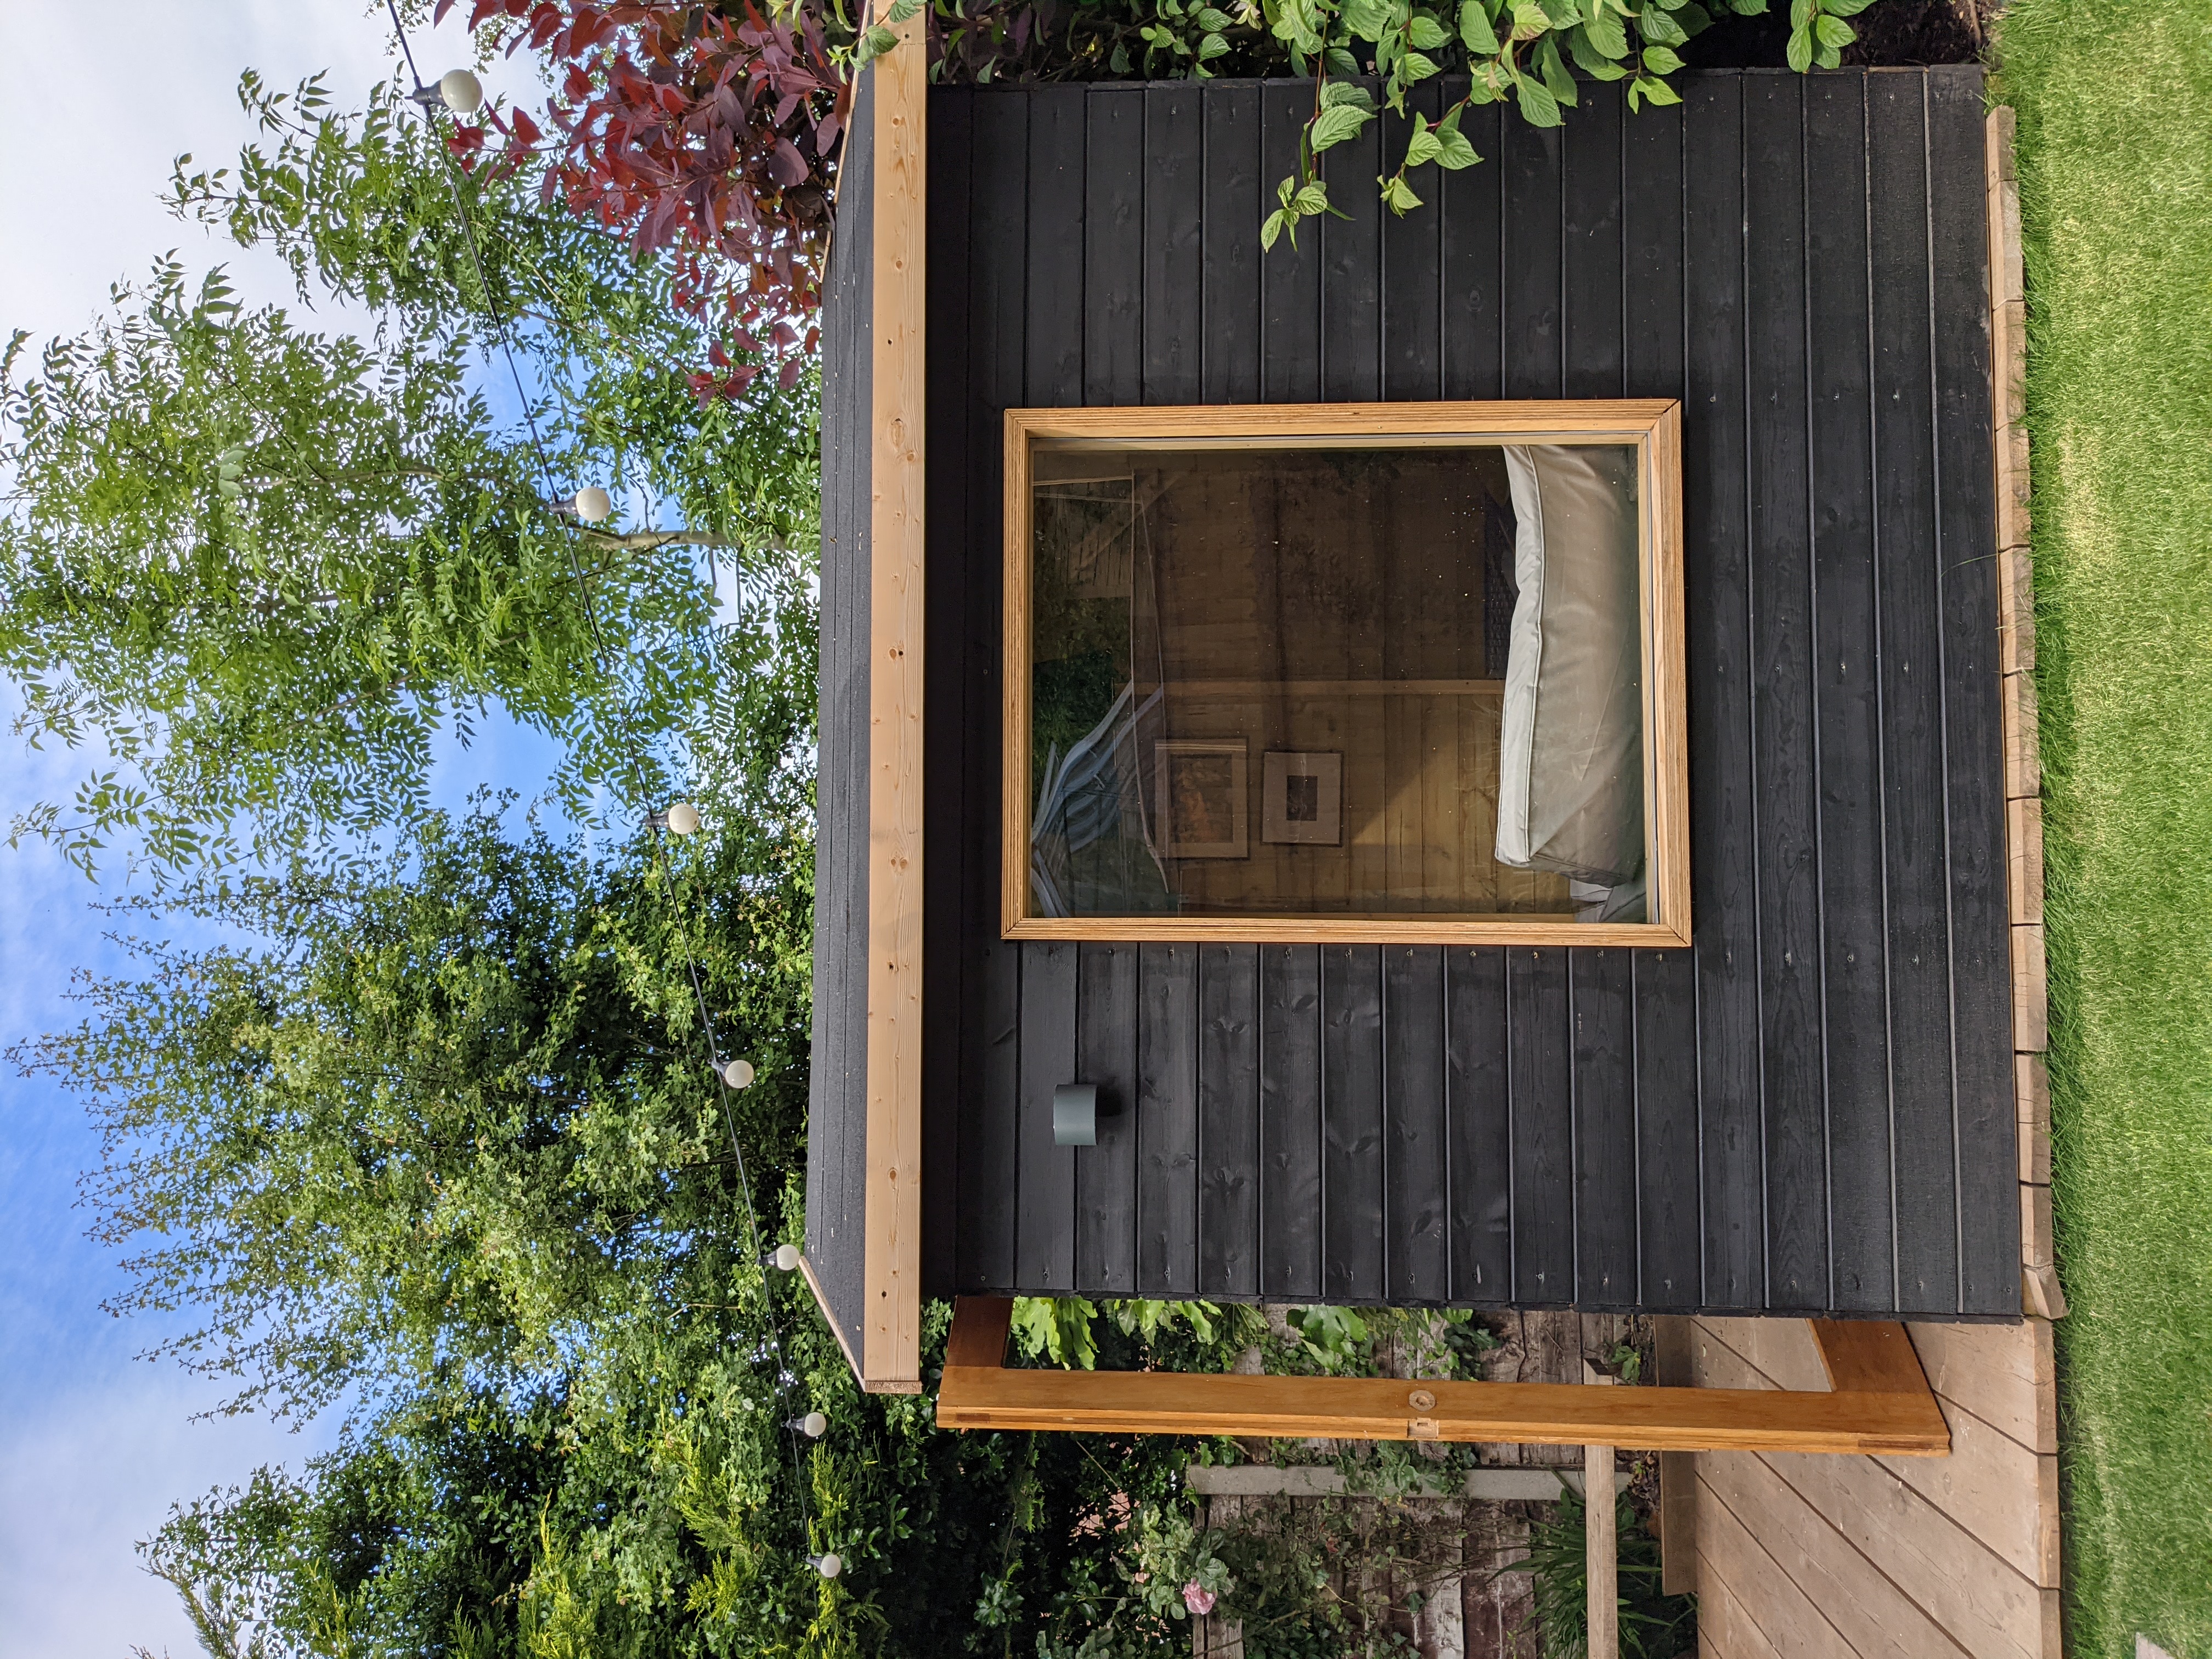
The design of your summer house can vary wildly, and depending on what you want to do it may be subject to local planning permission. As a general rule in England ‘outbuildings’ are subject to the following; they must be single story and the height of the roof must not exceed 2.5 metres if it's less that 2 metres away from your boundary. Please do make sure what your local regulations are as neighbours have the right to complain. Tip: I found a Facebook group called “build your own summer house” which I found really useful where people share their designs and give each other tips.
As always YouTube and online forums are great ways to learn new building methods if you are unsure. There are many ways to construct a summerhouse using a variety of materials so it really comes down to what you want and how much you are willing to spend.
For our own summerhouse I wanted something simple with a cabin in the woods feel about it. I had a look at designs on Pinterest and decided to go with a square cabin with a pitched roof. I wanted it to have double doors and some glazing on each side that wasn’t facing our boundary. Our design was very fluid, we did each step and then figured out what materials we needed to prevent us from making mistakes or over ordering. All the wood we used for construction was 2.4 metres or less as that could fit into our car. This also meant that the walls would be a 2.4m x 2.4m box.
How to build a summer house: The foundation
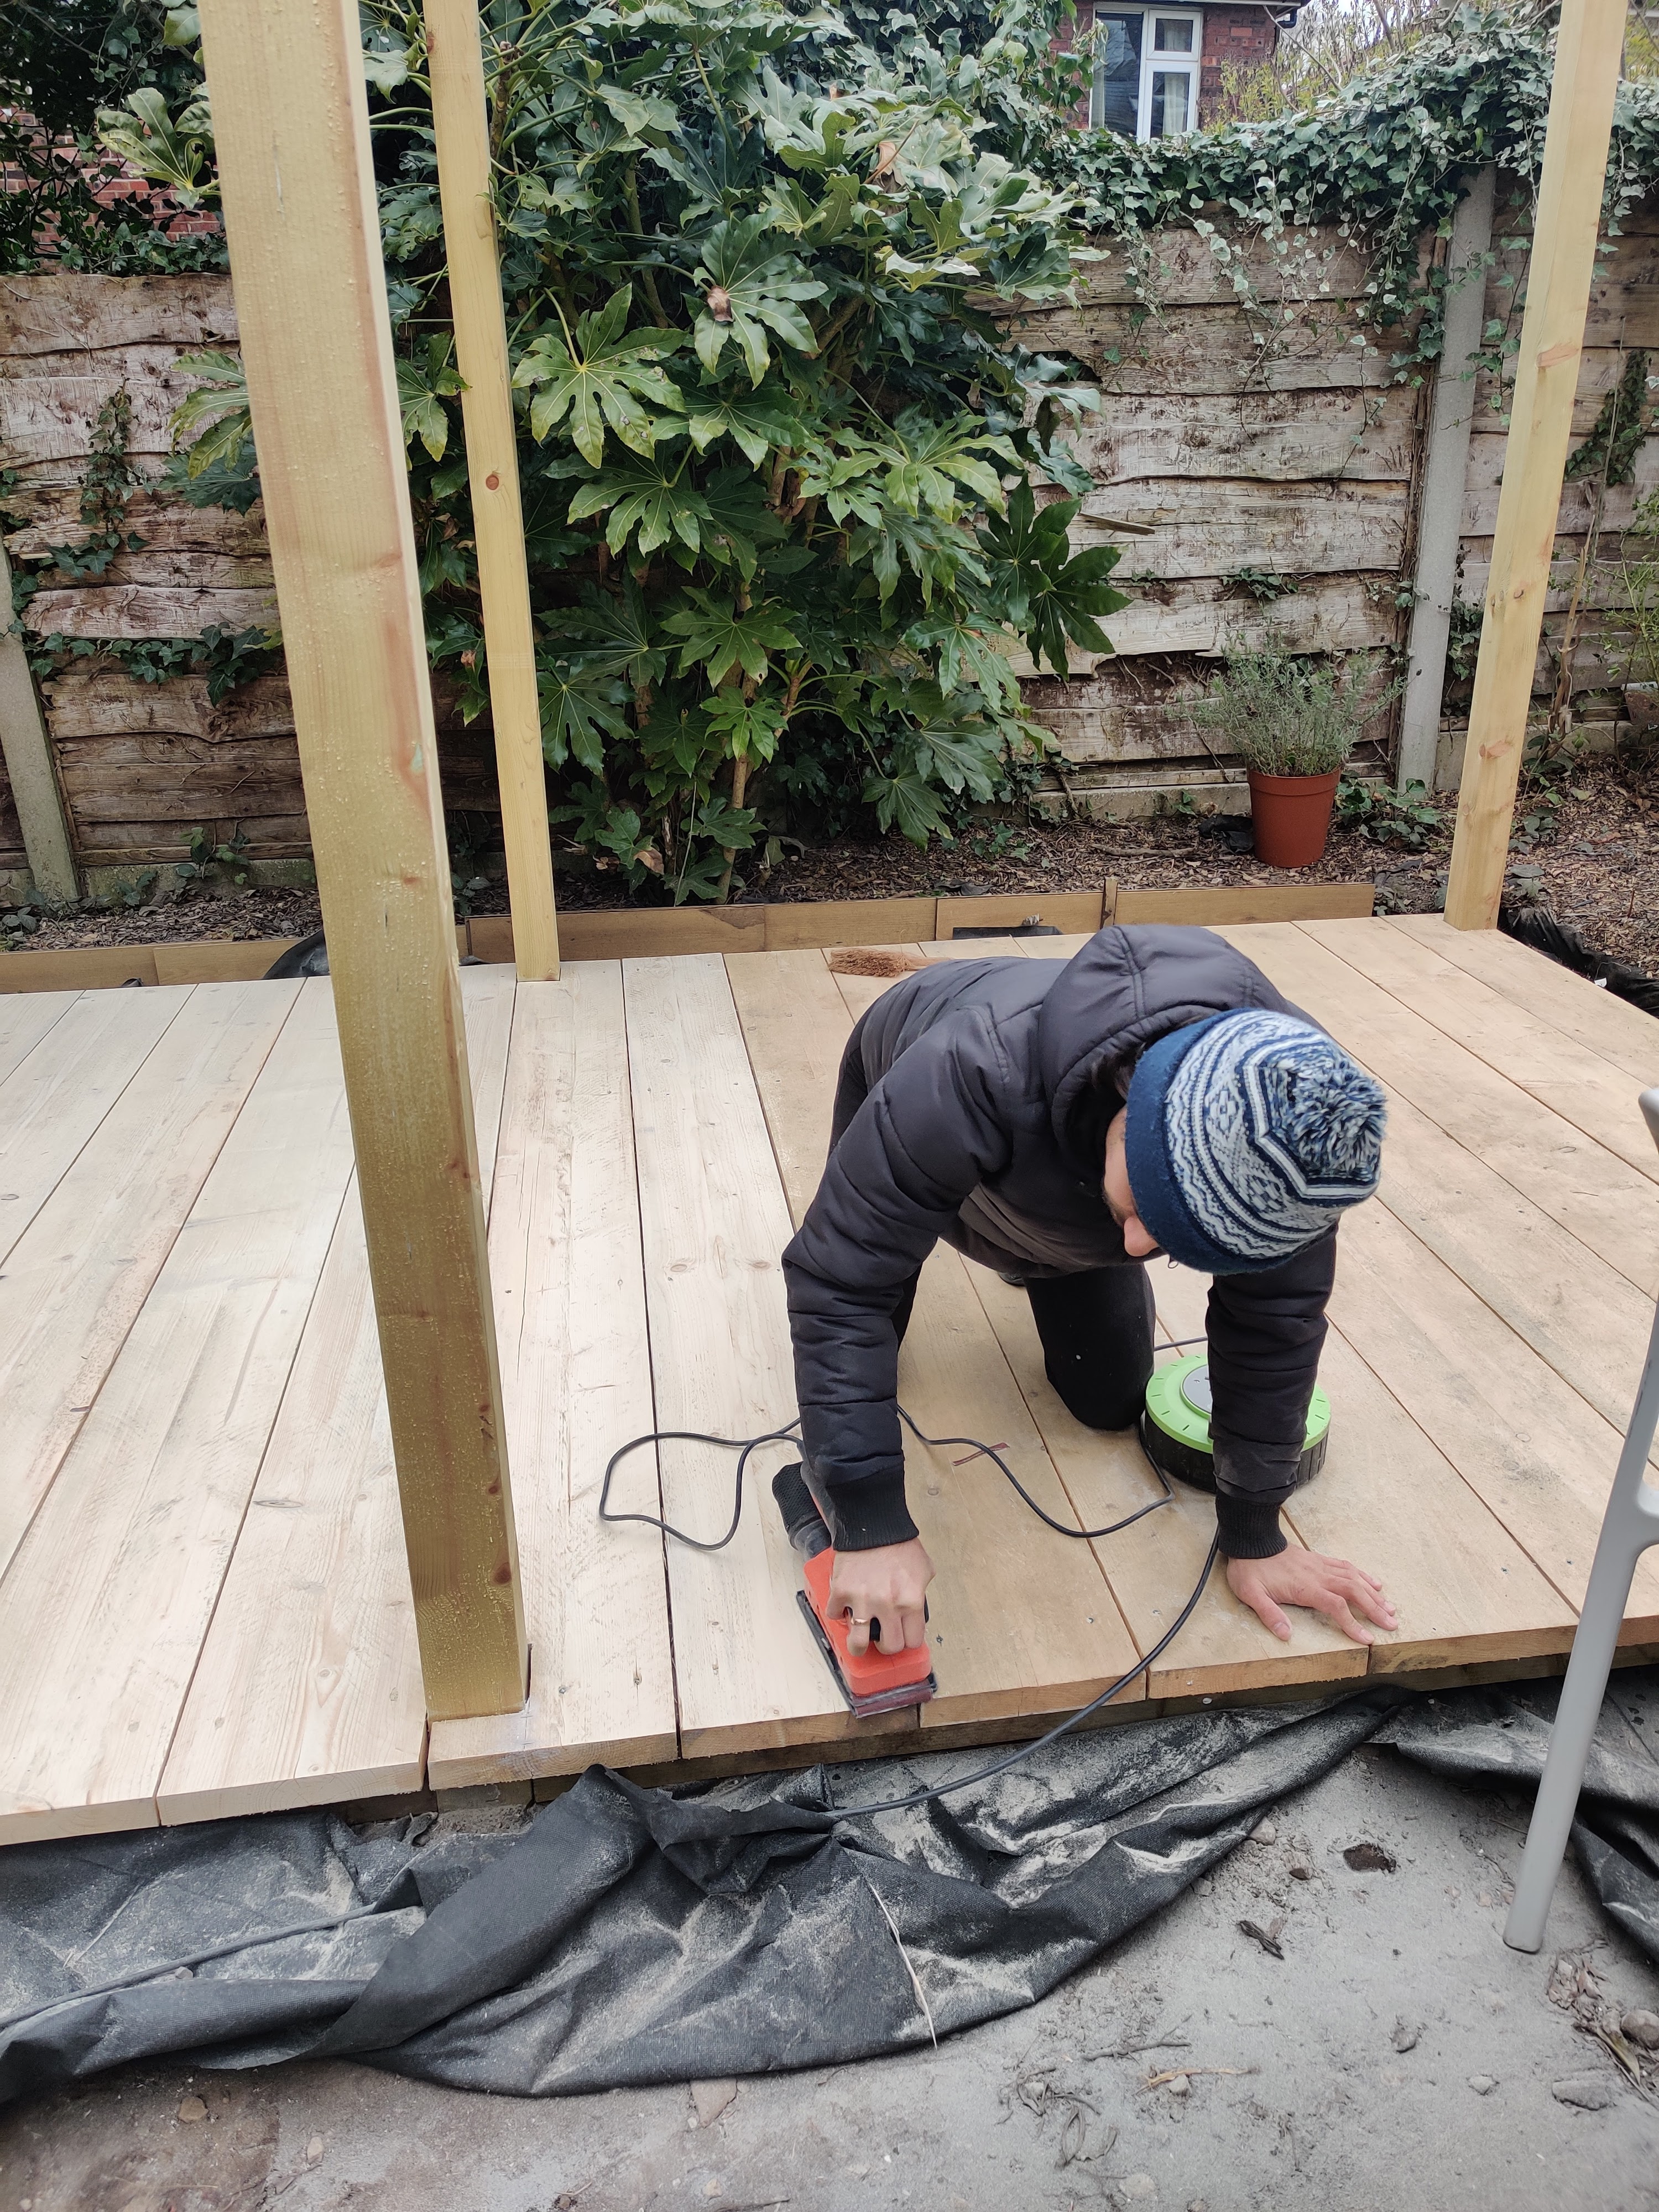
A strong foundation is important for any building. In my blog post about the scaffolding board decking I go into detail how I built the foundations that would be used for the decking and summerhouse. Basically, I used four 100mm x 100mm pressure treated wooden posts that were 2.4 metres tall. I dug a hole 400mm deep and positioned each post into it. The post was secured in place using a bag of premixed concrete bad that just needed water adding to it and no mixing and sets within 30 minutes. I took care to make sure each post was buried the same depth, vertically level and square with each other. The floor, wall and roof will all be supported off the 4 posts.
Our floor is a decking supported off the foundational posts but we also chose to insulate the area beneath the decking to make it more comfortable to stay in
This isn’t the only way to create a foundation for a summerhouse. The reason I decided to do it this way is it is cost effective and within our skill sets. Many prefer to make a more solid concrete foundation similar to buildings with a concrete slab to increase longevity. Whatever you decide is the best foundation for you. It is really important to take time at this stage to get it right or the entire build will be compromised
- See also: Garden room ideas - 23 modern designs for gardens of all sizes and budgets
How to build a summer house: Studwork
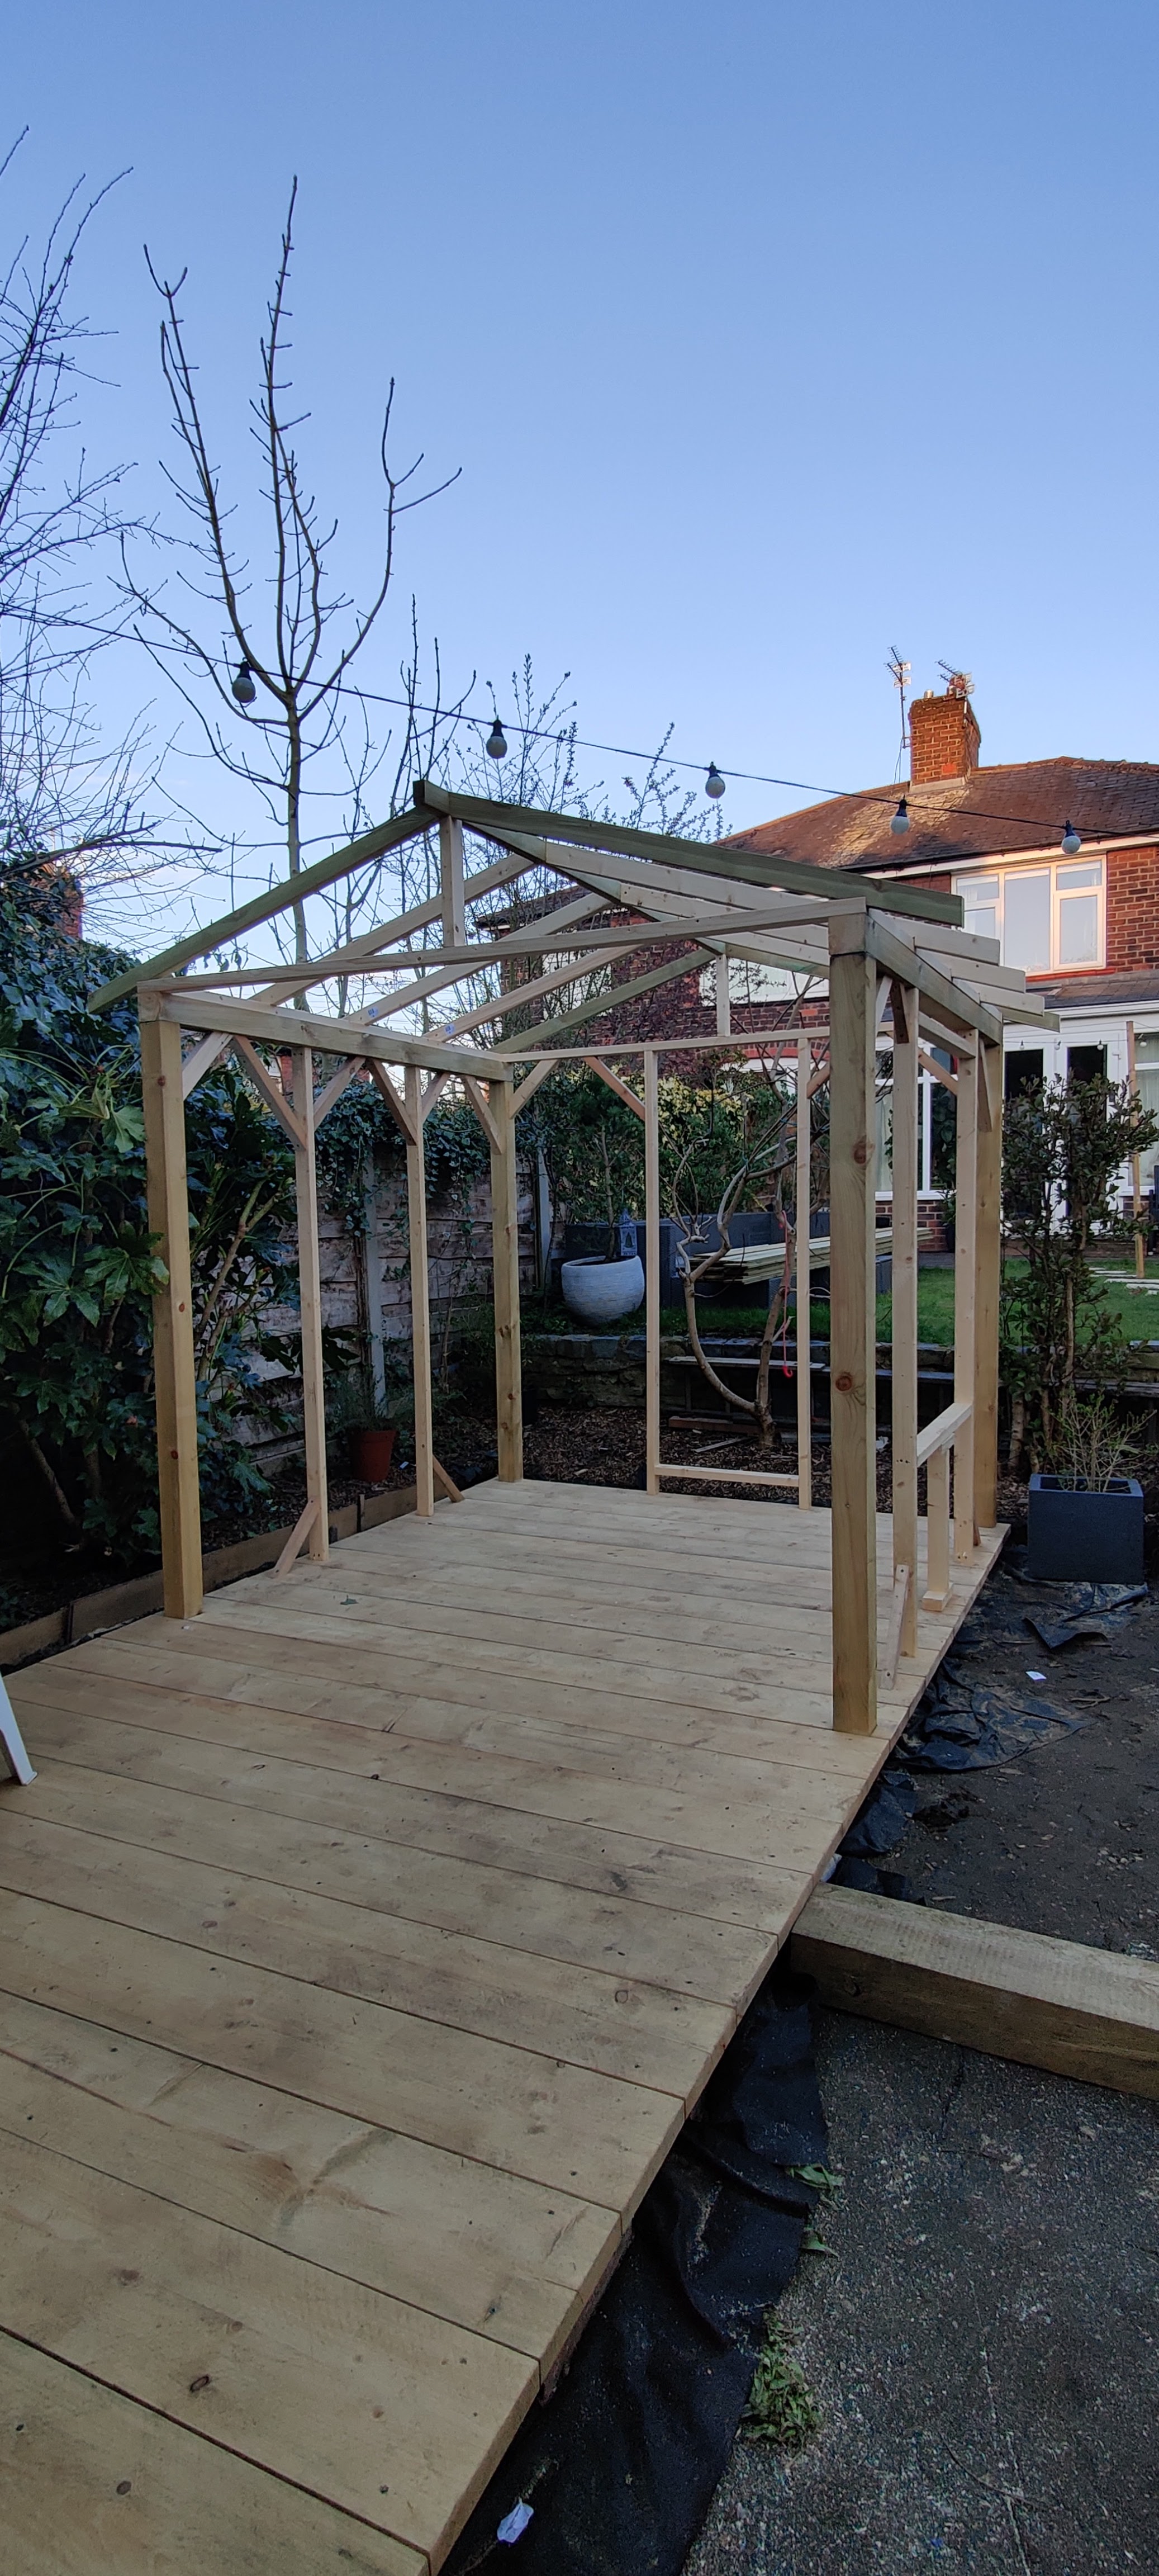
We built the walls and supporting structures out of pressure treated timber struts similar to how a stud wall in a house would be done. The roof and walls are made out of light weight materials and so we didn’t need anything too heavy weight and so used 2.4 metre lengths of C16 38mm x 68mm studs.
To slightly increase the height for doorways and windows I also placed another 100mm x 100mm post on top of the foundations posts which greatly increased rigidity. I cut each stud made to measure to between the floor and the top interconnecting timber. Make sure you leave space for your doors and windows in the desired location.
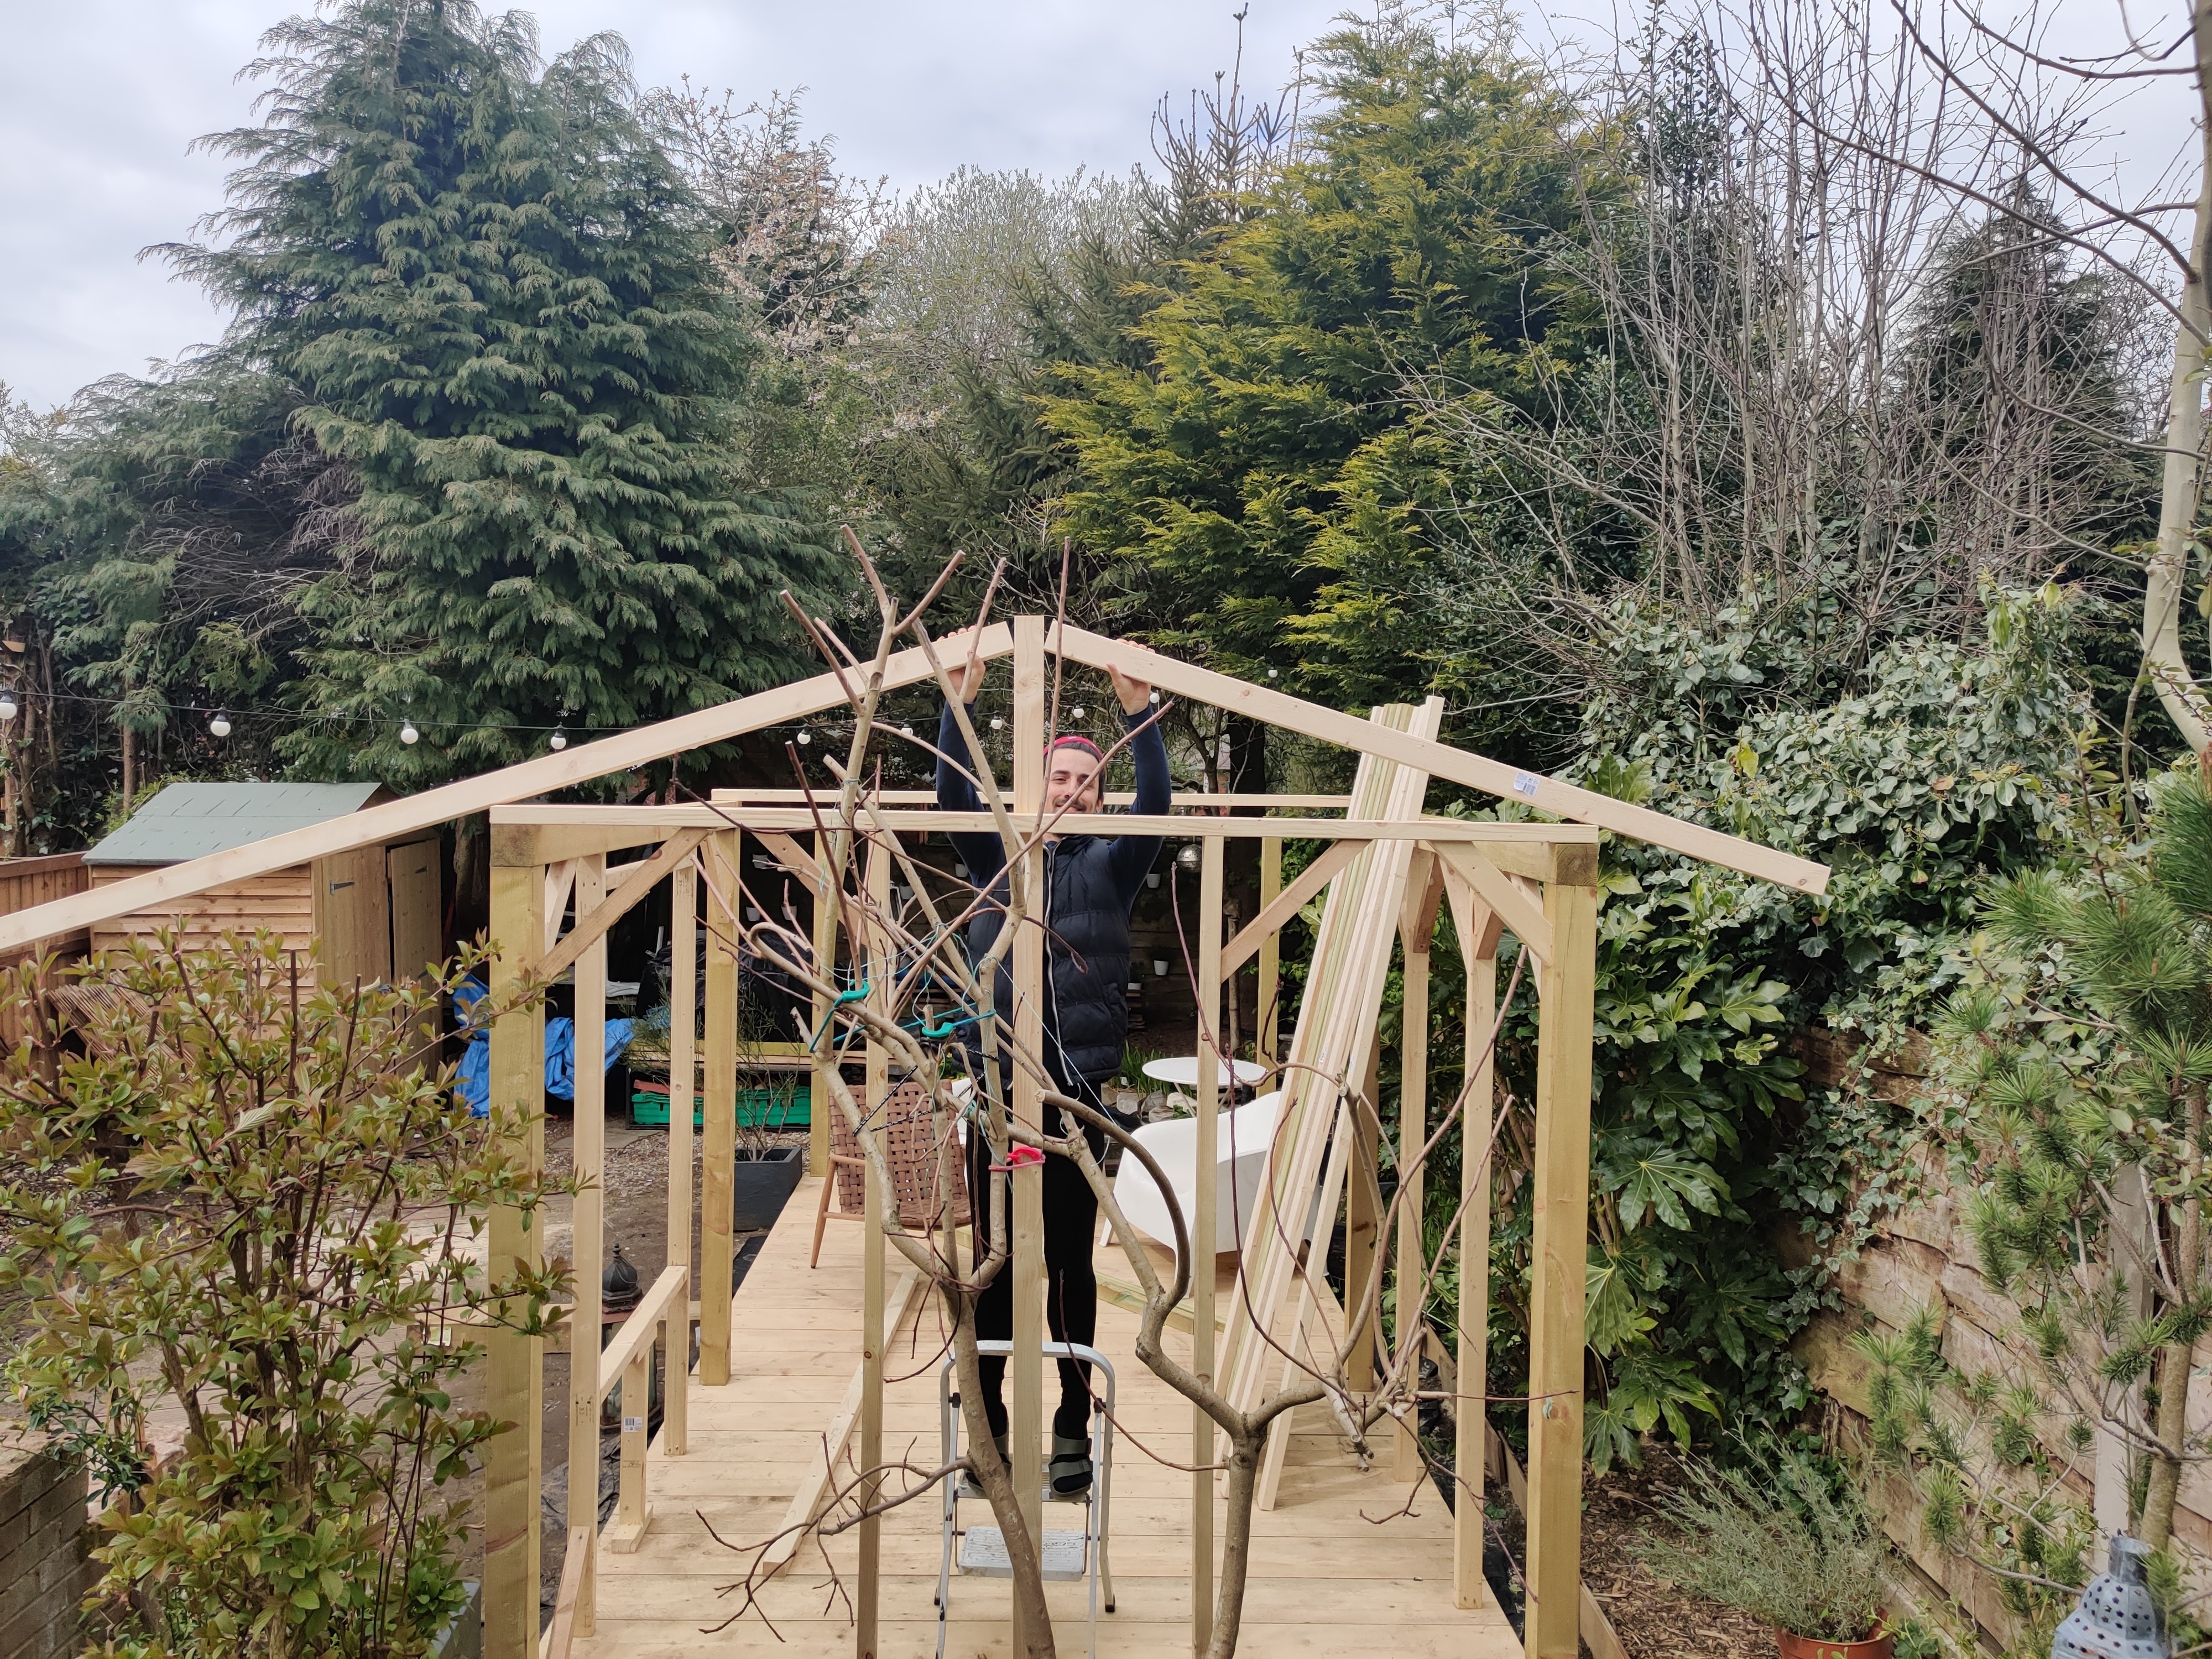
To improve rigidity for the structure we added supports between the vertical and horizontals sections of the studwork. With each piece added to get tell the structure is getting stronger, the more you can add the stronger the structure will be. As an extra step we also treated the timber with a wood preserver that gives it added water protection but not always necessary.
How to build a summer house: Doors & windows
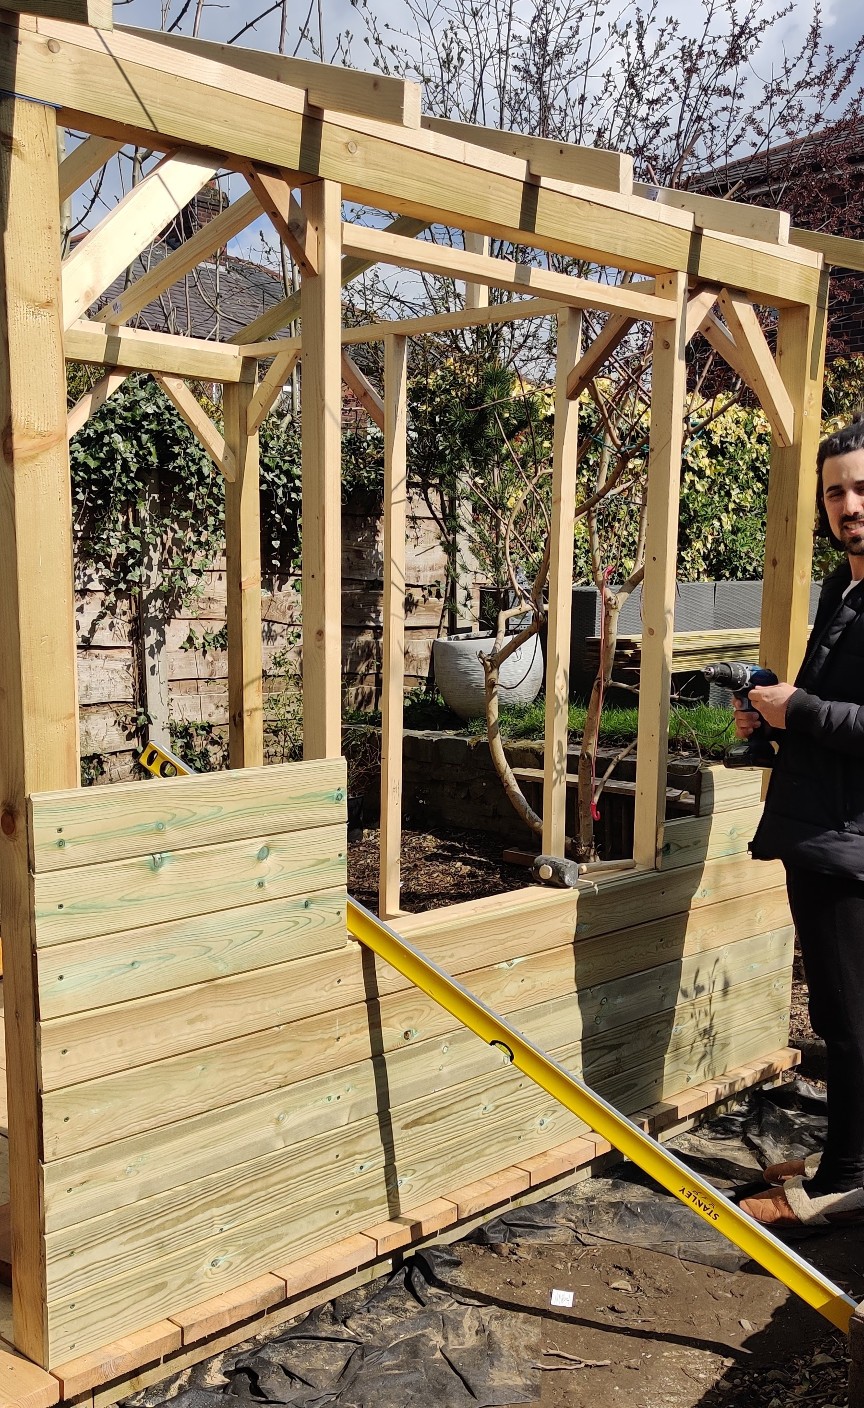
This was an opportunity for us to save some money by sourcing our doors & windows from second hand sites. We managed to get double doors and 2 large windows for £90. There are a lot out there to grab for free, we did get one of our windows for free but as we were after something specific we spend where we felt we had to. Studwork frames were build with the specific dimensions for each window centres to each wall.
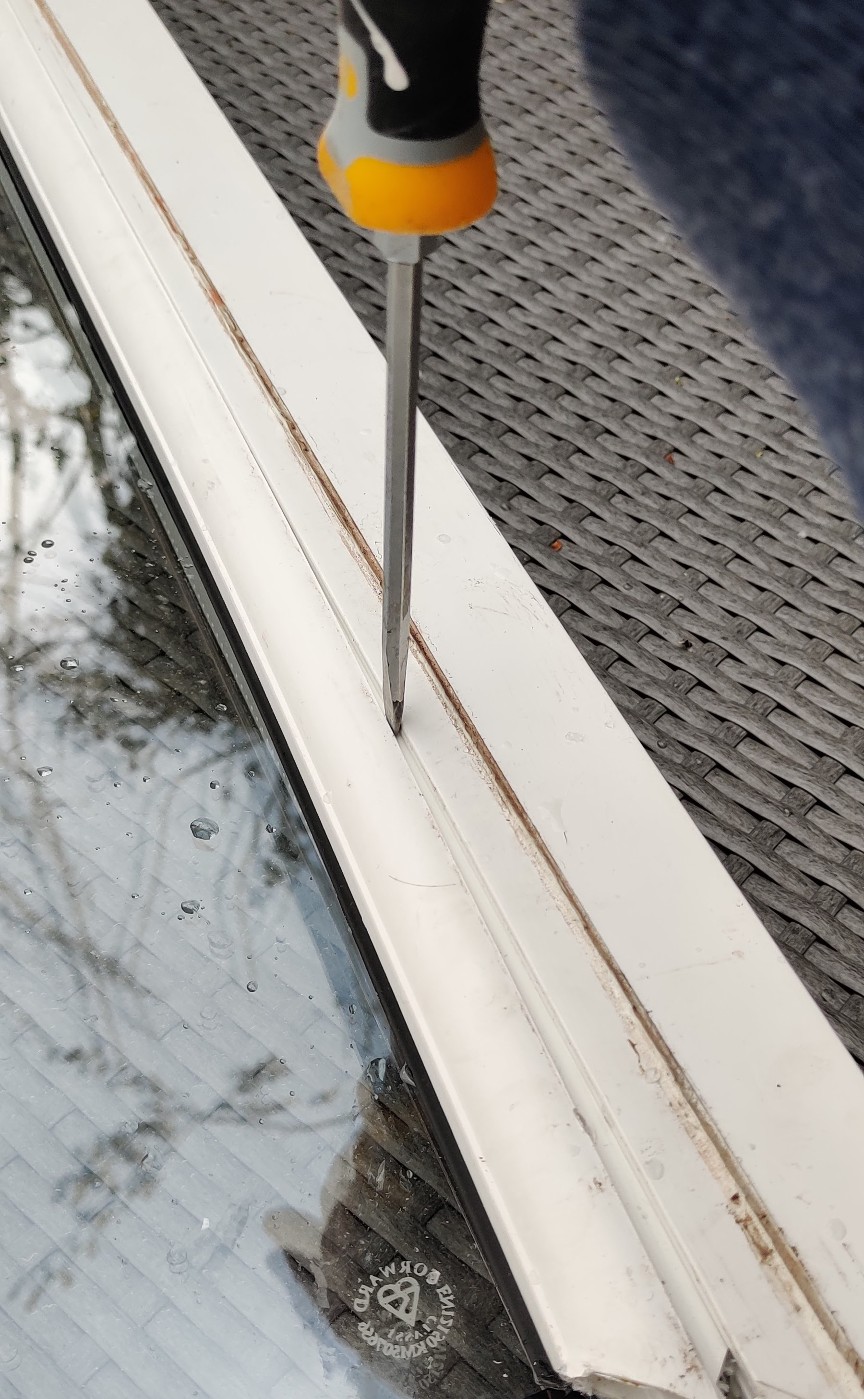
We decided to remove the glazing from the upvc frame for atheistic reasons but certainly not necessary. This is pretty simple to do by removing the beading on the frames using a flat tool to free up the glass. This mean we ha to make our own frames which we did using plywood. To do this, the opening on the stud work was made 20mm larger on each side than the size of the glazing.
The studwork frame was lined using 18mm plywood which the glazing was placed into. Smaller strips of plywood beading was added to secure the window in place, I screwed the lining and beading together to ensure strength but this could be glued also. To make sure it is watertight I applied silicone where the beading meets the window and waterproofing treatment was applied to the beading.
How to build a summer house: Walls
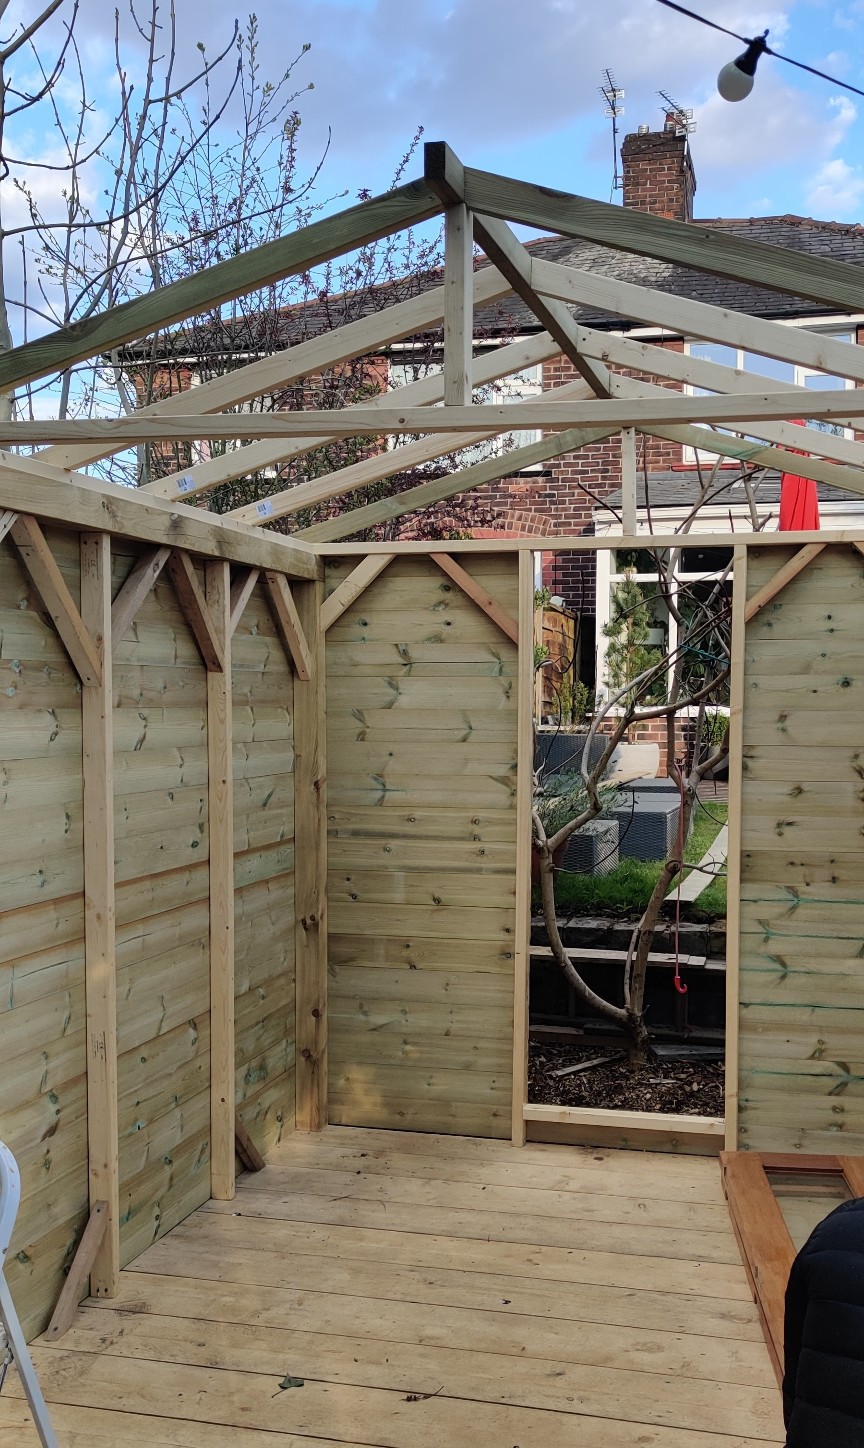
When the studwork, windows and doors were complete we added the external wall. Again, there is an abundance of choice for method and materials to do this. We chose to use a tongue & grove wooden cladding to go with the cabin in the woods aesthetic. This for us was the single biggest expense but we got a good price from a local timber yard. To calculate the amount you need measure the area of each wall (width x height) and remove the area of any windows and doors. Tip: We ordered 10 percent extra for cutting and wastage.
When the cladding was delivered it was slightly wet so we left it out to dry in some good weather. This is really important to do as timber will expand when wet. We unfortunately learnt this the hard way as we eagerly put up some cladding while it was still damp which eventually contracted leaving gaps. Having to remove all said cladding and refit it was not the most fun job so please avoid. To secure the cladding we used outdoor decking screws, nails can be used which are cheaper but in the end we were glad of the screws when we had to refit the shrunken boards. To finish the external walls we have painted them black and added uPVC angles on the edges.
How to build a summer house: The roof
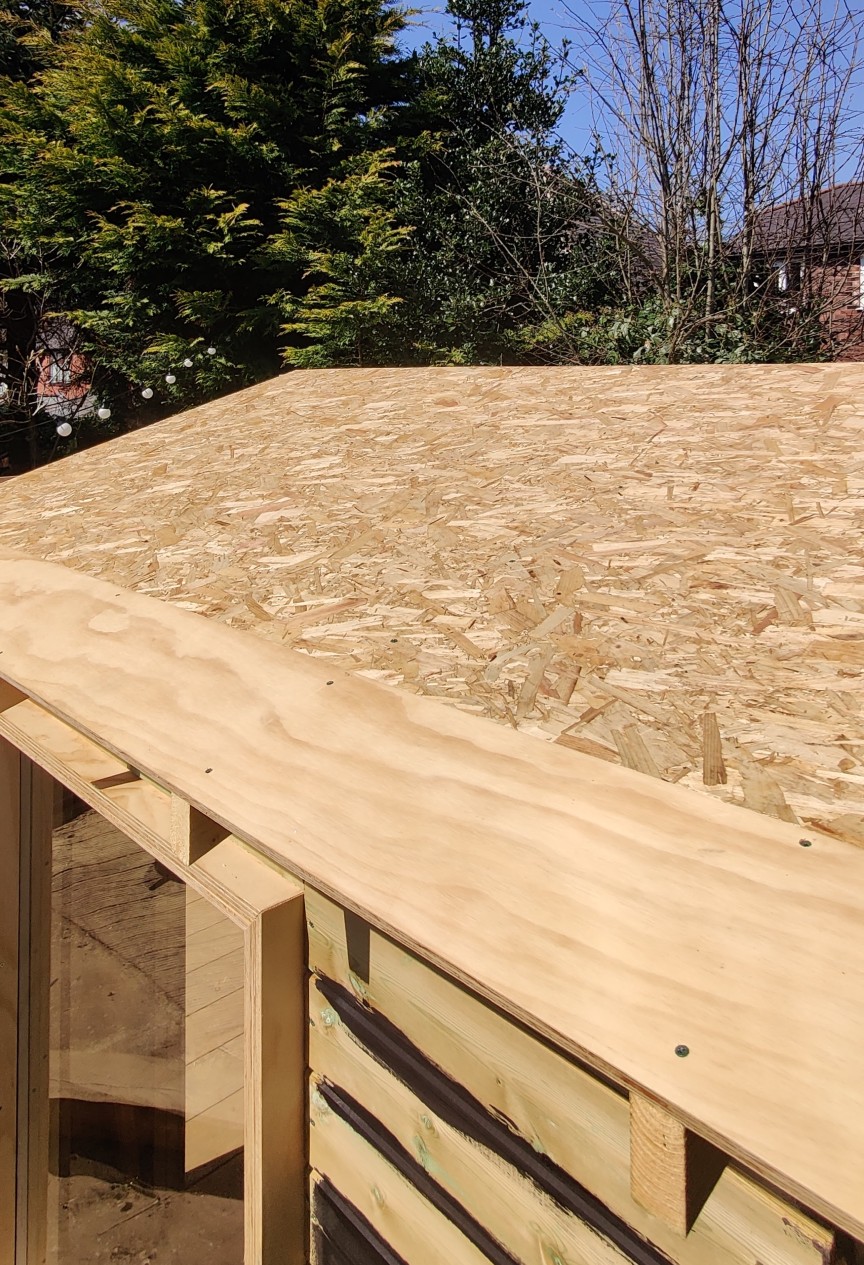
This for us was the trickiest part. The walls are pretty straightforward as they are at right angle to each other but the roof meets at an apex. We wanted a peaked roof which meant having to calculate the correct angle so not to go over the 2.5 metre rule next to our boundary.
There are a lot of guides that can be found online but we decided to go with a 20-degree pitch. I cut the C16 timber at 20-degree angles using a table saw. The roof trusts have been sized to extend past the walls on each side which will help make the walls watertight. Each roof thrust connects to a central column, and my recommendation is to do one first to check you are happy with the angles you have cut before starting on the others.
When all the roof thrusts where installed we put osb board on top and screwed in place. To keep costs low we used rolls of felt glued to the osb board and used felt nails to wrap around the edges and secure to the underside. We used some wooden facia boards that we treated with preserver to tidy up the edges of the roof. For a simpler roof you could choose to a sloped or flat roof but this is down to preference and the span of your room.
You will need two people to build the roof safely. Please don’t underestimate the danger in working at height, I learned the hard way by having to take a trip to A&E after a scary fall from a ladder. Luckily a couple of weeks rest was enough for me to recover so please stay safe.
Costs to build a summer house
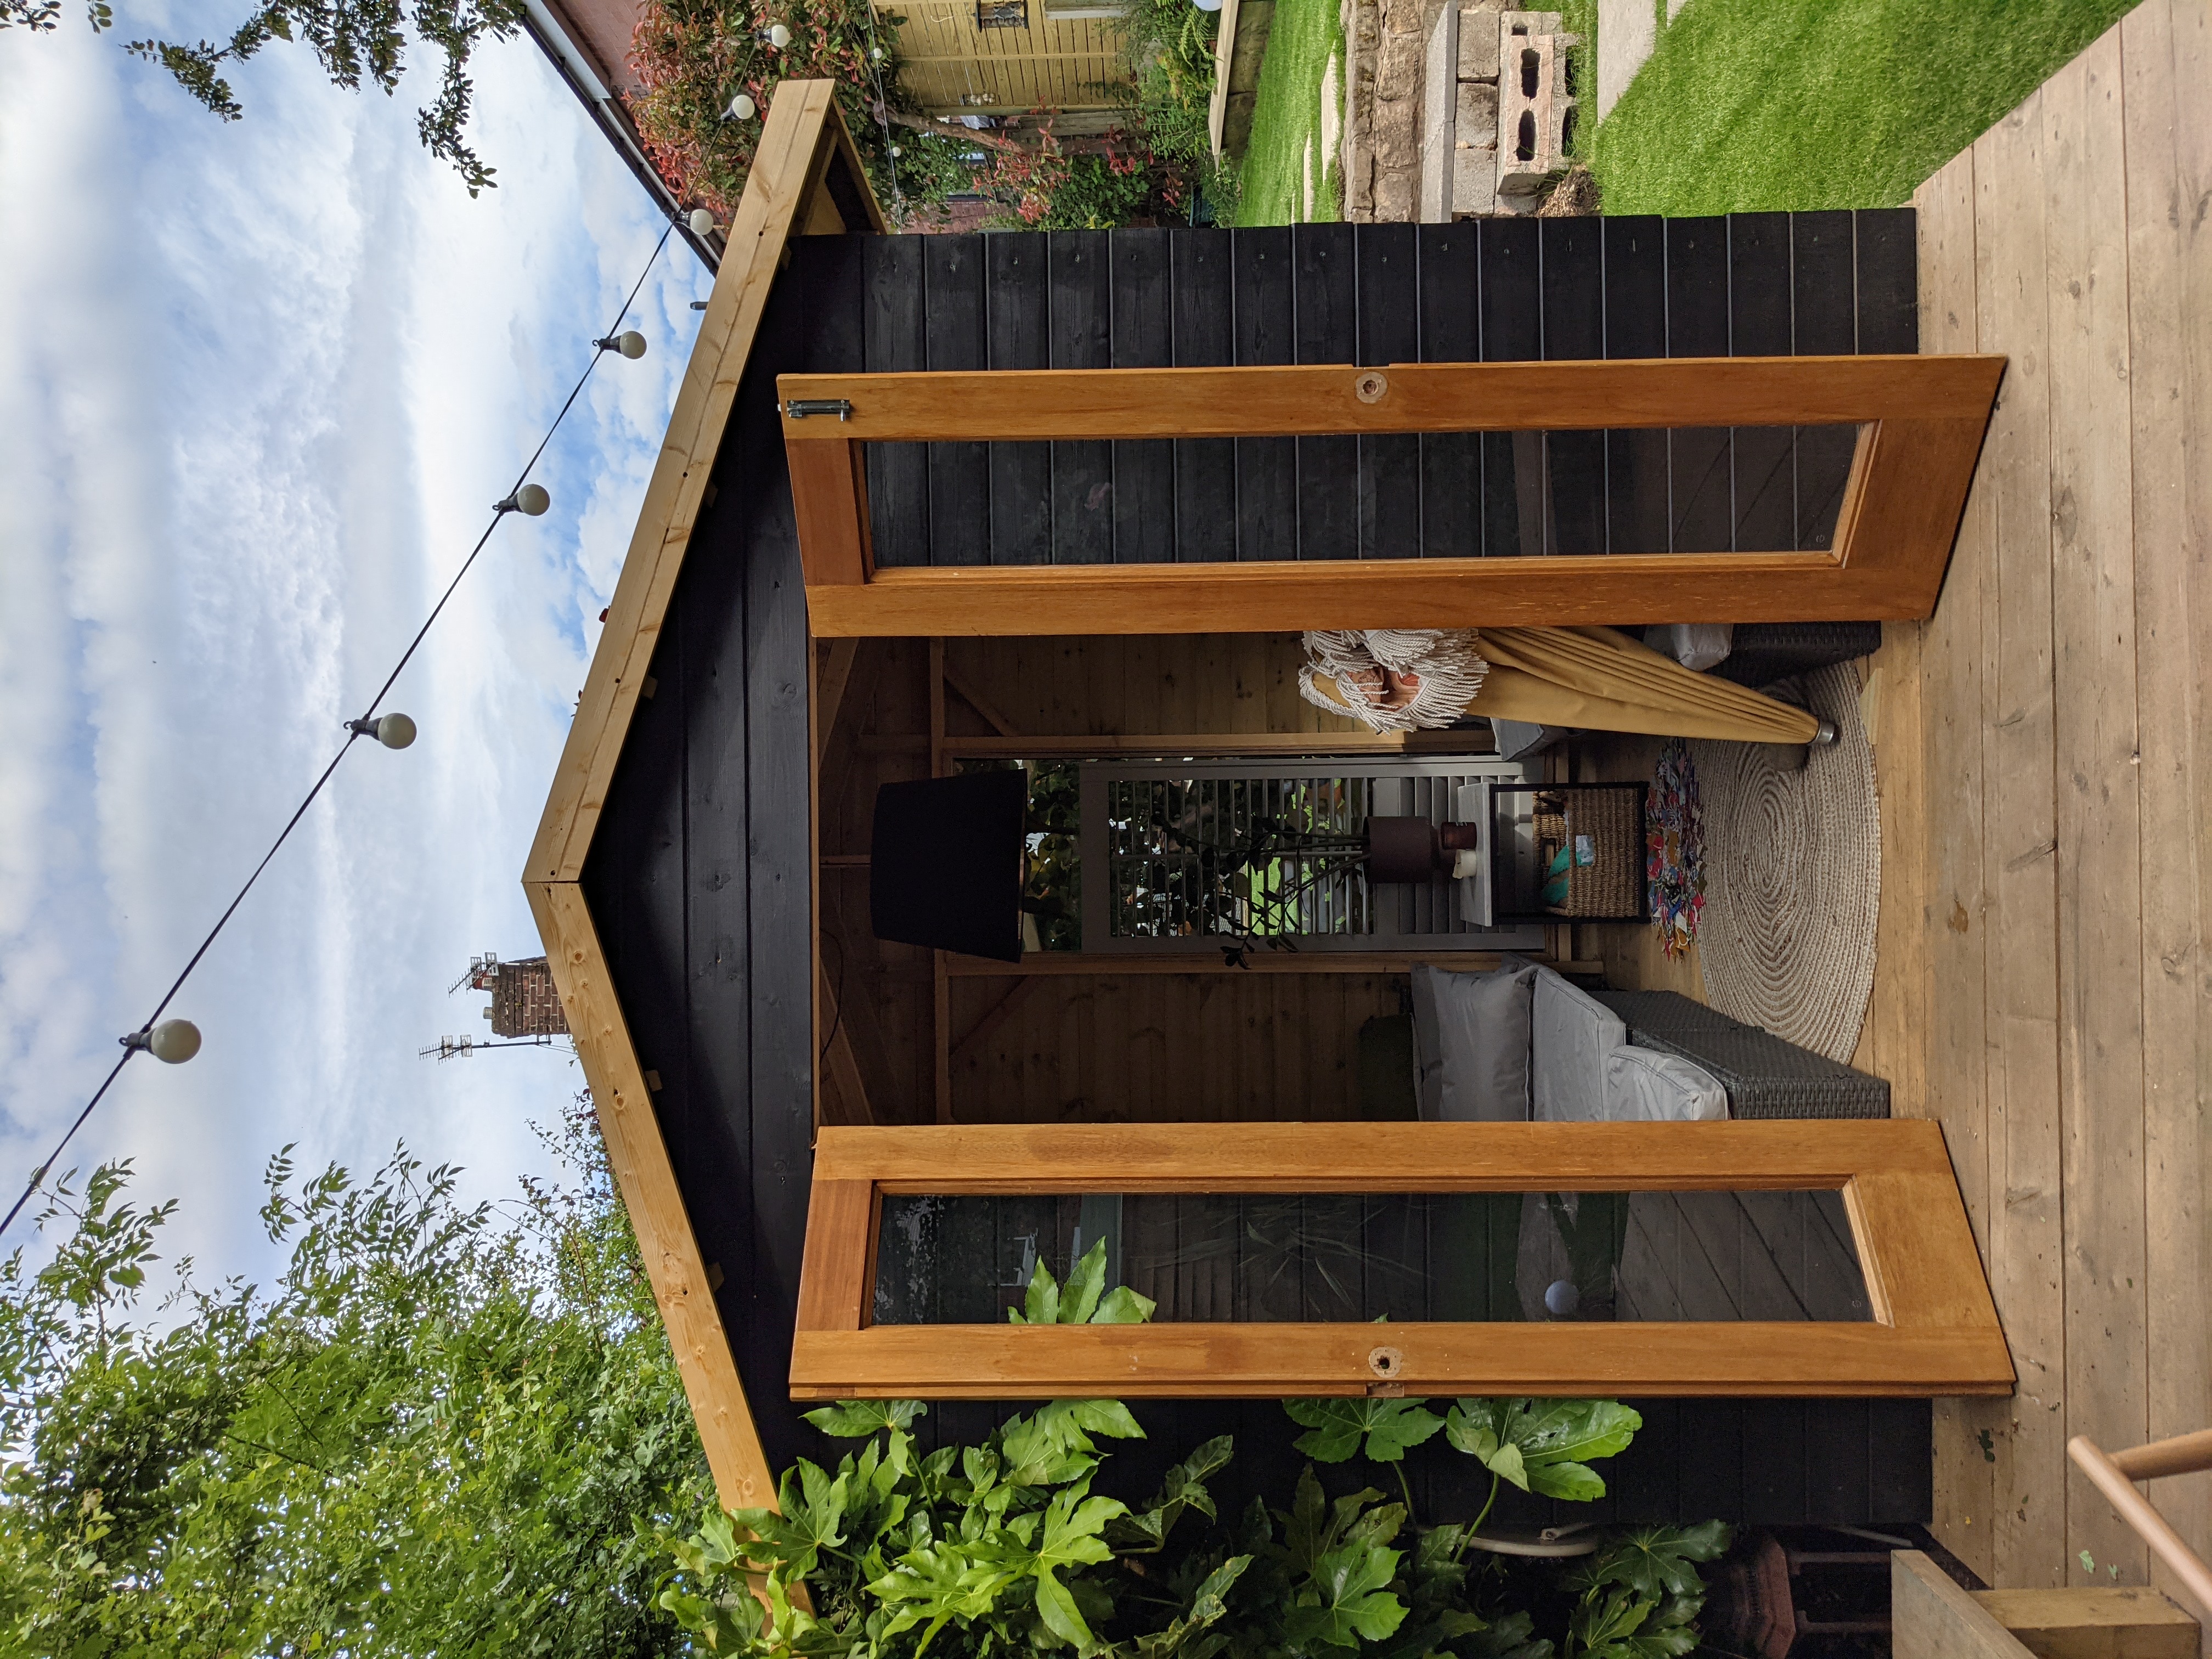

For the decking (with veranda) has come to £1200 for the structure and exterior. We are so happy with the end result and it was a fun project for us. We do have plans to insulate the walls and line the inner walls with plywood so we can use it throughout the year but for now we will just enjoy the summer.
About the expert
Jo Lemos is a DIYer and decorator who chronicles his projects on the popular Instagram account @two.men.and.a.semi. His DIY obsession began in childhood, when he used to help his parents redecorate the family house. Since then, he’s been developing his DIY skills for two decades, culminating in a full renovation of his current house alongside his partner, Chris. Currently the duo is restoring a 1930s semi-detached house in Manchester that had been badly renovated throughout the years. For Jo, sustainable and budget friendly design is the best way to renovate your house, and he considers his renovation motto to be: “Why pay someone when I can do it myself?!”
Join our newsletter
Get small space home decor ideas, celeb inspiration, DIY tips and more, straight to your inbox!
Jo Lemos is a DIYer and decorator who chronicles his projects on the popular Instagram account @two.men.and.a.semi. His DIY obsession began in childhood, when he used to help his parents redecorate the family house. Since then, he’s been developing his DIY skills for two decades, culminating in a full renovation of his current house alongside his partner, Chris. Currently the duo is restoring a 1930s semi-detached house in Manchester that had been badly renovated throughout the years. For Jo, sustainable and budget friendly design is the best way to renovate your house, and he considers his renovation motto to be: “Why pay someone when I can do it myself?!”
-
 The 7 flowers to plant in August, according to gardening gurus
Knowing what flowers to plant in August isn't always so clear-cut. But that's why we called in help from pro planters — here's what they said to pot.
By Becks Shepherd Published
-
 The 7 plants to prune in August — and the 2 pieces of greenery you shouldn't touch
Wondering what plants to prune in August? We asked a gardening expert for their top tips plus info on what pieces of greenery to avoid pruning this month
By Becks Shepherd Published
-
 Do you need to deadhead azaleas? Top tips for pruning these flowering shrubs
Wondering whether you need to deadhead azaleas? We asked a gardening expert for their top tips for looking after these blooms
By Becks Shepherd Published
-
 14 lawn edging ideas that will add definition and style to your backyard
Want to neaten up your lawn with lawn edging ideas? From fresh flowers to laidback bricks, we've scouted out materials and styles that look brilliant
By Eve Smallman Published
-
 Which houseplants are toxic to dogs? Vet experts pinpoint problem plants and solutions
Wondering Which houseplants are toxic to dogs? We spoke to vets about the problematic leafy greens, what they trigger in dogs, and how to find a solution
By Danielle Valente Published
-
 How to attract hummingbirds to your backyard, according to ornithologists
Trying to figure out How to attract hummingbirds to your backyard? These ornithologist-backed tips will guarantee you visitors in no time
By Danielle Valente Published
-
 Does hydrangea bloom every year? Pros spill the dirt on the "garden favorite" and when to expect it
Wondering, "Does hydrangea bloom every year"? We asked the pros all about the garden favorite and how often to expect them — here's the dirt.
By Danielle Valente Published
-
 What to prune in spring — experts reveal how to get a lush, full garden
Curious what to prune in spring? We asked gardening experts for their top tips for a luscious, thriving garden
By Danielle Valente Published