
DIY coffee bars certainly have their advantages. No having to get up (and put pants on) to make your coffee run... Check. No waiting in line... Love! And, no handing your name over for a handwritten typo on your coffee cup. See, having a setup at home saves you much more than money. It can cut down wait times and save the planet from paper cups with plastic lids going to landfills.
And, just like an infamous burger joint: you can have it your way. Invest in the best coffee maker your money can buy, max out on your alternative milk menu, add some tasty syrups, and hey presto, you've got a coffee that walks over the well-known brands... And you won't have to pay extra for those add-ons either!
Sure, we'll still pay a trip to our fave independents to support their business, but this solution means that you won't have to go too far when you need a hot drink in cold weather, nor will you have to sneak out early in the morning to make sure guests have something a little better than a cup of joe made with instant. And, having a designated space for your coffee machine means you can style it up to give it a chic coffeehouse aesthetic.
We've searched social media for the most luxe-looking DIY home coffee bar ideas and even tracked down where these people have purchased everything from their coffee cups to shelving, wallpapers, paints, and more.
DIY coffee bar ideas
1. Niqueea's Dollar Tree DIY coffee bar
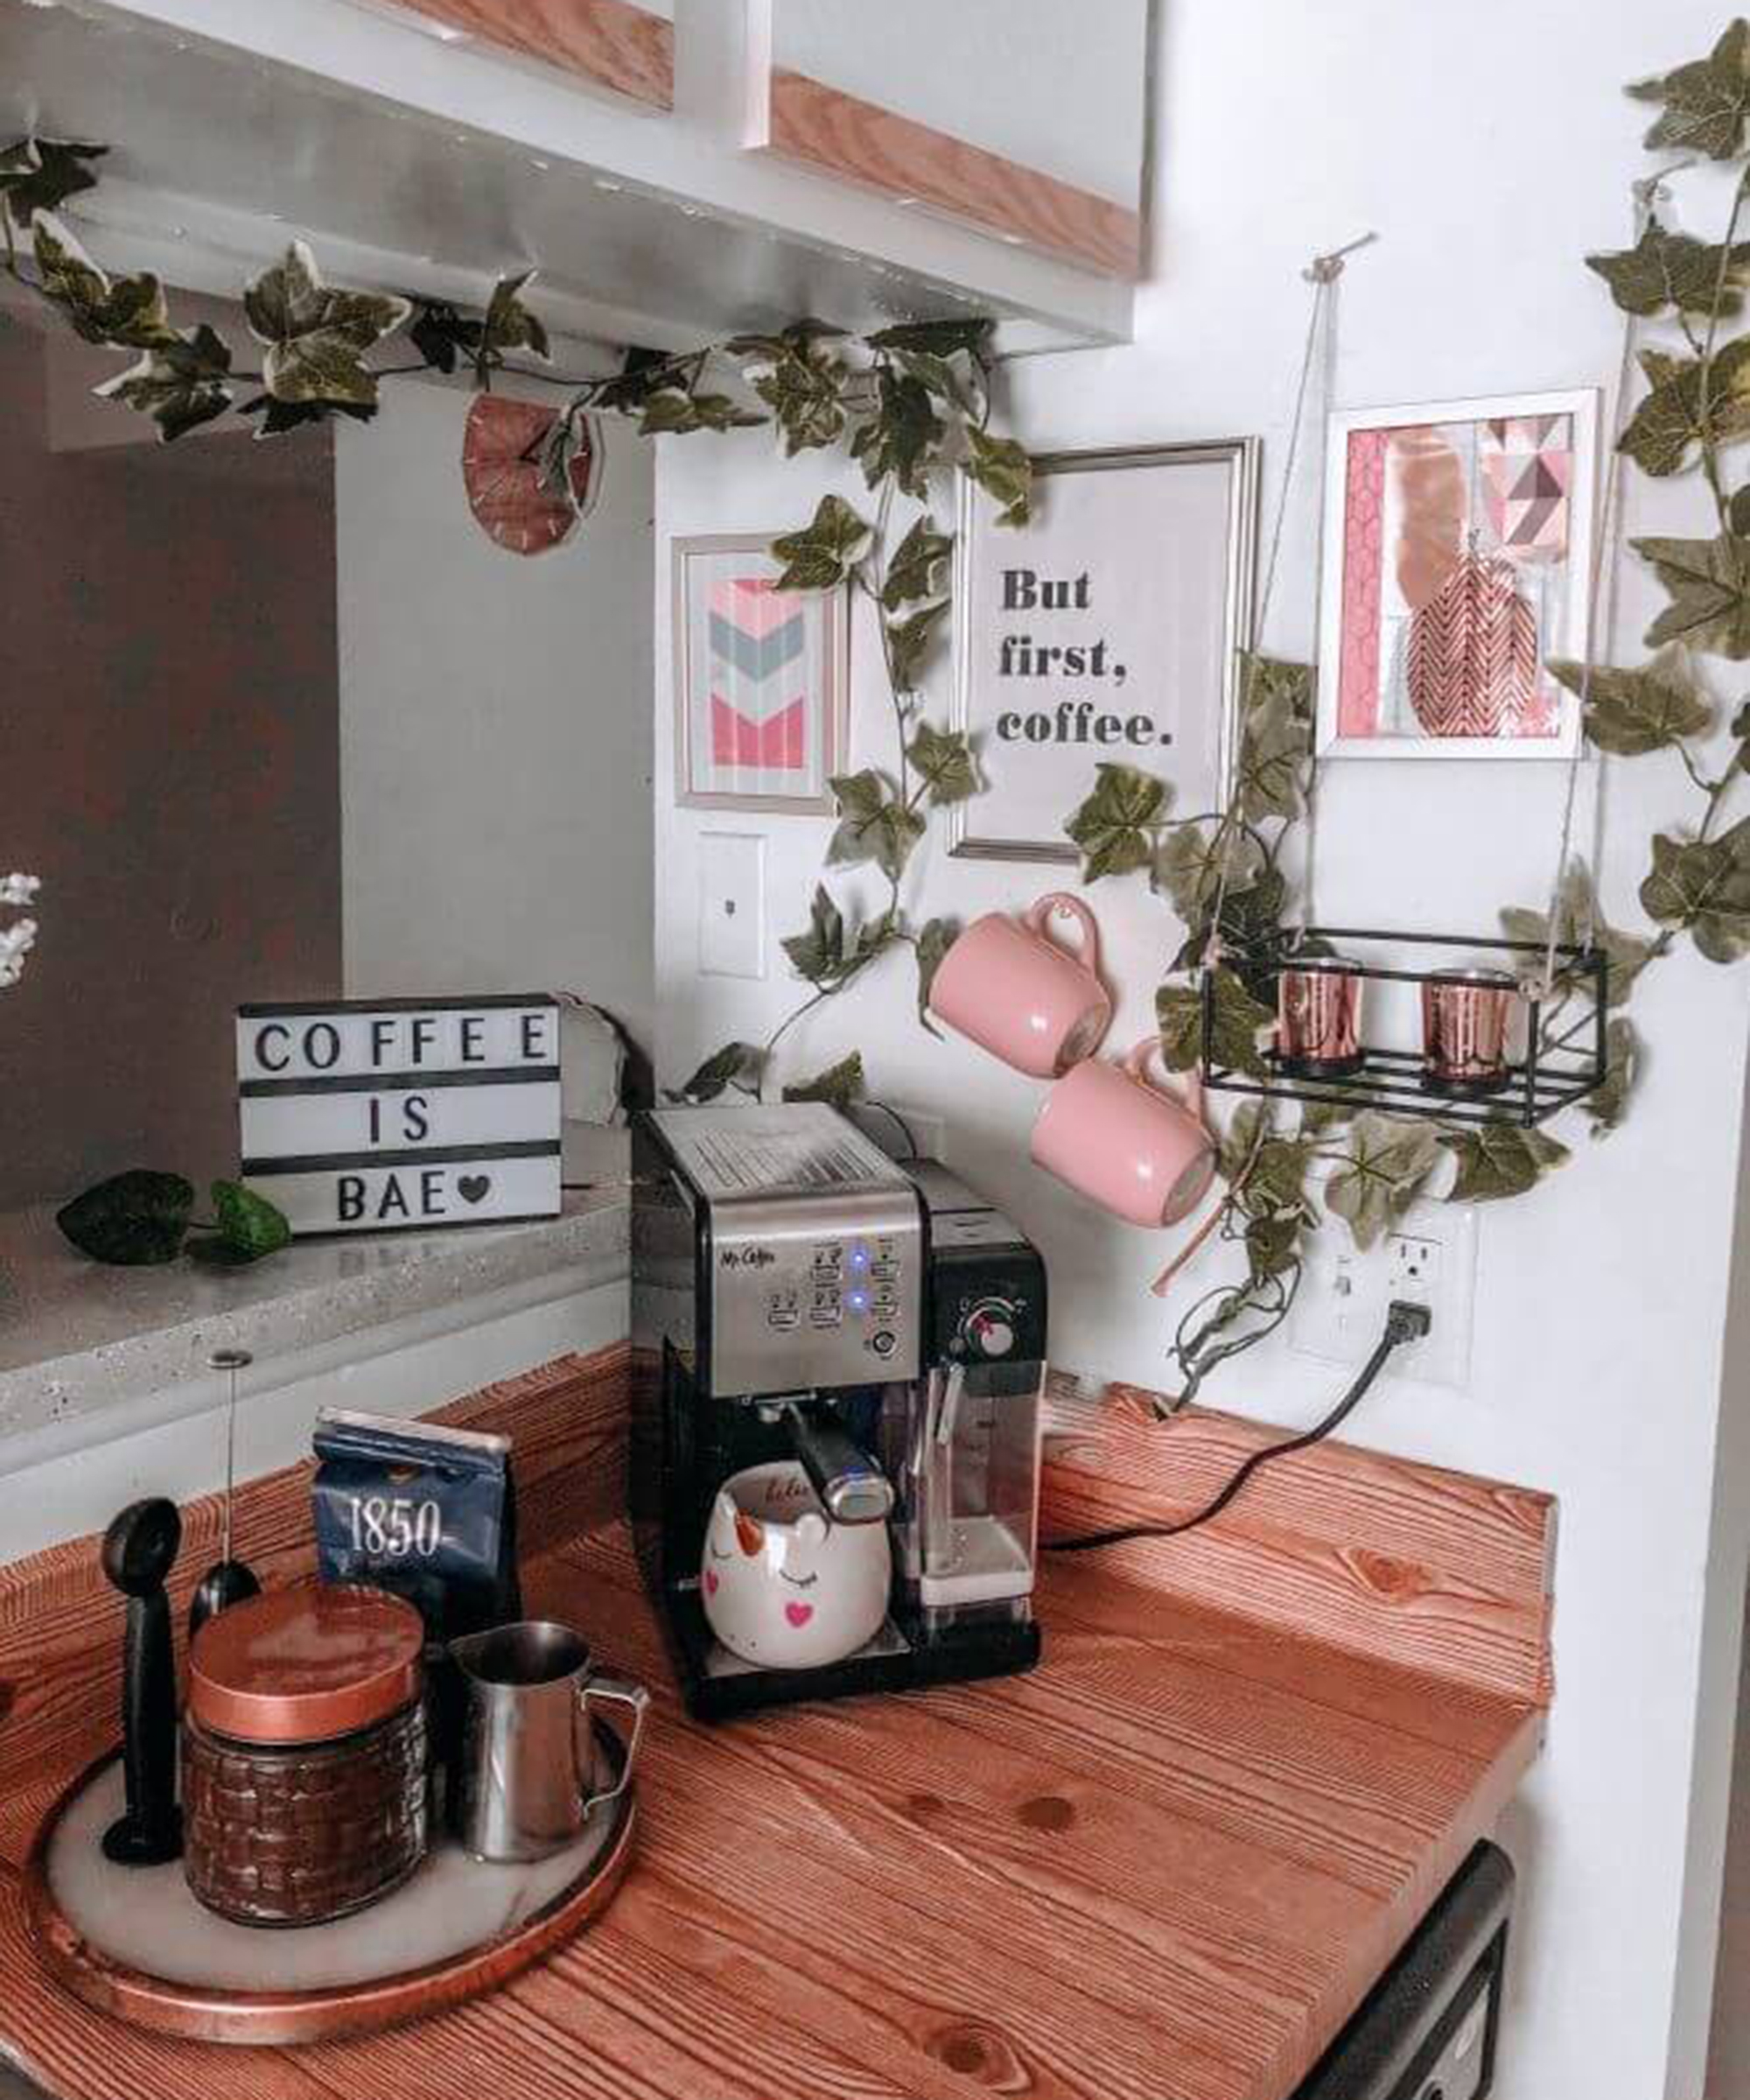
'Want to save money and make some DIY home decor fill up some kitchen counter space?' asks Niqueea Sykes aka @niqueea.s and owner of Happy Ever Poor blog.
'If you are a coffee lover like me, you’re going to love this Dollar Tree DIY! My coffee corner before I headed to the Dollar Store. It was plain jane and really had no character to it.'
However, don't panic if you haven't got this low-cost retailer nearby, as we've managed to find most of her picks on Amazon.
You will need:
- Birthday party bags (These pastel and gold ones from Amazon would look so cute!)
- Faux wooden contact paper (This one from Amazon is a great dupe)
- Faux vines with leaves (These artificial Ivy leaves from Amazon are ideal)
- Coffee mugs (These pink ceramic mugs from Amazon are similar in style)
- Picture frames (Pick some up for cheap at Amazon)
- Rose gold votives (We found something similar on Amazon)
- Thumbtacks (A 600pc set from Amazon, because you can never have too many!)
- Small wire crate
- Twine (Tie this task up with natural jute string from Amazon)
- Light-up letter board (we found this one on Amazon)
How to:
- First, Niqueela placed contact paper over her kitchen counter.
- Next, she used the picture frames and inserted them into old birthday bags that she had laying around.
- She then printed out the words “But, first coffee” onto paper and framed that as well.
- Then, she placed faux vine around the back wall area where the photos are hanging. She didn’t want it to look too neat so I left some parts hanging to look natural.
- With thumbtacks, she hung up the coffee mugs and picture frames.
- Finally, she tied the twine around the wire bin I bought and also hung that with thumbtacks. To spruce up the wire bin, she added rose-colored glass votives.
2. Amanda Tasca's wallpapered coffee bar alcove
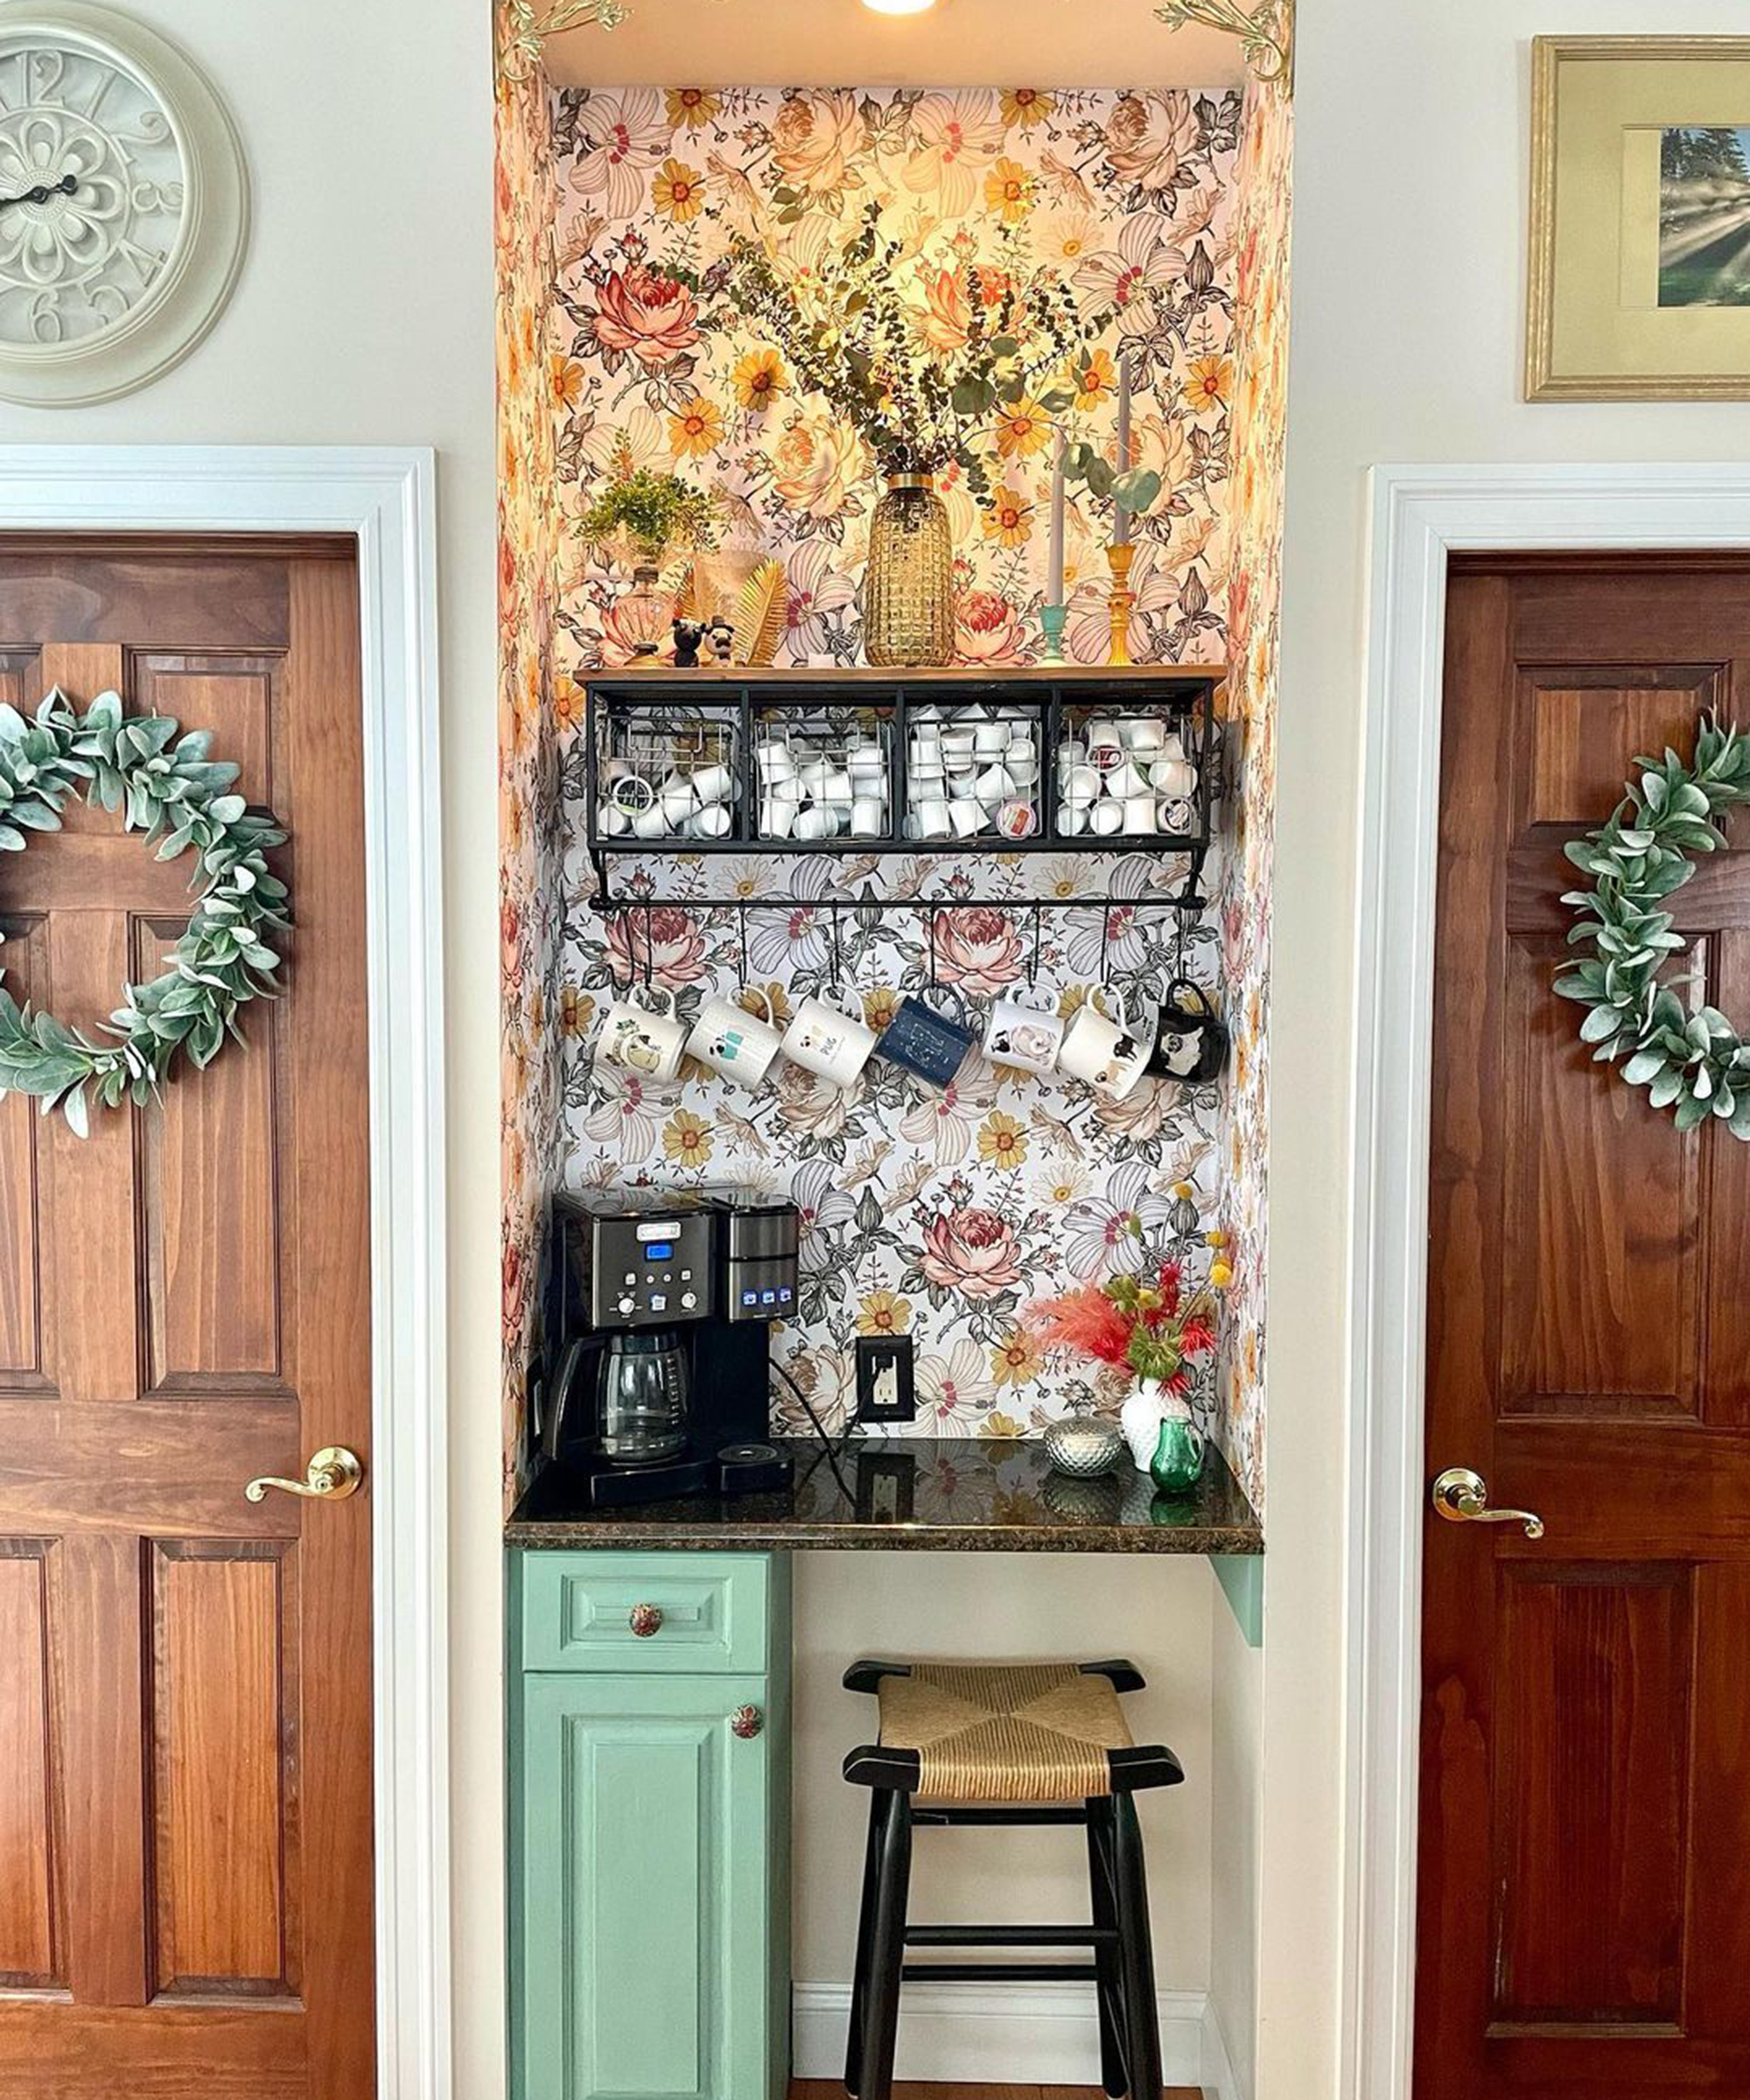
Alcoves are the perfect spot for a DIY coffee bar idea or nook. They're not too big or too small, and there's usually just enough space to squeeze in a bar stool to turn it into an intimate breakfast bar. This scheme by Amanda Tasca aka @casadetasca is the perfect spot for the best drip coffee maker.
On a scale of beginner to expert, this DIY coffee bar is a breeze. You've just got to know how to hang wallpaper a wall. Luckily we've got a whole 10-step tutorial on that.
3. Katie's jungle luxe DIY coffee bar
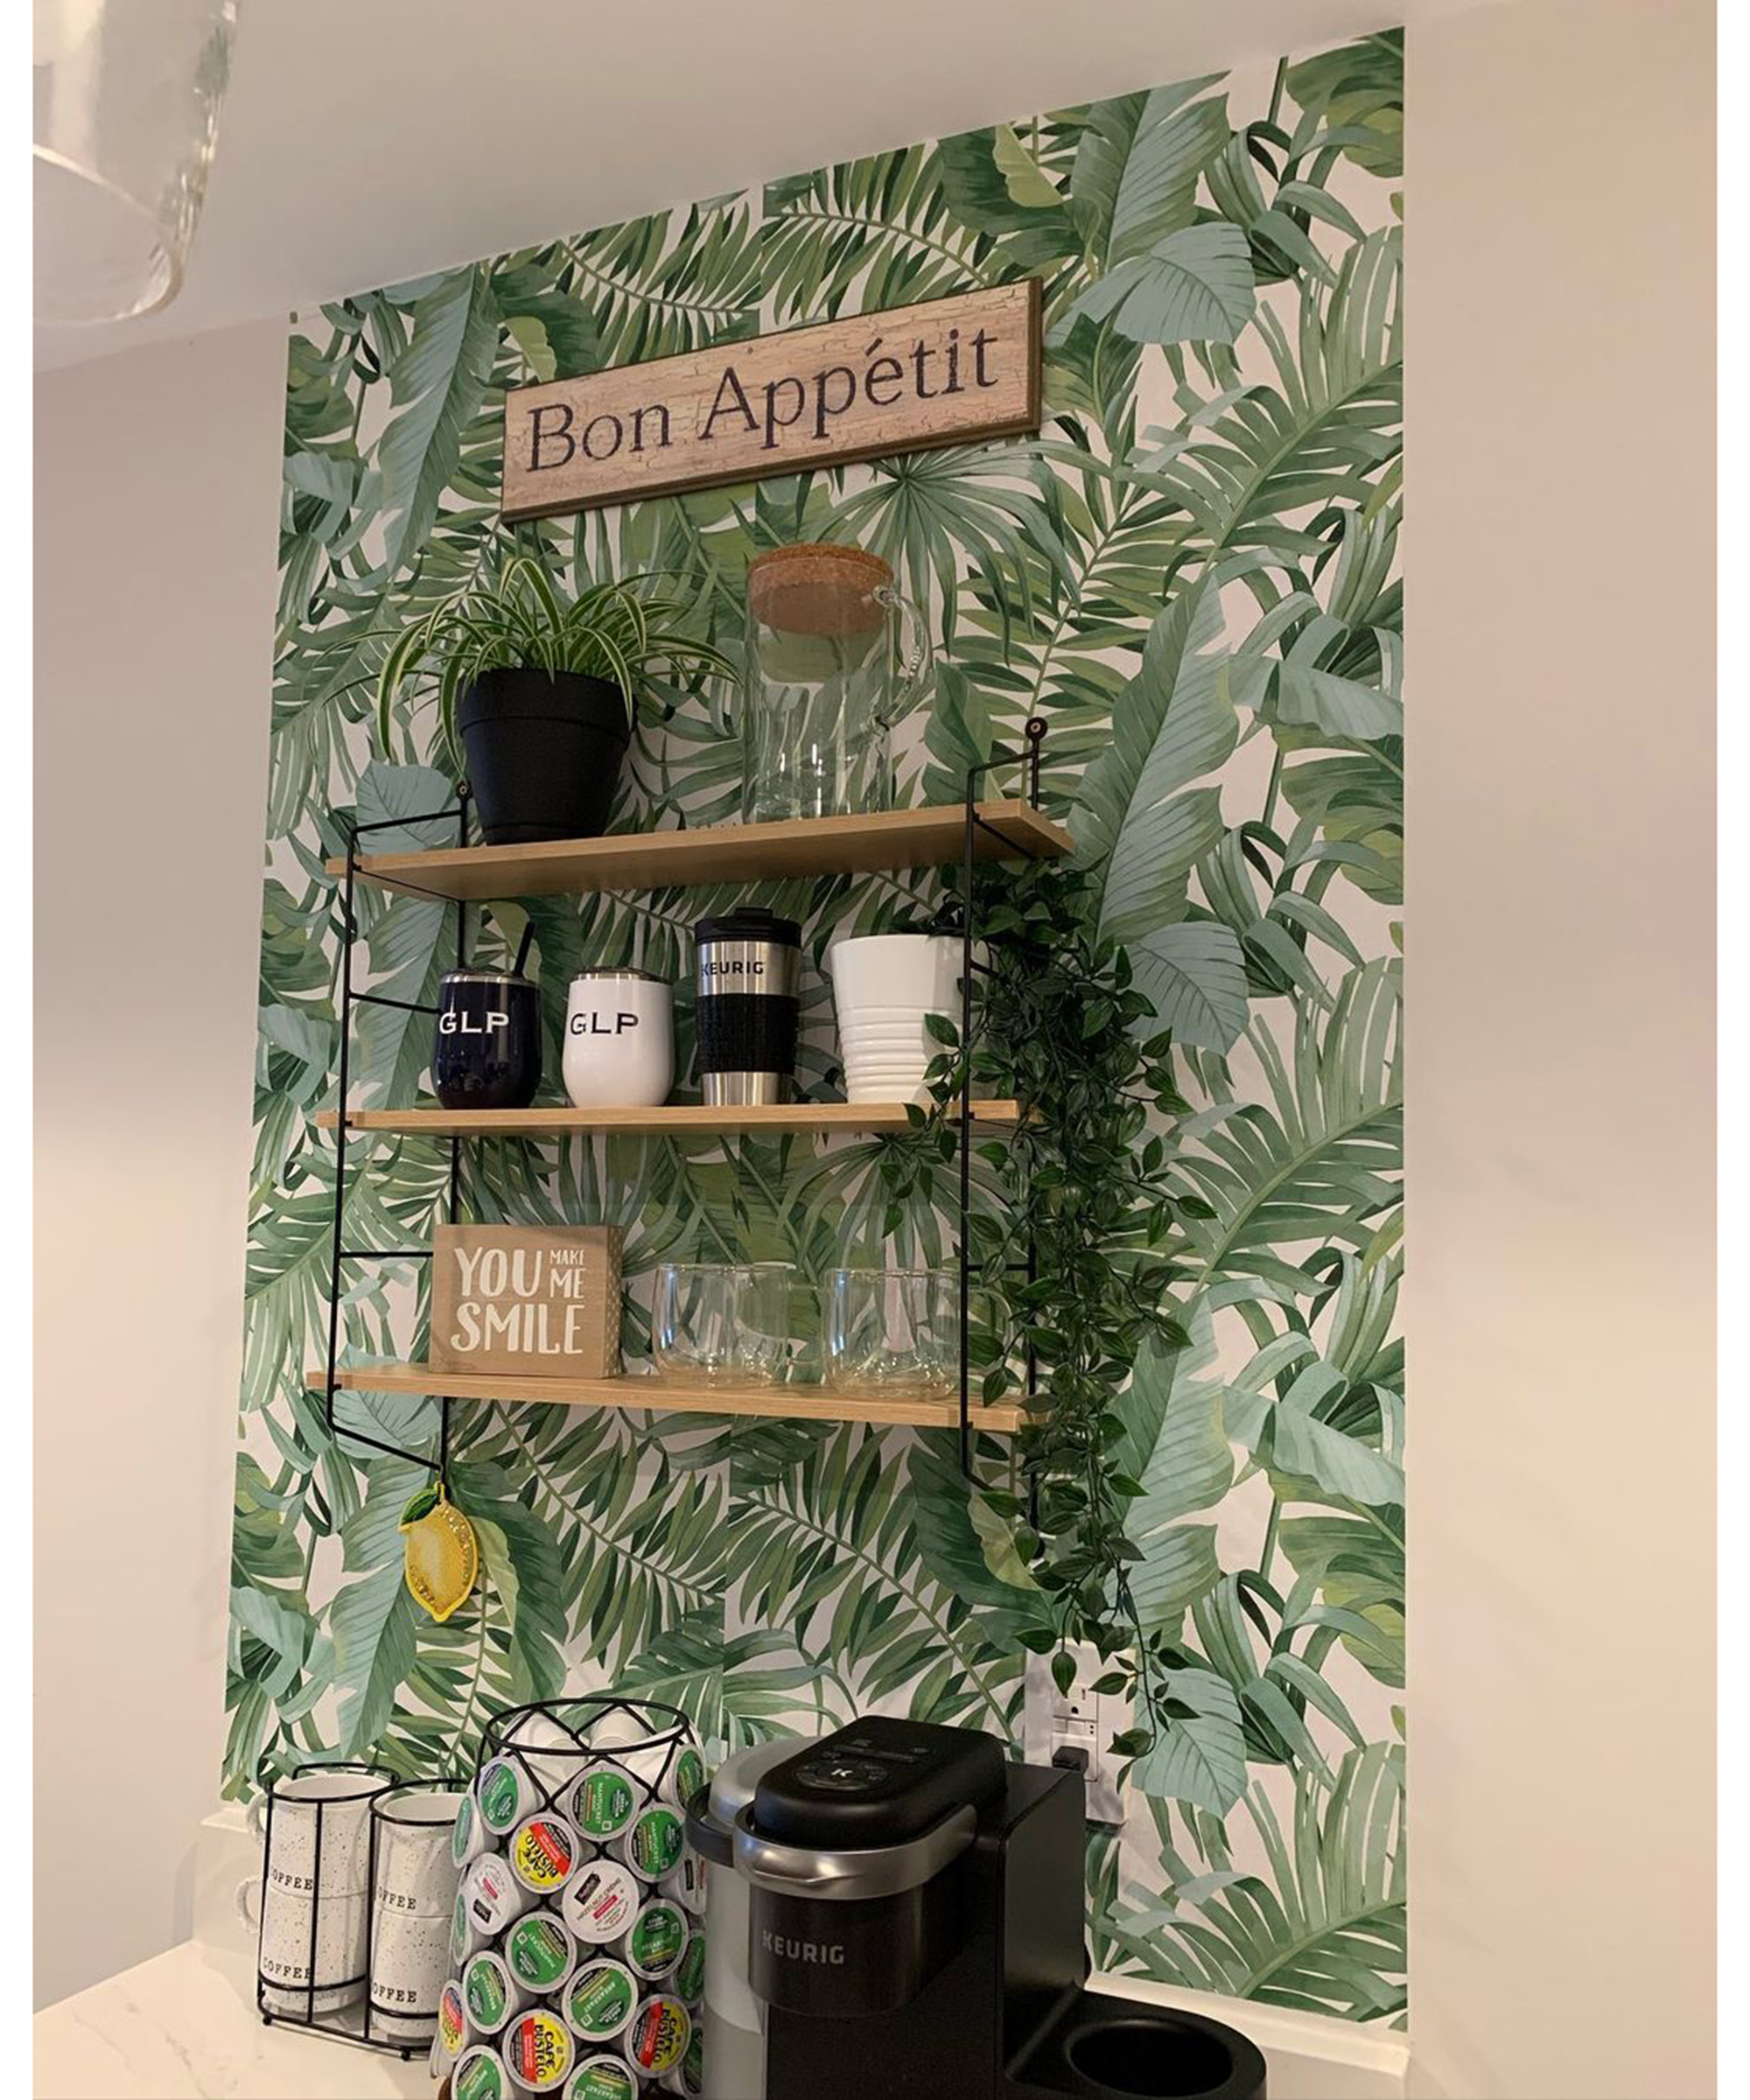
'What do you think of our new coffee bar?' asks Katie aka @_katies__kitchen__
'I got [my partner] Tyler a Keurig coffee maker for Xmas that can make lattes, shots, and cappuccinos/espresso drinks (and of course regular coffee too) - it also has a milk frother built-in. I got the shelf from Macy's and installed it myself along with the temporary wallpaper from TJ Maxx and the dangling plant is from Ikea.'
All you'll need for this do-it-yourself bar needs is a pair of scissors to cut your wallcovering to size and to know how to put up a shelf.
Shop the look:
- Palm print peel-and-stick wallpaper (This Tempaper design from Amazon is amazing!)
- 3-tier wall shelves (These Sorbus shelves from Amazon are a close match!)
- Ikea artificial plants (Find your fave FEDJKA at the Swedish store)
4. Kristy Wilson's hallway DIY coffee bar
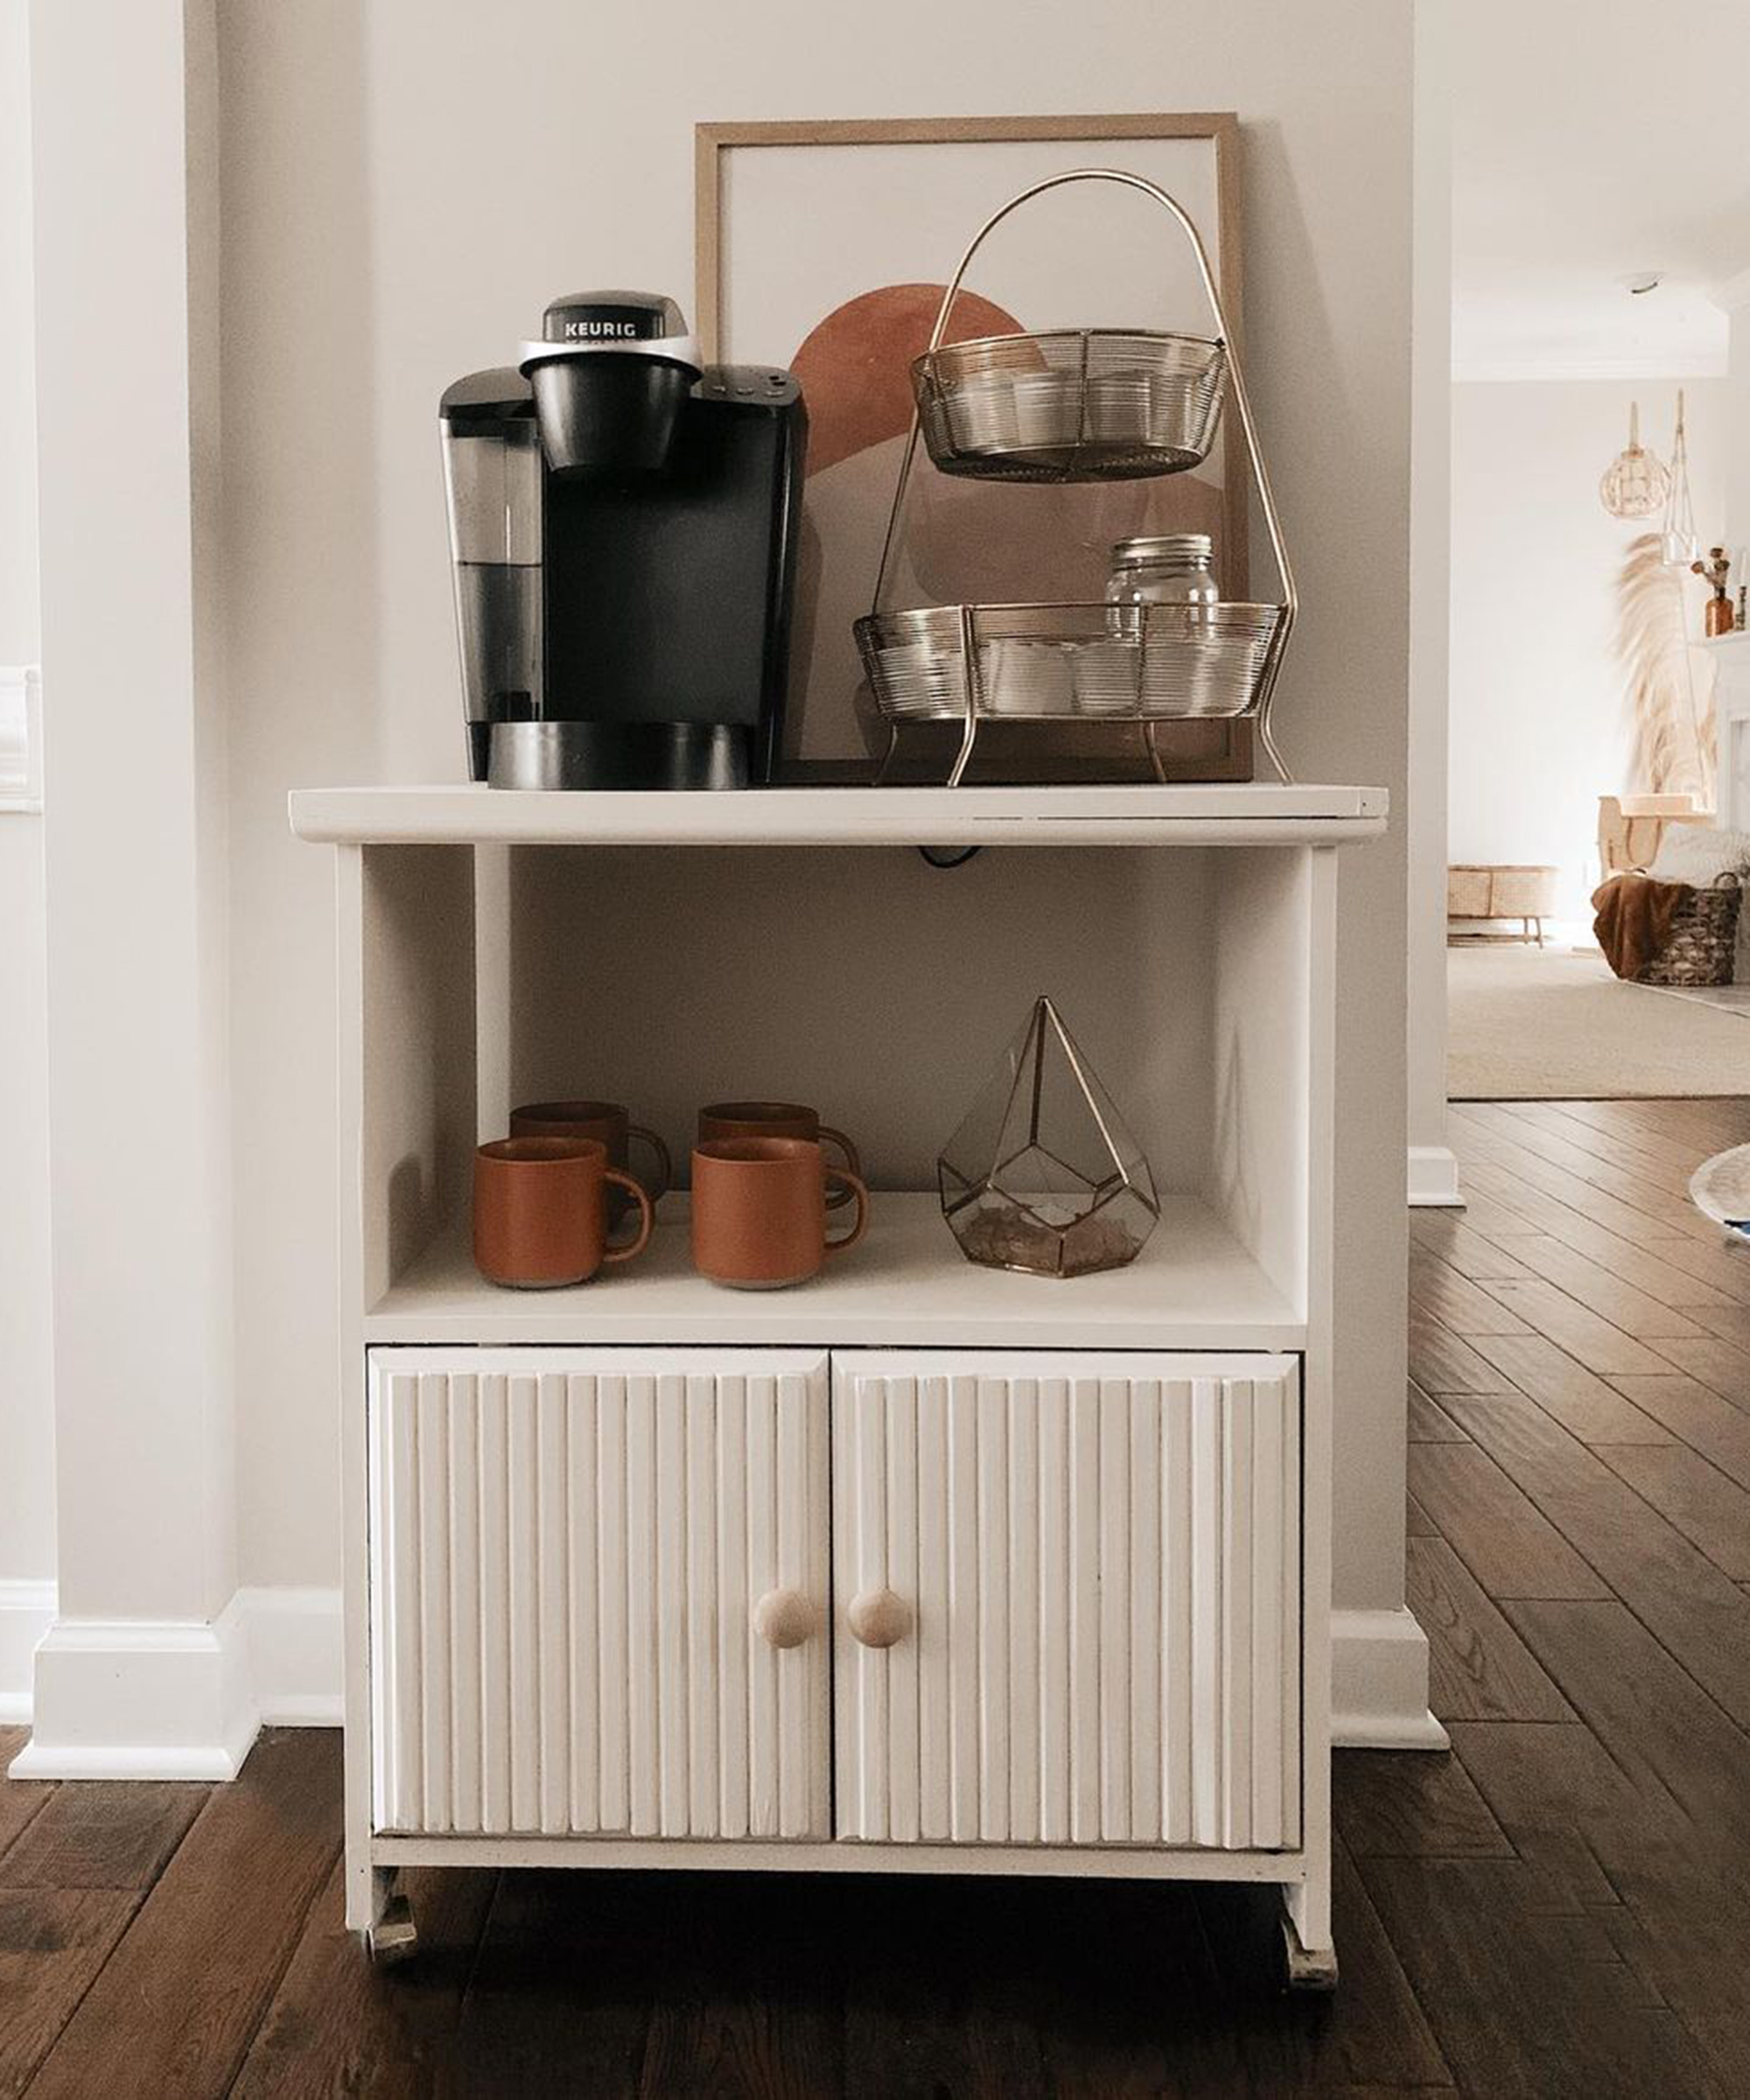
This upcycle costs just $5 to create proving DIY coffee bar ideas don't have to be expensive.
'I decided to make these cabinet doors fluted using some molding and wood glue then painted the cabinet using chalk paint. It’s perfect for our little coffee bar- I may end up adding some open shelves above it eventually.' says Kristie Wilson aka @laceandlatitude
5. Christina Eleton's farmhouse style DIY coffee bar
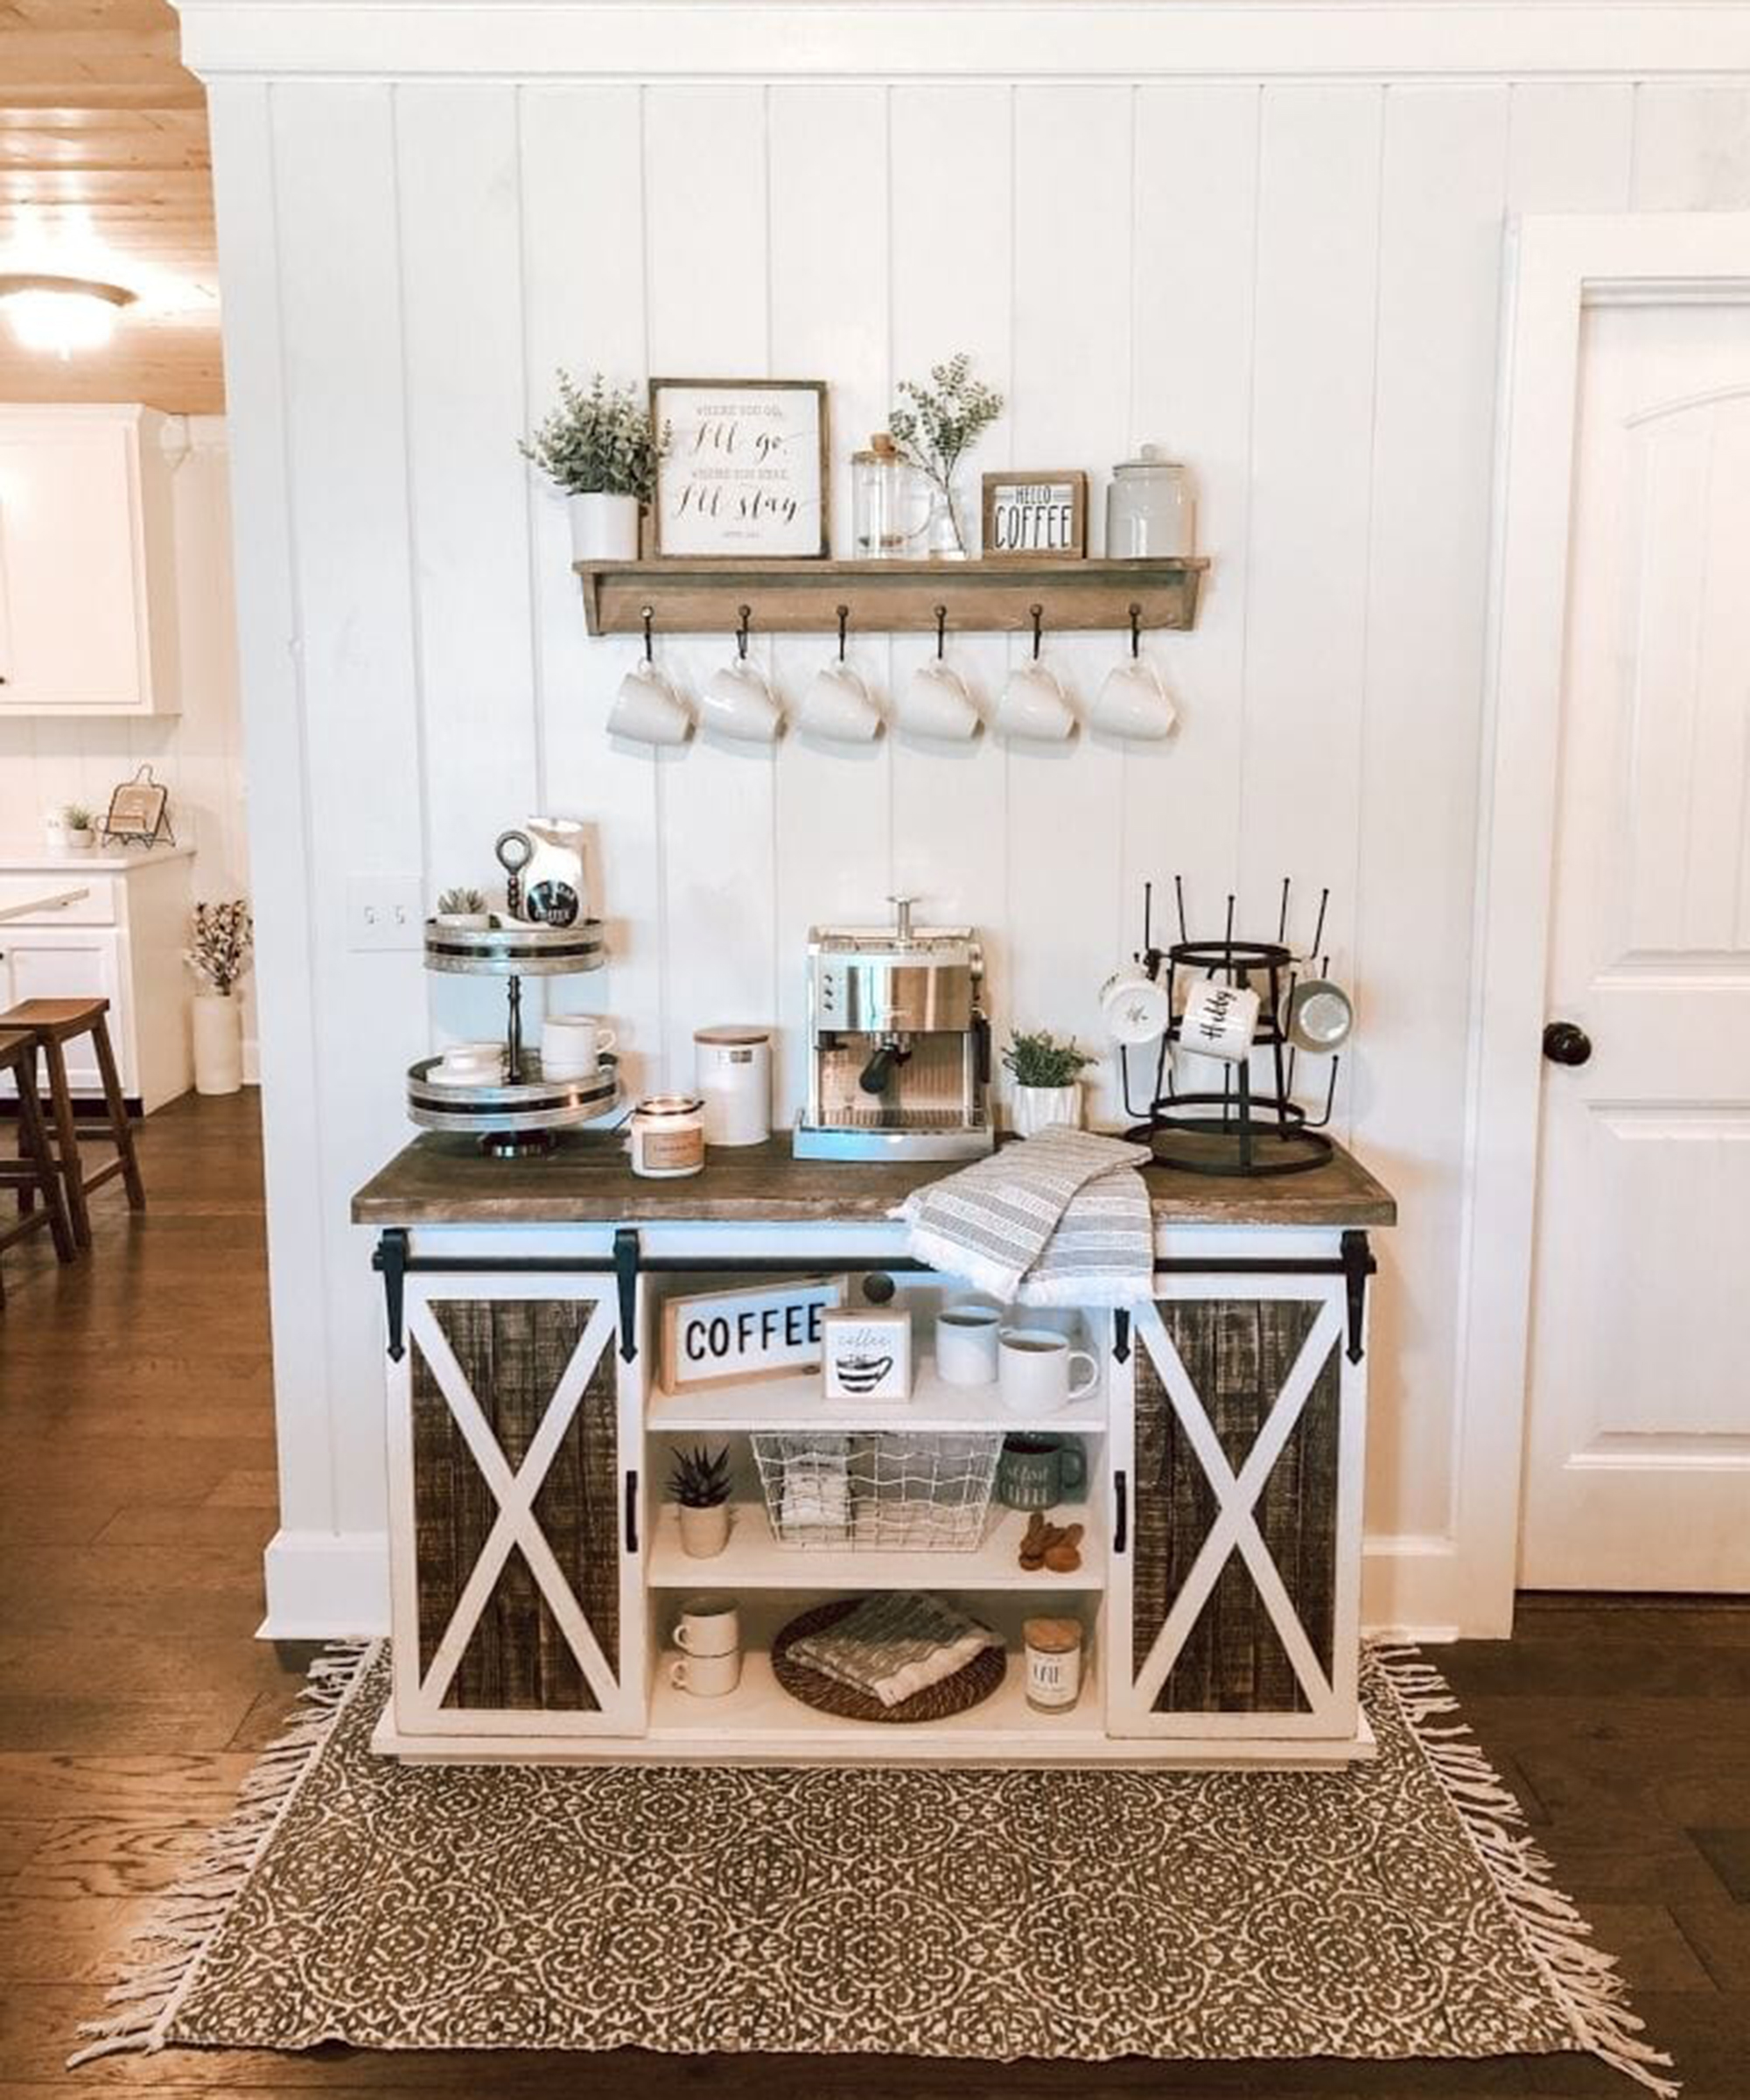
Turn your TV stand into a tea and coffee bar to brew your caffeinated drinks in country style.
'I’ve had a coffee bar/station ideas rolling around in my head for a couple of years now. My husband is the biggest coffee connoisseur I know, he can tell you whatever it is you need to know on this topic,' says Christina Eleton aka @realgirlliving
So, I put myself to the challenge and thought I would surprise him for our 21st anniversary with his/our own coffee bar setup.
'This whole idea started way back in 2014 when my husband bought me a cappuccino/espresso maker. I’ve been collecting and gathering items here and there ever since. What makes a coffee station like this so fun and special is all the little details that we picked out together along the way. Oh, and the money we save is definitely an added bonus!'
'I couldn’t be more excited the way mine turned out and it even succeeded my expectations. A few days back, I completed my project and surprised my husband. He was blown away and absolutely loved it! We’ve been enjoying this every single morning and sometimes afternoons too. It’s been so much fun for the whole family. '
You will need:
- A sliding door TV stand (Find the same farmhouse furniture from Walker Edison)
- Coffee/espresso Machine (Buy the same model as Christina on Amazon!)
- Coffee cups (Get the exact same cups as Christina from Amazon)
- Coffee bar signage (Shop Christina's 'Hello Coffee' sign here)
- Faux potted plants (Christina used these faux green rosemary plants)
- Faux succulents (Get a set of six for under $20!)
- A floating shelf with hooks (If you're hooked on coffee, you'll need this)
- A mug tree (a distressed-look decoration to store your cups)
6. Molly Kuehling's DIY coffee bar with arch feature
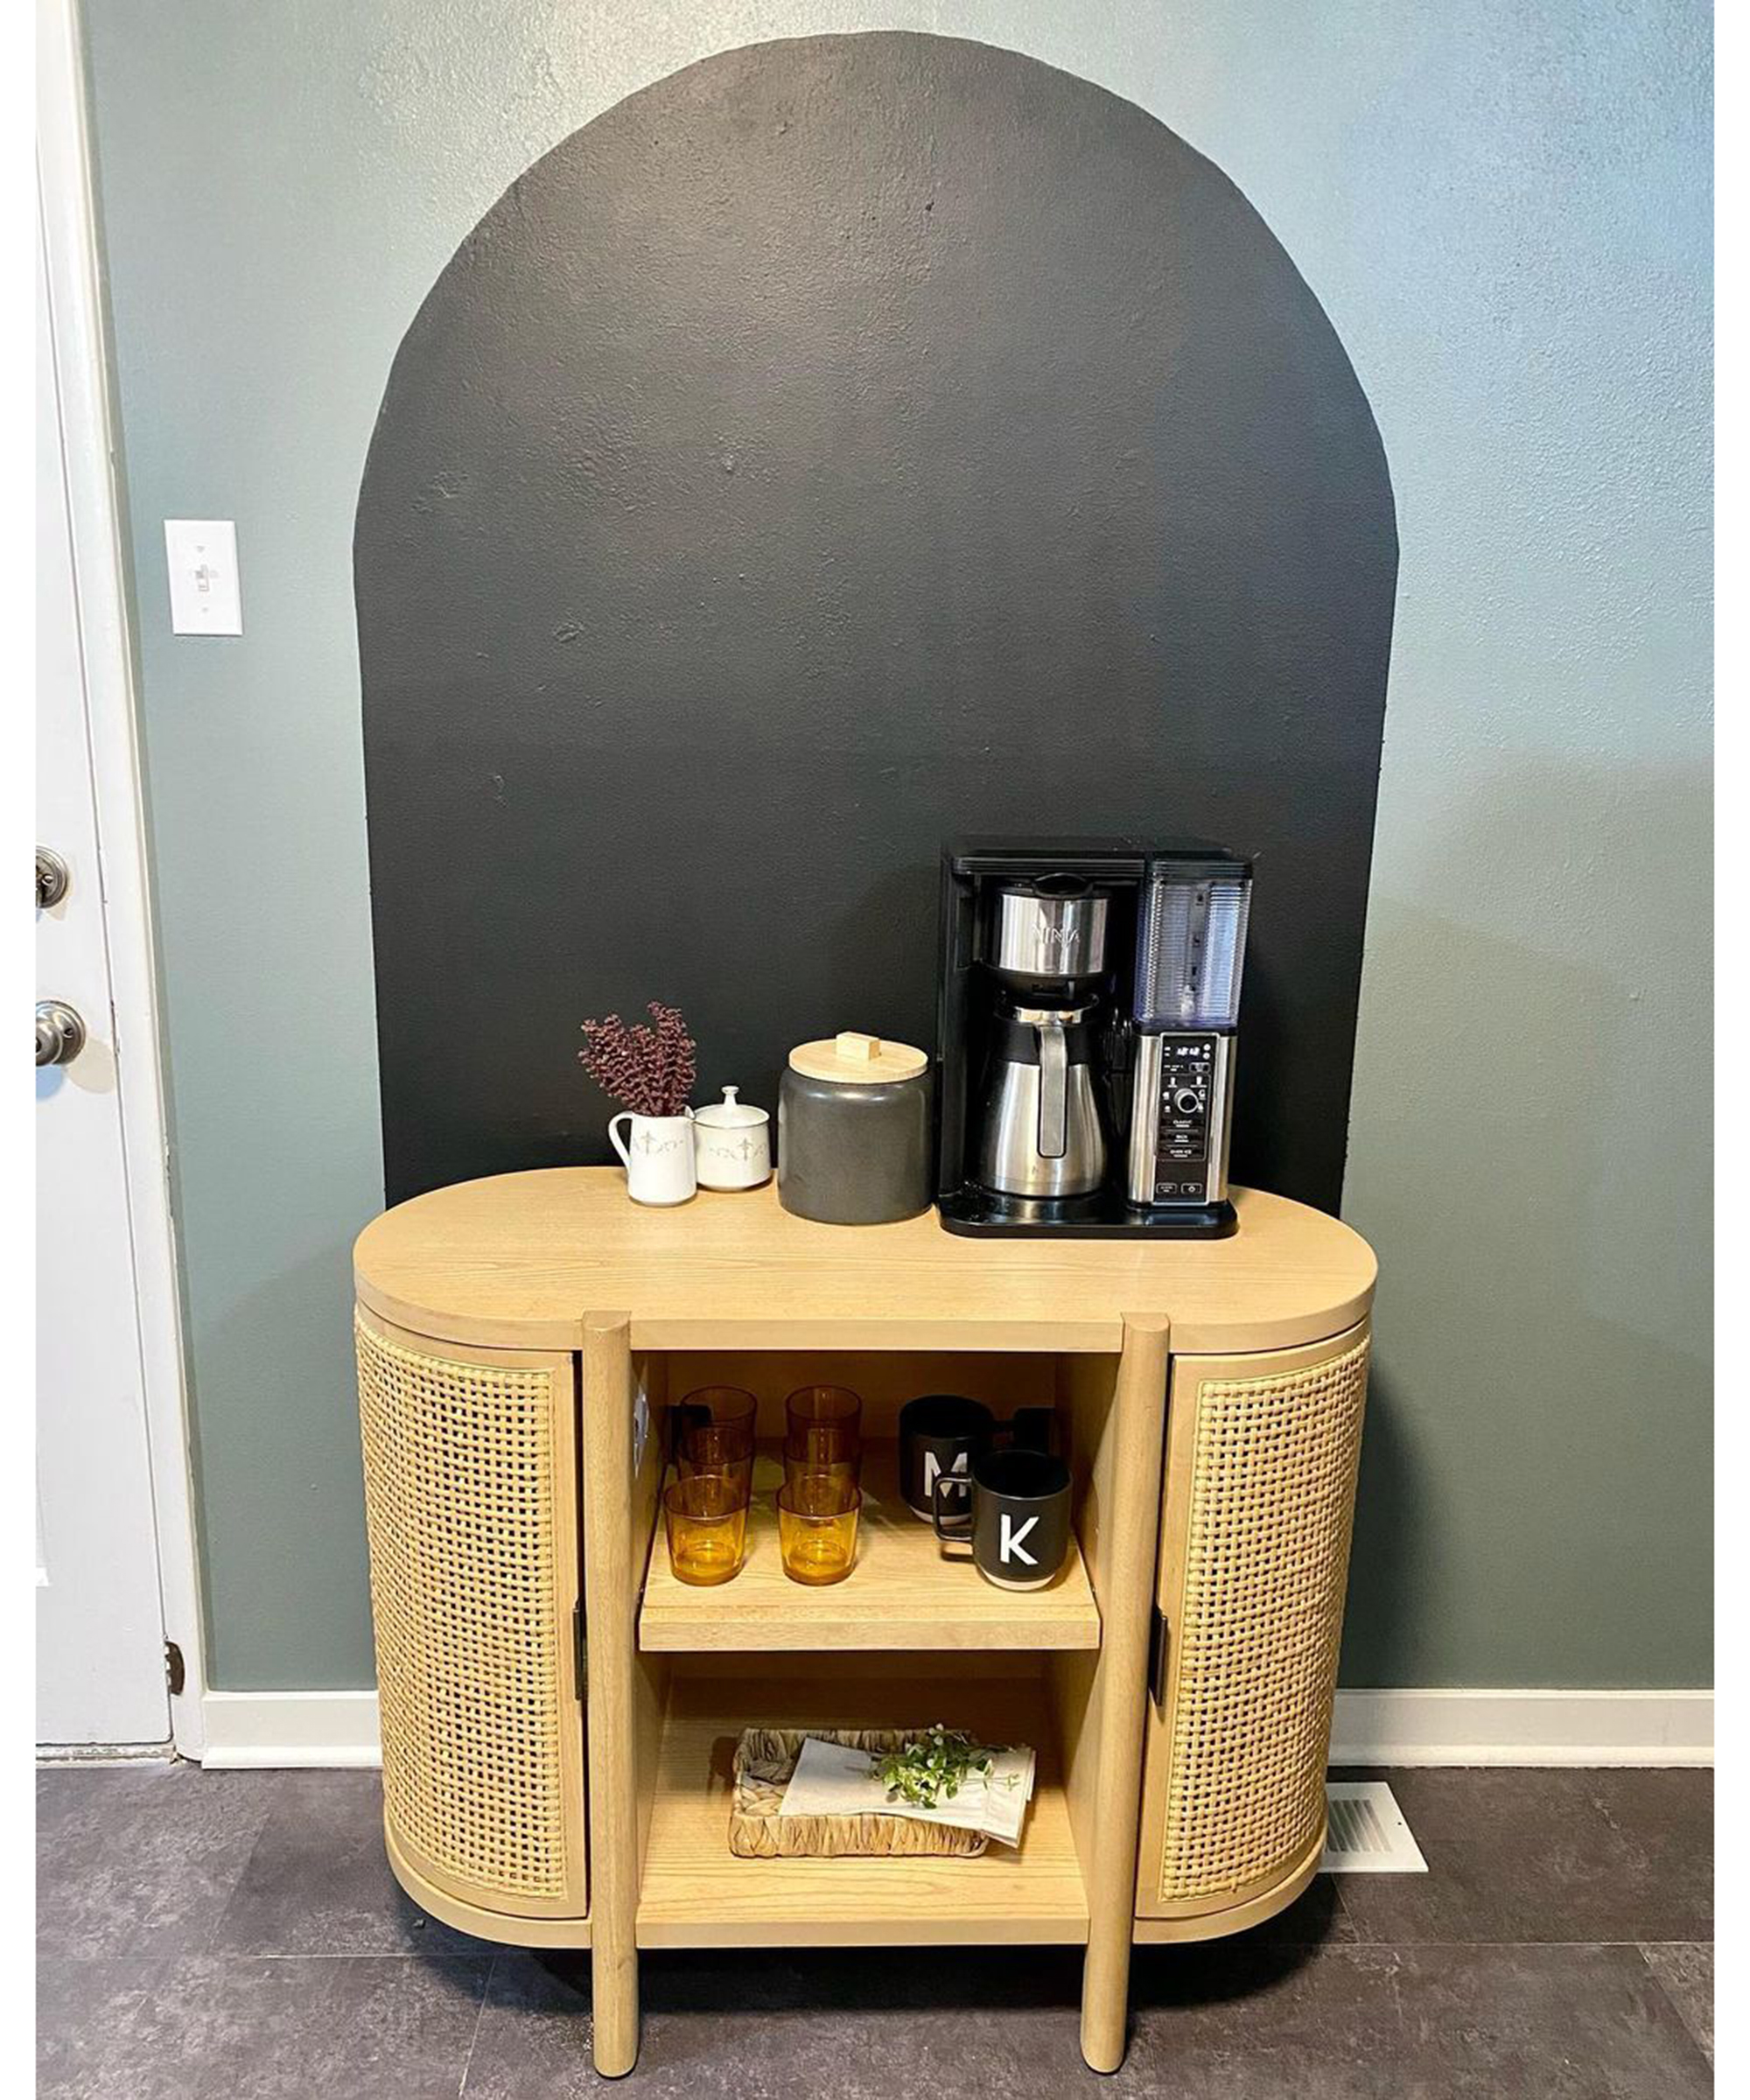
Prop up a DIY coffee bar pronto with a feature wall arch. This is a very quick, easy, and affordable do-it-yourself which you can create using a bit of masking tape, a sample pot of paint, and our advice on how to paint a wall arch.
You will need:
- Black chalk paint (Molly used Shabby Chic chalked furniture paint in Black Liquorice)
- Portola Hills caned cabinet (Available from Target and designed with Studio McGee)
- Masking tape
- Paintbrush
- Pencil
7. Sophia Dewald's DIY coffee bar dresser
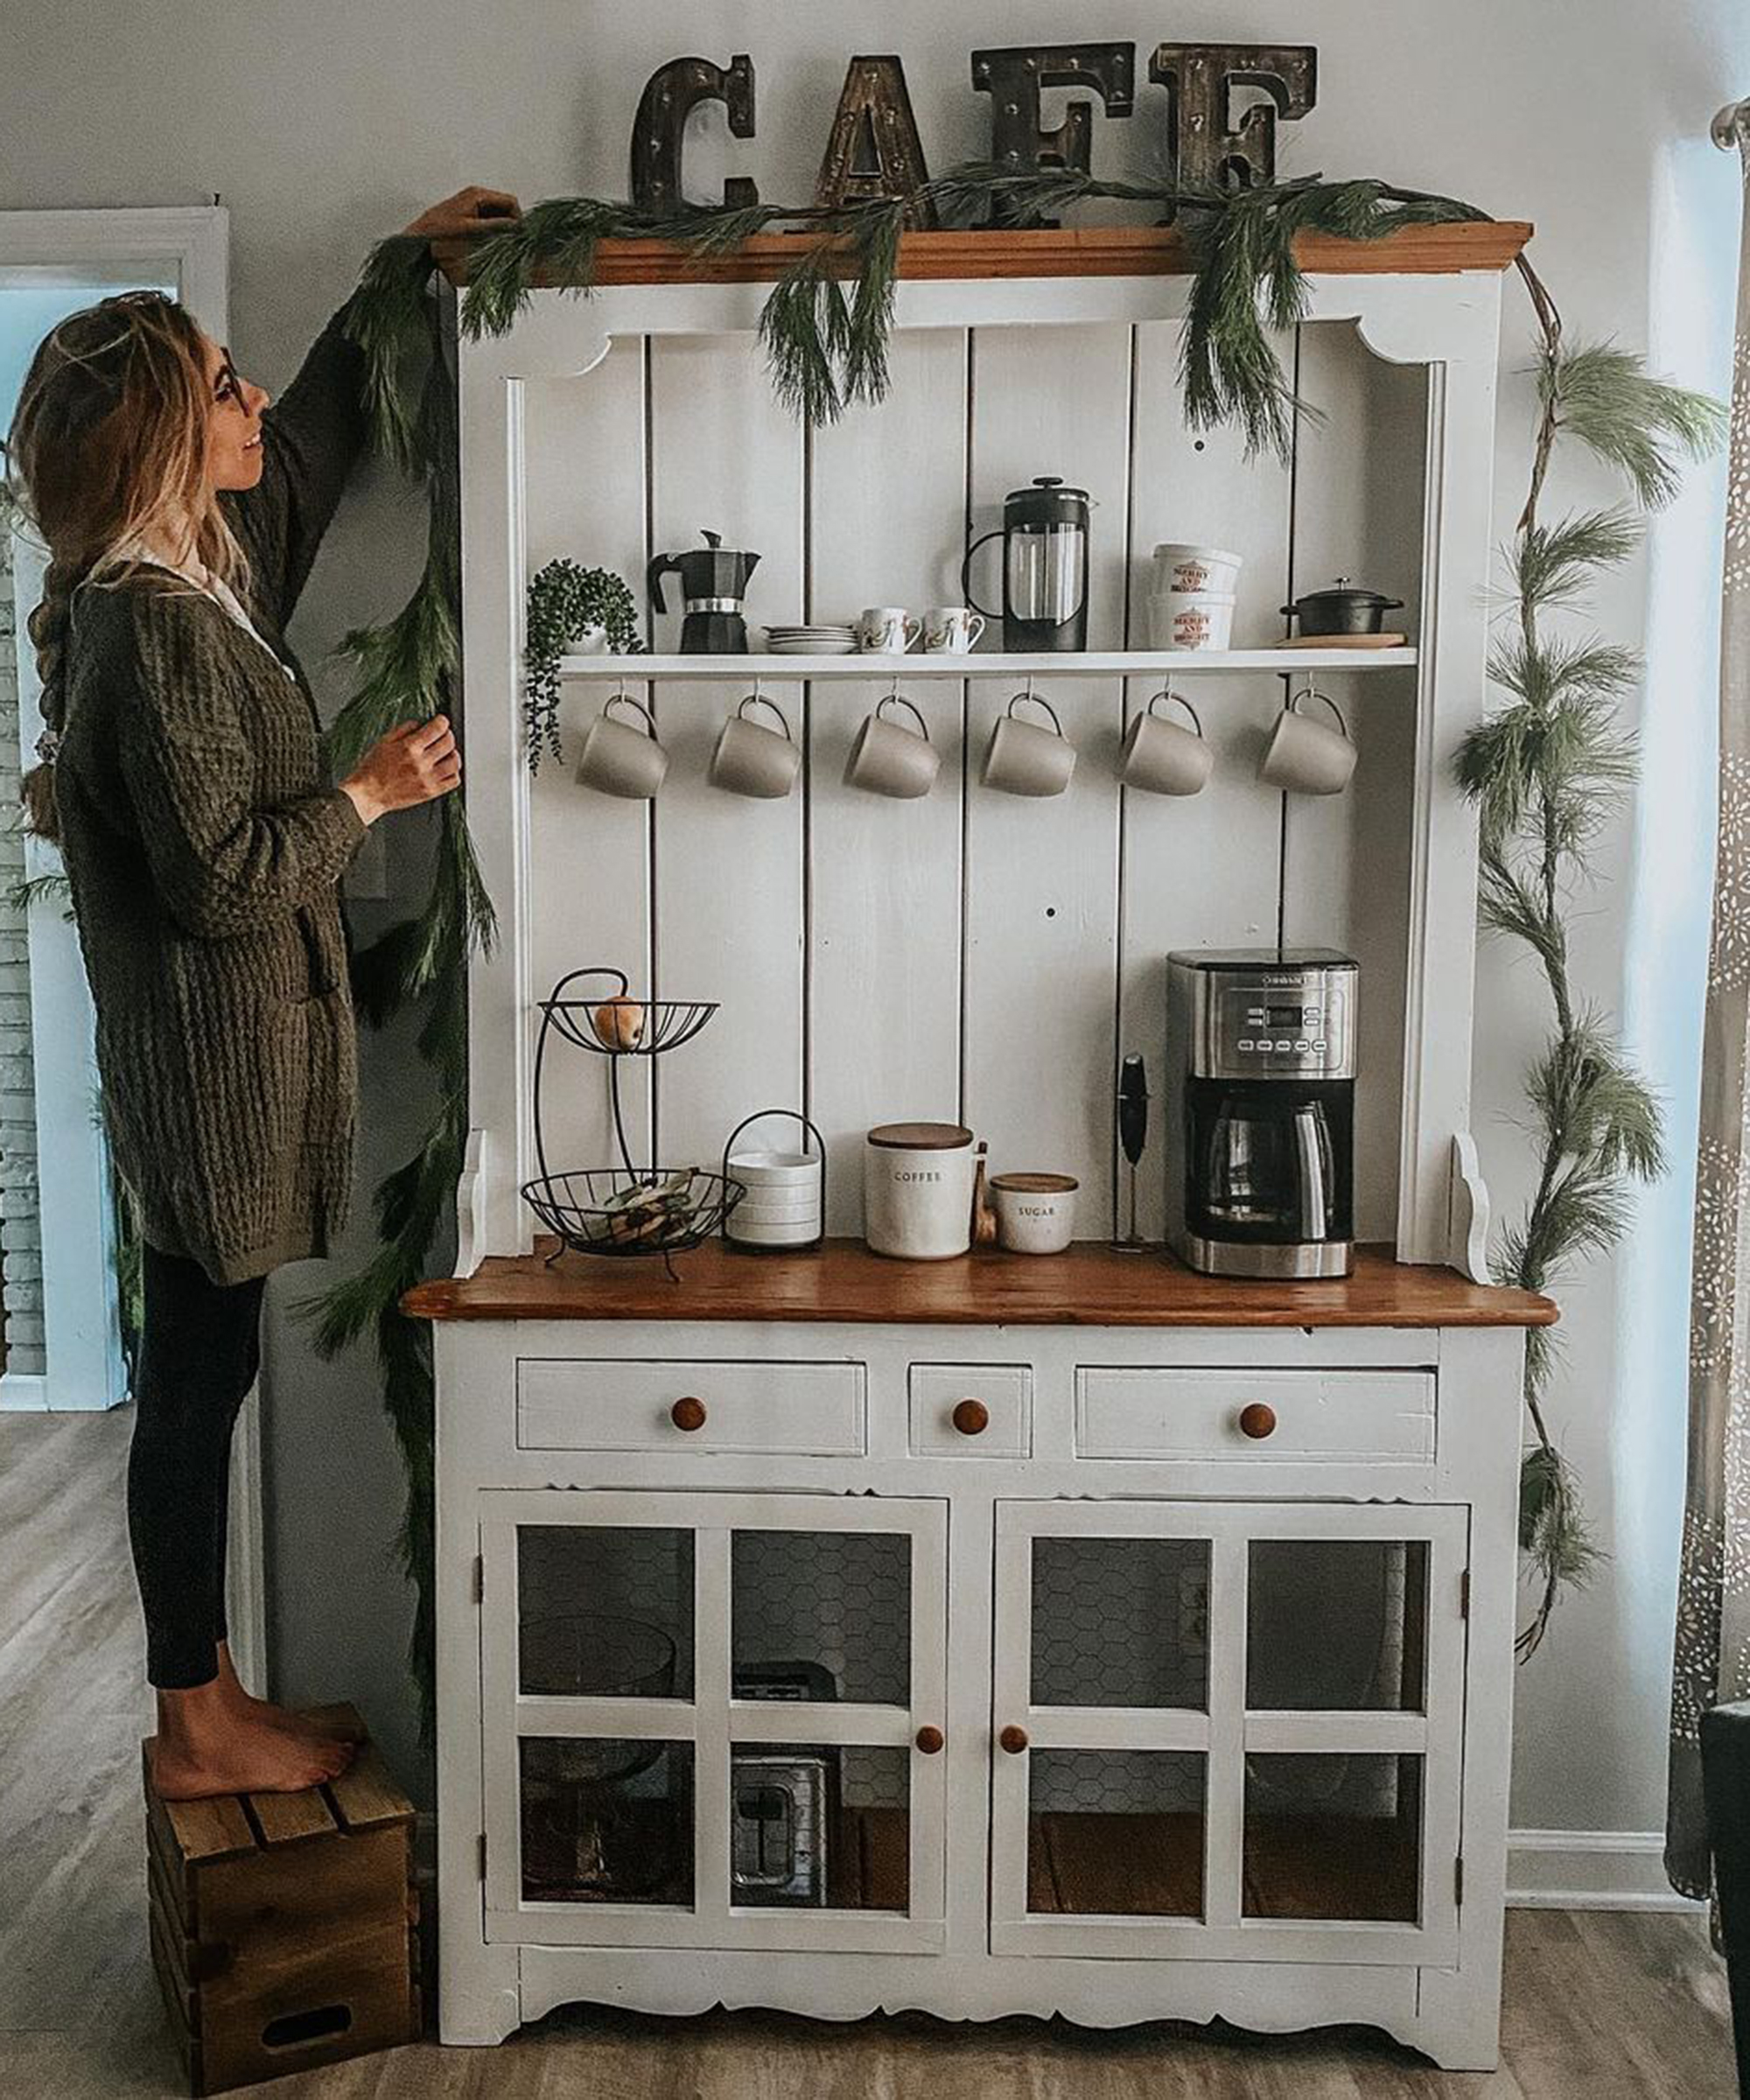
'The “must-have” features that we demanded from our perfect hutch were that it needed to be slim, and customizable. We wanted something that wasn’t too bulky and didn’t stick too far out from the wall. Through trial and error, we discovered that petite furniture complements our home. Finding that style of furniture in itself is difficult as that style is in high demand,' says Sophia Dewald, a Philadelphia-based blogger.
'After 2-3 weeks of browsing, this came up on our search. We knew it was the one! This was listed for only $50 and it was in great condition. We definitely saw potential in it and it was a perfect size.'
'The only part of the hutch that seemed physically outdated to us, was the funky trim. Eddie cut those curvy parts off using a Jigsaw and it really modernized this piece. The other structural change we made involved removing the lower shelf. If we left it as-is, we weren’t able to fit the coffee pot under the shelf. We wanted the pot to fit flush against the back of the piece, so we removed the shelf to allow some more space.'
'We painted it, removed the lower shelf, and gave the curved section a straight edge across the top. This made it look much more modern and clean. We eventually cut off the curves on the bottom sections as well and added doors.'
'Adding hooks underneath the shelf allowed us to hang mugs across the entire shelf while still allowing enough room to open the lid on top of the coffee pot. Adding a plant and some cute accessories made it start to feel like a coffee bar. I love the coffee and sugar canisters. The faux string of pearls plant is the perfect size for a narrow shelf.'
'In addition to coffee, we also enjoy brewing hot tea in the evenings. I knew I wanted to create a tea drawer. When I saw that this hutch had drawers, I knew it would be a perfect fit. I ordered these tea organizers and added in some of our favorite teas. I can’t wait to add to it.'
'We added doors to the bottom with a chicken wire front so that it still has an open concept but compartmentalizes the lower portion. We spray painted it black to mute it from the silver.'
Shop the look:
- A cheap dresser (thrifted from eBay, Gumtree, Facebook Marketplace, etc.)
- A jigsaw - choose from a shed load at Amazon
- Behr paint in shade Linen White (available from Home Depot)
- Cuisinart DCC-3200P1 PerfecTemp 14-cup programmable coffee maker with glass carafe in stainless steel (available from Amazon)
- BSTWM Chicken wire net for craft projects (available from Amazon)
- Stoneware Honey Pot with Acacia Wood Dipper and Lid - Hearth & Hand™ with Magnolia available from Target
- Stoneware Coffee Canister with Wood Lid & Scoop - Hearth & Hand™ with Magnolia available from Target
- Stoneware Sugar Cellar with Wood Lid - Hearth & Hand™ with Magnolia available from Target
- OYCBUZO Golden black LED marquee letters available from Amazon
- MyGift artificial String of Pearls plants in white ceramic planters, available from Amazon
- Spectrum Diversified Stacked 3-tier bowls, available from Amazon
- Yabano Store Moka pot, 6 cup stovetop espresso maker, available from Amazon
- Everbilt #8 zinc-plated steel screw hook (25pcs), available from Home Depot
8. Nicole Coutinho's desk-to-DIY-coffee-bar
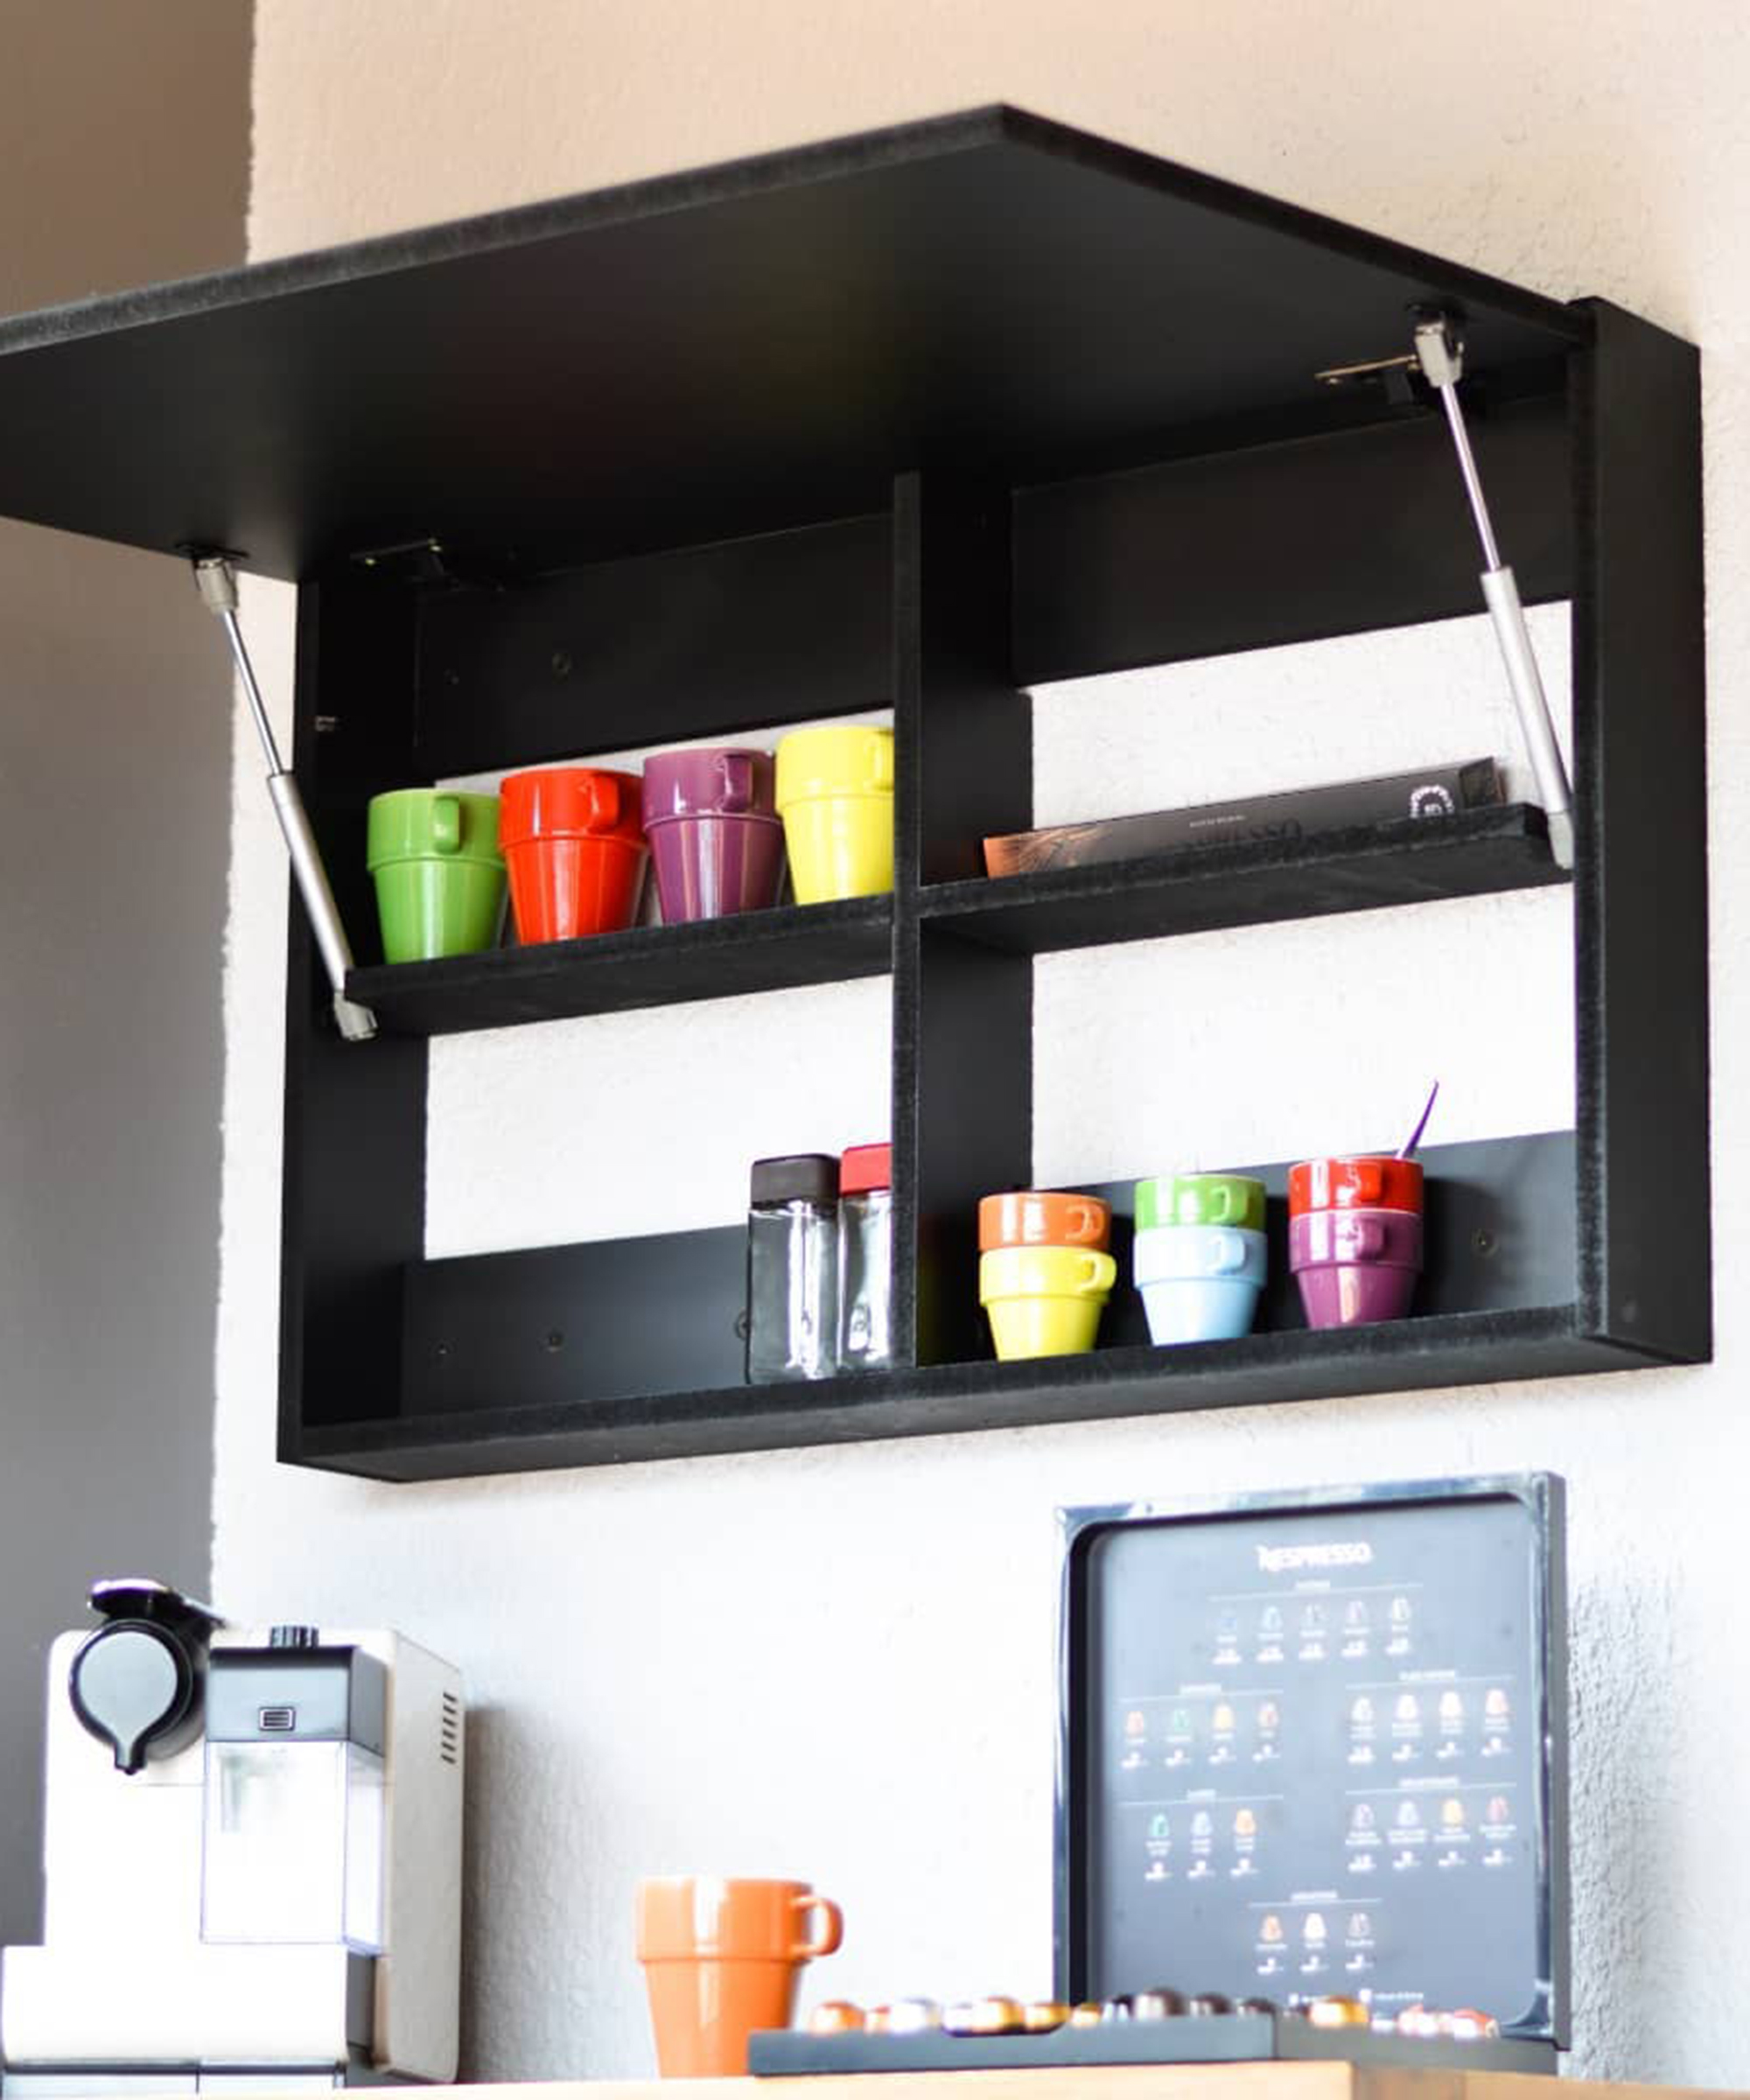
'Our project is finally complete and what a journey it was!' says Nicole Coutinho, aka @thelittleguru_sa
'What started as a simple idea turned into something quite awesome. Our plan was to focus on making the corner of our newly renovated room a bit more "boujee" so we thought of perhaps adding shelves to display and hold our coffee cups and capsules.'
'Spending a good amount of time on Builderswe saw a fold-up desk from the flat pack range and sparked an idea to turn it upside down and use it as a storage cabinet instead.'
'With minor adjustments, repurchasing of some parts, and Hubby's mad DIY skills, we installed some gas struts and painted it matt black to match our home's aesthetic. Safe to say that it came out better than expected.'
10. Jen Woodhouse's navy DIY coffee bar
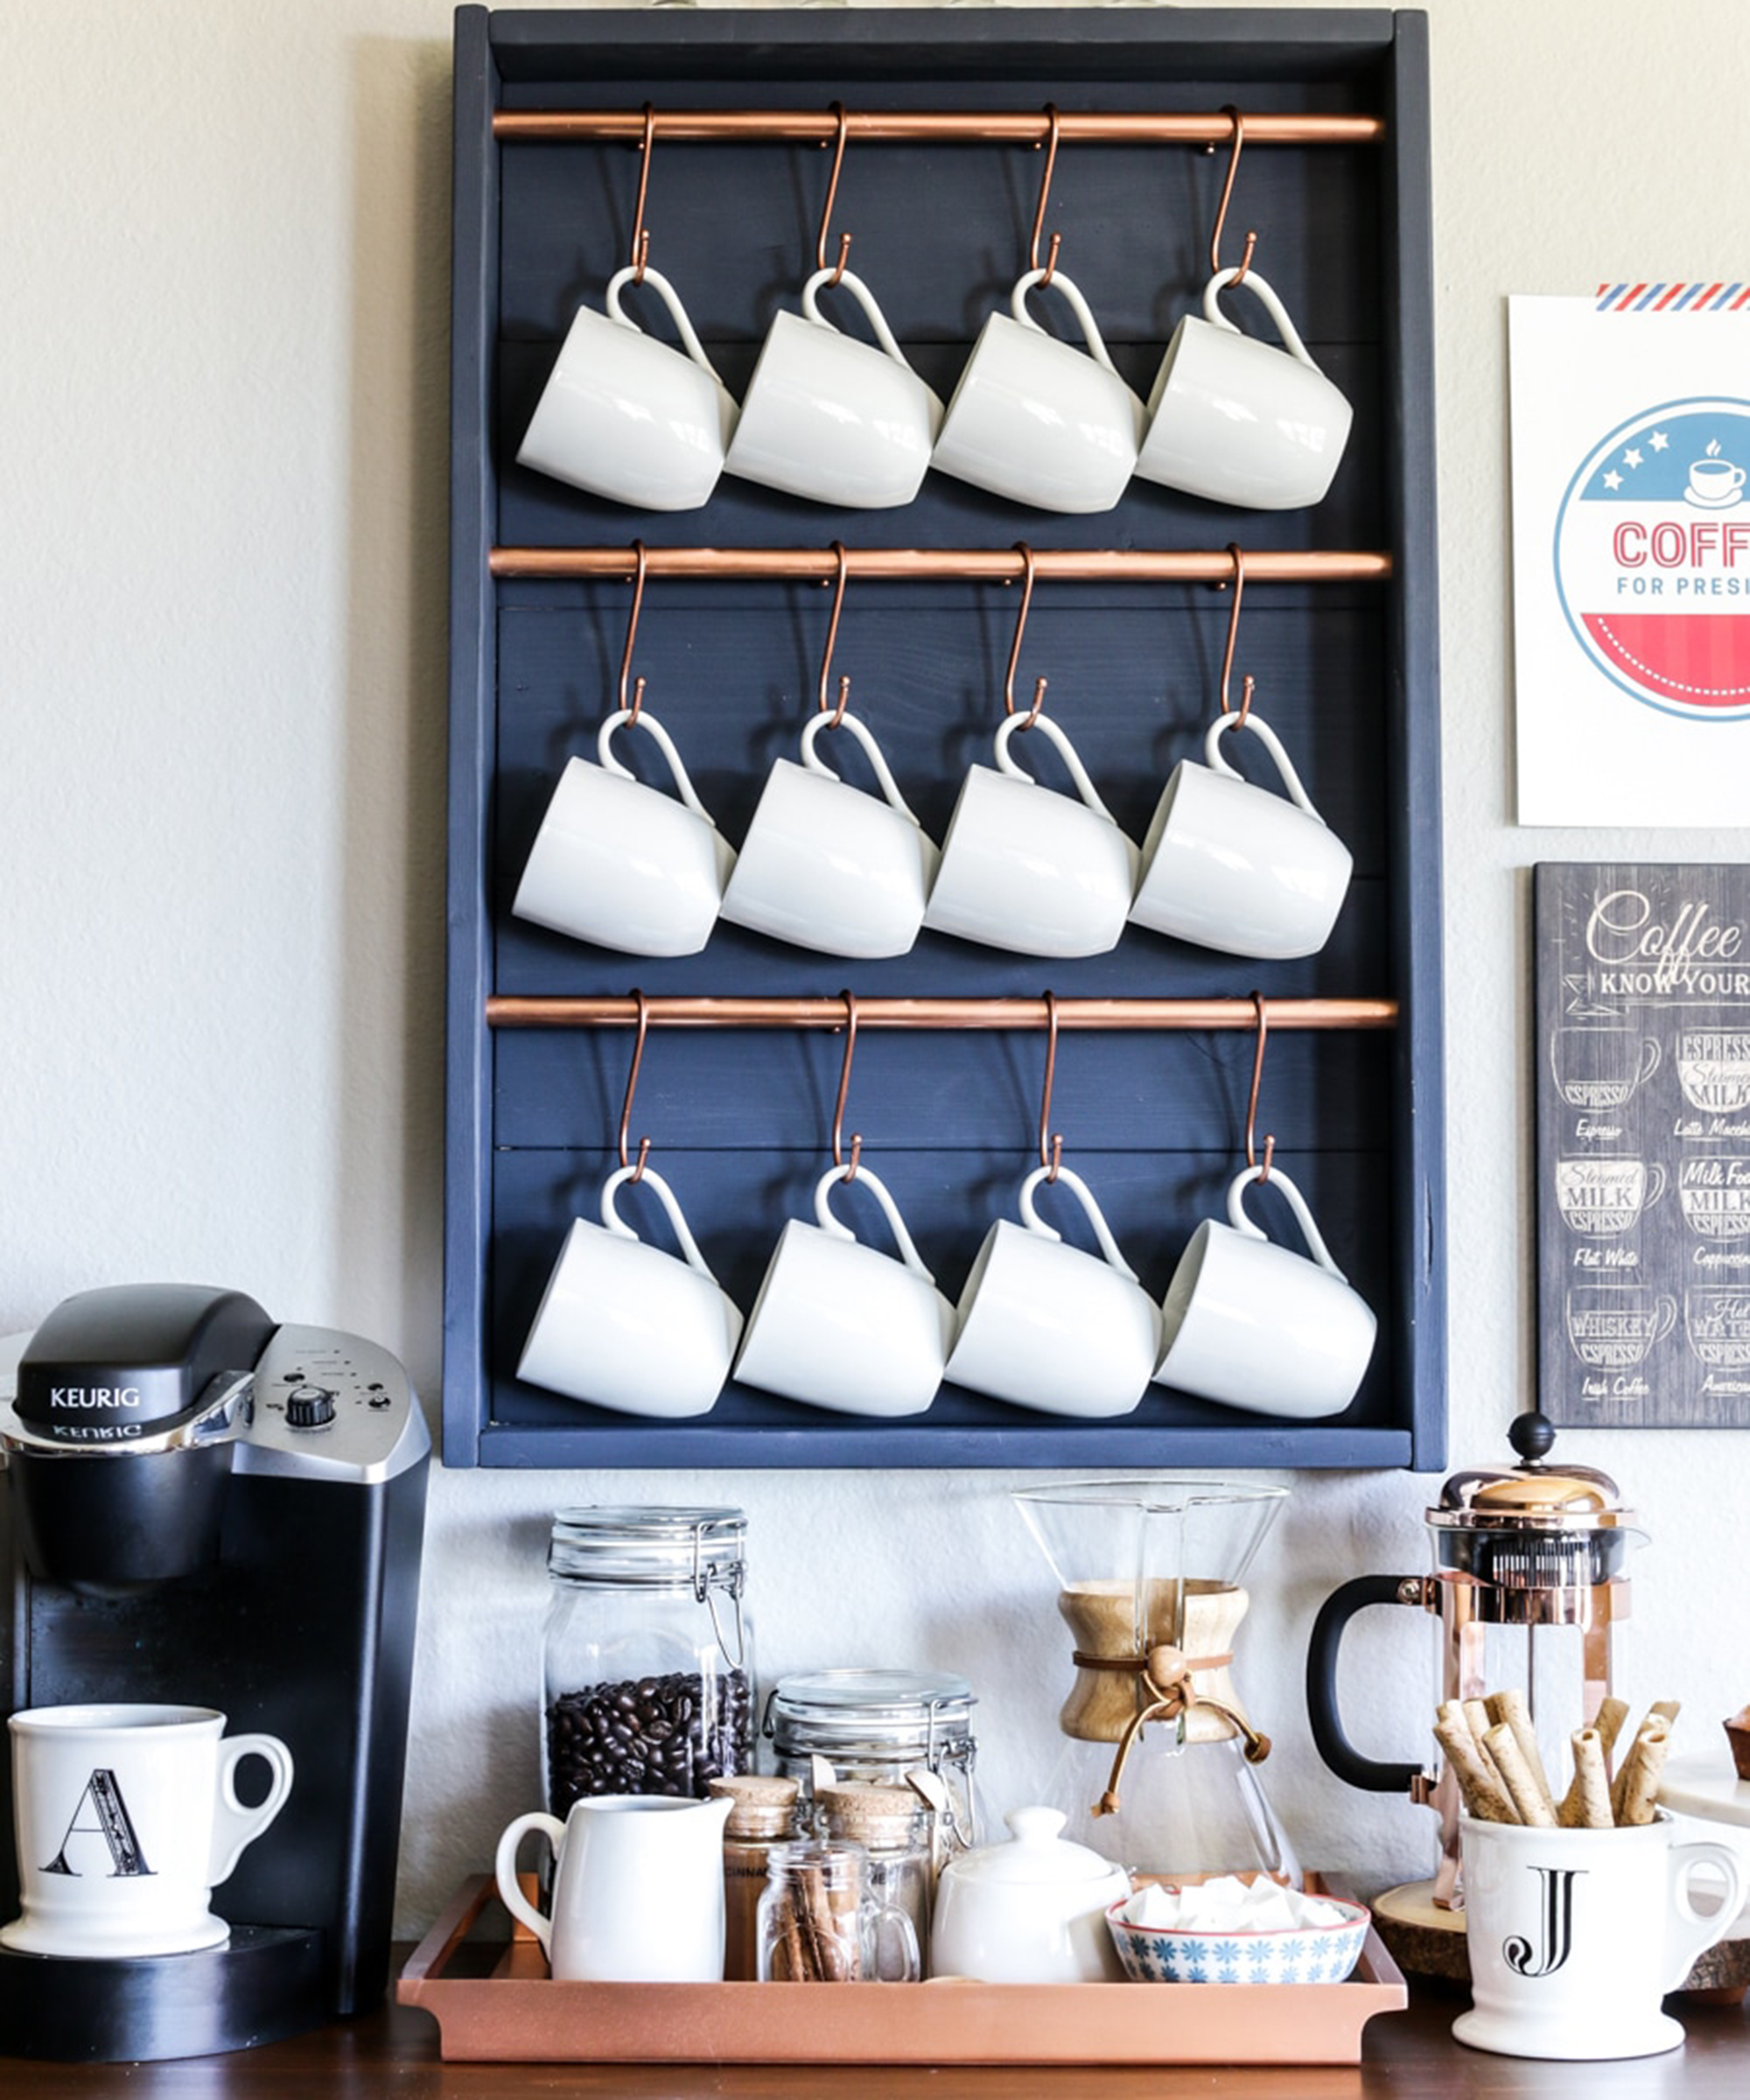
'I’ve been crushing hard on a navy and copper color combo so naturally, that was the route I took. I love how the DIY coffee bar turned out!' says Jen Woodhouse.
You will need:
- Tape measure
- Drill with 5/8” Forstner bit
- Hammer or pneumatic brad nailer
- Pipe cutter
- Mallet
- Stud finder
- #000 steel wool
- (1) 1x4 x 8’ board
- (1) 1x6 x 8’ board
- (1) 1/2” x 5’ type M copper pipe
- (12) S-hooks
- 1-1/4” brad nails
- 2-1/2” wood screws
- Paint or stain
- Clear gloss spray lacquer
- 220-grit sandpaper
- Paintable/stainable wood filler
Cut list:
- (2) 1x4 @ 29” (side frame)
- (2) 1x4 @ 18” (top/bottom frame)
- (5) 1x6 @ 18” (back)
- (3) 1/2” copper pipe @ 18-3/4” (hanging rods)
How to:
- Measure and cut copper pipe: Measure and mark 18-3/4" of the copper pipe and use a pipe cutter to cut three pieces to length. Simply clamp the pipe cutter onto the pipe and turn it around the pipe. Twist the knob after every turn to tighten the clamp. The blade will slowly cut through the pipe. Gently sand any sharp edges if necessary.
- Clean the pipes: With the steel wool, wipe off any markings, dirt, or grime on the pipes. Because copper is soft, be gentle or you may risk scratching the copper finish.
- Seal the pipes: To keep fingerprints and tarnish at bay, spray a couple of light coats of clear lacquer on the copper pipes. NOTE: If your S-hooks aren’t copper, spray paint them with copper metallic paint to match the pipes.
- Cut the frame: Using the cut list above, measure and mark the 1x4 and 1x6 boards to length. Sand any splintered or rough edges with sandpaper until the wood is smooth.
- Bore holes for pipe: Using a drill fitted with a 5/8" Forstner bit, bore three holes in each side frame for the pipe to sit into. Bore the holes about 3/8" deep, being careful not to bore all the way through the boards. Be sure to measure and mark so that the holes in both boards are identical, otherwise, your hanging rods won’t be level or square.
- Drill holes for the coffee cups: For the coffee cups, make the first hole 2" from the top, the middle hole at 11", and the bottom hole at 20" from the top. If you have larger or taller coffee cups, you may want to measure and mark your own holes to accommodate your cups so that they hang freely, without bumping into the next row.
- Construct the frame and attach the back: Using a brad nailer or hammer, construct three sides of the frame (the side, top, and bottom boards) and secure with 1-1/4" brad nails and wood glue. Always use wood glue when using nails to reinforce the joints. Next, line up the 1x6 backboards edge-to-edge and attach them to the three sides of the frame with 1-1/4" brad nails and wood glue. You can also squeeze a small line of glue on each edge of the 1x6 boards and clamp them together.
- Paint or stain the frame and insert pipes: At this point, you’ll want to go ahead and paint or stain the frame before you add the copper pipe. Once the paint or stain is dry, insert the copper pipe into one of the sides. Use a mallet to gently tap each one into place.
- Attach the last piece of the frame: Position the other side of the frame into place and attach it with 1-1/4" brad nails and wood glue. Fill any nail holes with wood filler, sand smooth, and touch up with paint or stain.
- Hang the coffee mug display on the wall: Locate the studs in the wall and use 2-1/2" wood screws to screw the coffee cup display to the wall. Add the S-hooks and hang up your coffee cups.
- Complete your self-serve coffee bar: Add your favorite coffee-making essentials to create a chic and stylish coffee bar station.
10. Angela's DIY coffee bar cart
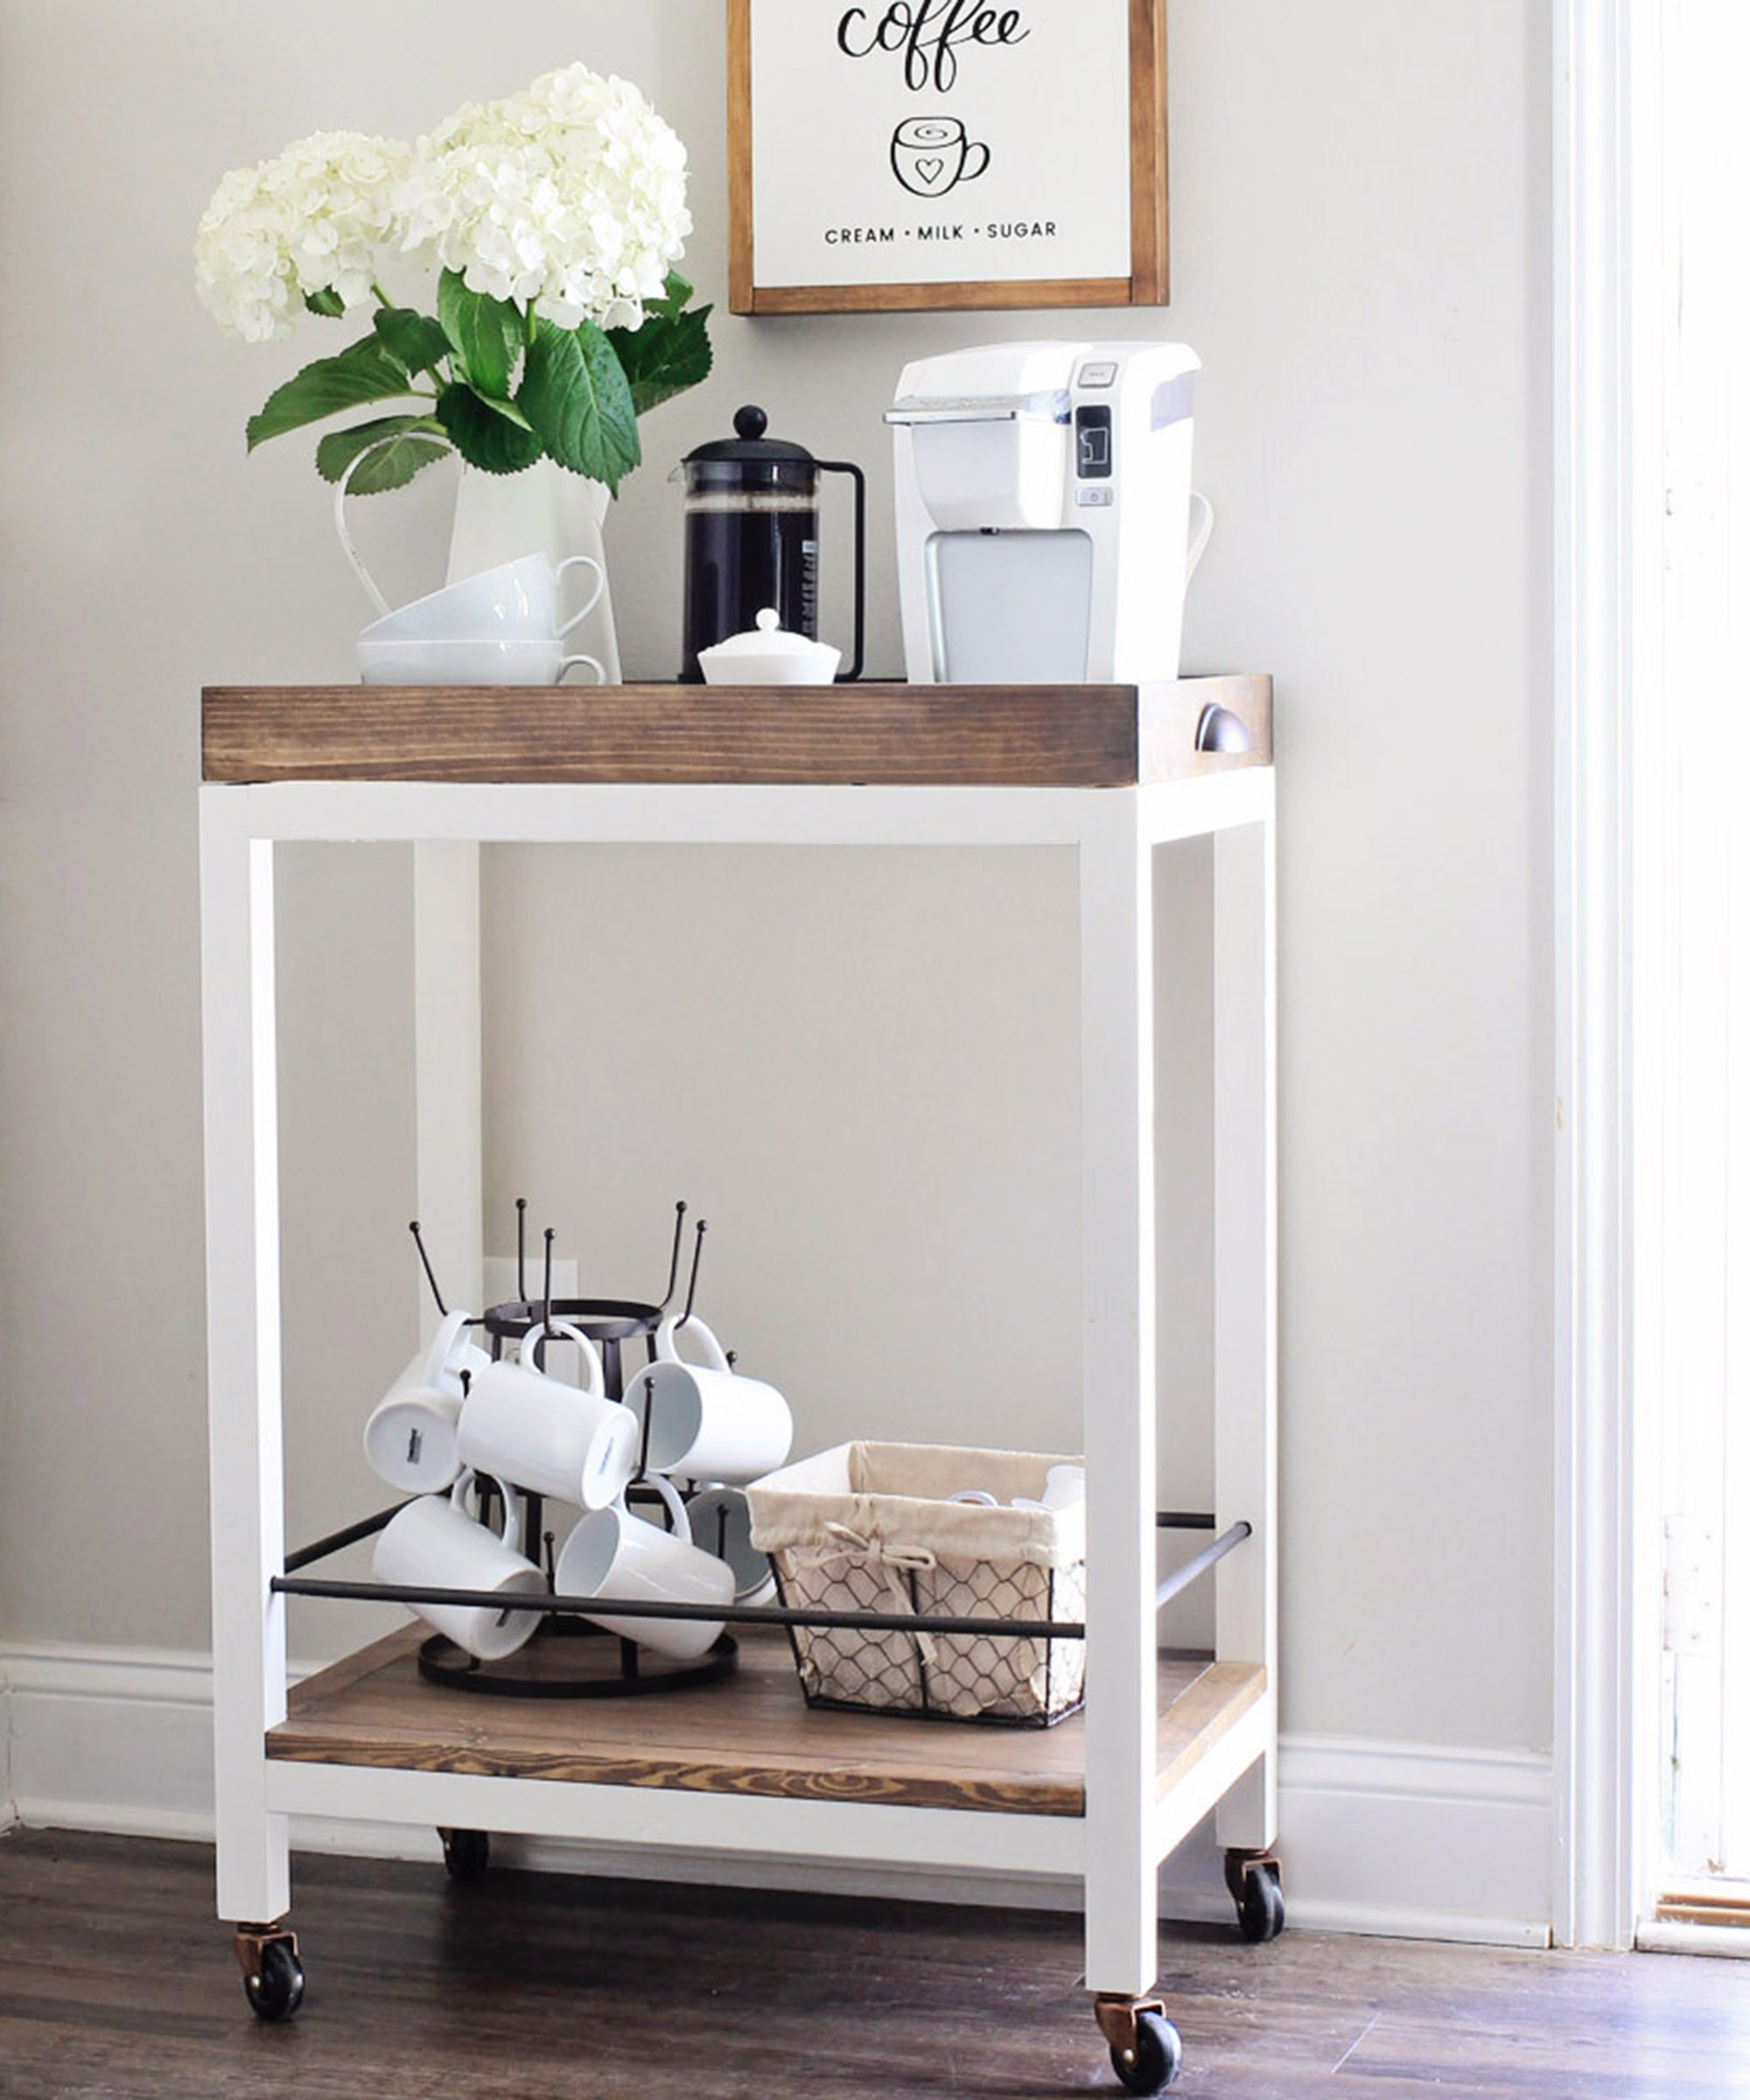
'I wanted to make a DIY bar cart that really looked like a custom, higher-end bar cart and that was also a bit rustic.' says Angela Marie, founder of Angela Marie made blog.
'This DIY bar cart was a little more time-consuming to build, but definitely worth it in the end, especially for the amount of savings! It cost me less than $50 in building materials to build, whereas other similar bar carts retail around $150+. Note, I did have the paint and stain on hand already for the finishing, so that is not included in the material cost.'
You will need:
- (3) 2×2 @ 8ft furring strips
- (1) 1×2 @ 8ft
- (1) 1×4 @ 8ft
- (1) 1×3 @ 8ft
- (1) 2ft x 2ft @ 3/4″ thick pine plywood
- (4) 2″ Casters
- (2) 3/8″ round wood dowel rods @ 4ft
- 2 1/2″ and 1 1/4″ Kreg screws
- 1 1/4″ Brad nails
- Wood glue (Go for Gorilla Ultimate)
- 2″ Wood screws
- (2) Cabinet pulls
- Kreg K4MS Jig Master System
- Drill (Find loads on Amazon!)
- Miter saw (This DeWalt machine is Amazon's bestseller)
- Circular Saw (This SKIL-branded saw is one of Amazon's top picks)
- Clamps (Secure these IRWIN QUICK-GRIP Clamps on Amazon)
- Brad nailer (Choose from a selection of cordless types)
- Rust-Oleum spray paint in rubbed bronze (Get it from Amazon)
- Minwax wood finish interior wood stain in dark walnut (Grab it from Amazon)
- Annie Sloan white chalk paint wax
How to:
- Make your bar cart frame cuts from the 2x2s: Angela used 2×2 furring strips for the frame of my bar cart. This saved her a ton of money, but she advises that try to choose really straight 2x2s and make sure you sand them really well since they are a more rough grade of wood. You'll need to cut 4 pieces at 30.5″, 4 pieces at 22.5″, and 4 pieces at 14″.
- Drill pocket holes and attach frame pieces: Layout how your frame is going to go together. Use two of the 30.5″ 2×2 pieces for your sides and two of the 22.5″ 2×2 pieces for the top and bottom of the frame. Angela placed my bottom frame piece 3″ up from the bottom of the side pieces since this is what the bottom shelf of the bar cart will sit on. Mark where your pocket holes need to go, one on each end of the two 22.5″ pieces (make sure you do them on the bottom side of your 2x2s so they don’t show). Then, drill your pocket holes with a Kreg Jig. Use 2 1/2″ Kreg screws to attach the frame together. Repeat these same steps for the other side of the frame. Angela used a scrap piece of 2×2 to help keep the pieces even as we drilled them together.
- Finish assembling the DIY bar cart frame: Drill one pocket hole on each end of your four 14″ 2×2 pieces. Add two of your 14″ 2×2 pieces to the bottom of one frame side and to the top of the other frame side using pocket holes and 2 1/2″ Kreg screws. The pocket holes can be either on the inside or underneath part of the 2x2s as you attach them, either way, they won’t show. Now attach your two frame pieces to form the final bar cart frame. Note, when attaching the frame on the short 14″ sides, the long Kreg drill bit to drive screws into the pocket holes, is too long with a standard drill. Angela had a smaller square tip drill bit that Angela used instead for this part.
- Make the bottom shelf of the DIY wood bar cart: Cut your 1×4 into four 24″ pieces. The cuts don’t have to be perfect for this step. Then, line up your 1×4 pieces and drill pocket holes as shown in the photo below and attach with 1 1/4″ Kreg screws. To get a perfectly straight edge on each side, use a circular saw and trim each side so that the final length of your shelf is 22.5″ (the width should be 14″ already from your attached four 1x4s). Next, cut two 1×2 pieces at 22.5″ and two at 14″. These pieces are going to be attached to the sides of your shelf piece as shown in the photos below. But, before you attach them to the shelf, make sure they fit snugly between the frame sides, you may need to sand them down slightly to get a better fit (Angela had to do this for two of them). Add two pocket holes to the bottom shelf sides as shown in the below photo and attach 1×2 pieces with 1 1/4″ Kreg screws. Flip over and your bottom shelf should like the 2nd photo below! Go ahead and place the bottom shelf on the lower frame and make sure it fits well but don’t attach it yet to the frame.
- Make the top tray shelf of the bar cart: Using a circular saw, cut one side of your 2ft x 2ft plywood piece to 15.5″ so that the final size is 24″ x 15.5″. Next, for joining the sides of the top tray shelf, you can either do straight cuts or 45 degree angled cuts. I chose to do the angled cuts to make the bar cart look a bit higher end even though angled cuts are a bit more challenging. Either way, cut two 1×3 pieces at 25.5″. Attach the two 25.5″ pieces to each long side of the plywood using a brad nailer and 1 1/4″ brad nails. If you did angled cuts, make sure the inner angles on the ends are lined up correctly to the plywood edges before nailing. Now measure the exact width for your two side pieces. It should be just about 17″ but mine was off by 1/16″ so I adjusted my cuts accordingly. It’s always good to measure twice and cut once! Then, attach your two side pieces with brad nails to complete the top shelf tray of the bar cart! Also, for these side pieces, Angela put brad nails along the bottom edge and side edges to make it more secure.
- Prepare dowel rods: Cut the 3/8″ dowel rods as follows: two pieces at 23.5″ and two at 14.5″. Then, mark the center point on the inside edge of the 2×2, 4″ up from the bottom shelf (on all inside edges for a total of 8 marks). Use a 1/2″ drill bit and drill 8 holes where your markings are. Note, Angela first drilled a 1″ deep hole and then 1/2″ deep on the opposite side and continued this pattern until she finished all 8 holes. She marked 1″ and 1/2″ on a scrap dowel piece to test my depths for each hole to make sure I drilled deep enough. Go ahead and add your dowel rods to the holes to make sure they fit properly. It works best to put them into the 1″ deep side holes first to get them in. If you are having trouble getting them in, trim off 1/4″ or so more but be careful not to trim too much off.
- Paint bar cart frame and fill holes: If you’d like to have a cleaner look use wood filler to fill holes on the top tray shelf over the brad nail holes. Angela also used light spackle to fill any wood knots/cracks in the frame that is getting painted. If you are staining the frame, use wood filler. Sand where needed to prep the frame for painting (or staining). Then, paint (or stain) the frame. Angela chose to do a white frame for the bar cart.
- Attach caster wheels to bar cart frame: Angela bought her 2″ casters at Lowes. They come two to a pack and each caster has a spiky metal piece that you need to remove from the caster. Flip over your bar cart frame and drill a 1/2″ hole in the middle of the bar cart leg bottoms. Make sure to drill the hole a little bit deeper than the length of the spiky metal piece. Then tap the spiky metal piece into the hole with a hammer until the spiky part goes into the wood. Next, place your caster wheel into the metal hole and it should click into place. Repeat for all sides.
- Stain and finish the top tray shelf and bottom shelf of your bar cart and attach to the bar cart frame: Stain your top tray shelf and bottom shelf. Angela used one coat of Minwax Dark Walnut and then applied one coat of Annie Sloan White Wax, but finish however you’d prefer!
- Spray paint your round, dowel rods: Angela used Rust-Oleum Oil Rubbed Bronze.
- Secure your dowel rods: Add a little bit of wood glue to the dowel rod ends and attach them as well to your bar cart.
- Attach top tray shelf to DIY bar cart: Attach your top tray shelf to your bar cart with 2″ wood screws from the bottom side. It’s best to drill pilot holes first about 3/4″ from the inside of the bar cart (so it goes through the frame and plywood piece of the tray, not the side 1×3 edges). Also, clamp the tray down while drilling. Lastly, add cabinet pulls on each side of your top tray shelf.
Shop the look:
- Cappuccino mugs (Angela's ones are discontinued, but these do the trick)
- World Market wire 3-tier glass drying rack
- World Market wire lined Charlotte basket
- Crate & Barrel Aspen can 11oz. mugs
- Sugar holder (push the boat out with a Le Creuset cream and sugar 2-piece set)
- French Press (the Bodrum Brazil coffee maker on Amazon peaks our interest)
- A white Keurig coffee maker
- Flower pitcher (this galvanized metal jug vase from Amazon will do the job nicely)
Why have a coffee bar?
'The coffee bar been my favorite addition to our house,' says Eleton.
'It was not only fun to put together, but the coffee dates and memories my husband and I have made are priceless. Incorporating this coffee bar in our home is by far one of the best decisions we have ever made. I absolutely love it!'
'It saves time and money, is great for entertaining guests, and is a beautiful decor piece.'
Join our newsletter
Get small space home decor ideas, celeb inspiration, DIY tips and more, straight to your inbox!

Hi, I'm the former acting head ecommerce editor at Real Homes. Prior to working for the Future plc family, I've worked on a number of consumer events including the Ideal Home Show, Grand Designs Live, and Good Homes Magazine. With a first class degree from Keele University, and a plethora of experience in digital marketing, editorial, and social media, I have an eye for what should be in your shopping basket and have gone through the internal customer advisor accreditation process.
-
 What is bookshelf wealth? Everything you need to know about the cozy design trend
Wondering what bookshelf wealth is? We've chatted with interior designers to find out what bookshelf wealth is and how to style it in your home
By Eve Smallman
-
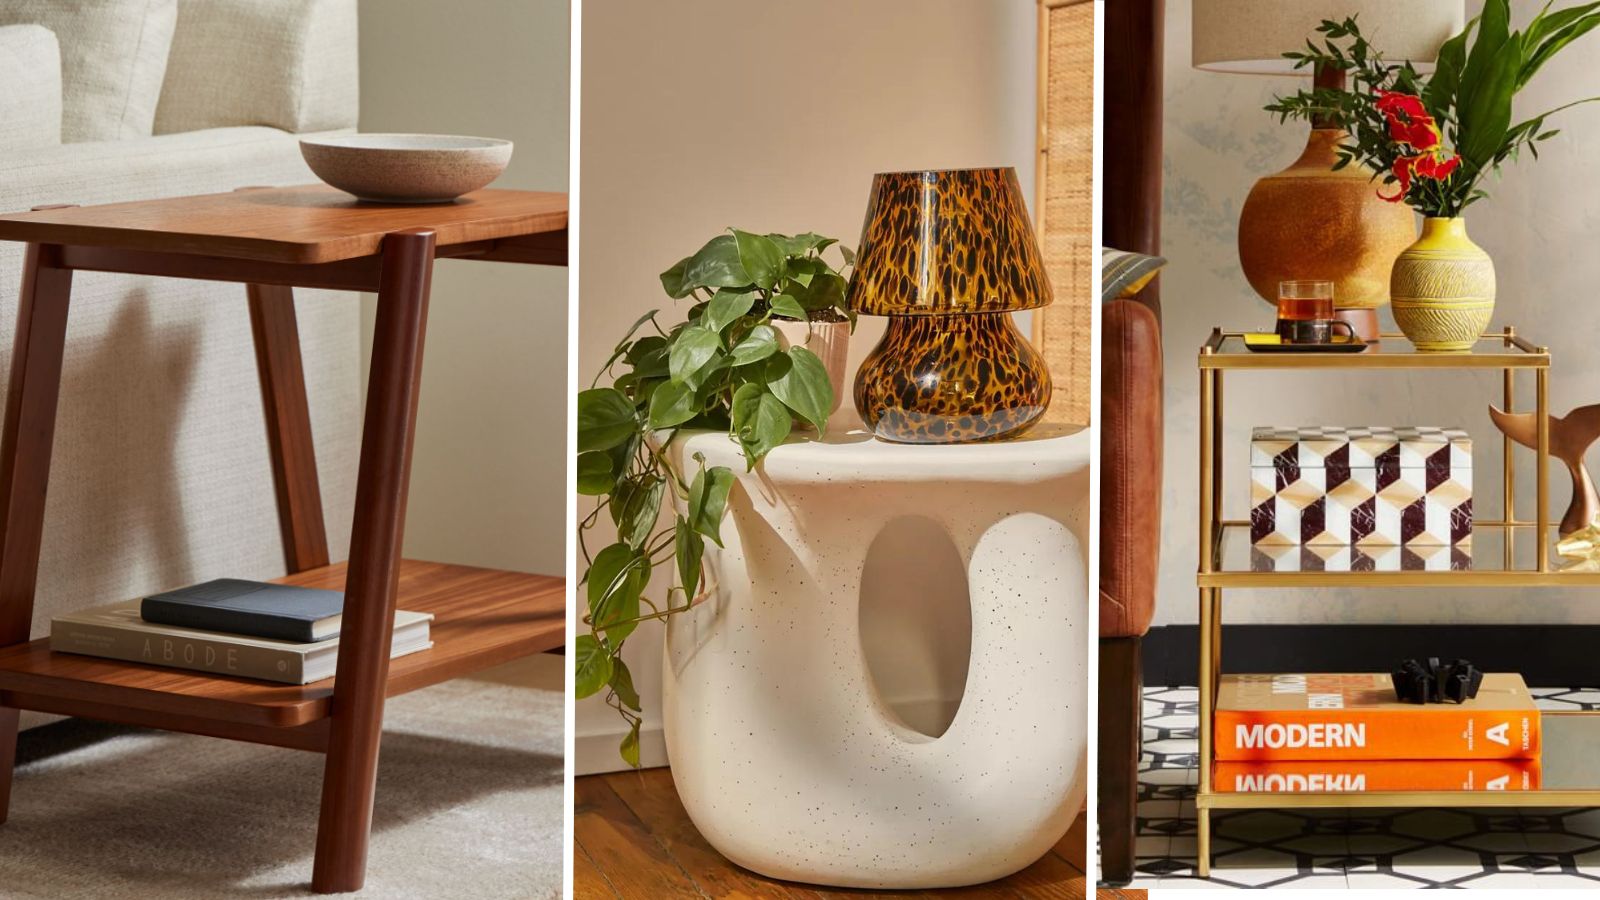 How to style small living room end tables — enjoy chic zoning with 8 expert tips
8 expert-approved tips for how to style small living room end tables
By Jessie Quinn
-
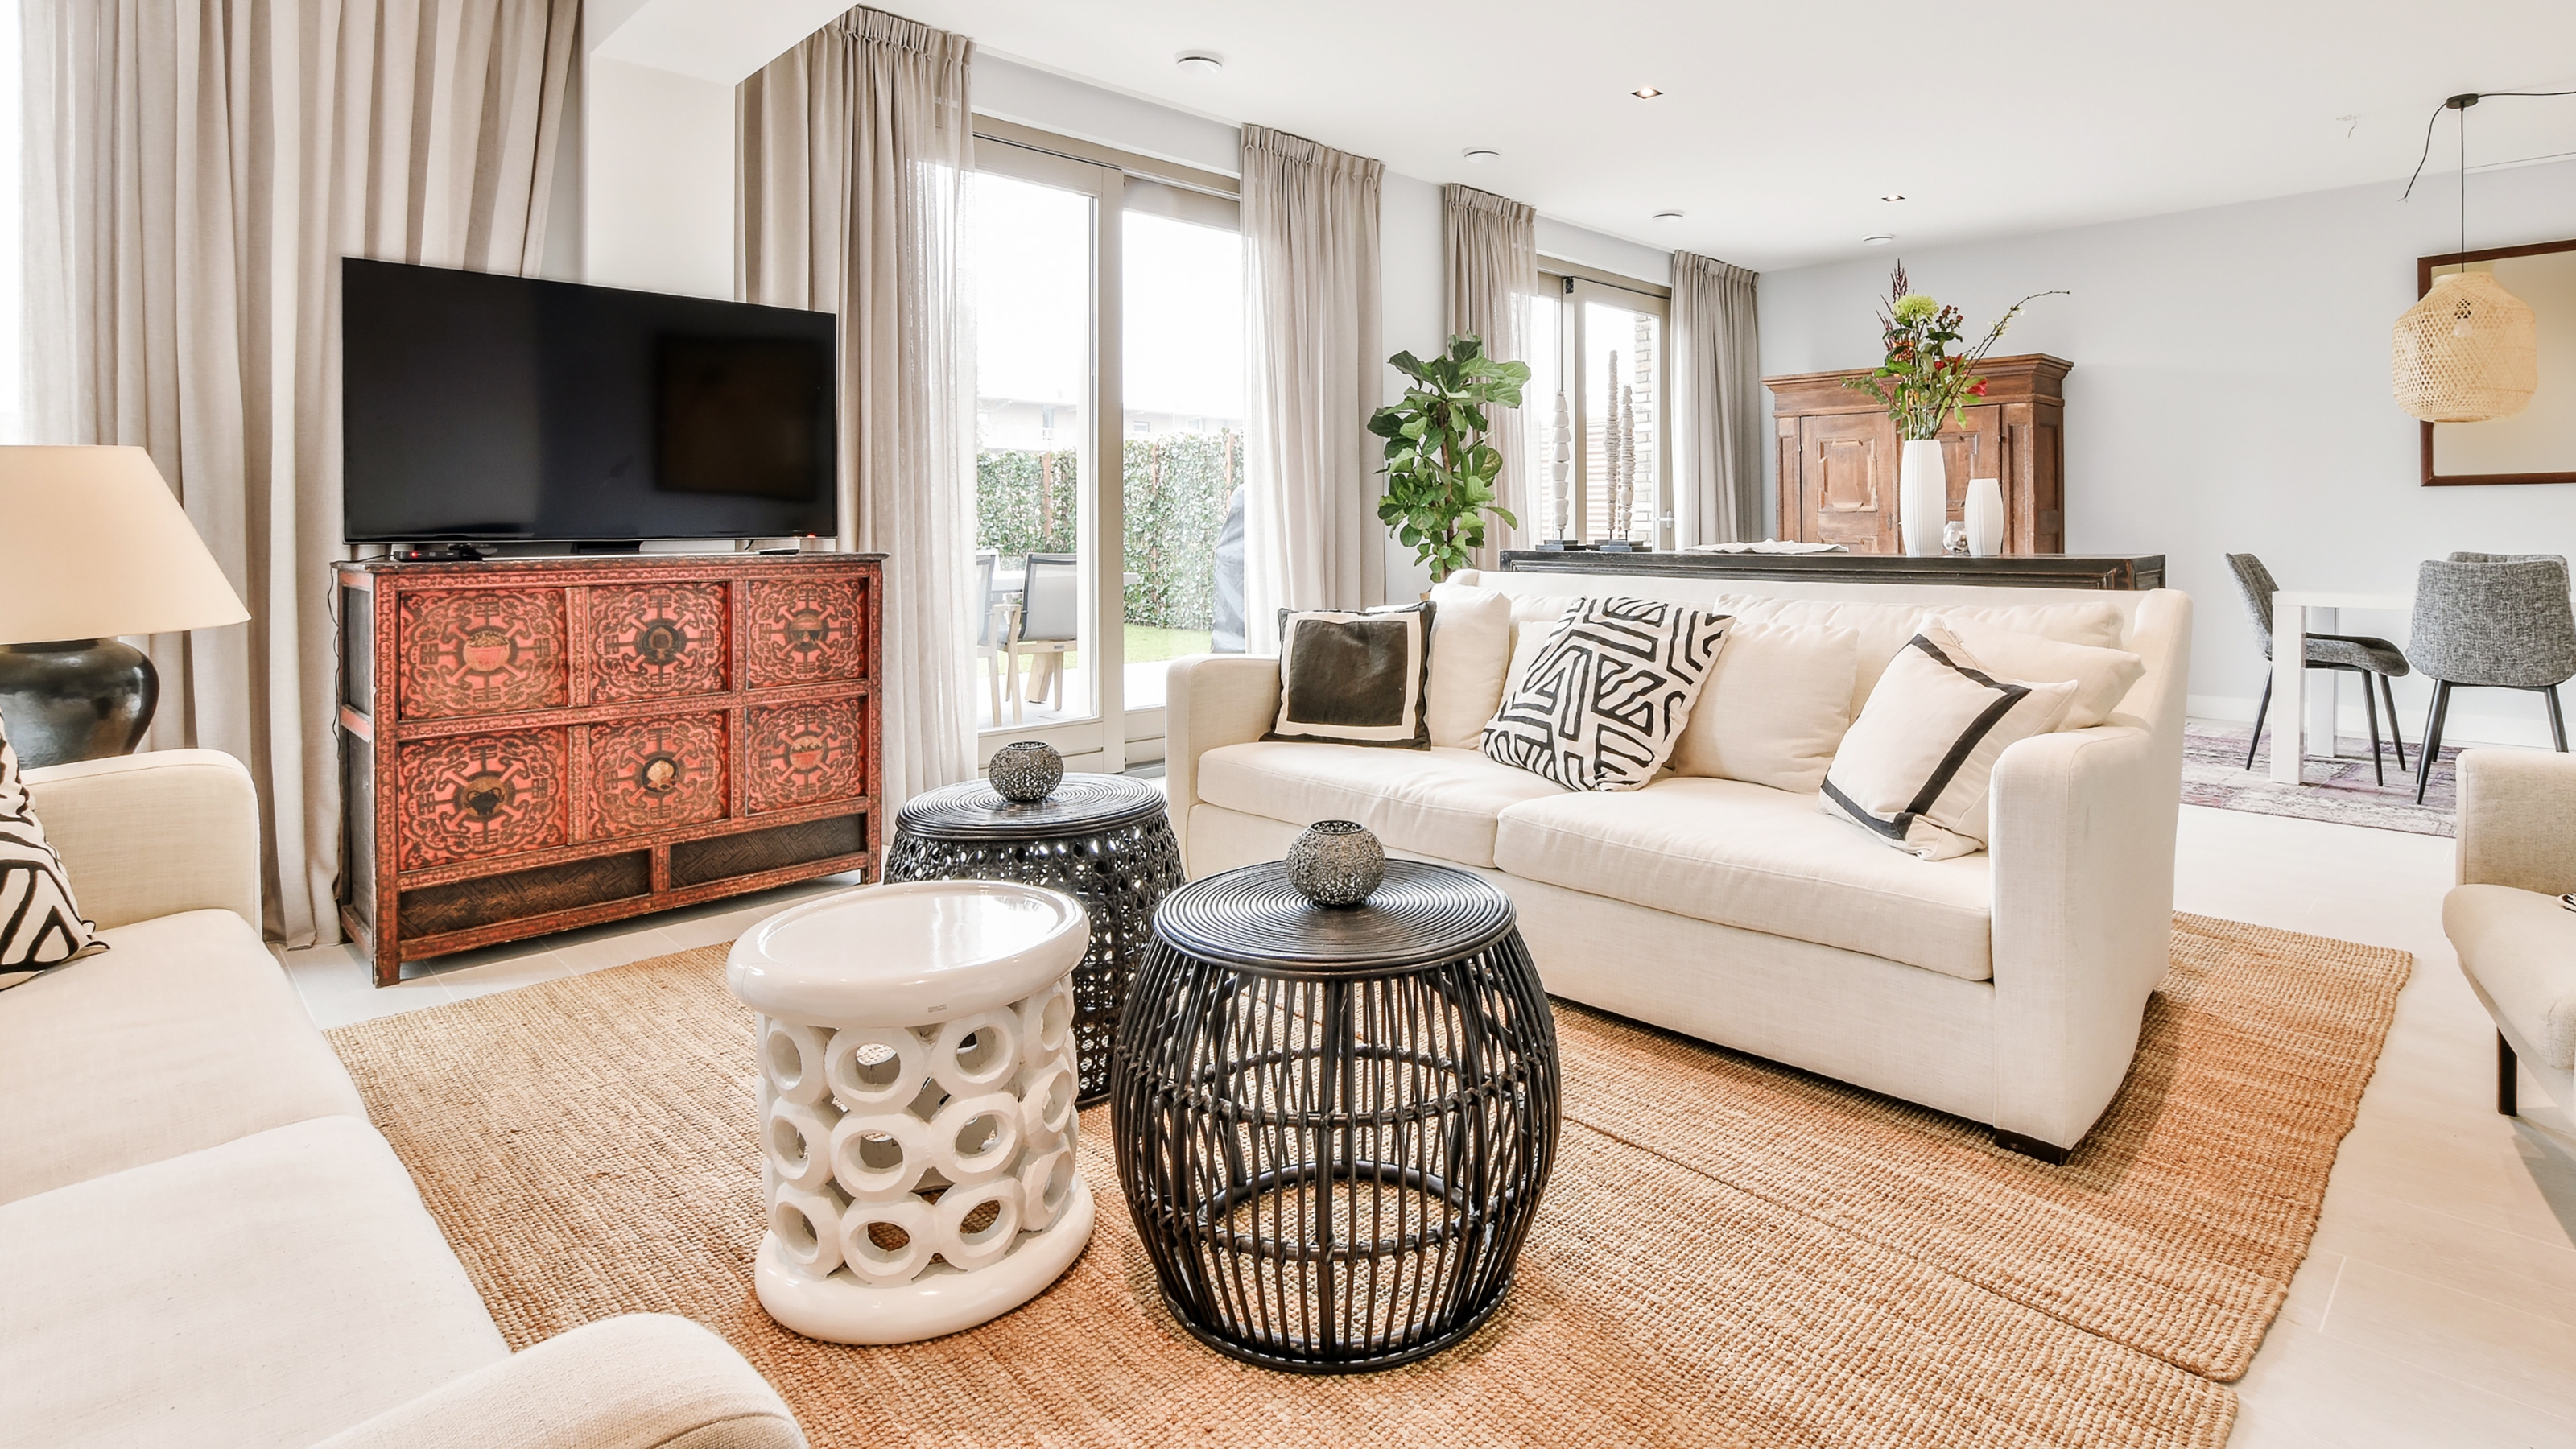 6 small living room DIY projects — inspired ideas from an interior designer
Does your small living room need a refresh? These 6 small living room DIY projects will have your living room serving looks
By Aida M. Toro
-
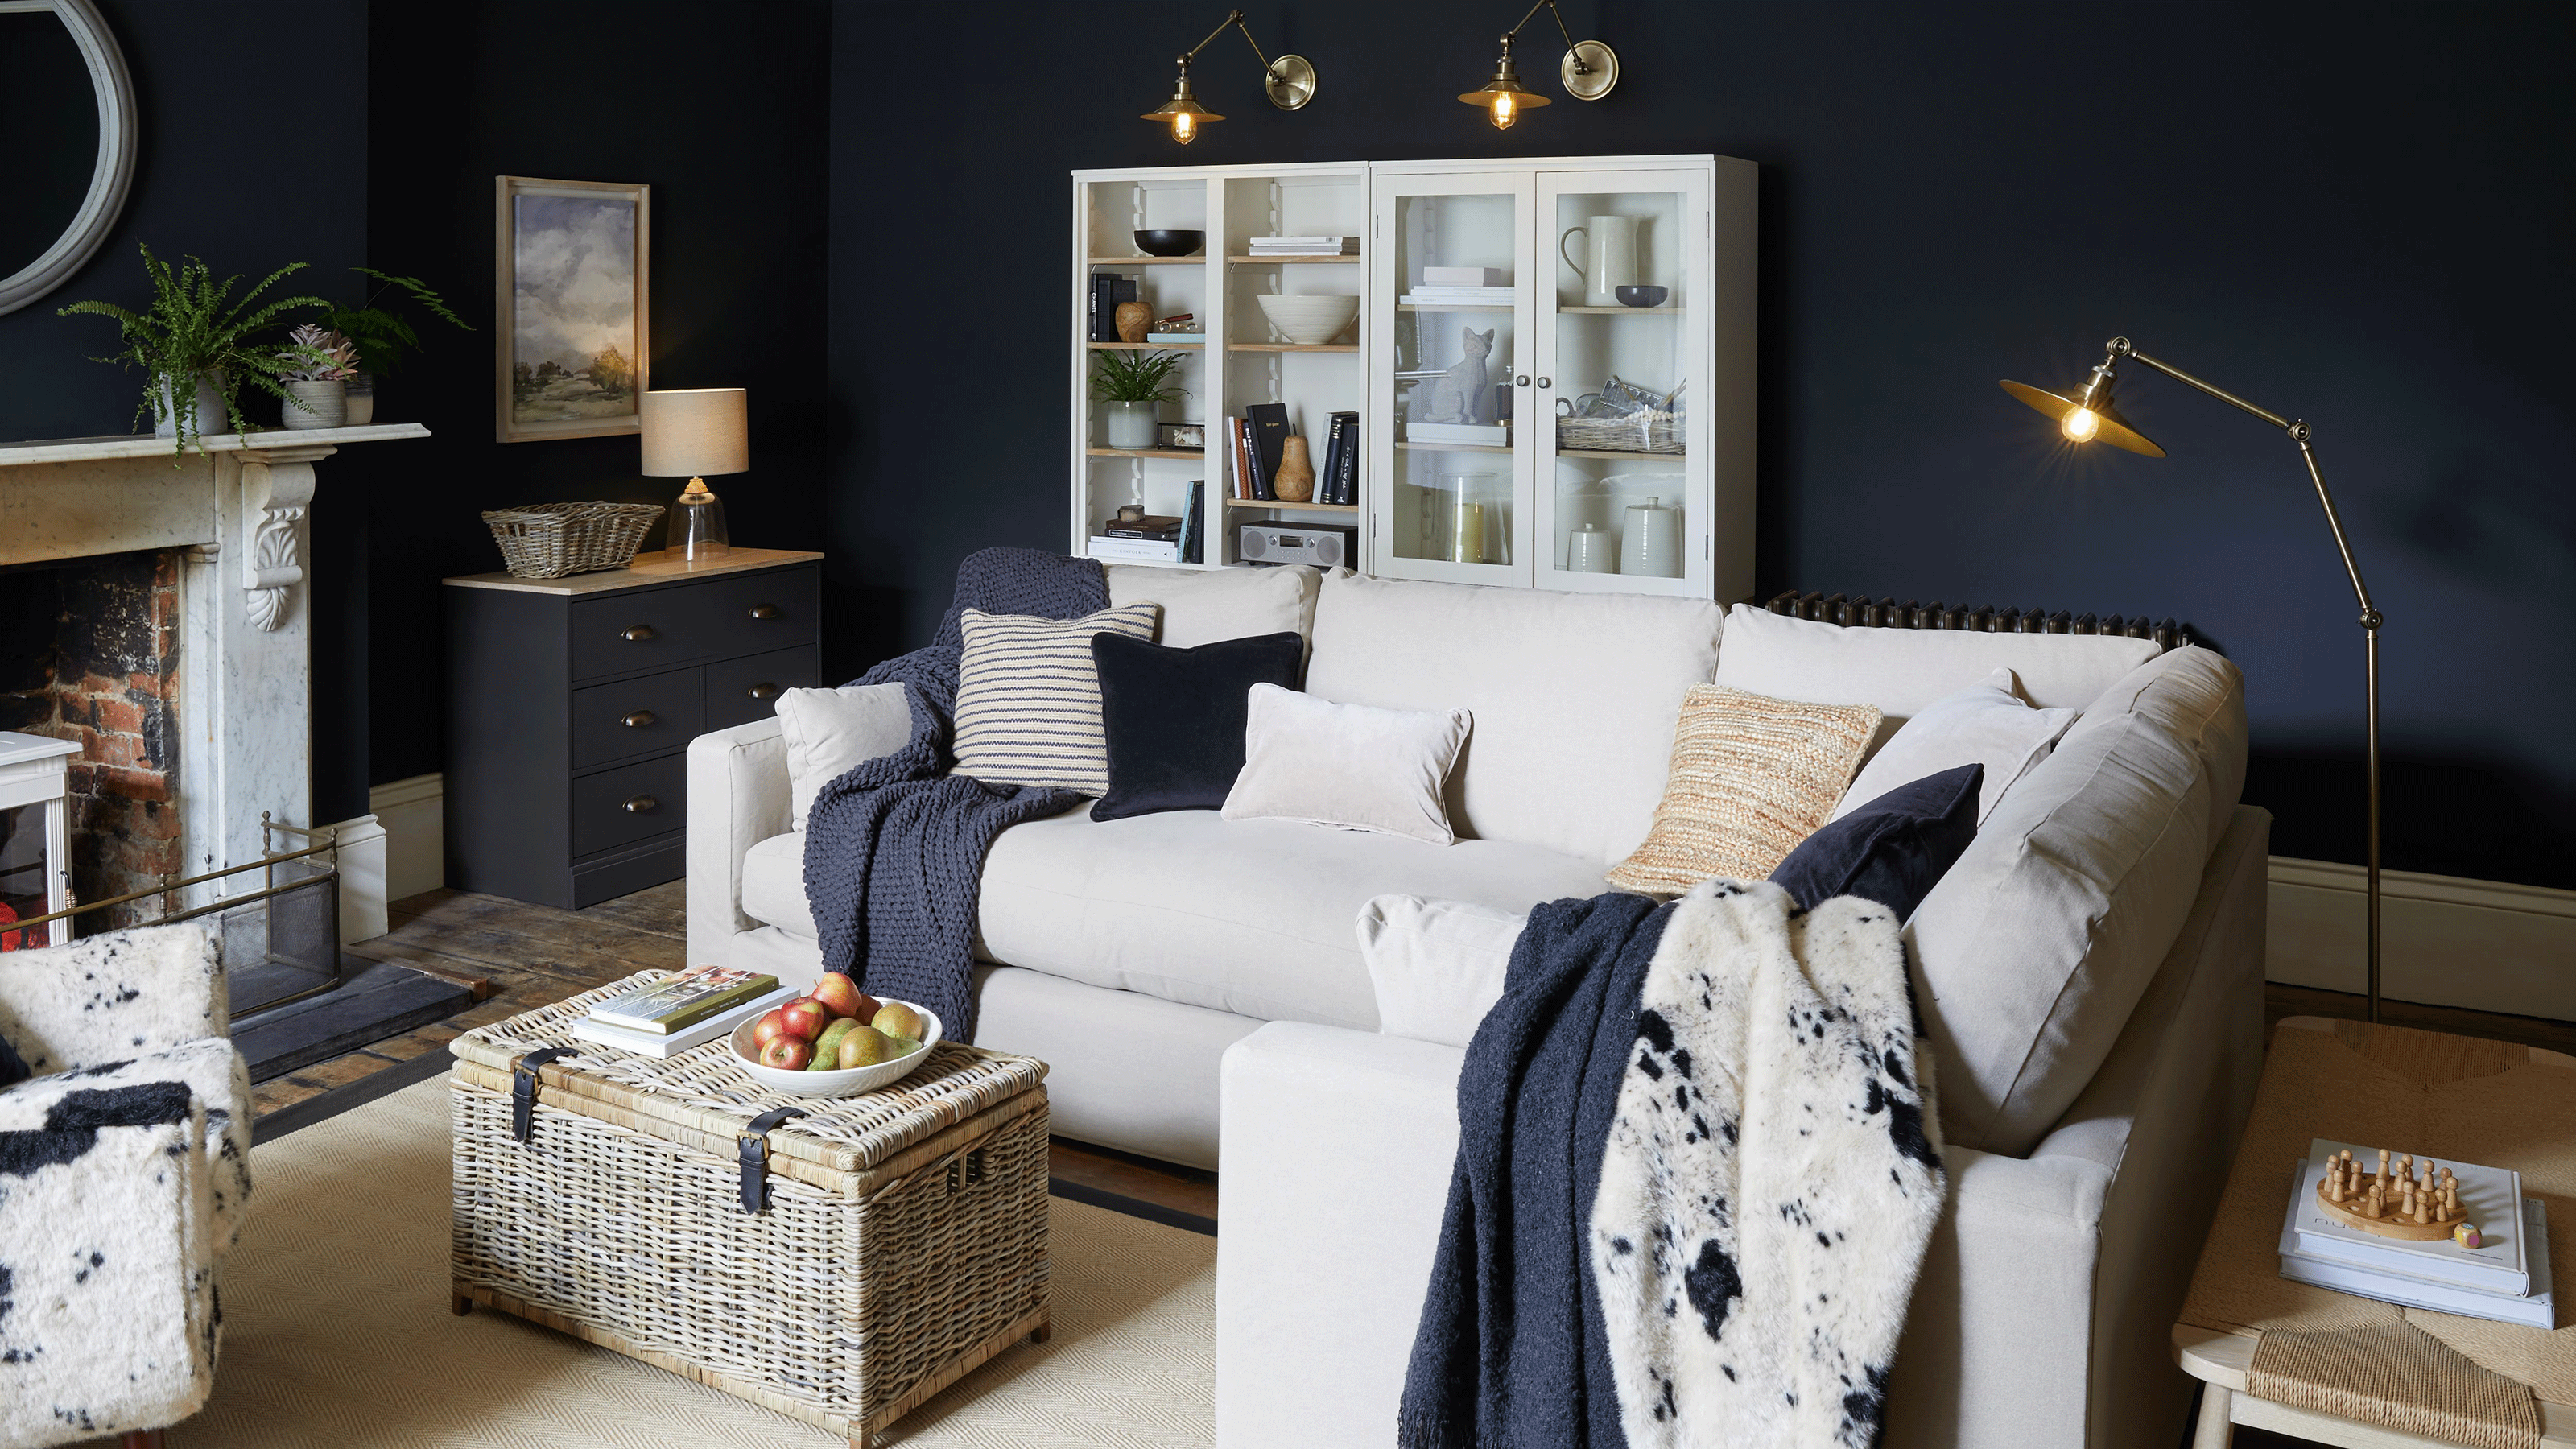 14 best ways to arrange living room furniture — from the experts
How you arrange living room furniture will make or break the space you have. Learn the right way to organize your reception
By Christina Chrysostomou
-
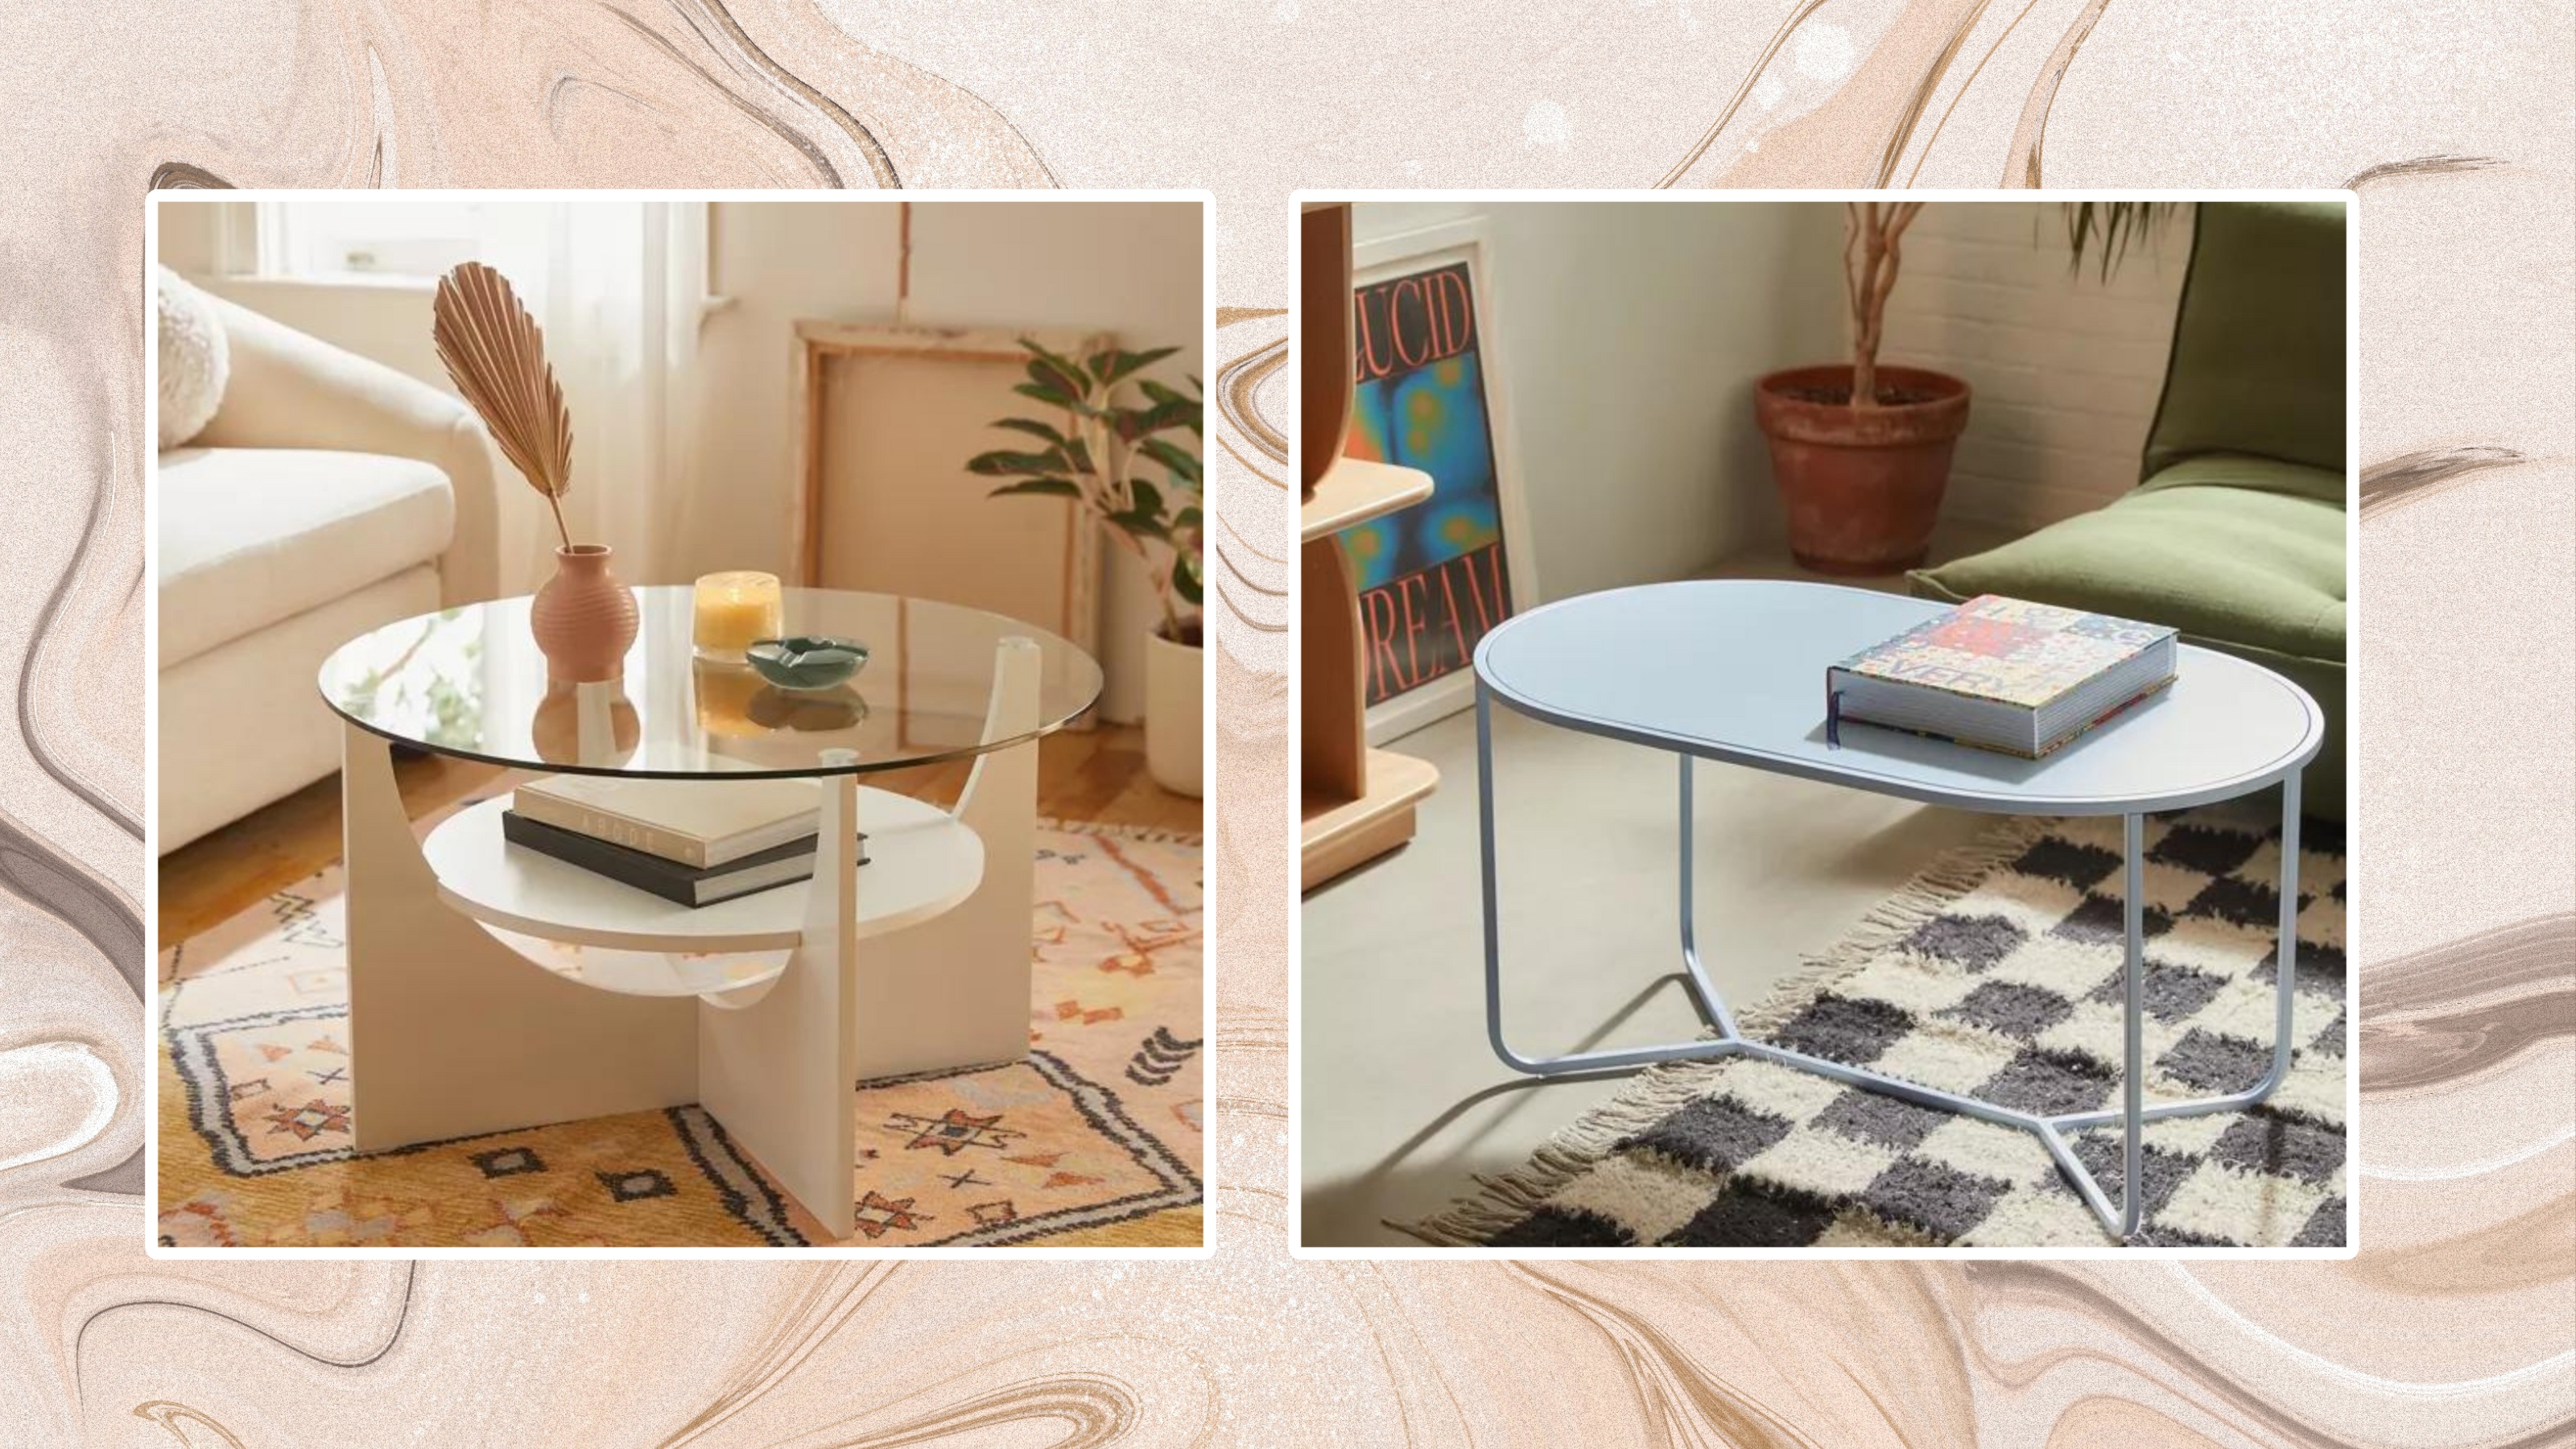 Out of the 22 coffee tables at Urban Outfitters, these are the 9 I'd pop my iced latte on
From round to oblong styles made from glass, metal, concrete, and wood, these Urban Outfitters coffee tables deliver on style, form, and functionality.
By Christina Chrysostomou
-
 7 living room design trends for 2024 to use right now
2024 small living room design trends will be all about sparking conversations and cozy vibes. We speak to design experts to find out what these are.
By Camille Dubuis-Welch
-
 A 9-step guide to installing kitchen cabinets yourself, for a pro finish
You can install kitchen cabinets yourself no problem. Measure carefully and take it one step at a time when replacing base and wall cabinets to upgrade your cooking space.
By Sarah Warwick
-
 Pink room decor ideas: 28 ways to use this sweet shade
Pink room decor is always a winning option – use these fail-safe design ideas for a grown-up take on this popular color
By Hebe Hatton