
Upcycle a coffee table and you've given a worn or unwanted piece of furniture a new lease of life.
With the cost of living constantly fluctuating, sometimes our disposable income doesn't always stretch to buying one a trendy coffee table, so when you're strapped for cash, it's time to get creative.
Whether you choose to add personality to a table you own that looks a bit tired, find something for free on an online marketplace, or grab something for cheap at a charity store or yard sale, upcycling a coffee table can look just as professional as something store-bought.
Adding your own spin doesn't have to be expensive. From paint to decoupage, stenciling, and vinyl cut-outs you can repurpose a coffee table for a couple of cents.
How to upcycle a coffee table
'The possibilities are endless when it comes to upcycling - you can come up with a truly unique look just by using your imagination,' says Sophie Hill, marketing and insight and innovation at Rothley.
Typically people upcycle with a lick of paint or a different countertop, but why not move a little bit further and swap the legs too? Change the traditional wooden legs to hairpin legs to charmingly bring together classic elements with new and trendy finishes like copper or matt black.
Use the new legs as a starting point or a color reference and build up from there. You can also paint patterns, or tile the top creating a mosaic to spark conversation at your next dinner party.
1. Pretend G Plan table
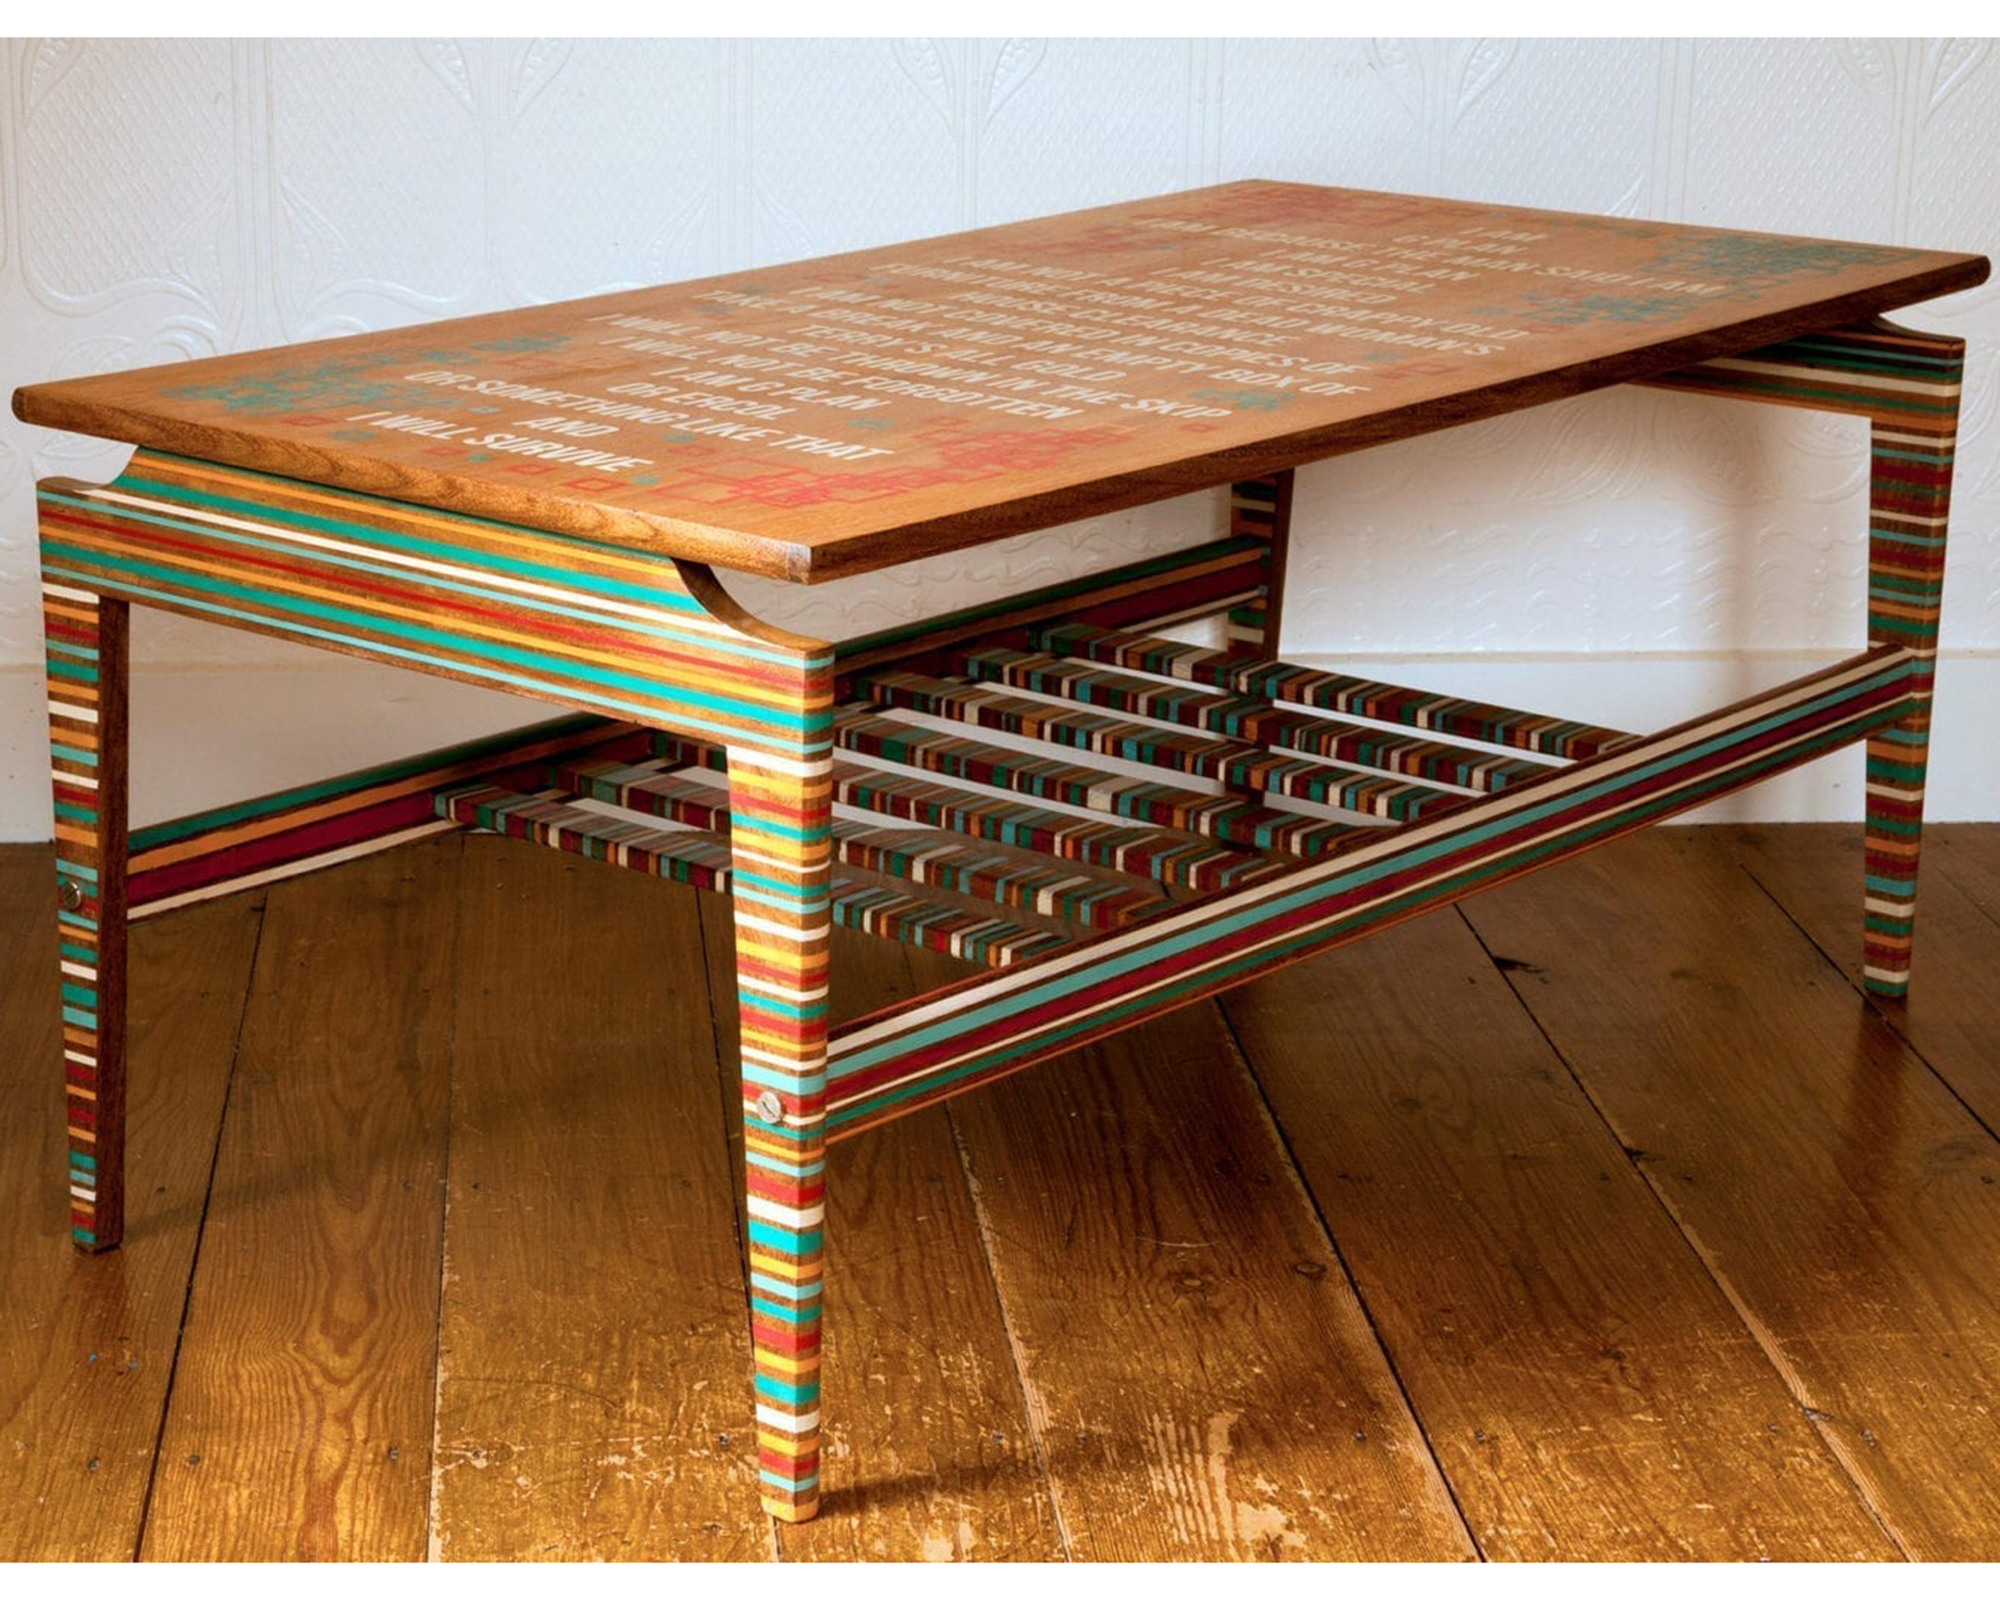
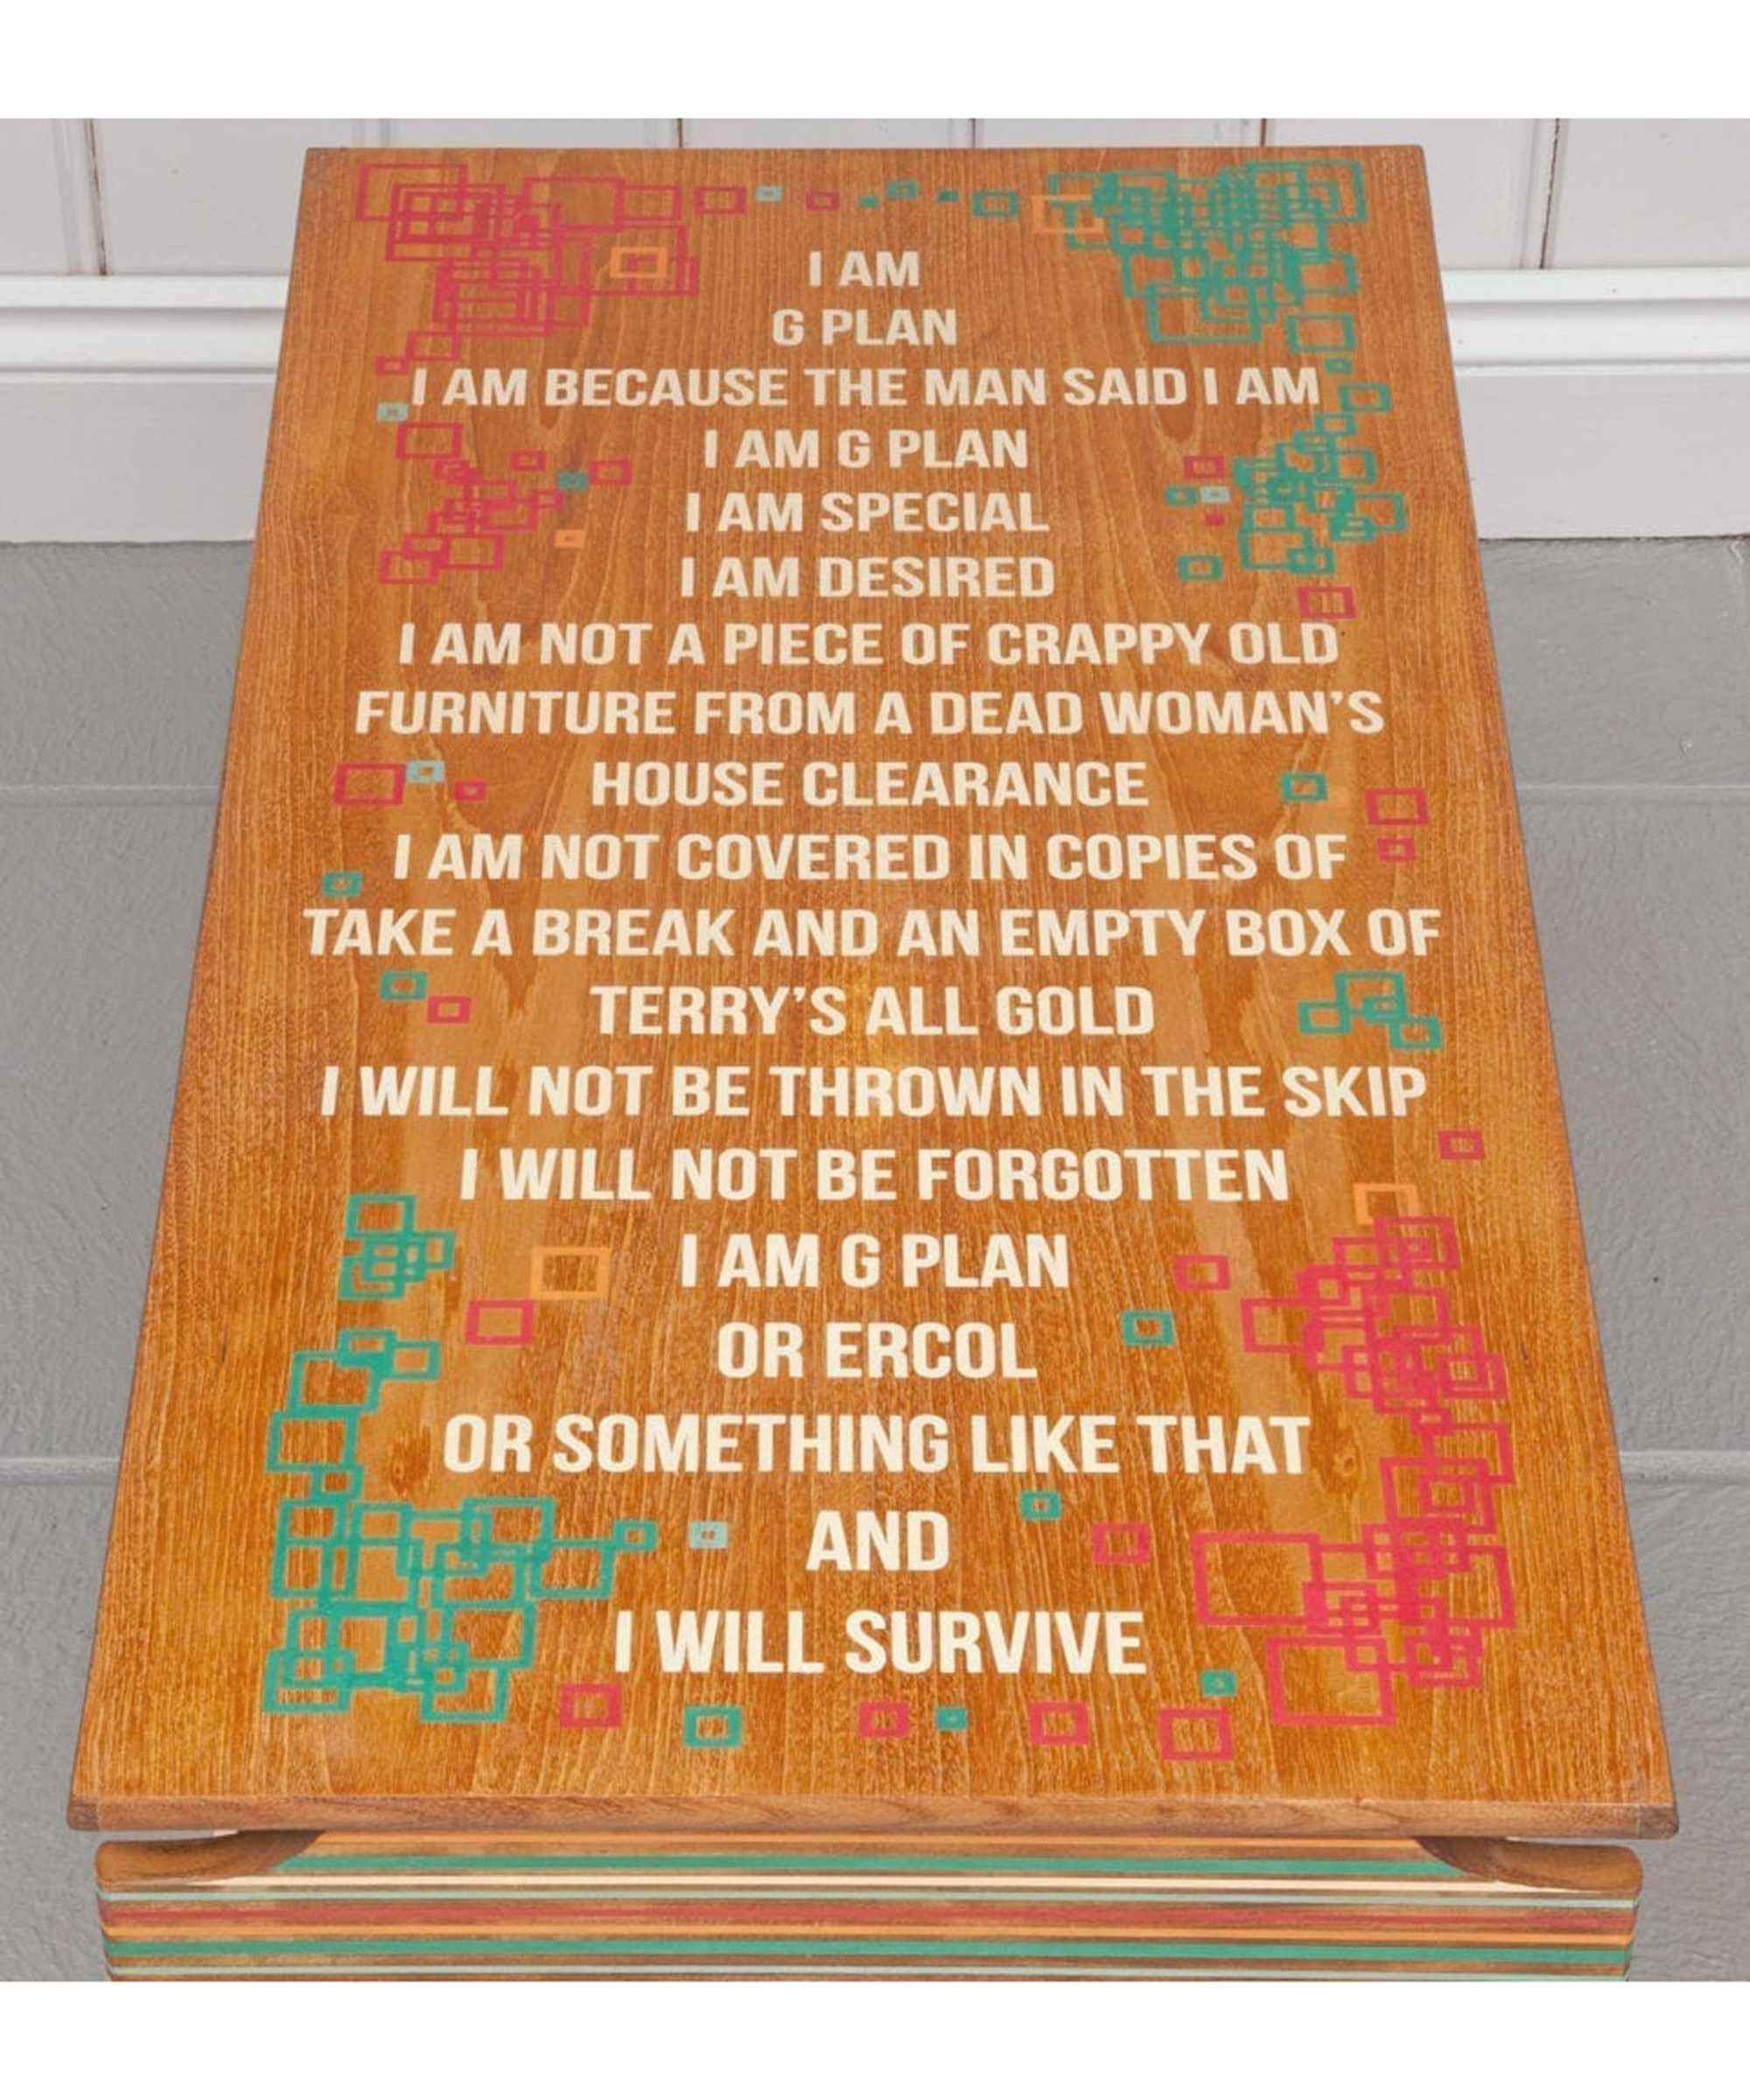
For his first project as Tim Gould, painter in residence, Annie Sloan stencilled this midcentury modern coffee table with witty lines inspired by the table’s dubious authenticity as a G Plan.
Tim bought this table from a man advertising it as “G Plan”. On closer inspection, Tim suspected this may not have been true, which inspired him to write the words on the top.
If you like this midcentury modern idea, then you may want to delve into our step-by-step guide on how to stencil for your other upcycling projects.
You will need:
- A computer
- Adobe Illustrator or design software
- A printer (take a look at our best small printers)
- Annie Sloan wall paint in Emperor’s Silk
- Annie Sloan wall paint in Florence
- Annie Sloan wall paint in Arles
- Annie Sloan wall paint in Pure
- Annie Sloan Chalk Paint® in Pure
How to:
- Tim always starts his projects by creating the design for his piece of furniture on Adobe Illustrator. He then prints his designs out onto vinyl – creating the stencils that he’ll use on the piece.
- A retro palette of Emperor’s Silk, Florence, Provence, Arles, and Pure was used to create the pin-stripes that run across the table legs and the slats below. The same colors are used on the intersecting geometric pattern that frames the typography on the tabletop. The typography is painted all with Chalk Paint in Pure – a crisp white that forms a stark contrast against the wood.
- Tim finished the piece by applying Clear Chalk Paint Wax – the first coat was brushed on before the stencil was removed to avoid any shift in color. A second coat was applied after the stencil was removed to make the piece really durable.
Real Homes top tip: If you don't want to invest in a printer and design software, you may be better off with a more craft-led product like a Cricut Joy + Smart Vinyl bundle.
2. Art Deco coffee table
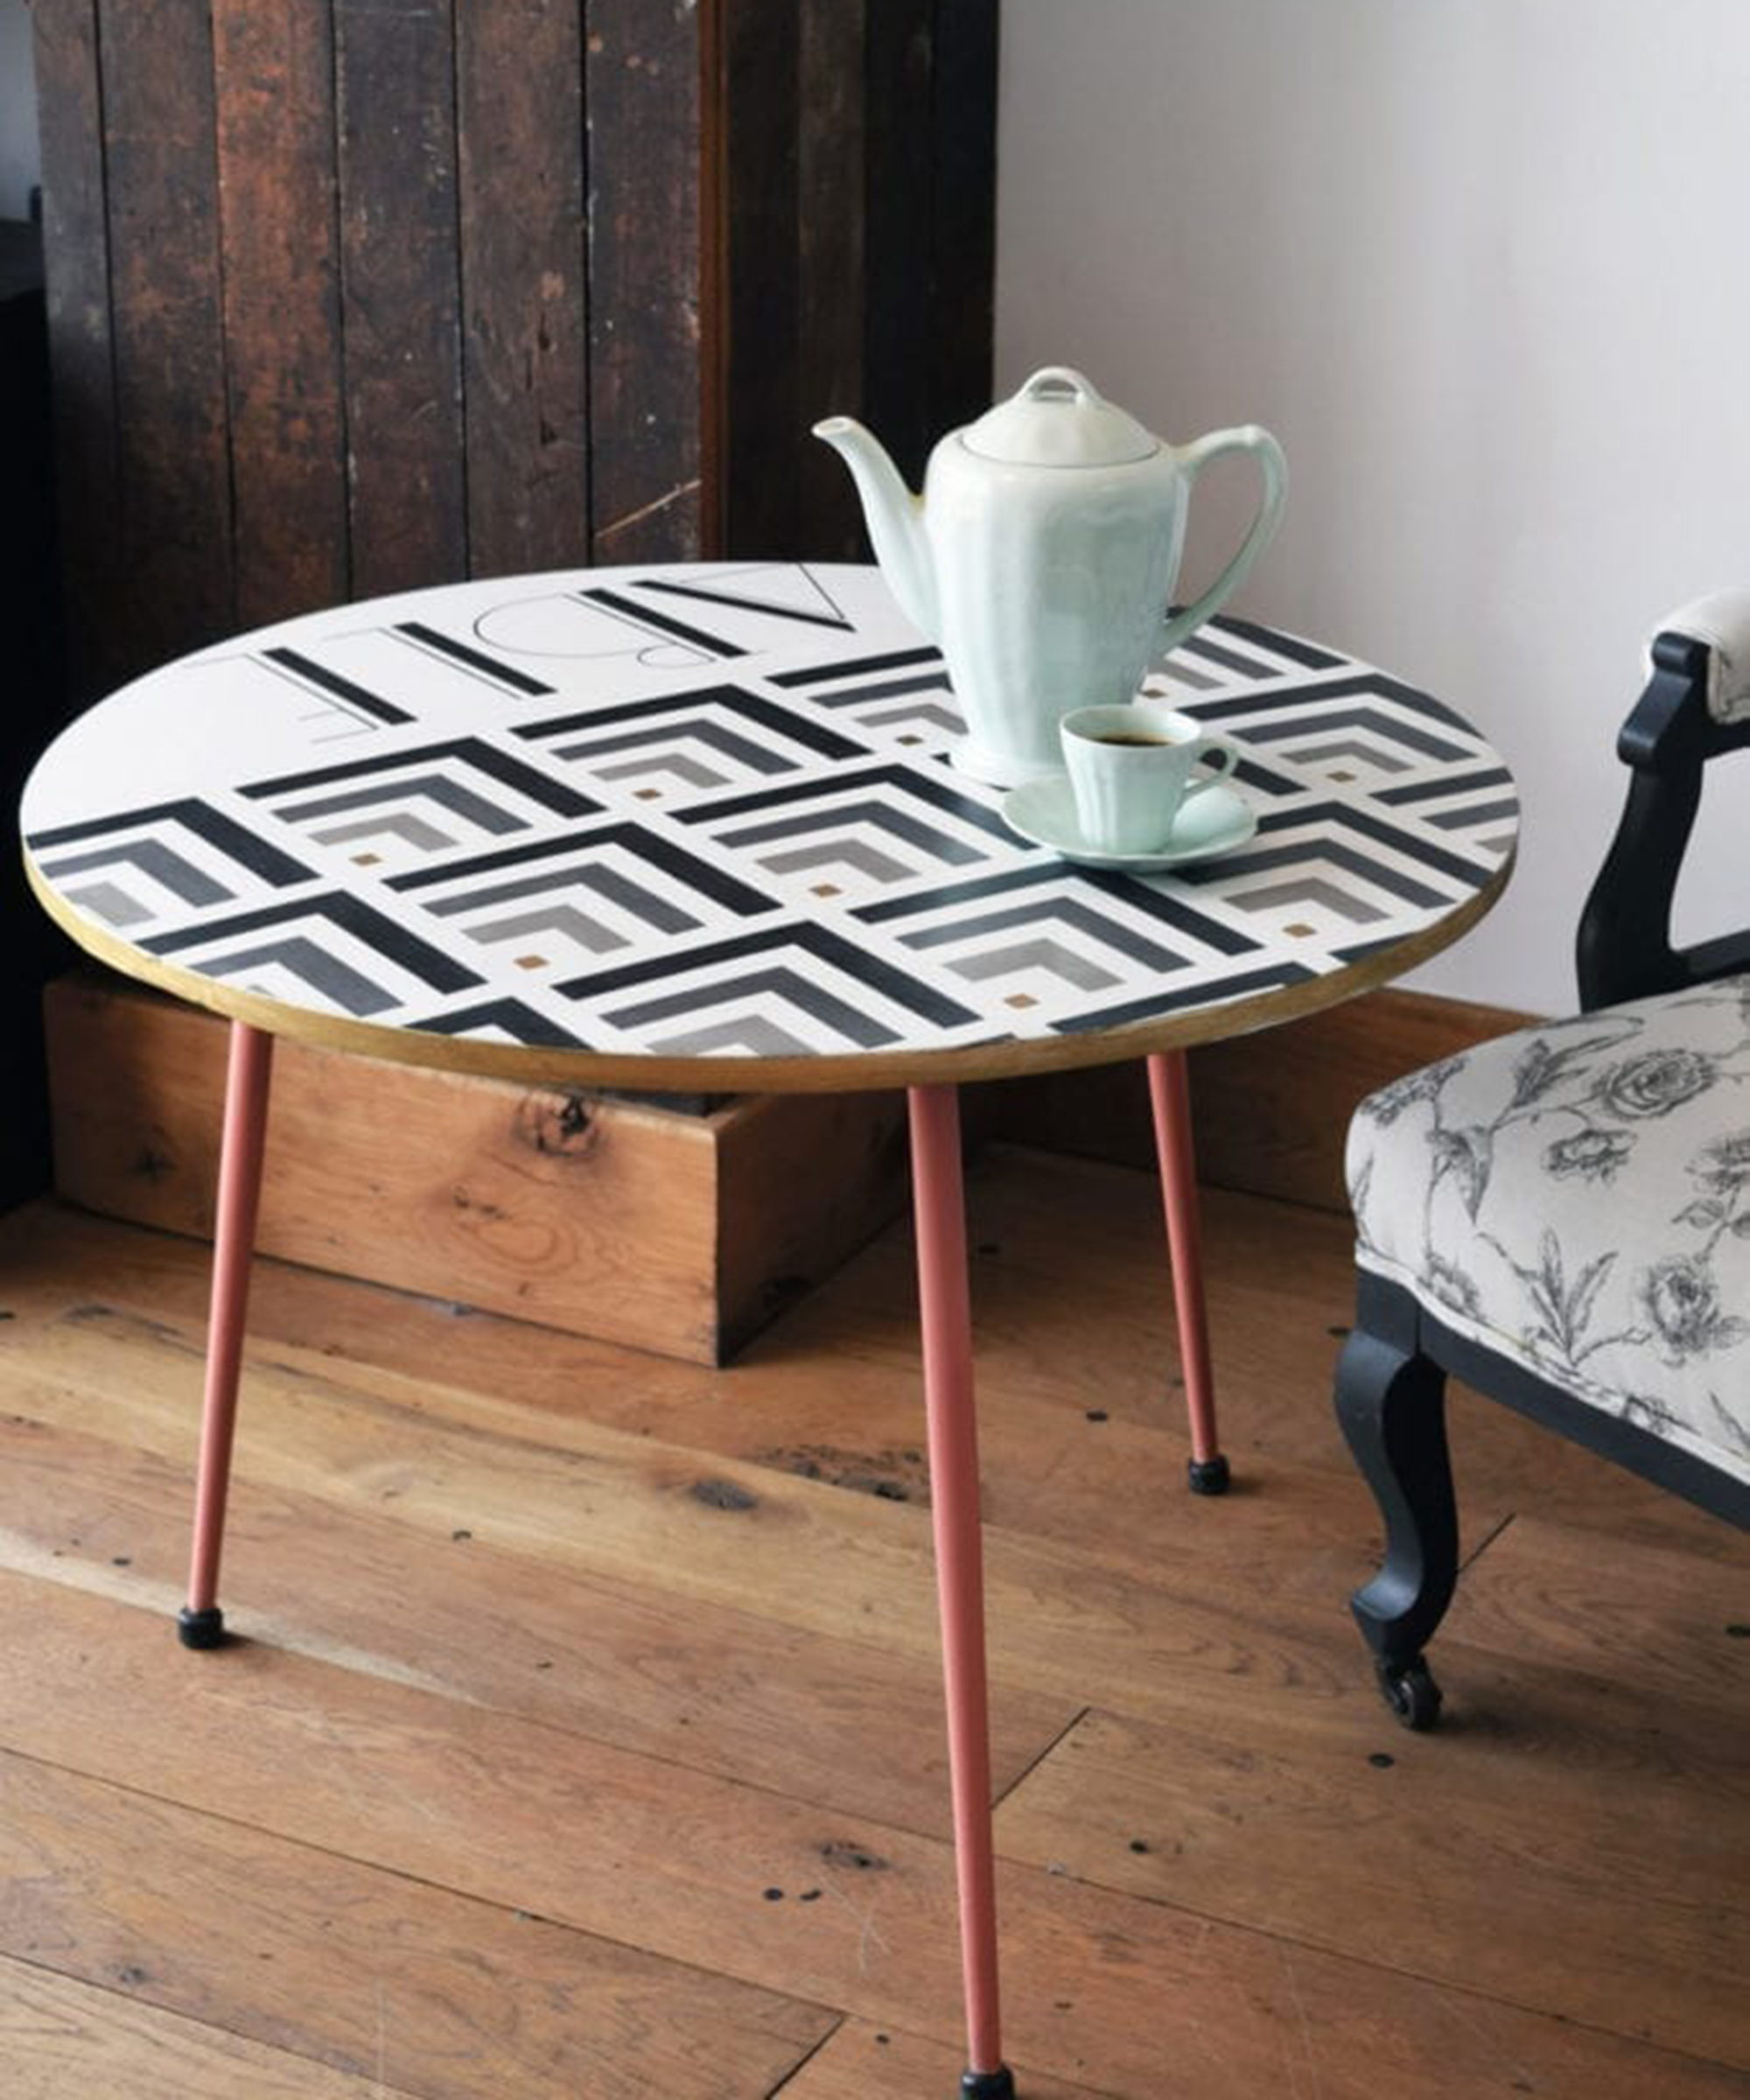
Jonathon Marc Mendes, painter in residence at Annie Sloan found this round coffee table at a junk shop for under $10. He gave it a whole new lease of life and a cool Art Deco look using small project pots of Annie Sloan's signature Chalk Paint in three shades to add a chevron design to the tabletop.
A further combination of Arles, Emperor’s Silk, and Old White creates a gorgeous warm color that has been used on the legs of the table and the edge of the table is highlighted with brass leaf for added decadence. When upcycling a coffee table, protecting your work is just as important as creating the initial design concept. Because of this, Mendes made sure to finish this table with clear chalky wax.
You will need:
- An artists' paintbrush
- Annie Sloan Chalk Paint™ in Old White
- Annie Sloan Chalk Paint™ in Graphite
- Annie Sloan Chalk Paint™ in French Linen
- Annie Sloan wall paint in Arles
- Annie Sloan Chalk Paint™ in Emperor's Silk
- Brass foil
- Annie Sloan Chalk Paint™ clear wax
3. Memories coffee table
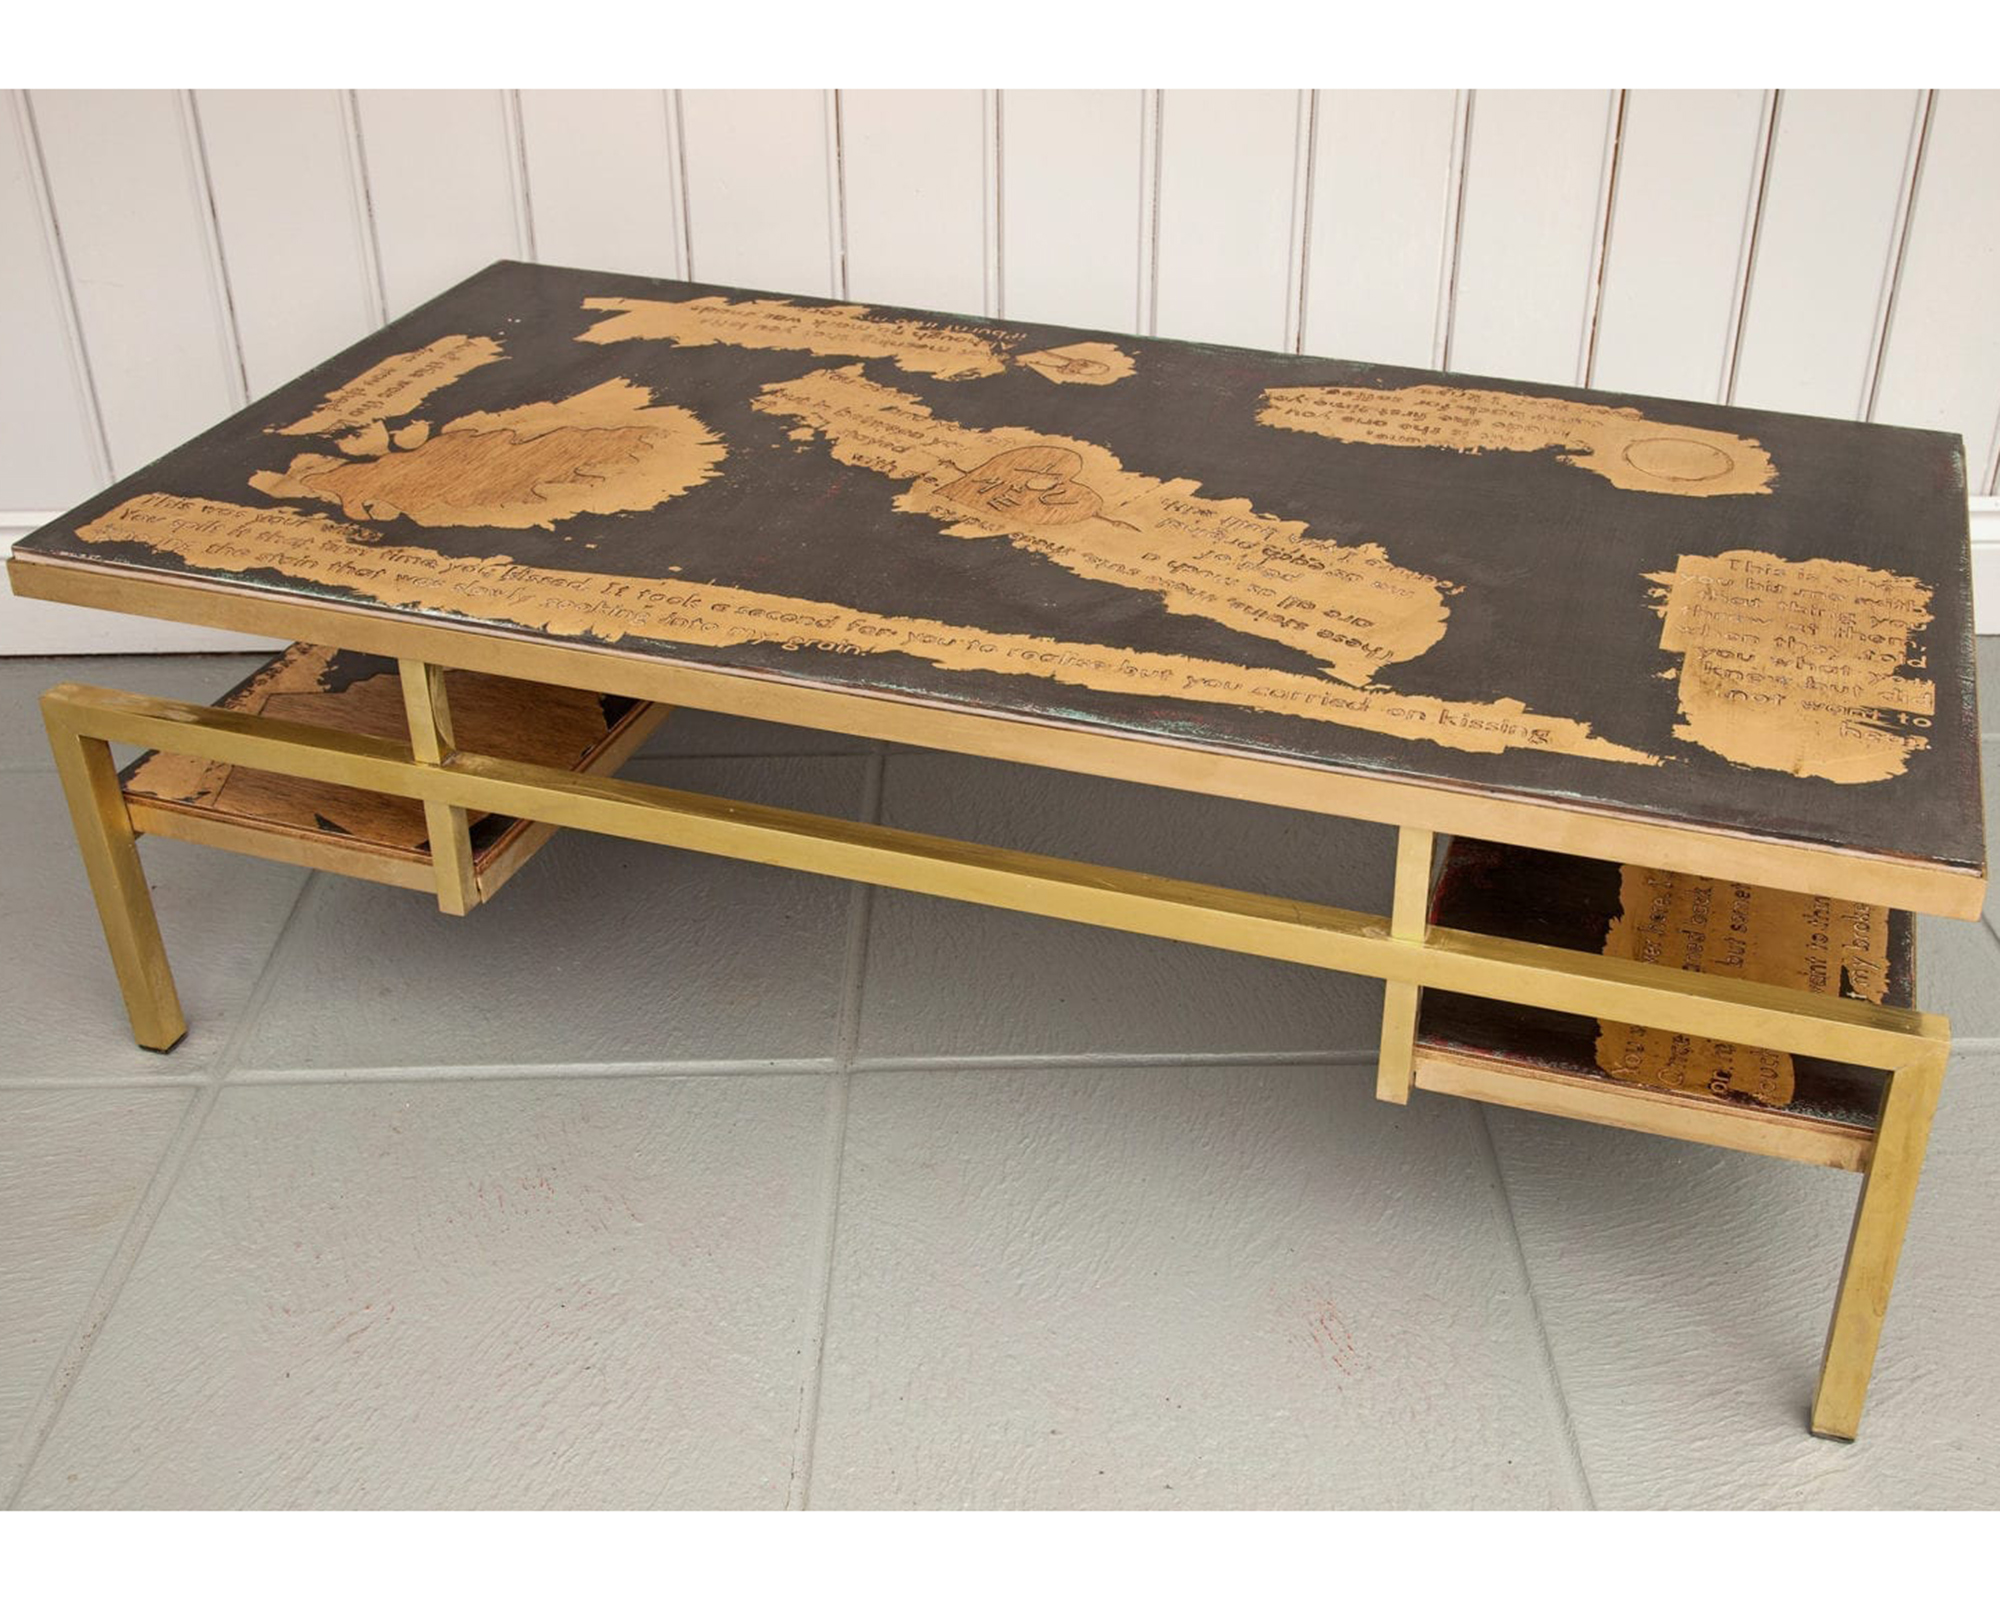
Gould had this coffee table for years. It used to have a glass top to it, however, he accidentally smashed this fragile element of his glass coffee table years ago and replaced it with a piece of ply.
The idea for the table came from the many stains and marks the table has gained over the years and the memories that they’ve left behind. The areas that were covered with the stencils are left as bare wood – as if the paint has been cut out of the paint.
You will need:
- A coffee table
- A computer with basic design or word processing software
- Vinyl printing paper
- Annie Sloan chalk Paint® in Pure
- Annie Sloan chalk Paint® in Emperor's Silk
- Annie Sloan chalk Paint® in Provence
- Annie Sloan chalk Paint® in Graphite
- Brass leaf
- Gold leaf
- Tweezers
- Scalpel
- Annie Sloan clear Chalk Paint® wax
- Annie Sloan Chalk Paint® dark wax
How to:
- Tim created word and image stencils on a computer, printed them onto vinyl, and applied them to the table surface.
- Instead of the traditional stencil, where the letters are cut out and paint is applied, Tim did the reverse; laying the letters in vinyl on the tabletop.
- He then painted layers of Chalk Paint in Pure, Emperor’s Silk, Provence, and Graphite over the designs. He lightly rubbed the paint down between coats, leaving a wonderful textured patina.
- Using brass leaf and gold size, Tim highlighted areas around the text and imagery.
- Once dry, Tim carefully peeled back the stencils using tweezers, exposing the letters and shapes. The areas that were covered with the stencils are left as bare wood as if the design has been cut out of the paint.
- To finish the piece, Tim covered the legs and sides with more Brass Leaf. The piece is sealed with Clear Chalk Paint® Wax and a little Dark Wax.
Want to level up on your paint technique? We've a whole tutorial on how to paint wooden furniture.
4. Rust-Oleum's playful chalkboard coffee table
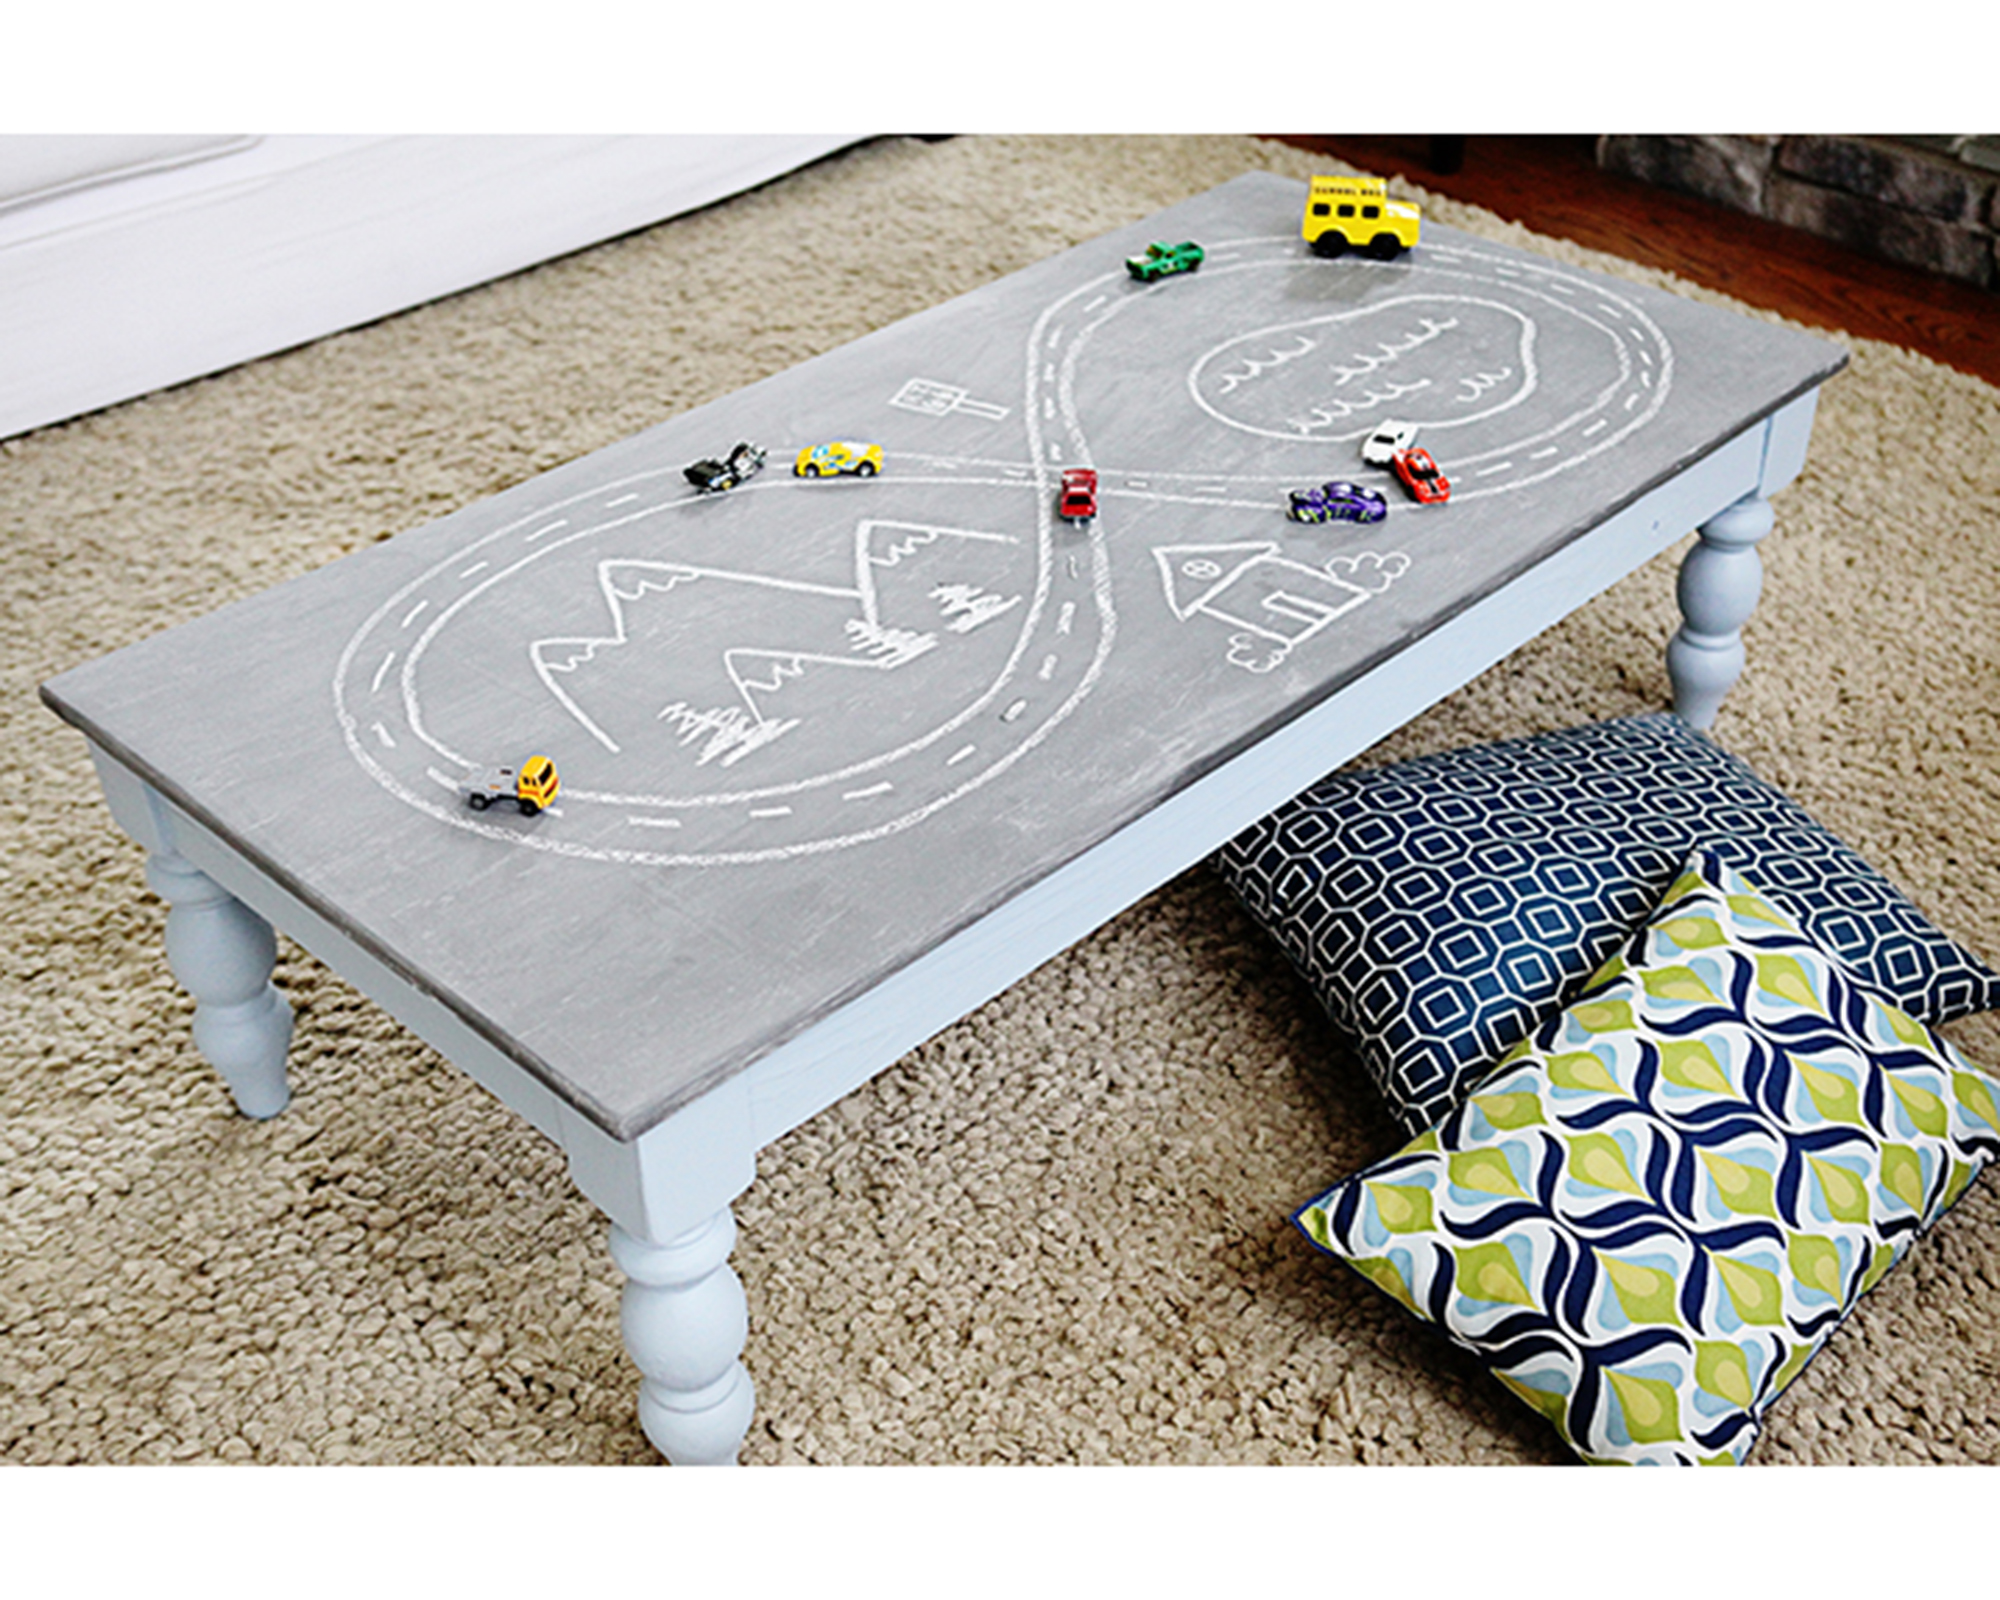
Create a writable-erasable chalkboard surface on your coffee table where your little ones can play with chalk. When your kids are done playing, turn the temporary playroom back into a family room and write a creative message to your family or make some art. Or, alternatively, make this a permanent fixture in your kids' room.
You will need:
- Rust-Oleum clear chalk board - grab it at Amazon
- 1/4" to 3/8" nap roller cover
- Paint roller
- Drop cloth
- Paint tray
- Stir stick
- Chalk
How to:
- Lay your drop cloth beneath where you'll be painting. With painter's tape, mask off any areas you don't want to cover in Clear Chalkboard paint. Use a good quality synthetic brush, ¼” to ⅜” nap roller, or a foam roller. Stir the paint thoroughly and pour it into a paint tray. Roll the paint onto the roller and use light, even strokes to ensure an even and smooth finish on the tabletop.
- Clear Chalkboard paint dries to touch in 30 minutes, to handle in 2 hours, and is fully dry in 2-4 hours. It may be recoated after 4 hours. Allow the paint to cure for 3 days before using it as a writeable surface. After 3 days, the chalkboard finish is ready for use.
- Before writing, condition the surface by rubbing the side of a piece of chalk over the entire surface and erase. This will leave a coat of chalk dust that will provide the best erasability. Clear Chalkboard can be wiped clean with a damp cloth. Wait 7 days after painting before washing it with water. Repeat conditioning step after cleaning.
5. Victorian tile-inspired coffee table
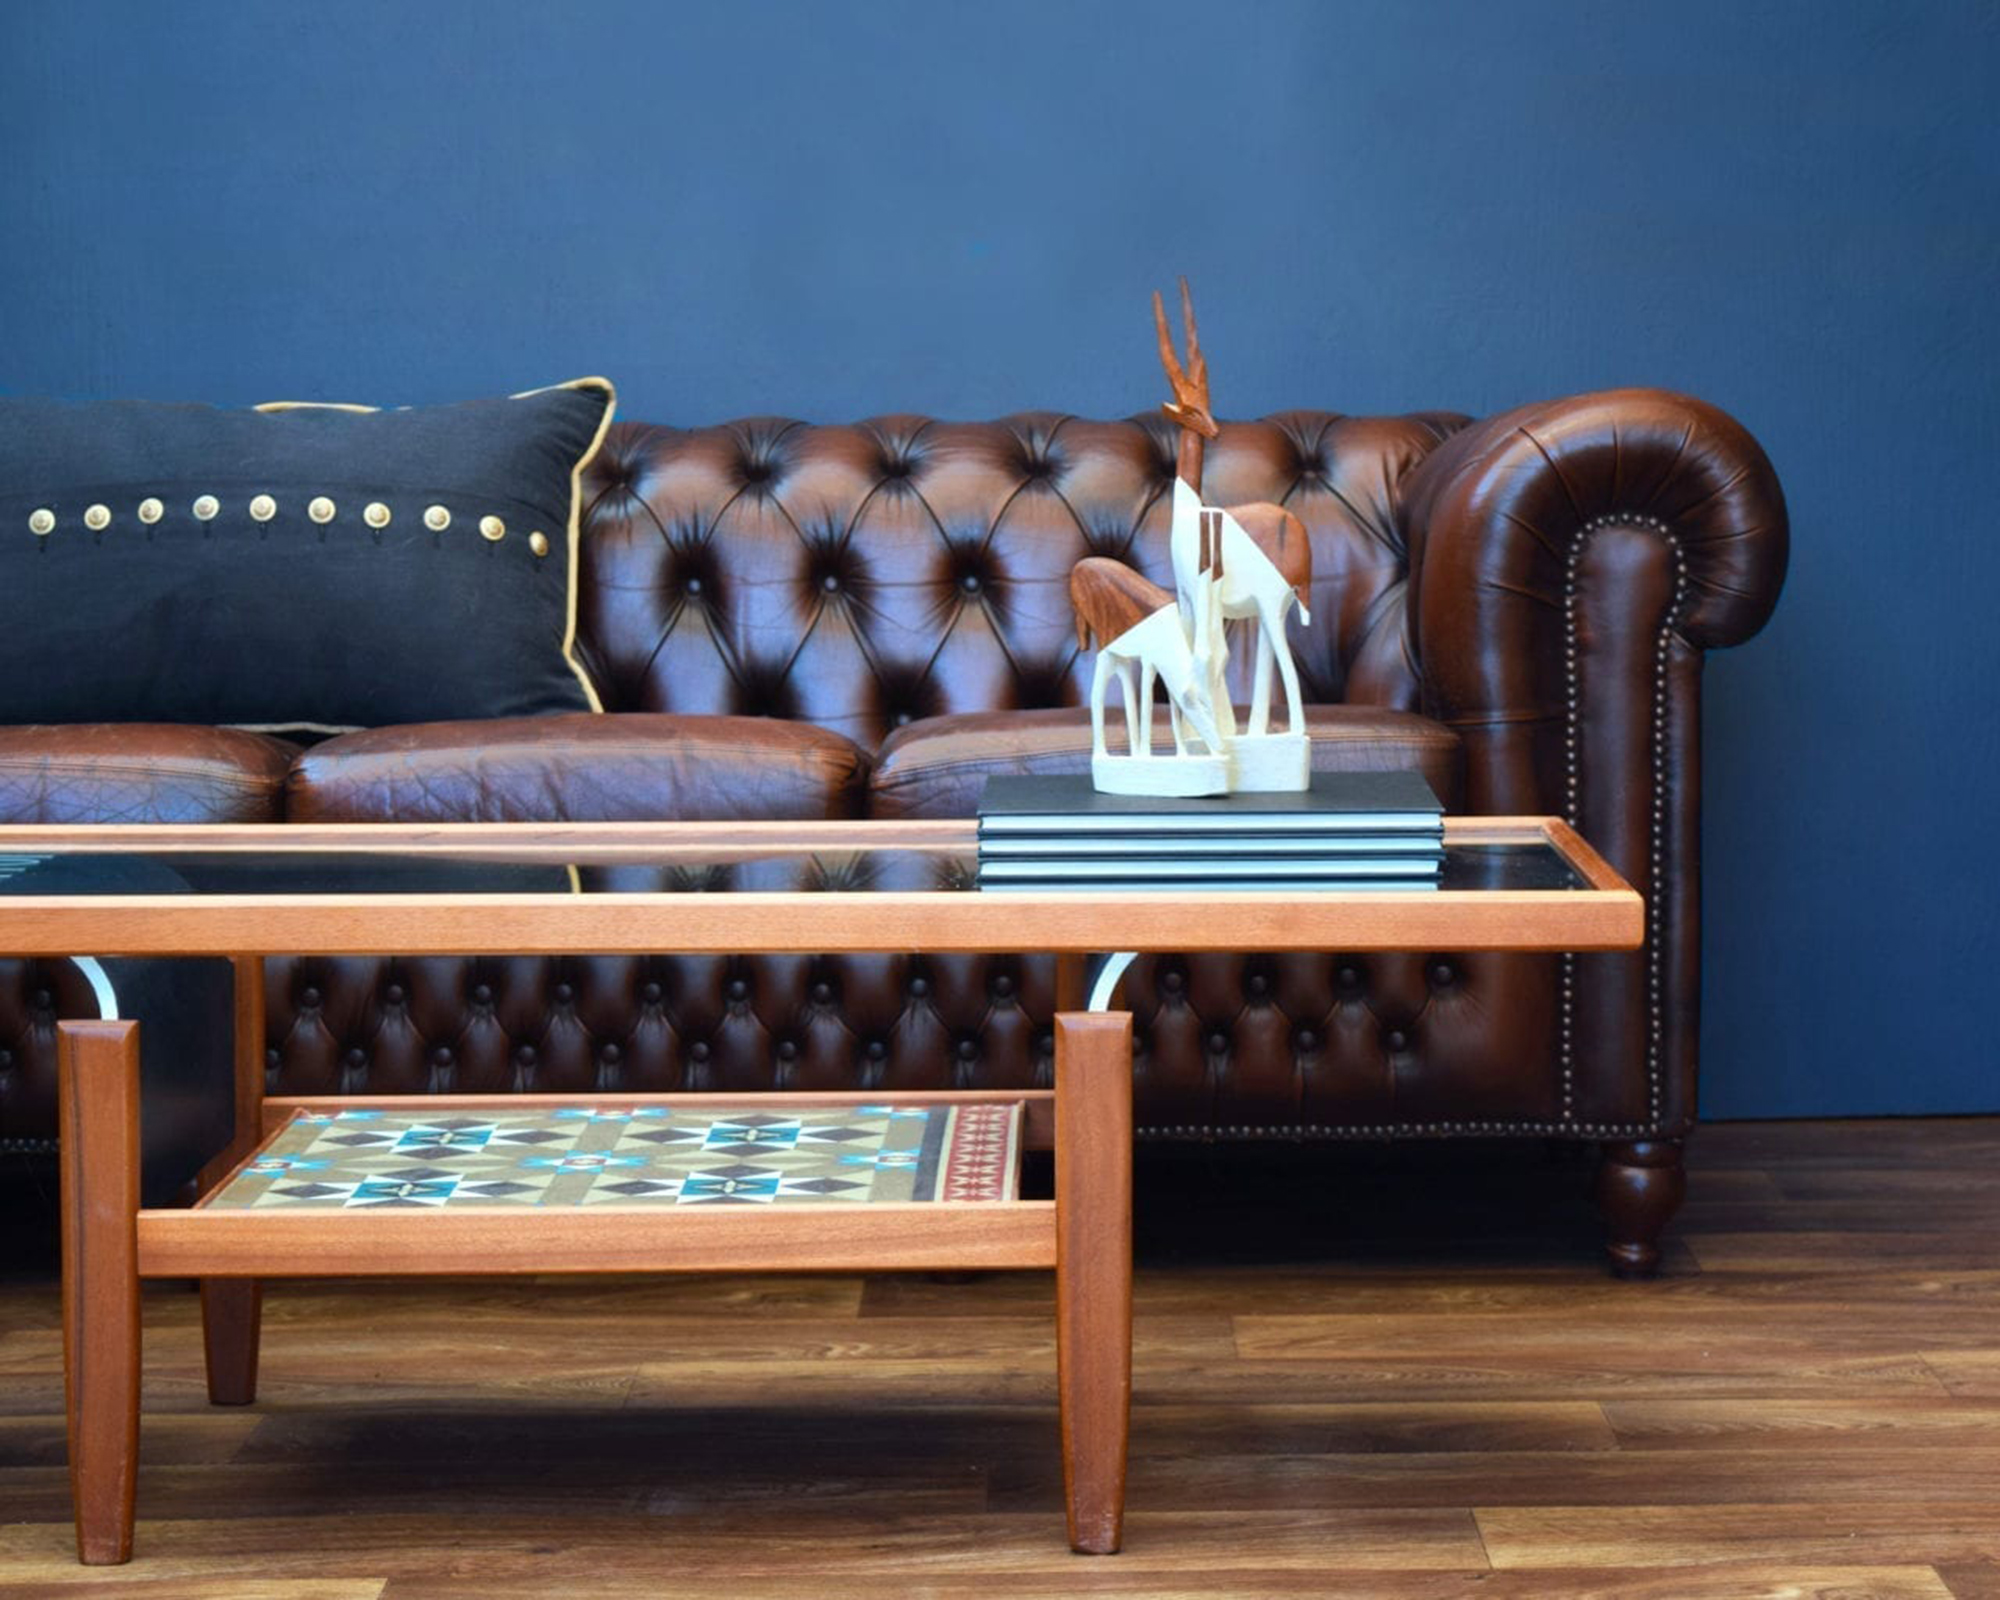
This project by Mendes has his stamp all over it: the thoughtful color combo, the clever mix of styles and influences, the excellent paintwork and, of course, vintage typography.
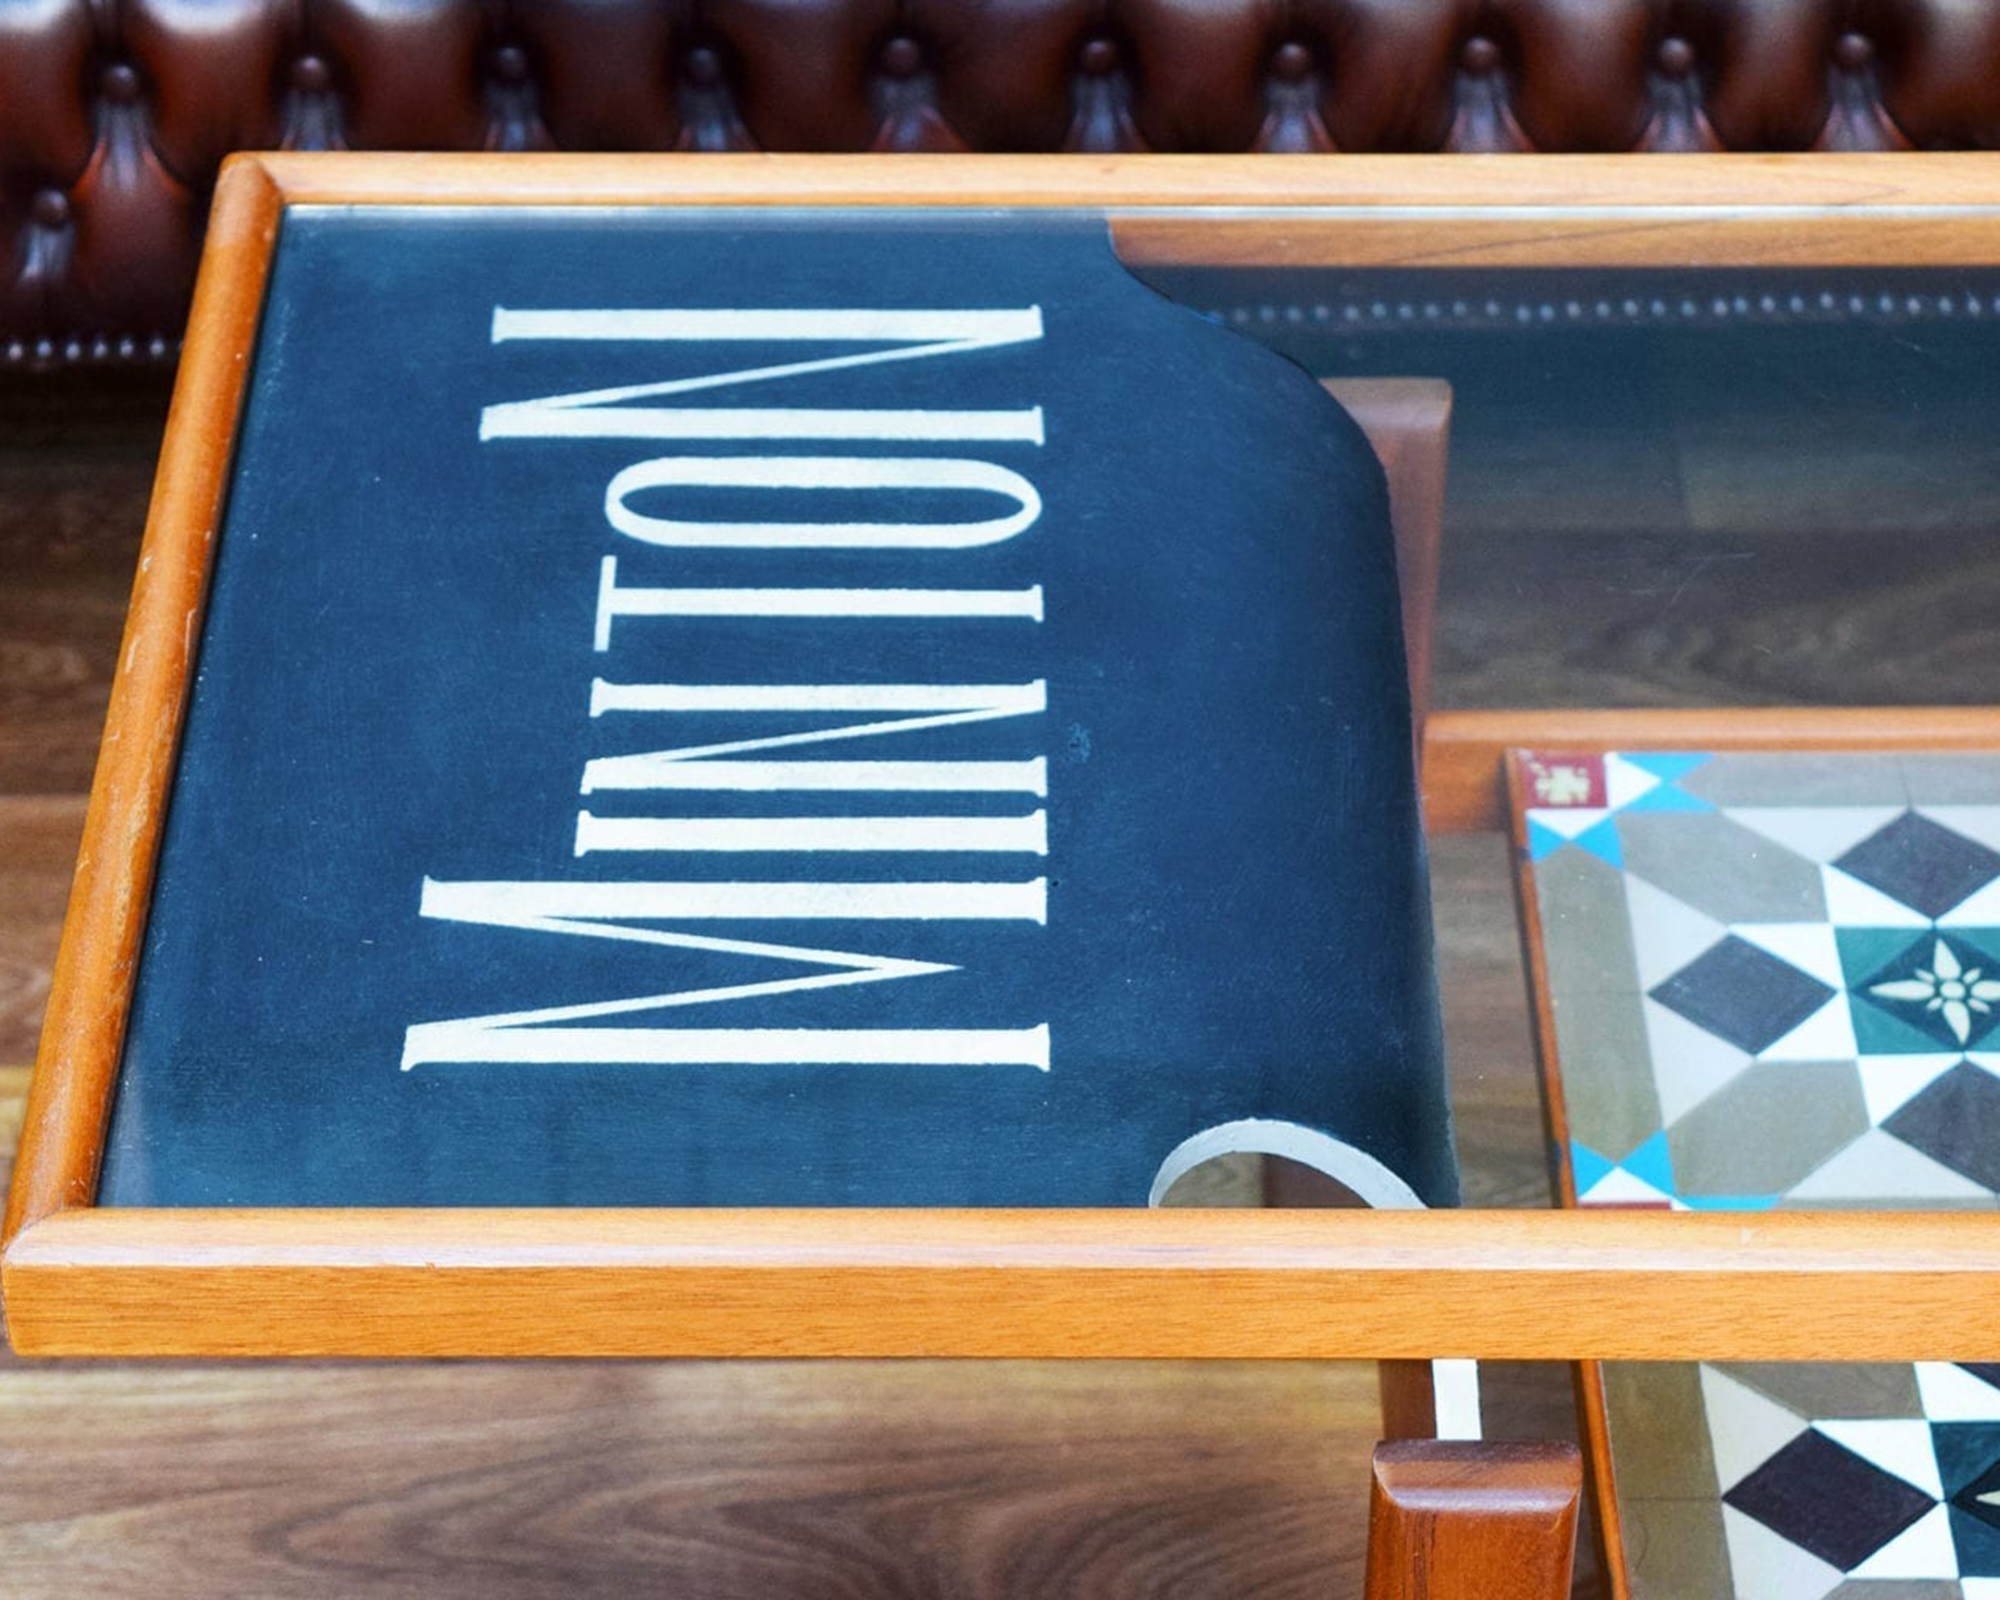
This G Plan bentwood coffee table was picked up at a local junk shop. Mendes was drawn to the waterfall edges and clean lines. It’s a classic example of '70s design, so he decided to keep some of the wood unpainted, and add an architectural heritage detail, in this case, his Victorian tile design, using the famous encaustic tile company Minton as his main source of inspo.
You will need:
- A coffee table
- Annie Sloan Chalk Paint® in Old White
- Annie Sloan Chalk Paint® in Country Grey
- Annie Sloan Chalk Paint® in Antibes Green
- Annie Sloan Chalk Paint® in Graphite
- Annie Sloan Chalk Paint® in English Yellow
- Annie Sloan Chalk Paint® in Giverny
- Annie Sloan Chalk Paint® in Napoleonic Blue
How to:
- Jonathon first painted the base of the table in Old White. He then used various Chalk Paint® colors to create his Victorian-style tile design. Jonathan used mixes of Country Grey, Antibes Green, Graphite, and English Yellow. The pop of Giverny really makes it sing. He drew the design and painted it by hand.
- The combination of the G Plan design and hand-painted geometric details creates a modern, interesting look. He then painted the sides in a mix of Napoleonic Blue and Graphite for a deep navy, ready for the Minton typography, which he created with an acetate stencil.
- The 1970s stag carvings have been given a modern twist, diagonally painted in Old White to link to the piece of furniture. A coat of Clear Chalk Paint® Wax was then applied over the whole piece, to protect the paint and give the woodwork a refresh too.
6. Rust-Oleum's weathered wood coffee table upcycle
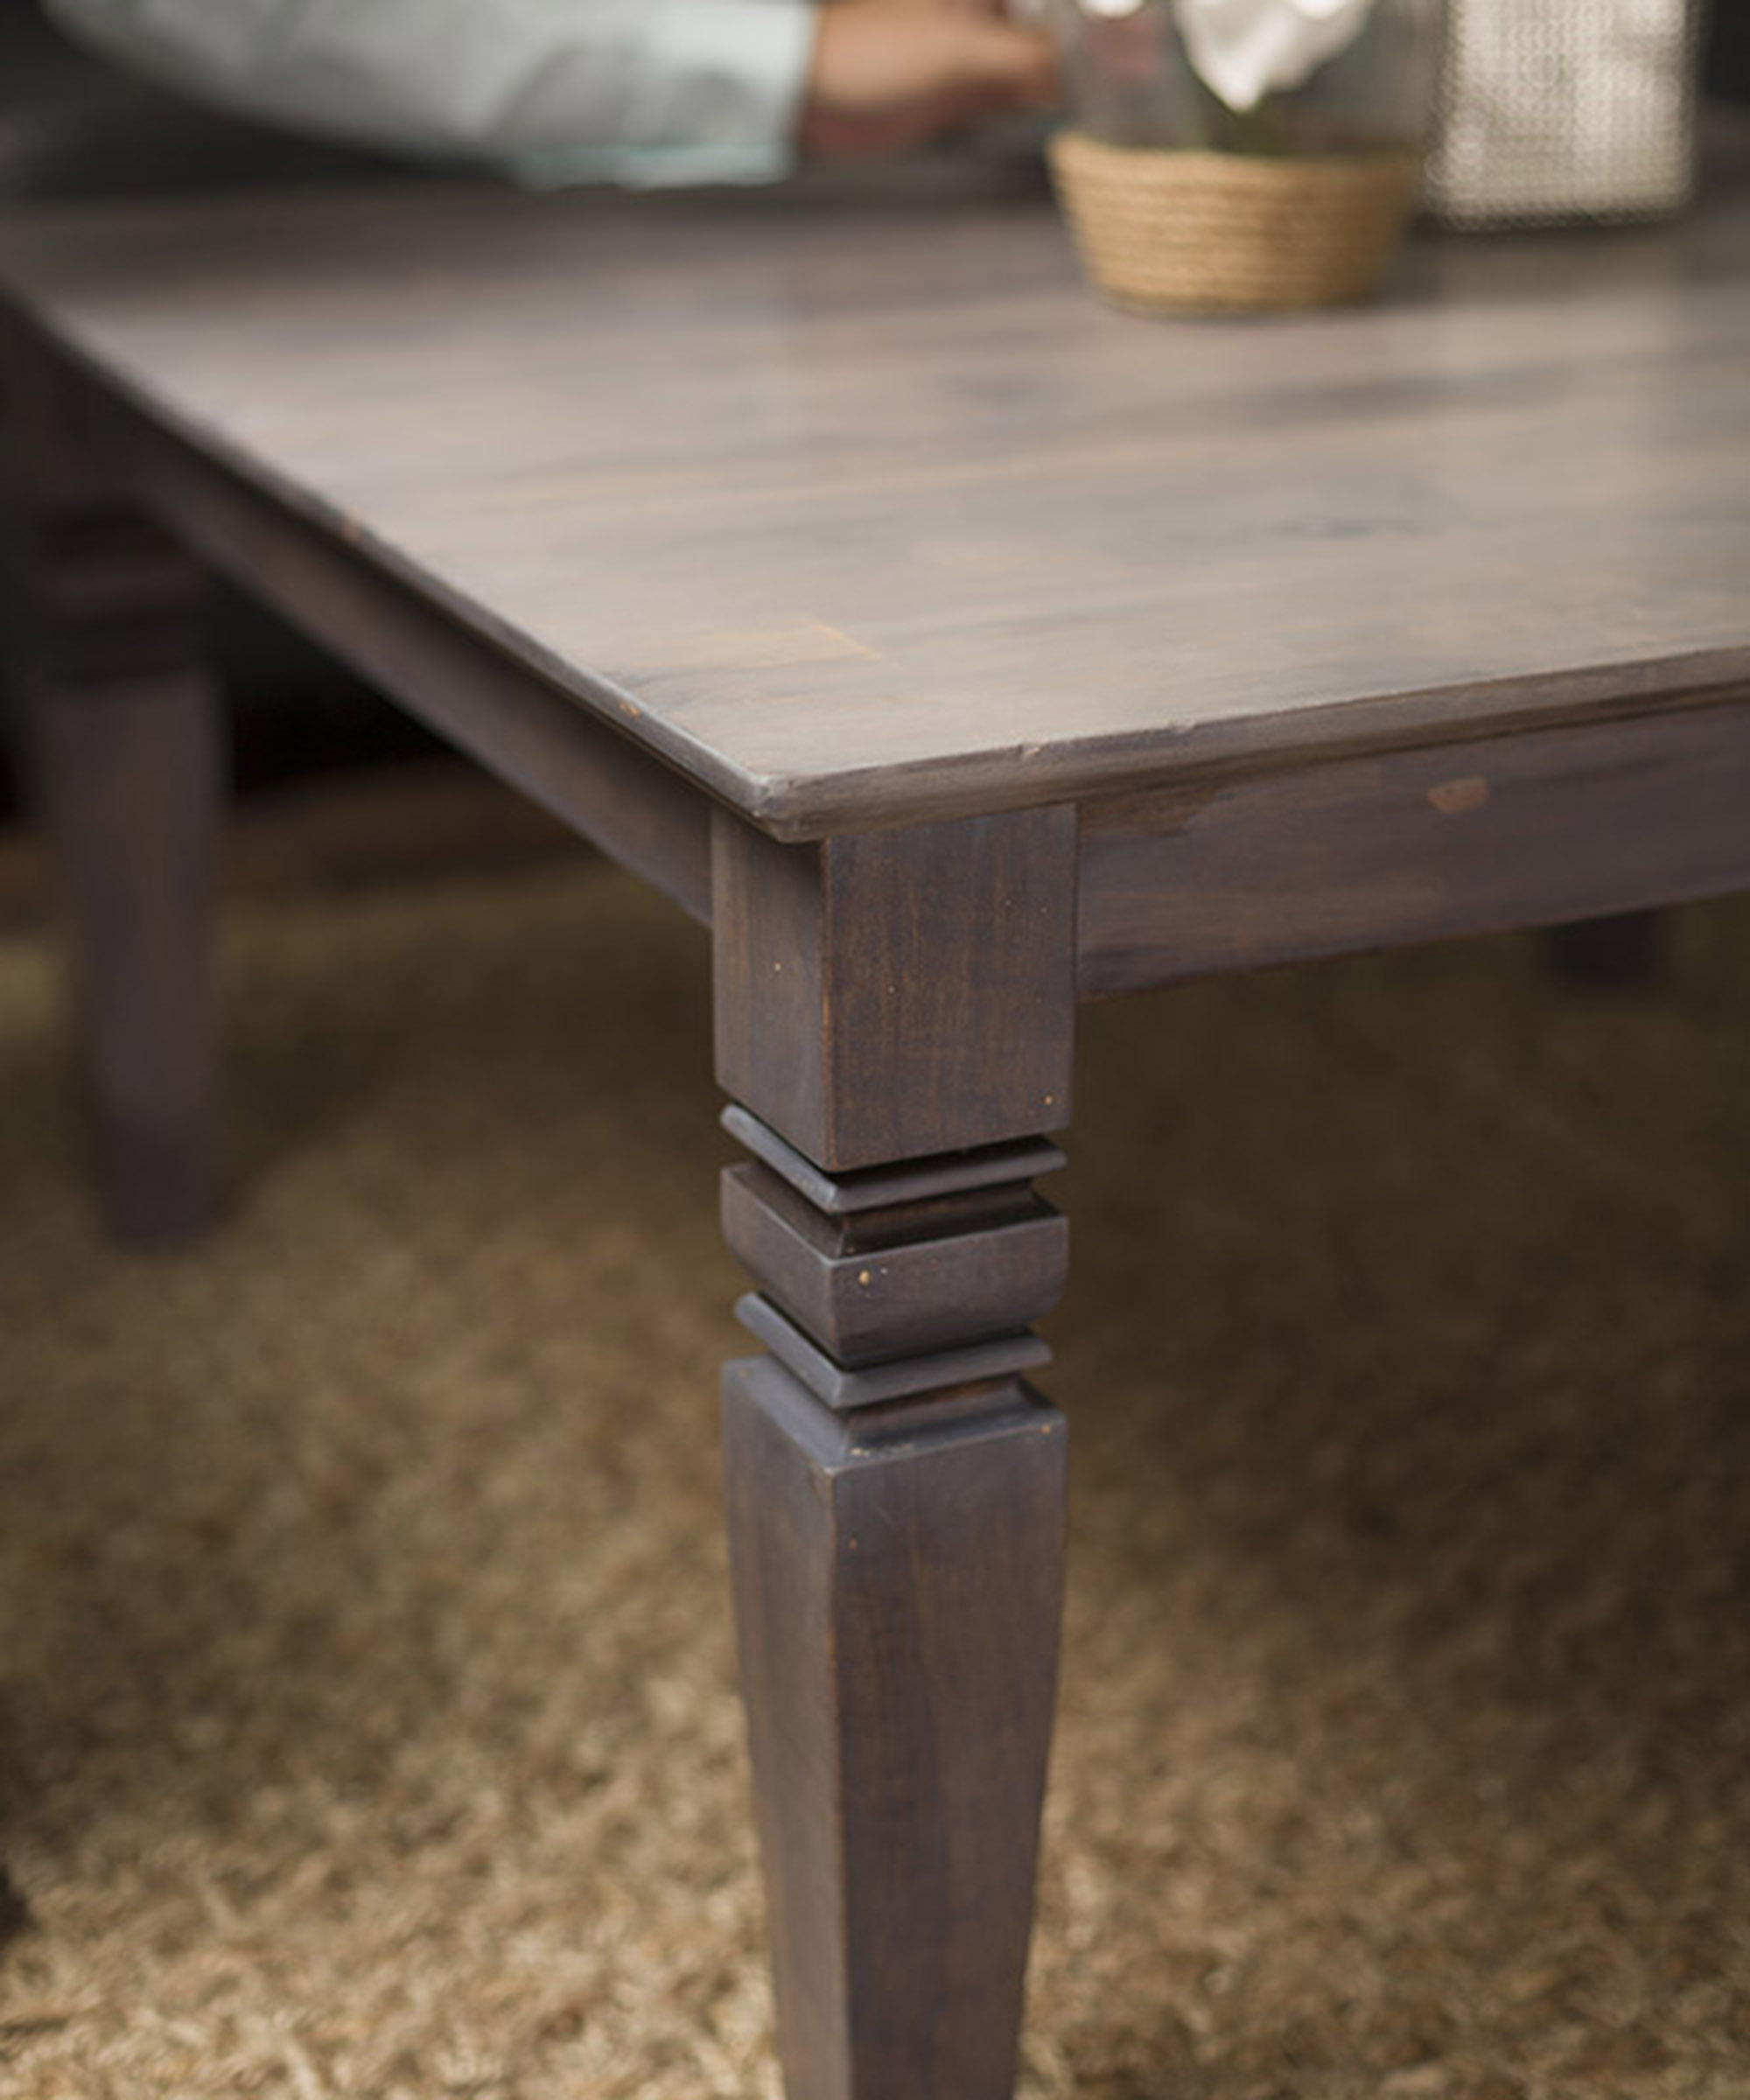
Fake the distressed look with this coffee table upcycle by paint experts Rust-Oleum. You can achieve an aged look in minutes and give your best sofa an accompaniment worthy of conversation - perfect for a rustic living room scheme.
The key component here is their Varathane® weathered wood accelerator which creates a country look on bare or untreated wood.
It replicates the aging process that happens in nature by reacting with the wood to create a unique one-of-a-kind aged grey look. So there's no need to find an old barn or old wood to get a reclaimed look.
You will need:
- Rust-Oleum weathered Wood Accelerator - available at Amazon
- Unfinished coffee table
- 120 grit sandpaper
- 2 lint-free rags
- Protective gloves
- Drop cloth
How to:
- Prepare: lightly sand the unfinished coffee table with 120 grit sandpaper for better product adhesion. Wipe with a lint-free rag. Stir or shake material thoroughly before and occasionally during use.
- Apply: open the can of Varathane wood accelerator and stir thoroughly before and occasionally during use. We recommend applying the product with a synthetic bristle brush or foam brush. Allow Weathered Wood Accelerator to sit on the wood for 30 minutes to 1 hour for the final effect.
- Finish: a topcoat should be applied for the best protection. Wait two hours for the weathered wood accelerator to dry.
Rust-Oleum's top tip: For a lighter effect, apply product and wipe away immediately or lightly sand the finish with fine grit sandpaper once it is dry. To darken, a second coat can be applied after 1 hour.
7. Kaylah's thrifty coffee table upcycle
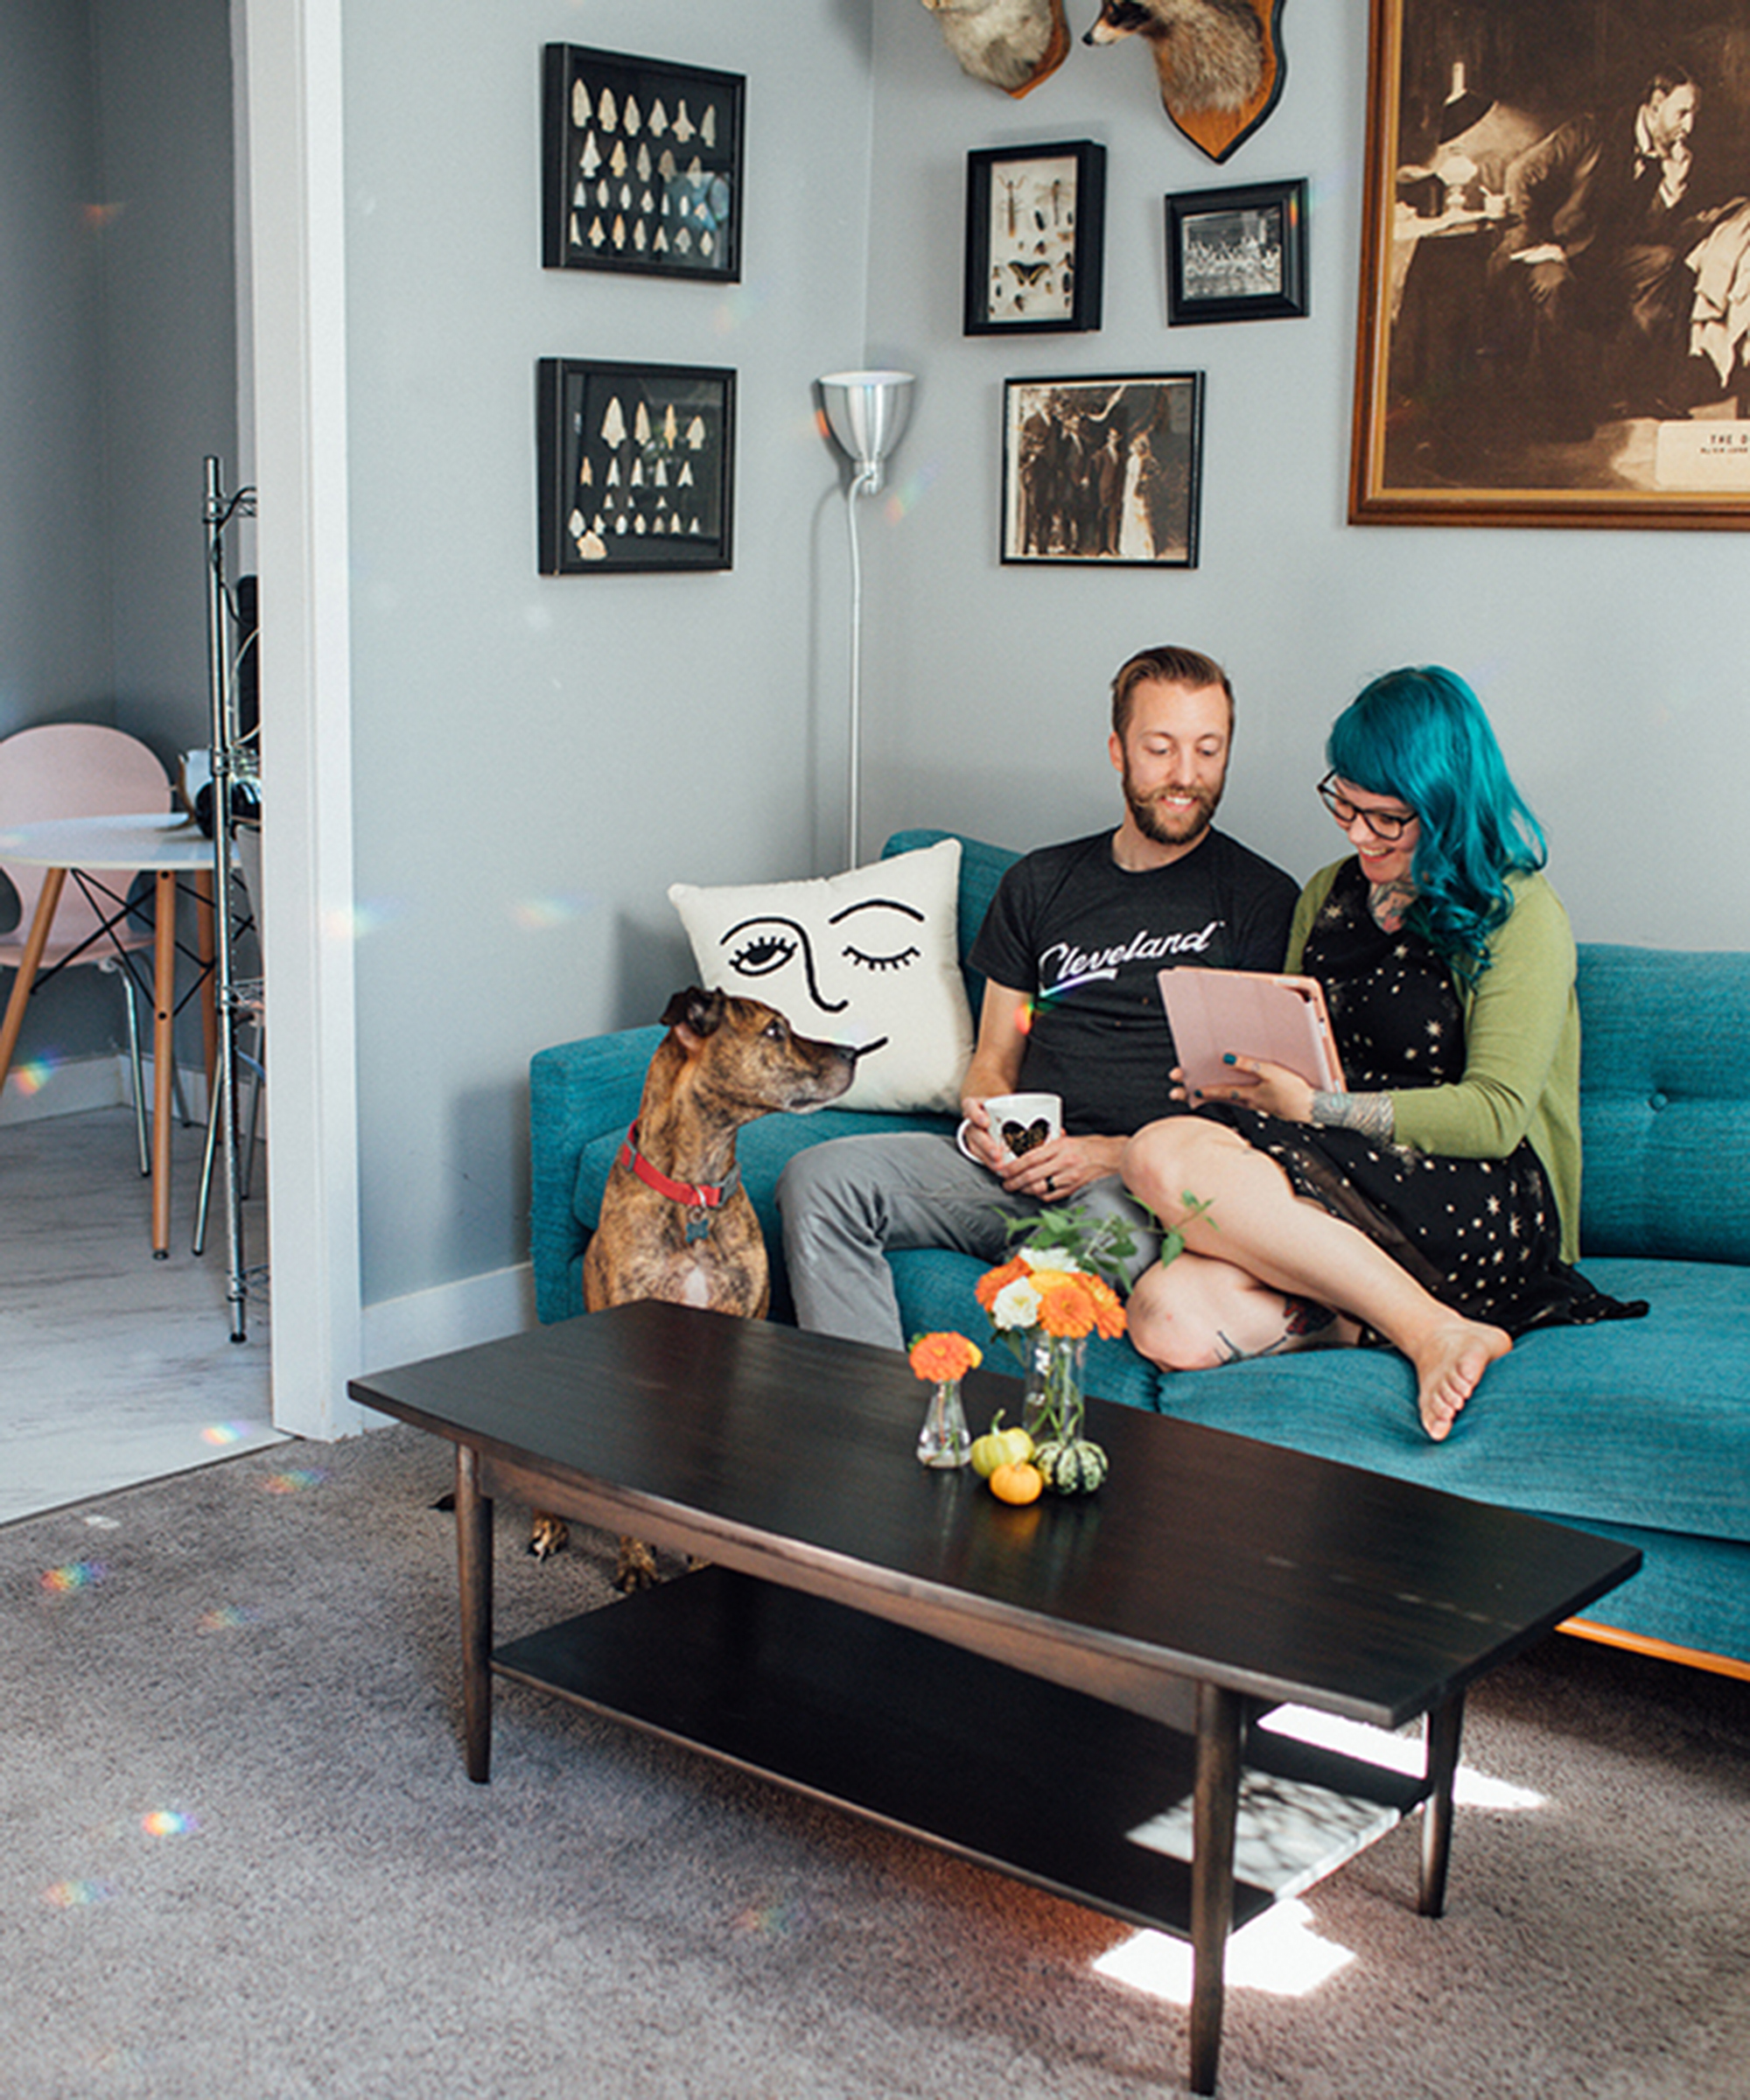
Two pairs of hands are better than one when it comes to upcycling so blogger Kaylah Stroup aka The Dainty Squid enlisted the help of her partner to transformed a nutty-hued furniture into a moody and dramatic black coffee table.
She says: 'After putting it off forever, Jeff and I finally refinished our coffee table with Rust-Oleum. I bought it second hand for a whole five bucks and had definitely put a hurting on it over the six or seven years I’ve had it. It had watermarks, scratches from me accidentally slamming the vacuum into its legs, and just didn’t look so great anymore.'
'We used Varathane Fast Dry Wood Stain and topped it with Varathane Crystal Clear Water-Based Polyurethane. It didn’t take all that long and made such a huge difference. Our living room looks so much more complete now I'm obsessed. Not sure why it took us so long to take on this project but now I’m aching to stain our TV stand together.'
You will need:
- Varathane Fast Dry Wood Stain in Ebony
- Varathane Crystal Clear Water-Based Polyurethane
- Thrifted coffee table
- Paint can opener
- Lint-free cloths
- Drop cloth
- Sandpaper
- Stir sticks
- Gloves
How to:
- Prep: sand the table to smooth the surface and wipe off any sanding residue with a lint-free cloth. Place the table over a drop cloth and use a paint can opener for the stain can. Gently stir the stain with a stir stick.
- Apply: Using a lint-free cloth, one of you can apply one coat of stain liberally. Allow the stain to penetrate for 5-10 minutes then the other person can remove the excess stain by wiping with a cloth in the direction of the grain.
- Dry: Fast Dry Stain is dry to touch in approximately 1 hour and can be recoated in 1 hour. Allow 24 hours for full cure.
- Topcoat: To provide long-term protection and durability, the table should be top coated with Varathane Polyurethane. Each of you can apply the polyurethane within 1 hour of applying the stain. Darker colors may require a slightly longer dry time.
8. Lisa Jane's animal print decoupage project
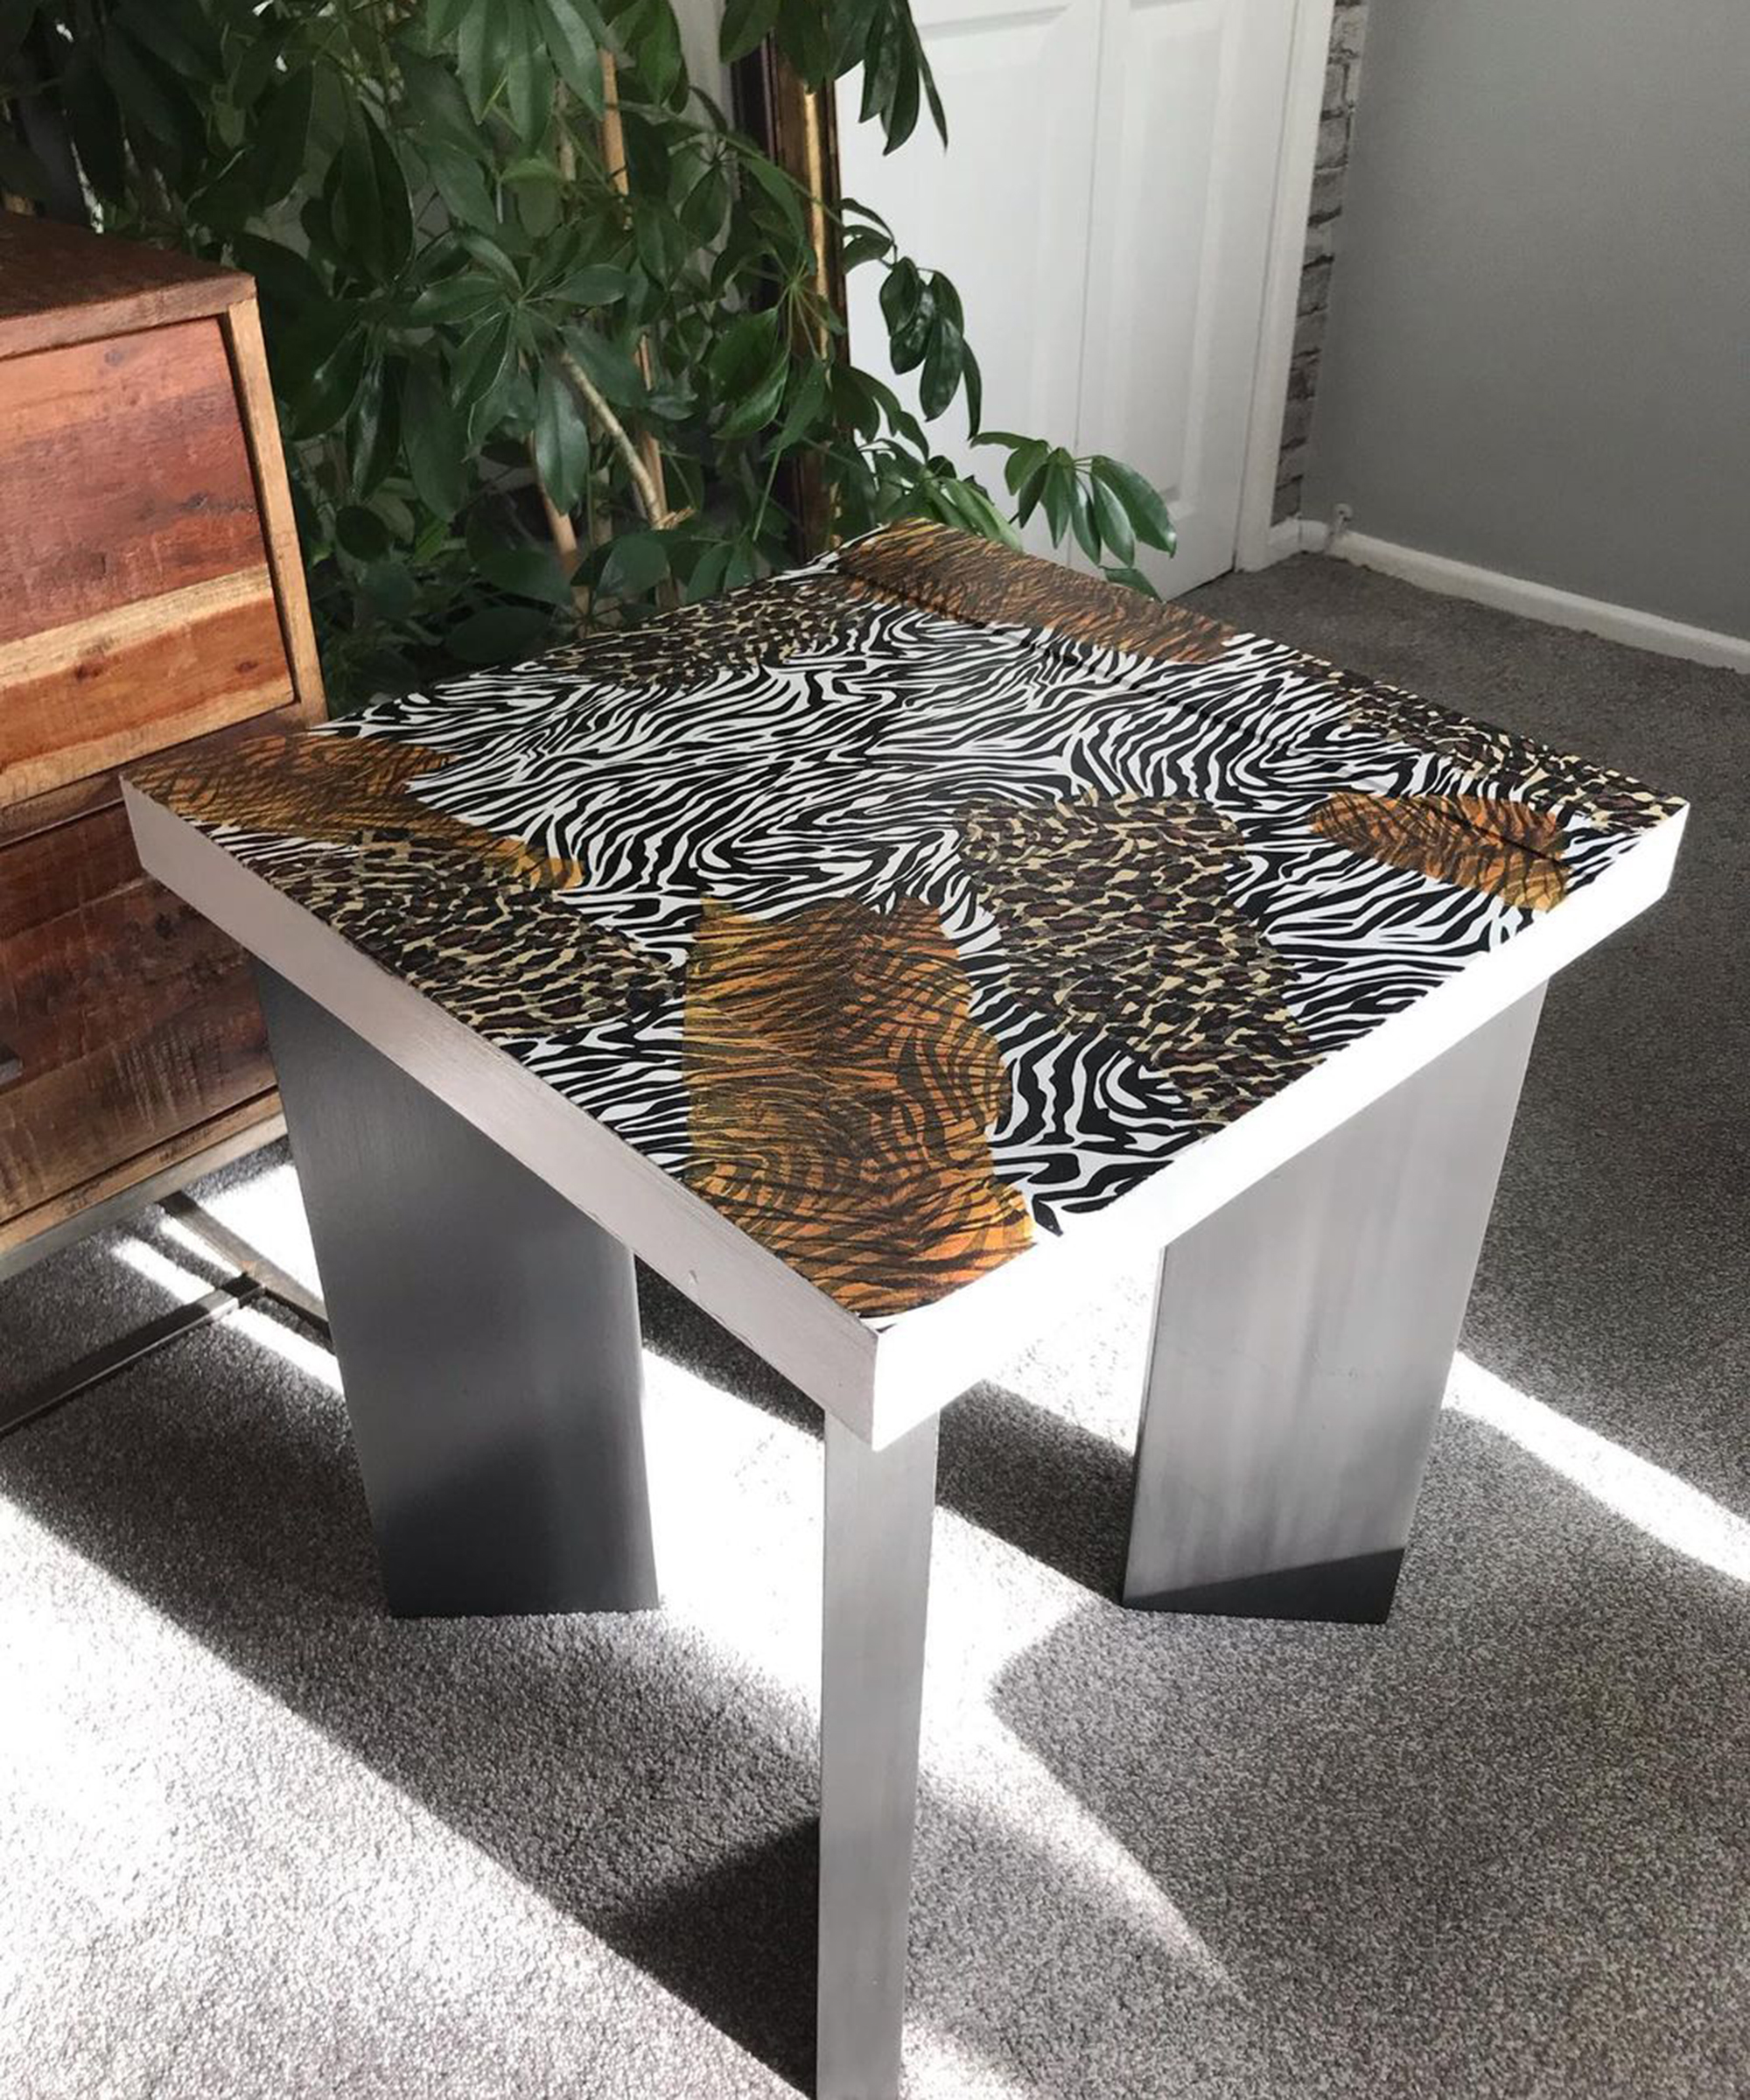
This jungle-inspired modern coffee table upcycle by Lisa Jane aka @happyupycler is not as wild as you think to recreate. A year prior to this upcycle, she previously painted the legs black and did a snake print stencil over the top.
You will need:
- A coffee table
- Sugar soap
- An assortment of animal print napkins
- PVA glue
- Small paint brush
- Soft clean cloth
- Clingfilm
- Annie Sloan Chalk Paint® in Old White
- Annie Sloan Chalk Paint® in Graphite
- Annie Sloan Chalk Paint® in clear wax
- Extra fine sandpaper
How to:
- Prepare the table for painting by cleaning it with sugar soap.
- Paint the table legs with Annie Sloan chalk paint 'Graphite', applying two coats (allowing time to dry between each coat).
- Protect the table legs using Annie Sloan Chalk Paint lacquer in Clear Gloss.
- Lisa had previously stenciled the top with a snake print stencil that she was not happy with so gave it a gentle sand to prep for repaint.
- Paint the tabletop and sides with Annie Sloan chalk paint 'Old White' (a pale background helps display decoupage print)
- Prepare the napkins by peeling off the back layers and leaving just the patterned layer
- Place napkins on the tabletop to plan location, matching up the pattern.
- Apply PVA glue over the first quarter of the tabletop with a brush.
- Sit down to decoupage with a section of clingfilm and soft cloth ready on your lap. Hold a napkin up to the first corner of the table, allowing one side to stick to the glue. Release one hand to lay the clingfilm on top of the napkin and use a soft cloth to guide the napkin into place.
- Once the first napkin has been laid, recover with plastic wrap and gently dab with a cloth to rub out any obvious creases (being careful not to rip it).
- Continue with other napkins until tabletop is covered and leave to dry.
- Added some extra sections of other animal print napkins randomly, using the same technique.
- Once dry, gently rub any napkin overhang in downward strokes using extra fine 280+ grit sandpaper.
- Finally, carefully added a coat of Annie Sloan clear gloss lacquer with one stroke per section so as not to drag the tissue paper and rip, leaving it to dry in between layers. Lisa Jane applied 3 coats to ensure complete protection and shine.
9. Bunning's hairpin leg coffee table upcycle
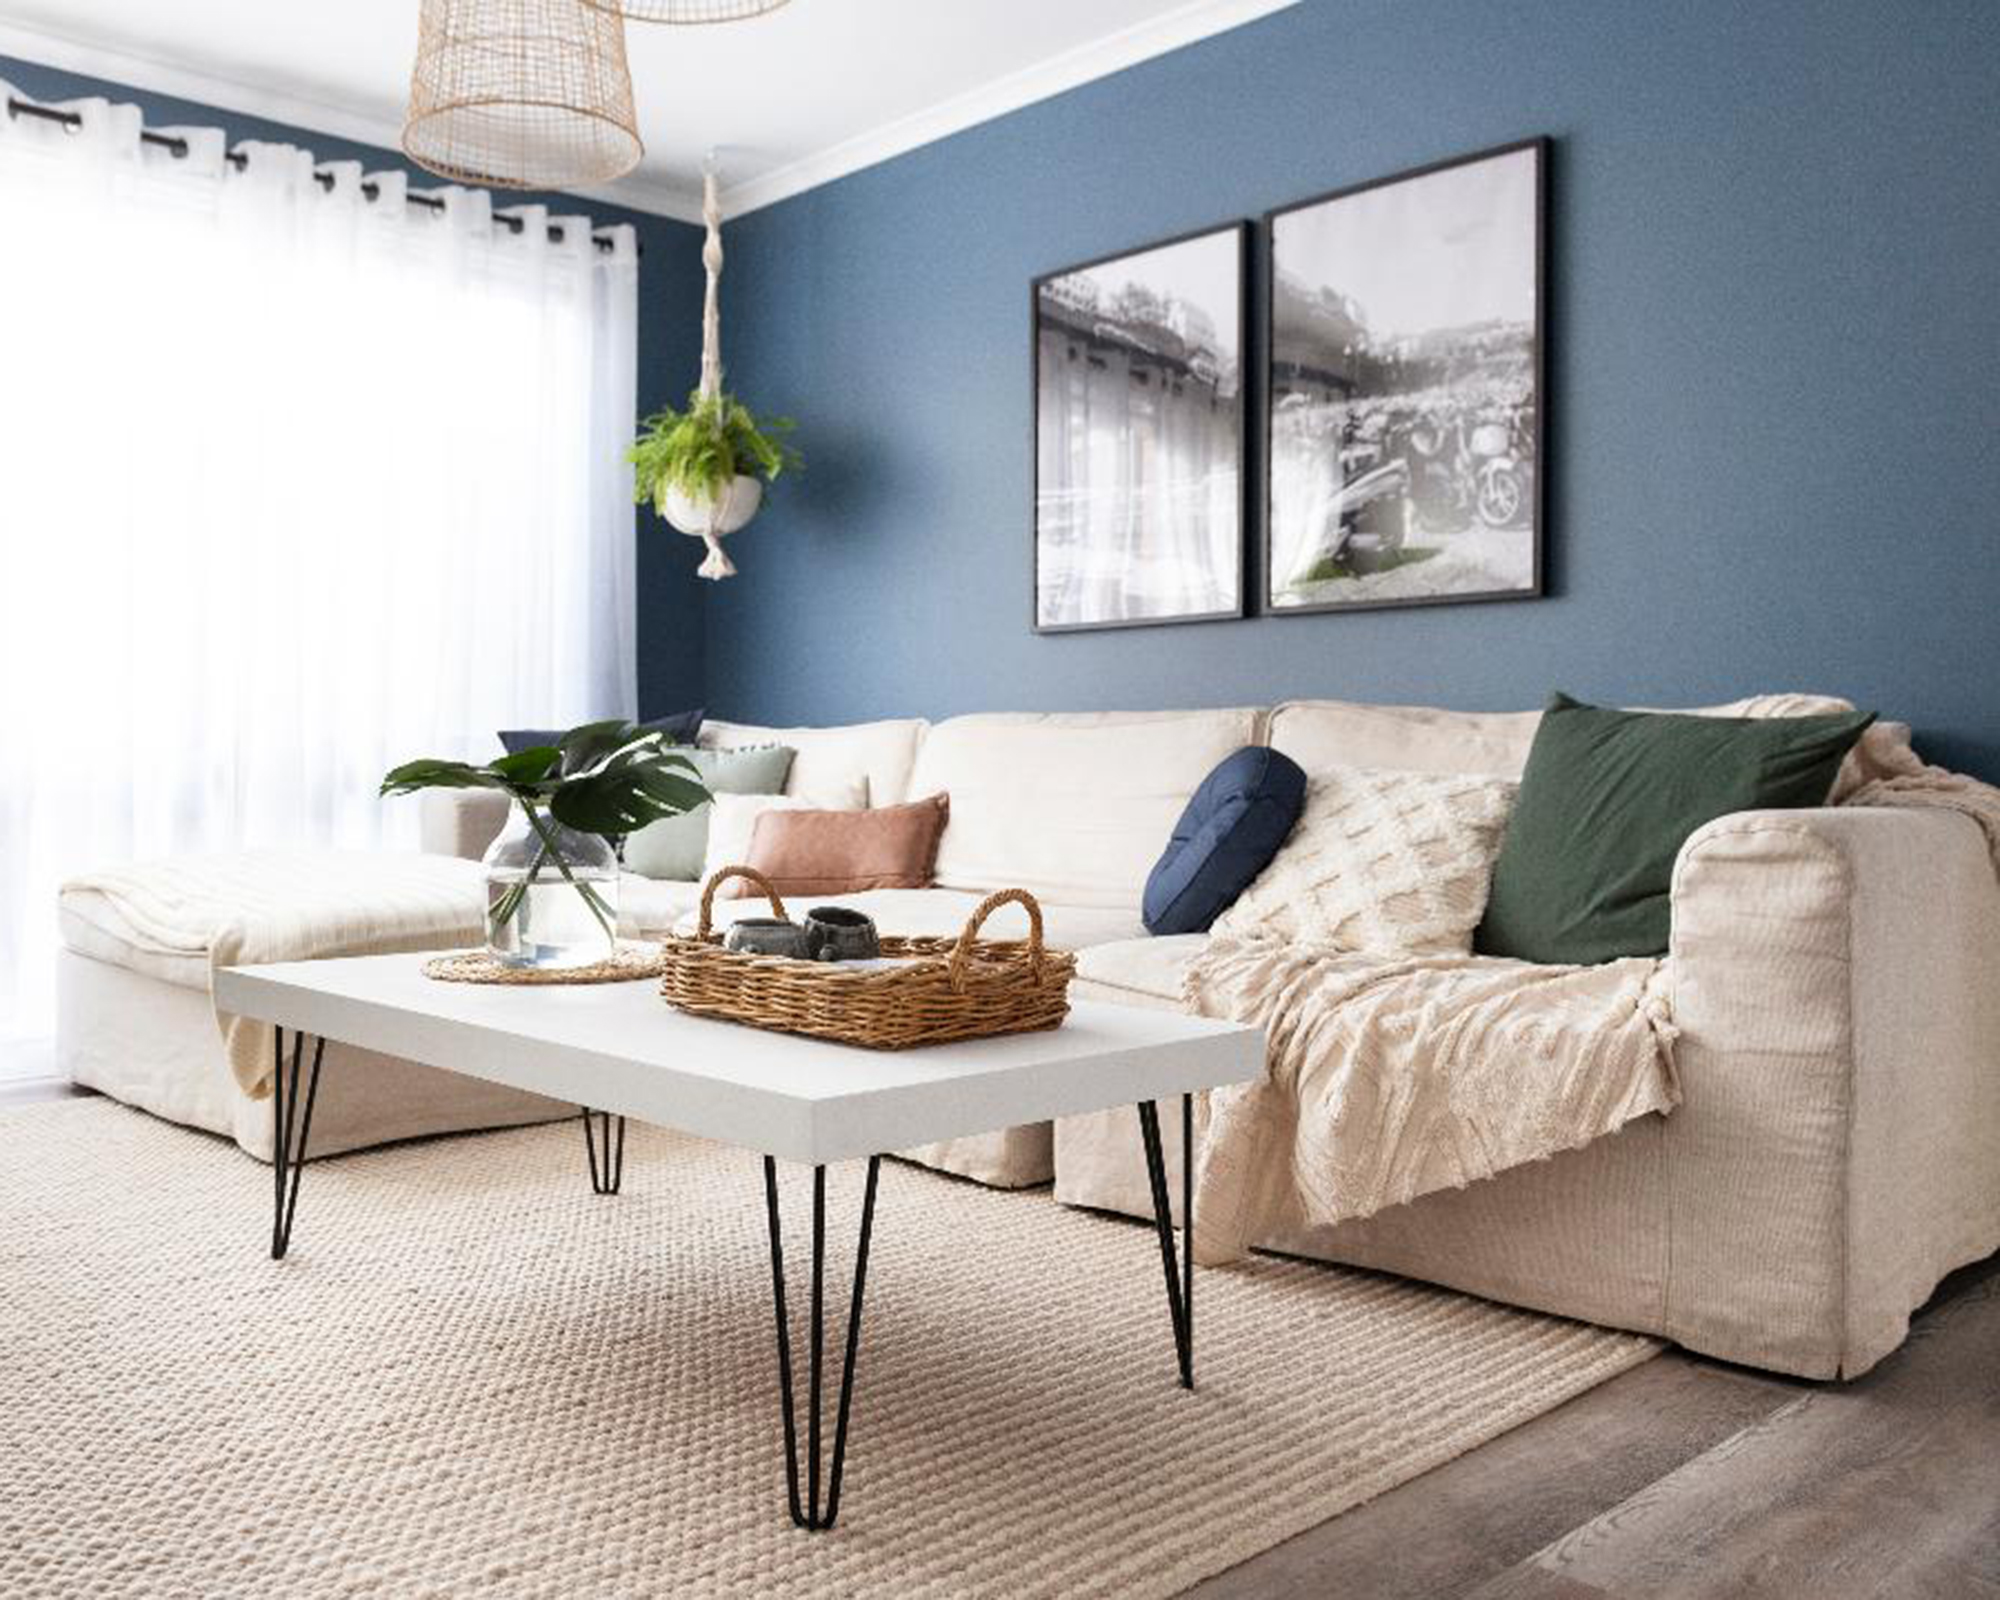
Creating a modern coffee table is super easy with this tutorial by Australian hardware company, Bunning's Warehouse. Just add some stylish slim legs and paint it up to match your living room decor and you're good to go.
You will need:
- Allen key set
- Paint brush
- Paint roller and trays
- Drill - including Phillips head drill bit
- Paint can opener
- Paint stirrer
- Drop cloth
- Pencil
- Old coffee table
- Chalk paint
- 4 x hairpin legs
- Screws
- Masking tape
- Eye protection
- Sandpaper
- Microfiber cloth
How to:
- Take off your existing legs: first things first – remove those daggy, old legs from your existing coffee table. There are several ways to do this – with a drill or a screwdriver for example – but Bunning's use a nifty Allen key set as their screws have a hex head. These sets are great – they come complete with not only a Phillips head and normal screwdriver, but also every Allen key size available, so you're bound to find the right fit for your screw.
- Prepare your surface: before you set about painting, make sure your tabletop is clean and dust-free (use a rag and some hot, soapy water to give it a spruce up.) If your table is glossy, give it a light sand – this will help your paint adhere to the surface. After you've done this, wipe away any excess dust with a microfiber cloth.
- Paint your tabletop: once you've picked out your color – we're using chalk paint in hues picked to match our interior – give it a good shake and a stir to make sure the pigment is mixed well. Then pour into a tray. Roll out your roller in the tray a few times before you start, then apply your paint in smooth, even motions across your tabletop. You'll want to start nice and thick, then even it out with long, straight even strokes.
- Apply a second coat of paint: once your first coat is dry, you're ready to apply your second (one coat may suffice if your wood is light, but we needed two for this table). When it's dry, carefully turn your table over on a clean drop sheet or piece of material – this chalk paint marks pretty easily, so take care during this step as you don't want your new paint job to mark.
- Attach your legs: you're now ready to attach your new hairpin legs (these are available to buy from Bunnings). Mark where the screws will go, then measure the length of your intended screw against the thickness of the table. This is an important step, as you don't want to accidentally drill right through your tabletop. Measure the length of your screw against the drill bit you're using (this needs to be slightly smaller than your screw) and mark your drill bit up with masking tape (only drill to that point). Drill a pilot hole before you use your screw – and remember to use safety glasses for this bit.
10. Annie Sloan's Malachite-effect table top
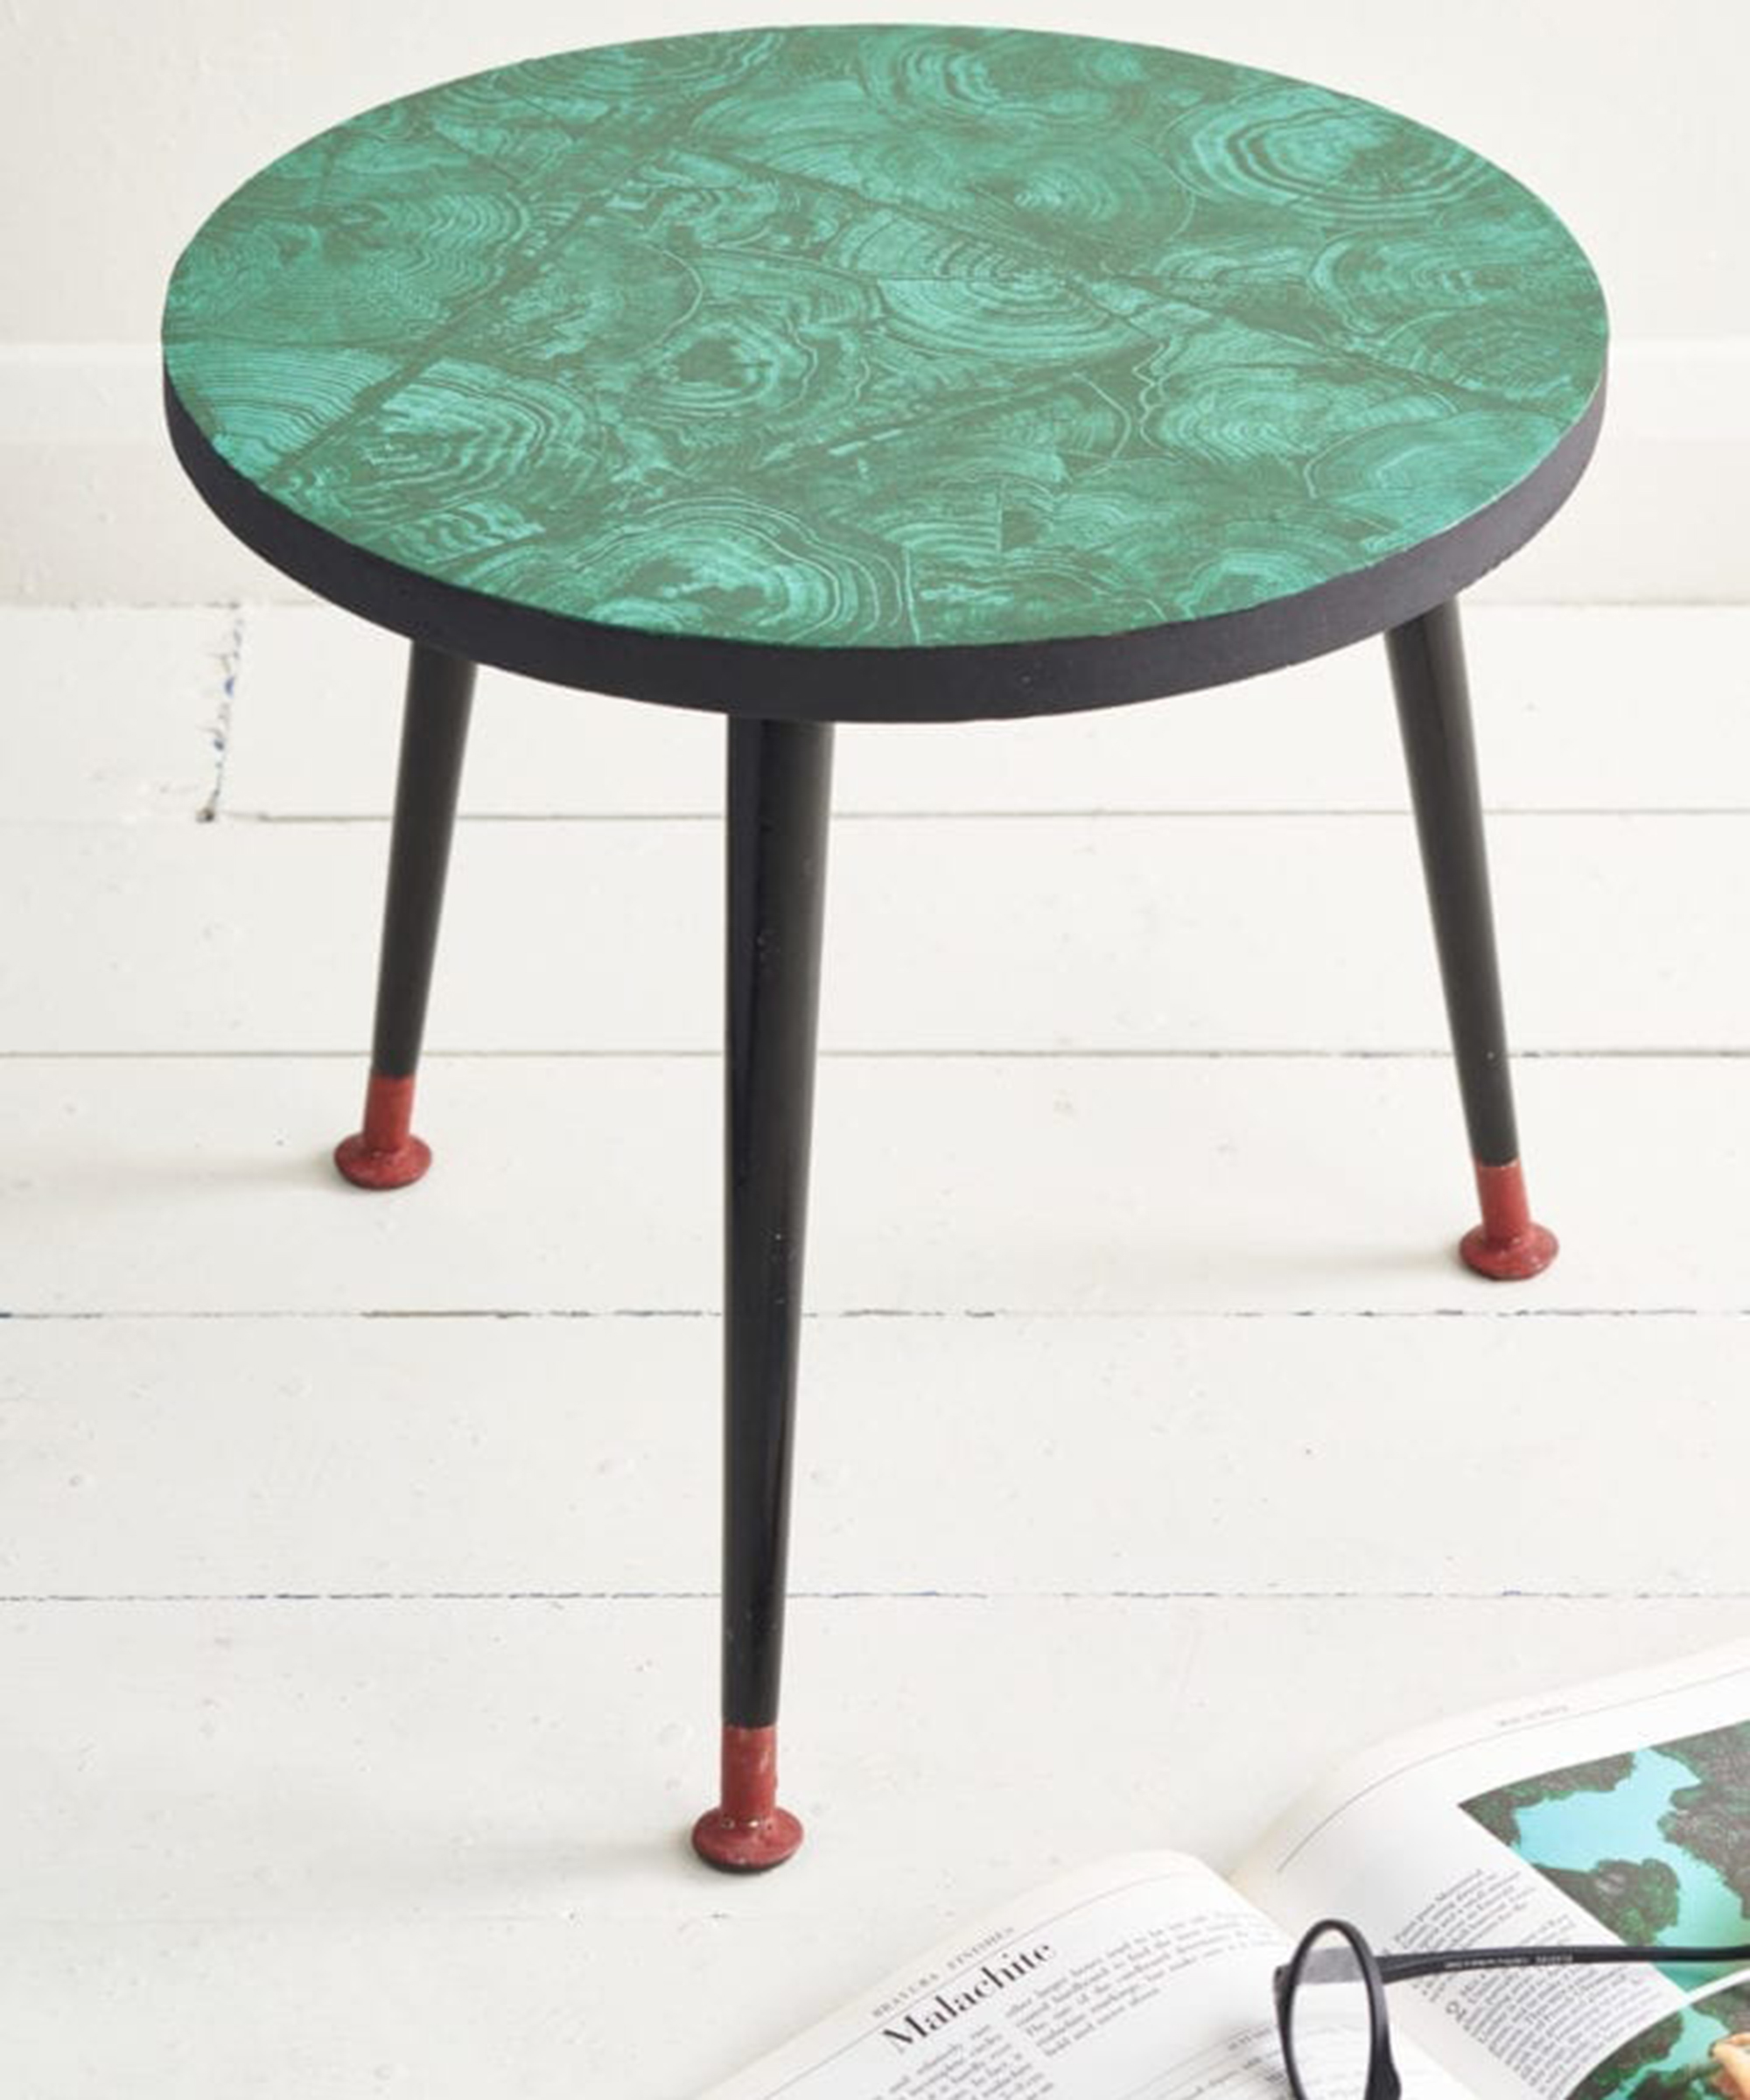
Malachite is a sparkling stone characterized by vibrant verdant hues and organic curves. Annie Sloan, shows how to replicate this gem of an upcycle in your own home with her Chalk Paint. It's similar to a green marble coffee table style, but will cost far less.
You will need:
- An artists' paintbrush
- A coffee table
- Annie Sloan Chalk Paint® in Florence
- Annie Sloan Chalk Paint® in Old White
- Annie Sloan Chalk Paint® in Amsterdam Green
- Medium grade sanding pad
How to:
- Annie mixed Chalk Paint in Old White with Florence and applied as a base, then sanded using a Fine Grade Sanding Pad before applying Gloss Chalk Paint® Lacquer to give an extremely smooth finish. Working in sections, Annie brushed a mix of Amsterdam Green and Lacquer over her base then dragged a stiff piece of corrugated cardboard through this layer in semi-circles. Mixing Chalk Paint with the Lacquer here is essential; the paint on its own won’t hold the pattern created by the cardboard. Using the end of a paintbrush, Annie emphasized some of the wiggly lines created by the cardboard for a more organic effect.
- Once dry, Annie then sanded with a Medium Grade Sanding Pad and applied two coats of Chalk Paint Lacquer with a Large Sponge Roller for an authentic high-sheen finish.
11. Lara's vintage green coffee table
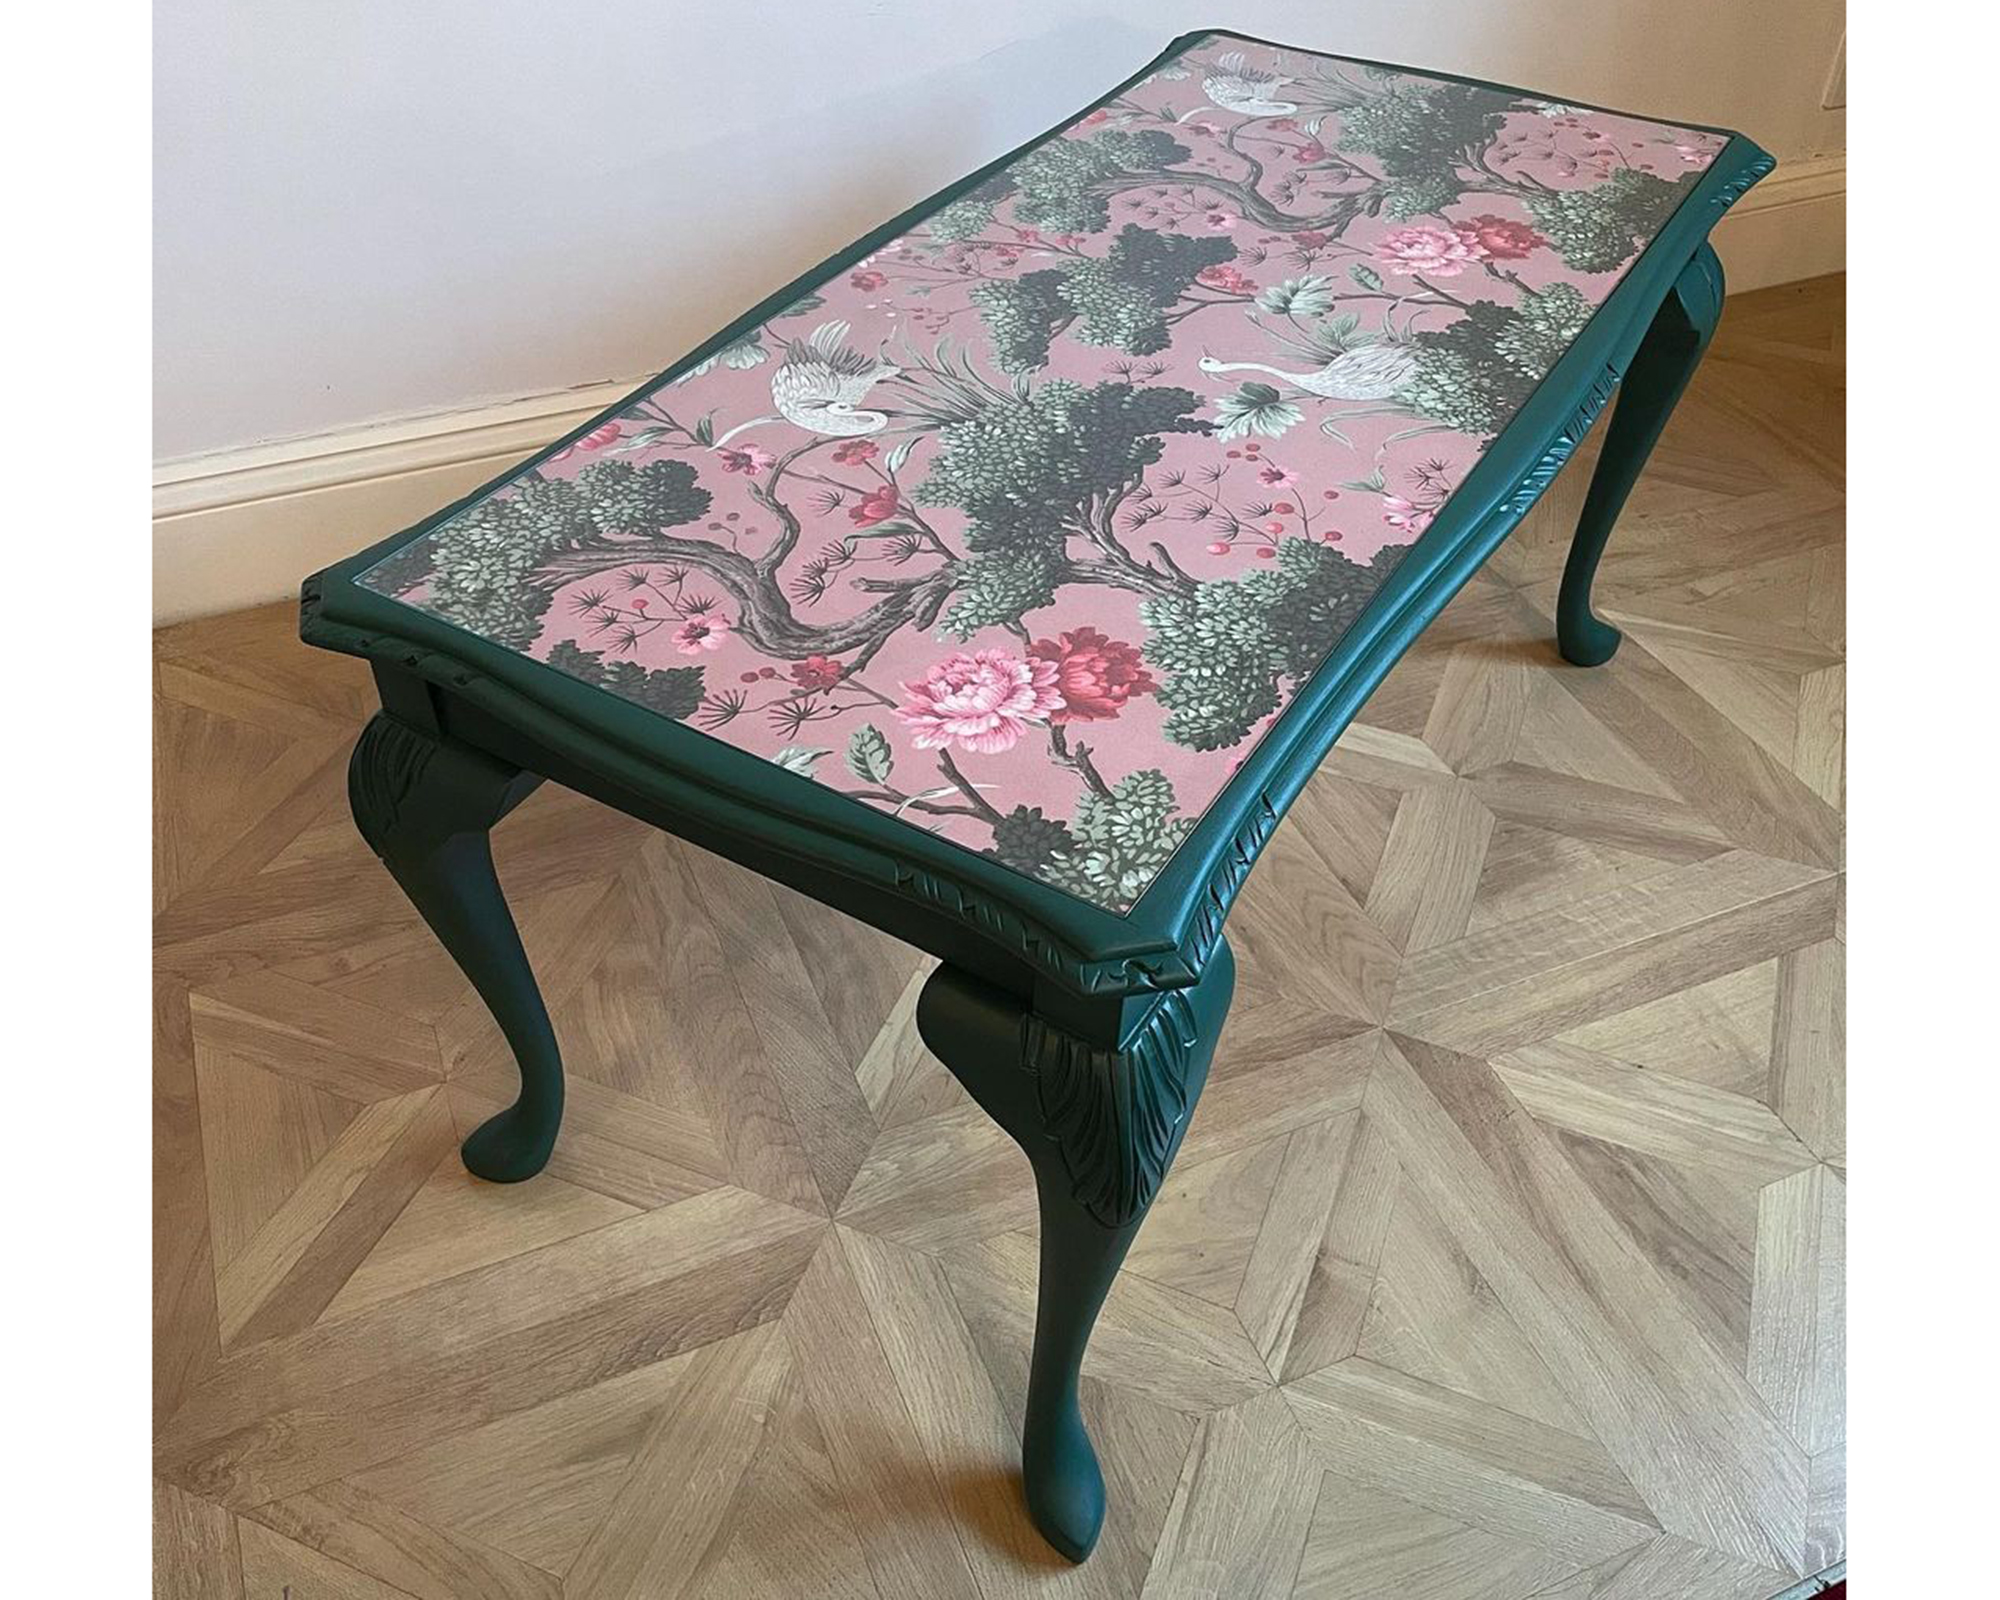
If you want to know how to upcycle furniture for a vintage look, this is one of the prettiest examples we've seen pop up on our Insta feed. Proving pink and green should always be seen, Lara Reid, furniture artist and owner at Vibrant Wood shows us how she went about upcycling a coffee table.
You will need:
- Soft microfiber cloths
- White spirit
- 120 and 240 grit sandpaper
- Zinsser B-I-N Primer
- Fusion Mineral Paint in Pressed Fern - grab a 500ml pot from Amazon
- A paint brush - Lara used the Cling On paintbrush - size 035, also on Amazon
- Wallpaper paste - Lara swears by Solvite high performance
- Crane Bird Vintage Pink Wallpaper by Woodchip & Magnolia
- White vinegar
How to:
- First, clean away all the surface dust and grime with a soft cloth and white spirit.
- Then, carefully sand the wood with 120 grit sandpaper, working with the grain. Going over again with 240 grit to give a smoother finish.
- Apply the Zinsser B-I-N Primer on the top surface where you are going to stick the wallpaper.
- Apply two coats of Fusion Mineral Paint in Pressed Fern, leaving 24 hours between coats.
- Measure and cut the wallpaper so that it covers the top surface of the table. Then once happy, stick it down with Solvite's 'High Performance Wallcoverings Adhesive'
- Finally, clean up the glass top of your coffee table using white vinegar and replace the glass over the paper.
What techniques can you apply to upcycle a coffee table?
'A DIY upcycling project doesn't have to be overly complicated, with the right approach you can achieve a high impact refresh for really low effort. There is so much guidance online that there is no excuse if you want to learn and get stuck into some exciting home projects,' says Hill.
'If you’re new to upcycling, start small with an easy project like switching the legs on a table or nightstand, to add a unique touch.'
'If you’re taking on a bigger project that requires sanding and painting, make sure you have a good work station where you don’t mind paint and dust going on the floor or on nearby surroundings.'
'There are lots of different techniques to apply when using paint as well - like applying a ‘blended’ effect using a sponge, or using a homemade stencil to make stripes making the table appear longer, or a ‘scallop design’ to add your personality, or give a tired piece of furniture a new lease of life.'
Join our newsletter
Get small space home decor ideas, celeb inspiration, DIY tips and more, straight to your inbox!

Hi, I'm the former acting head ecommerce editor at Real Homes. Prior to working for the Future plc family, I've worked on a number of consumer events including the Ideal Home Show, Grand Designs Live, and Good Homes Magazine. With a first class degree from Keele University, and a plethora of experience in digital marketing, editorial, and social media, I have an eye for what should be in your shopping basket and have gone through the internal customer advisor accreditation process.
-
 A $200 fluted panel transformed my drab kitchen in just one weekend
How to install a fluted kitchen panel: A speedy and achievable DIY tutorial even for DIY novices
By Claire Douglas
-
 How to replace a broken staircase spindle in 30 minutes flat
A missing or broken spindle on a staircase is not only unsightly, but it can be a real hazard. This is how to fix it in a few quick steps.
By Kate Sandhu
-
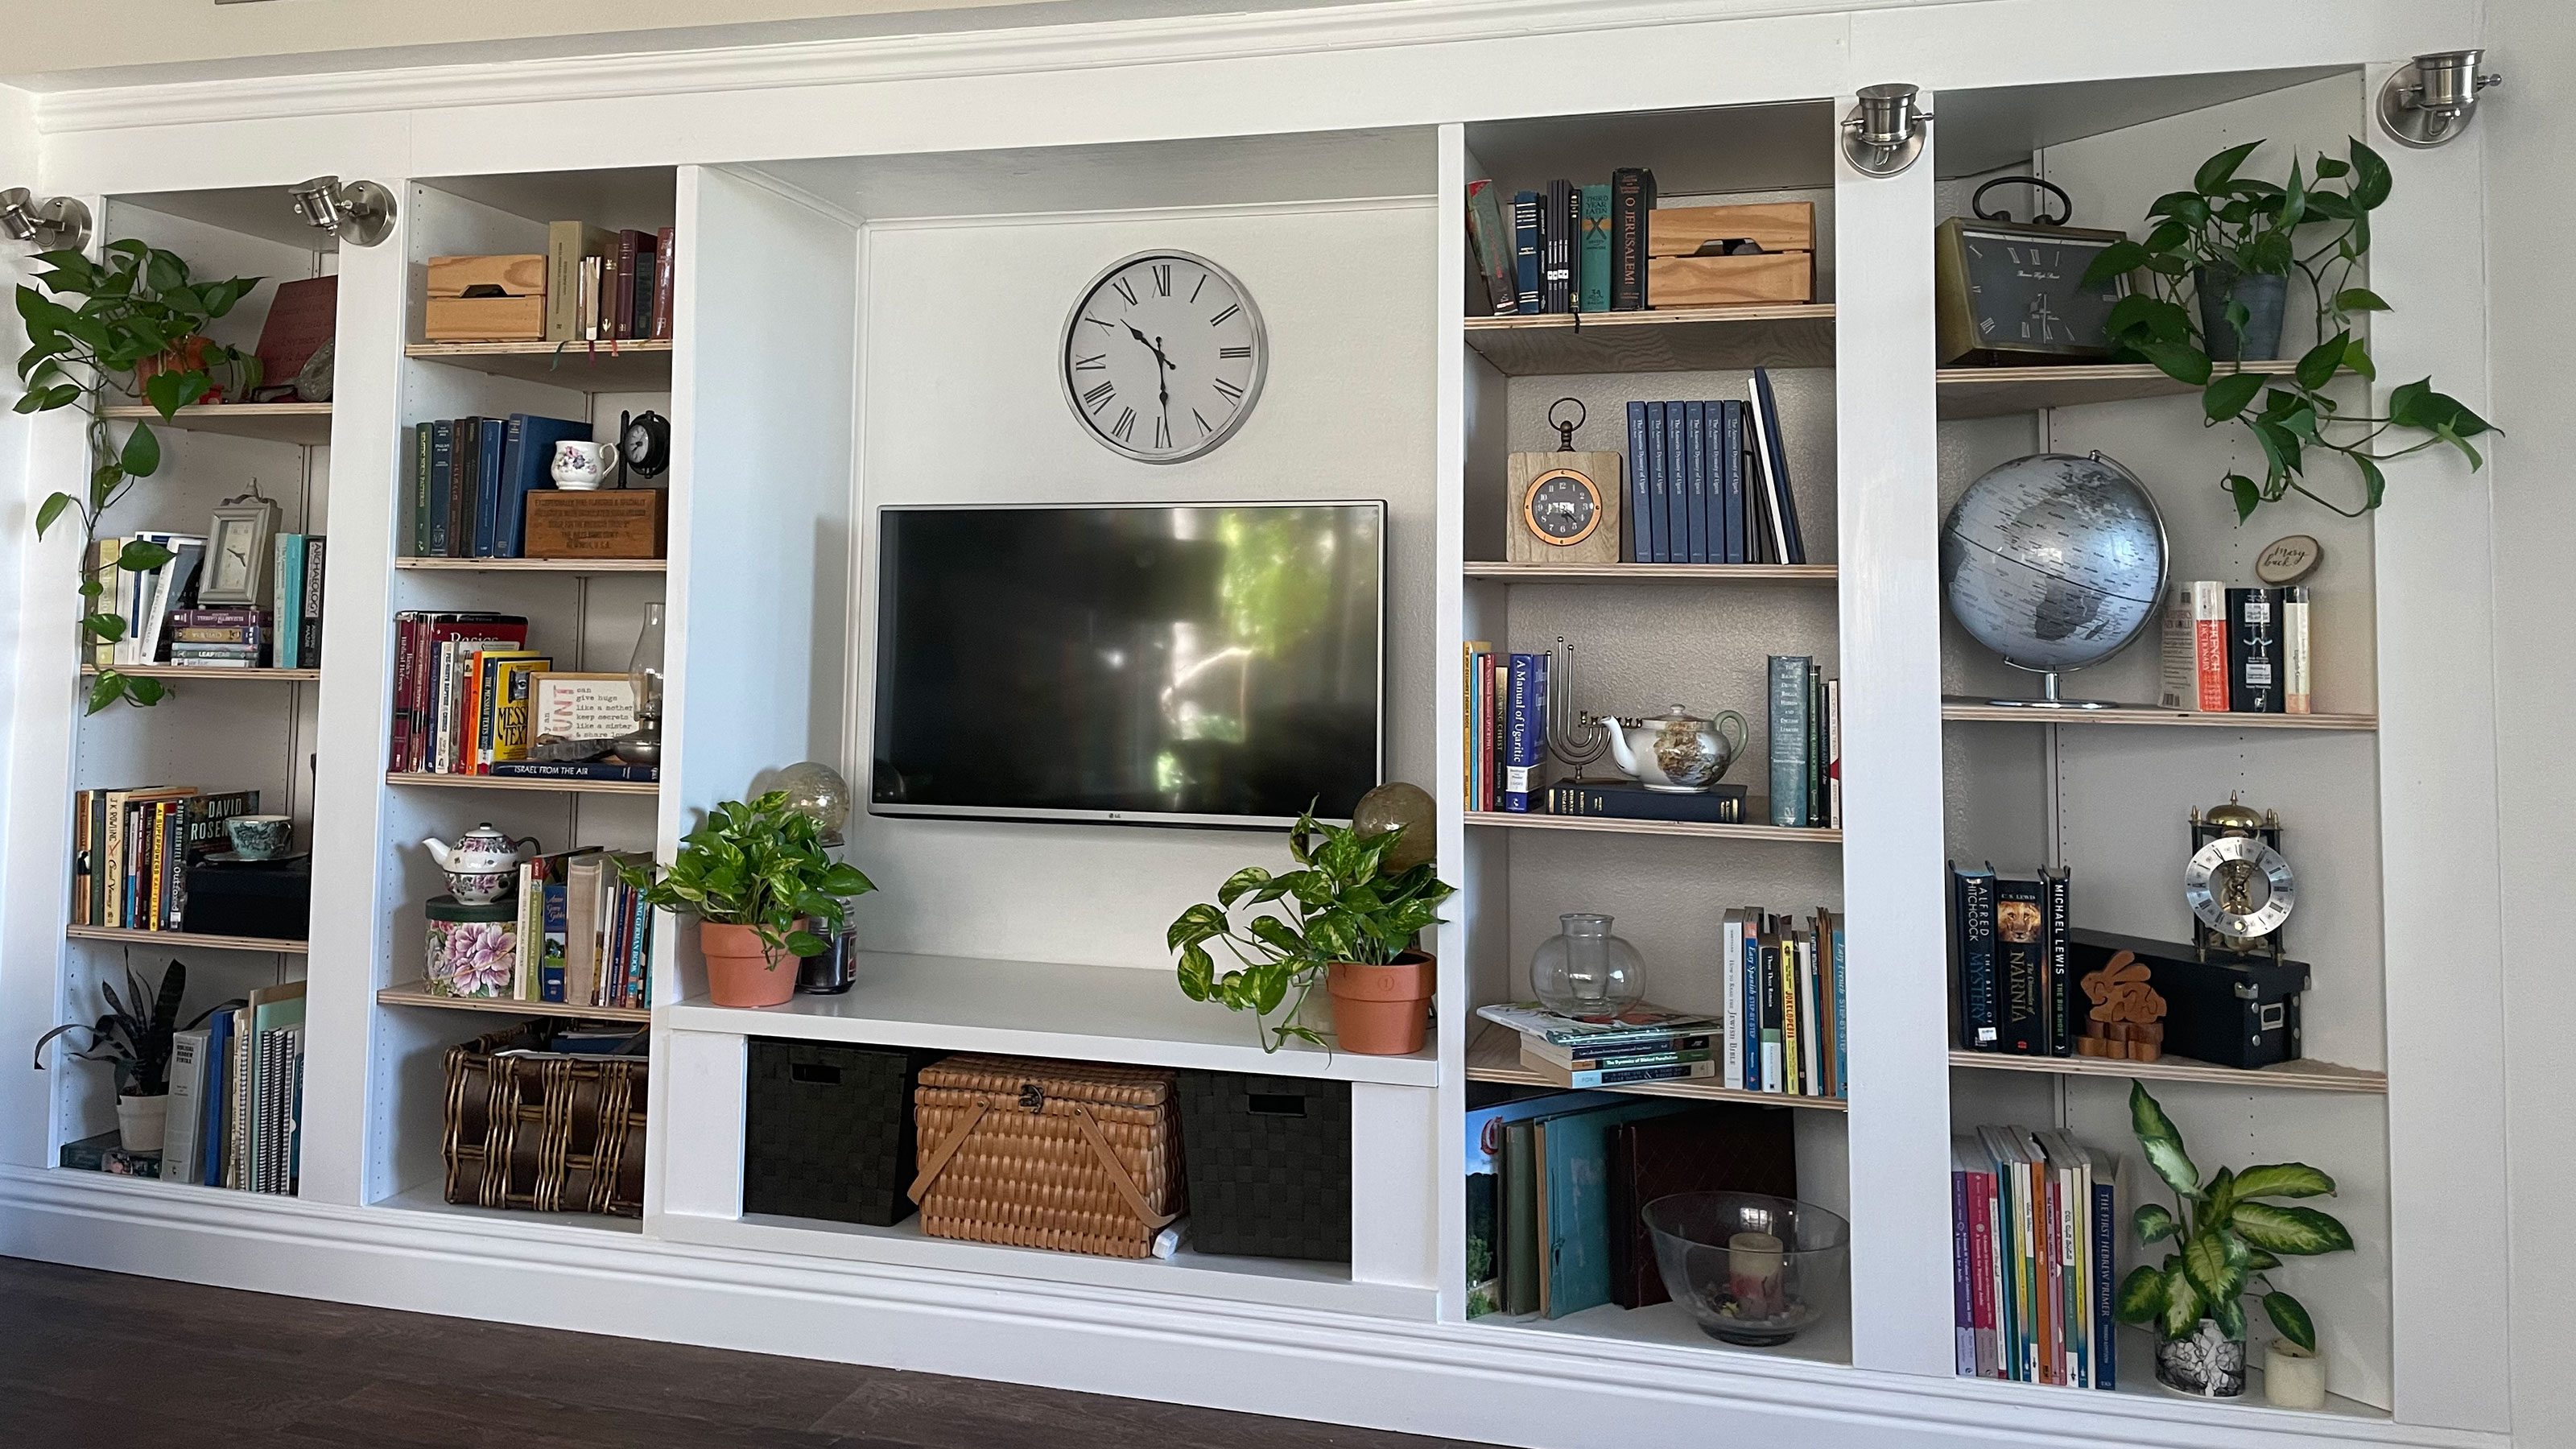 An IKEA Billy bookcase hack inspired this cute media wall DIY
This cute DIY was inspired by an IKEA Billy bookcase hack and brought a ton of symmetry to an otherwise basic media wall space.
By Camille Dubuis-Welch
-
 Share your small space glow up to win $150 in the Real Homes competition
Show off your creativity and DIY skills to win $150 and for the chance to be featured exclusively in Real Homes magazine
By Camille Dubuis-Welch
-
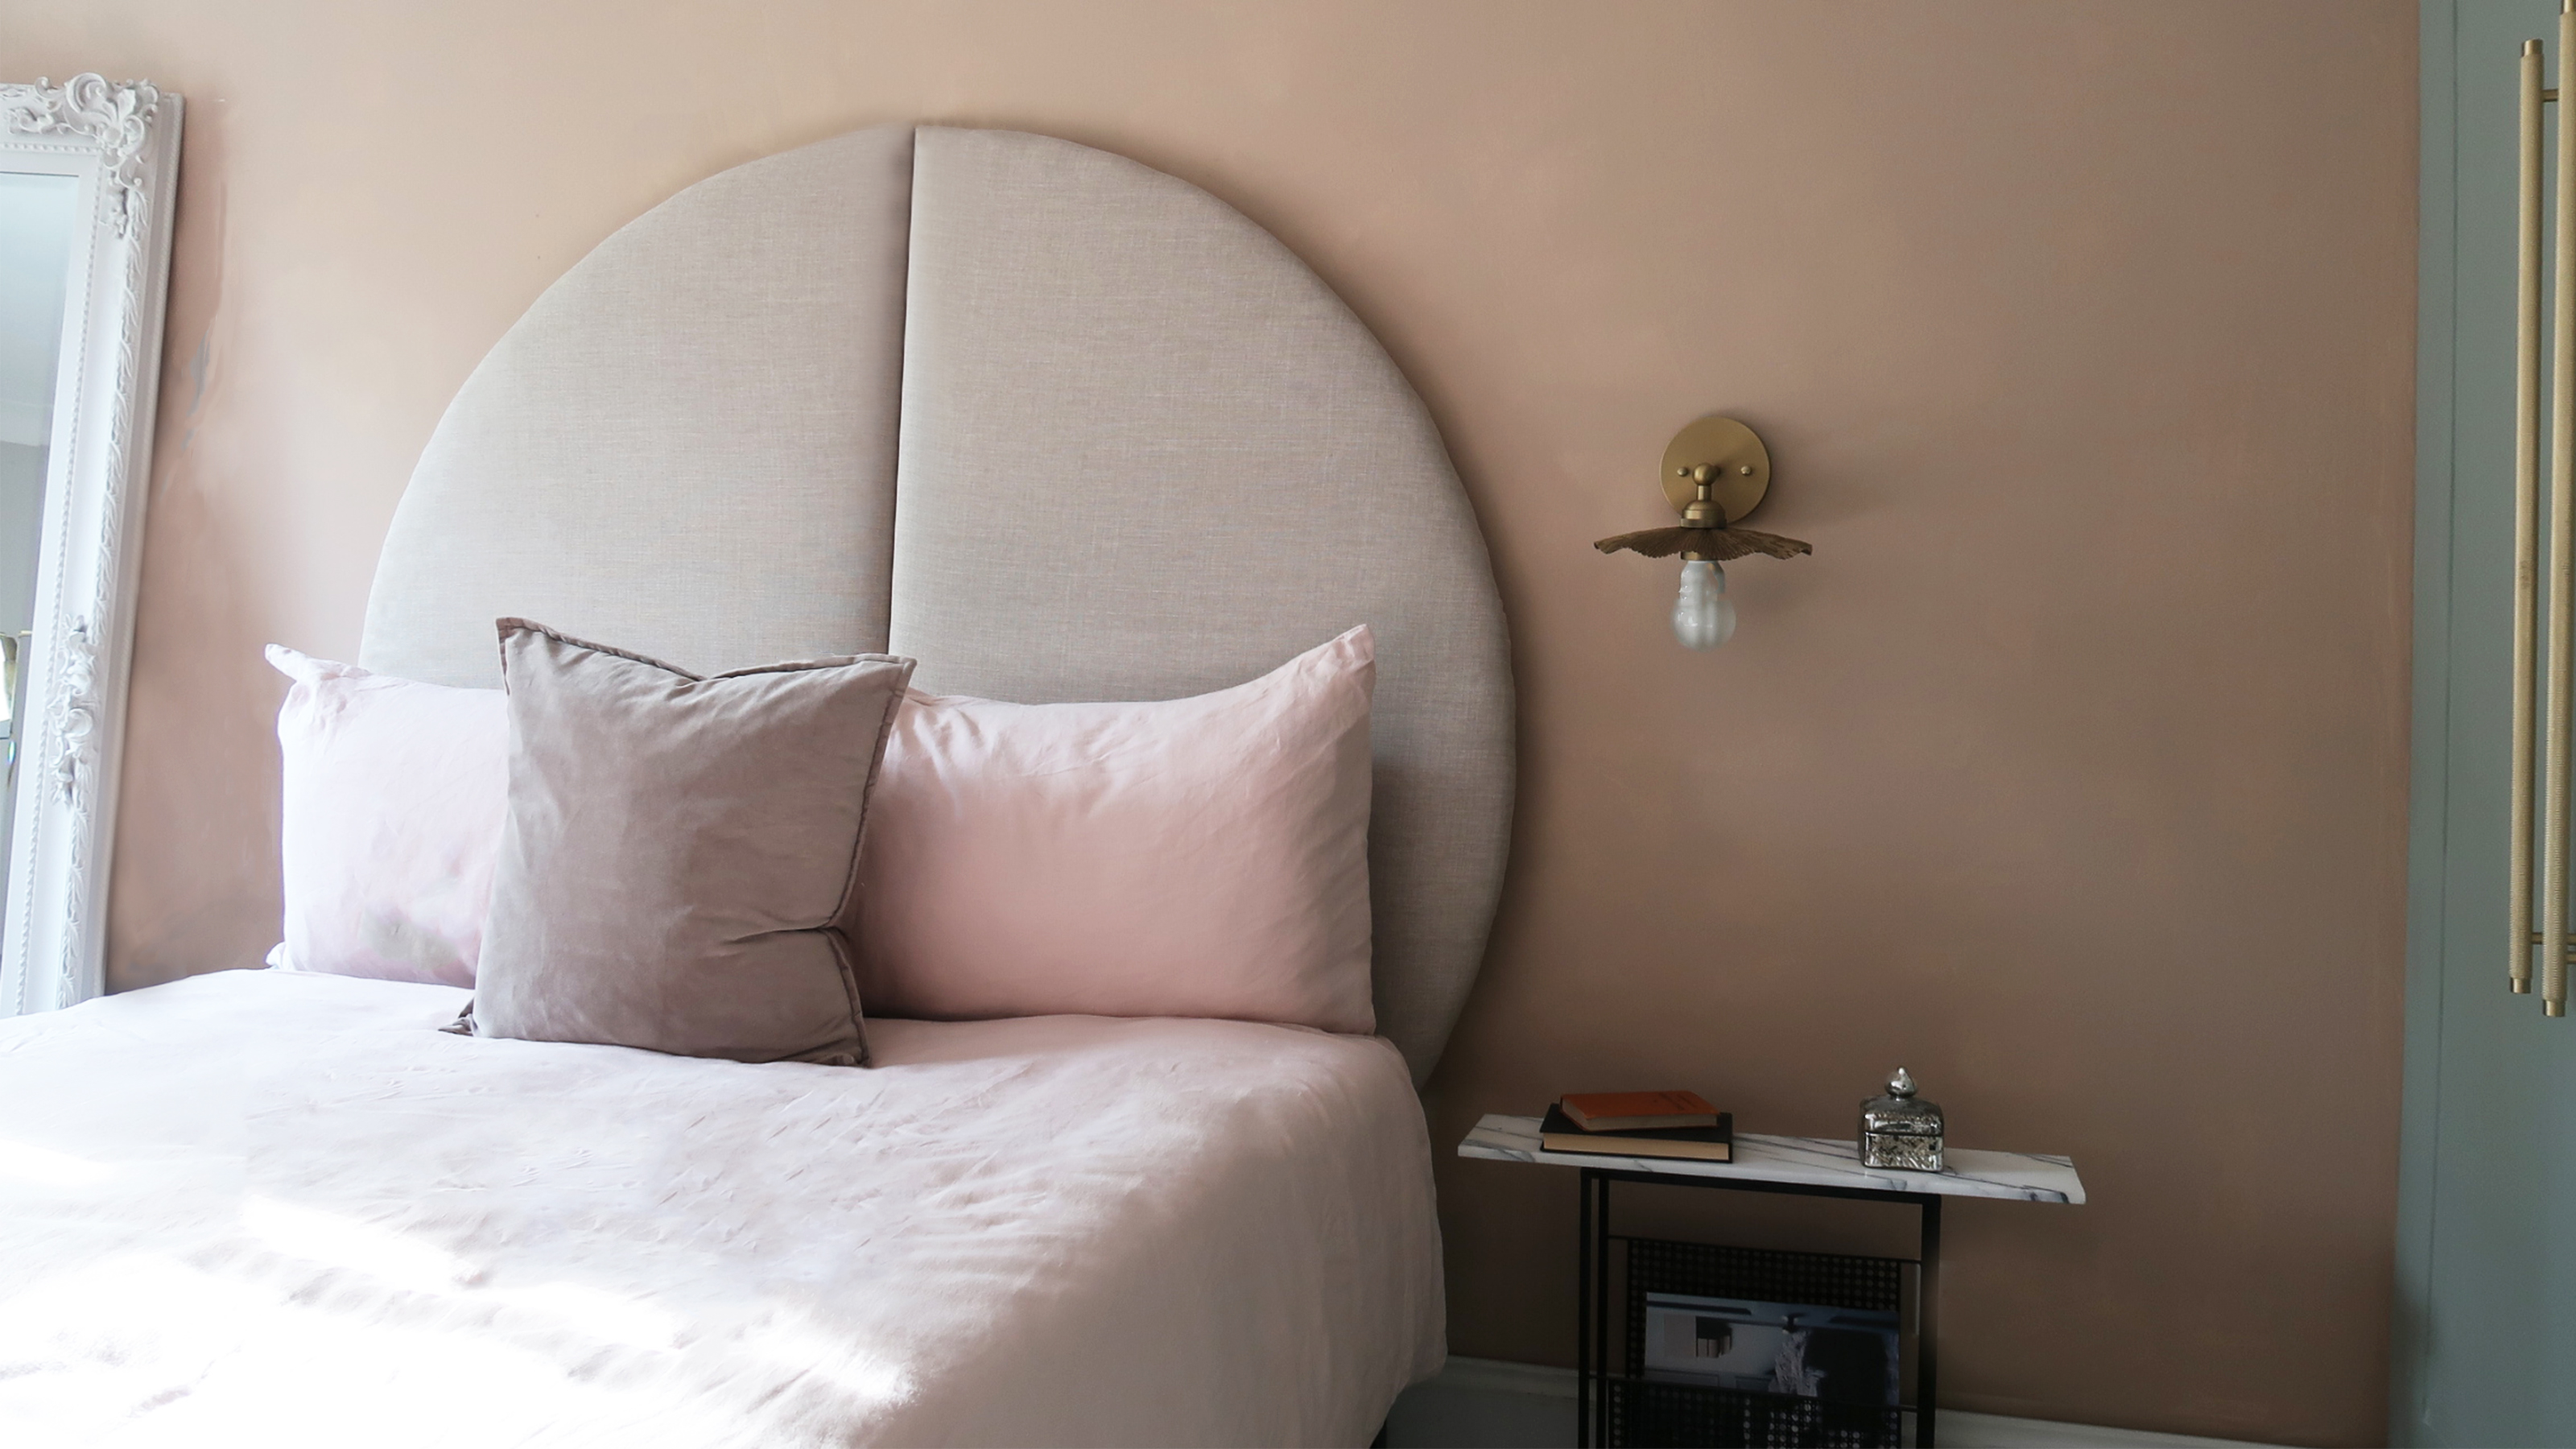 This oversized headboard looks designer, and takes 5 steps to DIY
Super simple to DIY, this oversized headboard will give your bedroom space all the designer vibes you could dream of.
By Claire Douglas
-
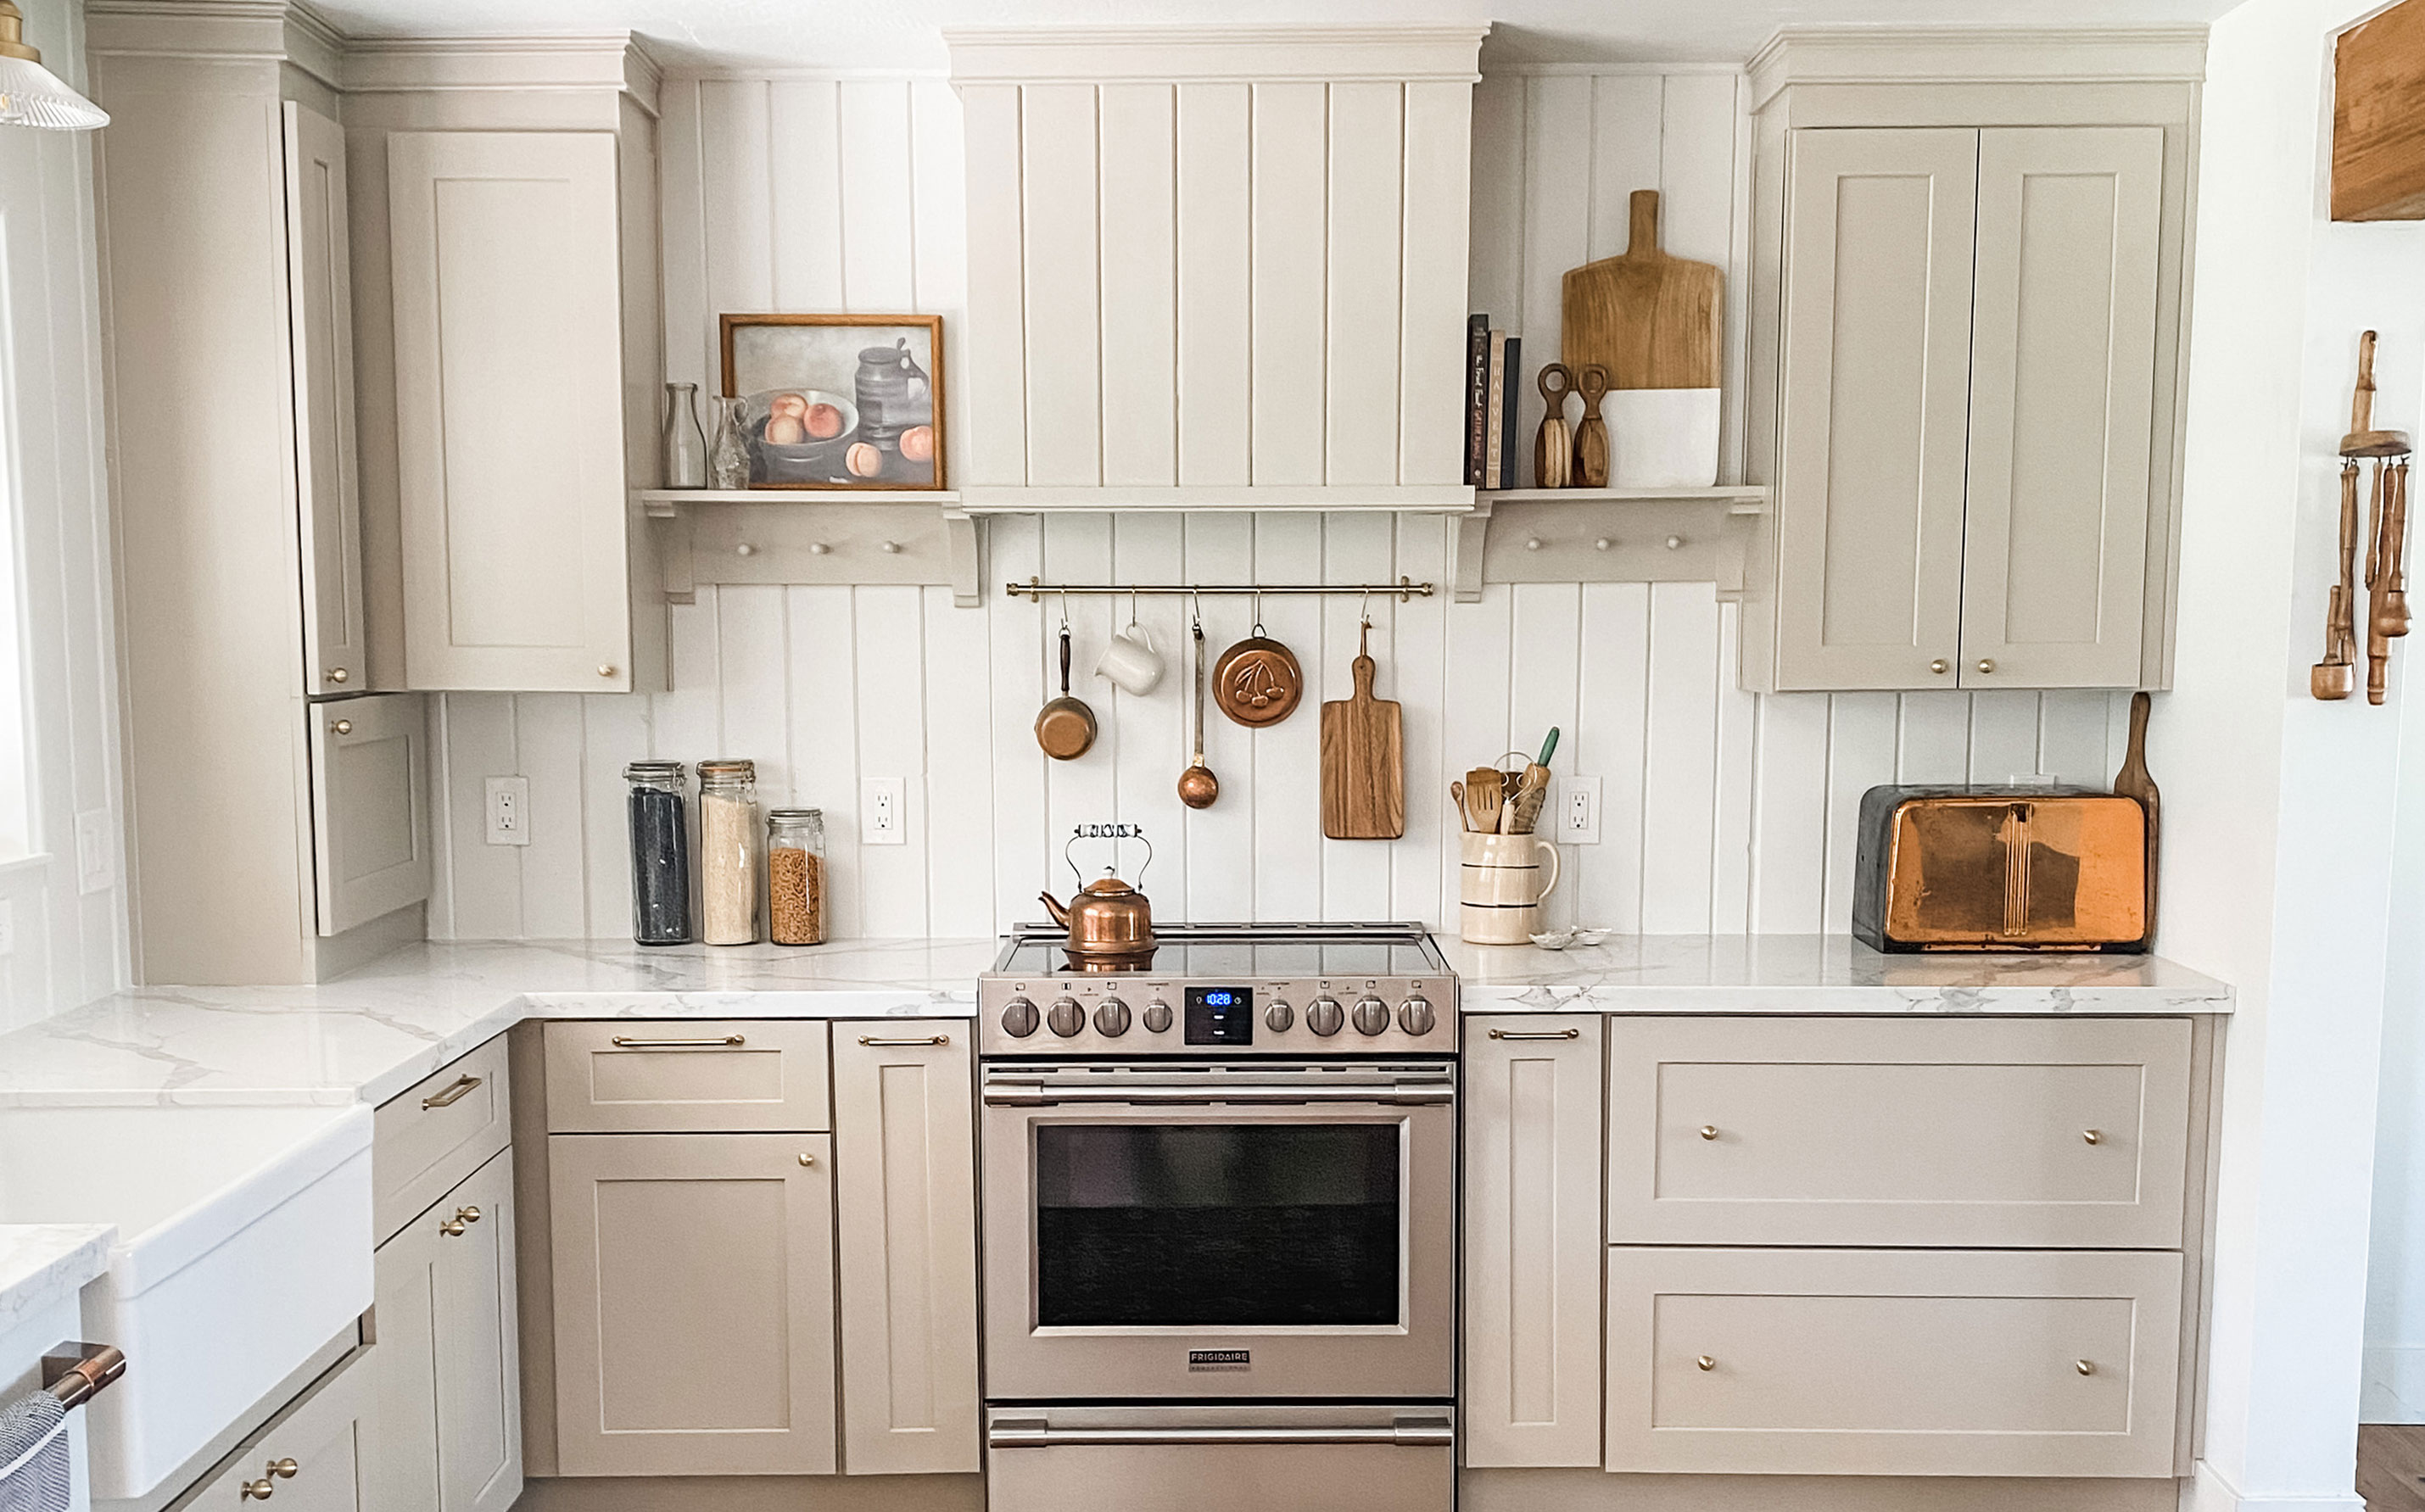 My DIY range hood and backsplash build gave my kitchen the perfect farmhouse finish
I craved charm in my kitchen space and adding a custom range hood and shelving was the best move.
By Brooke Waite
-
 How to paint a radiator in 7 steps
Painting radiators properly is all about choosing the right paint and the best process. Get interior designer-worthy results with our how-to.
By Kate Sandhu
-
 How to install a door knob
Updating your interior and exterior doors can be as easy as changing out the hardware! The best part is that installing a door knob is very DIY friendly. Follow these simple steps and enjoy a fresh look on your doors!
By Dori Turner