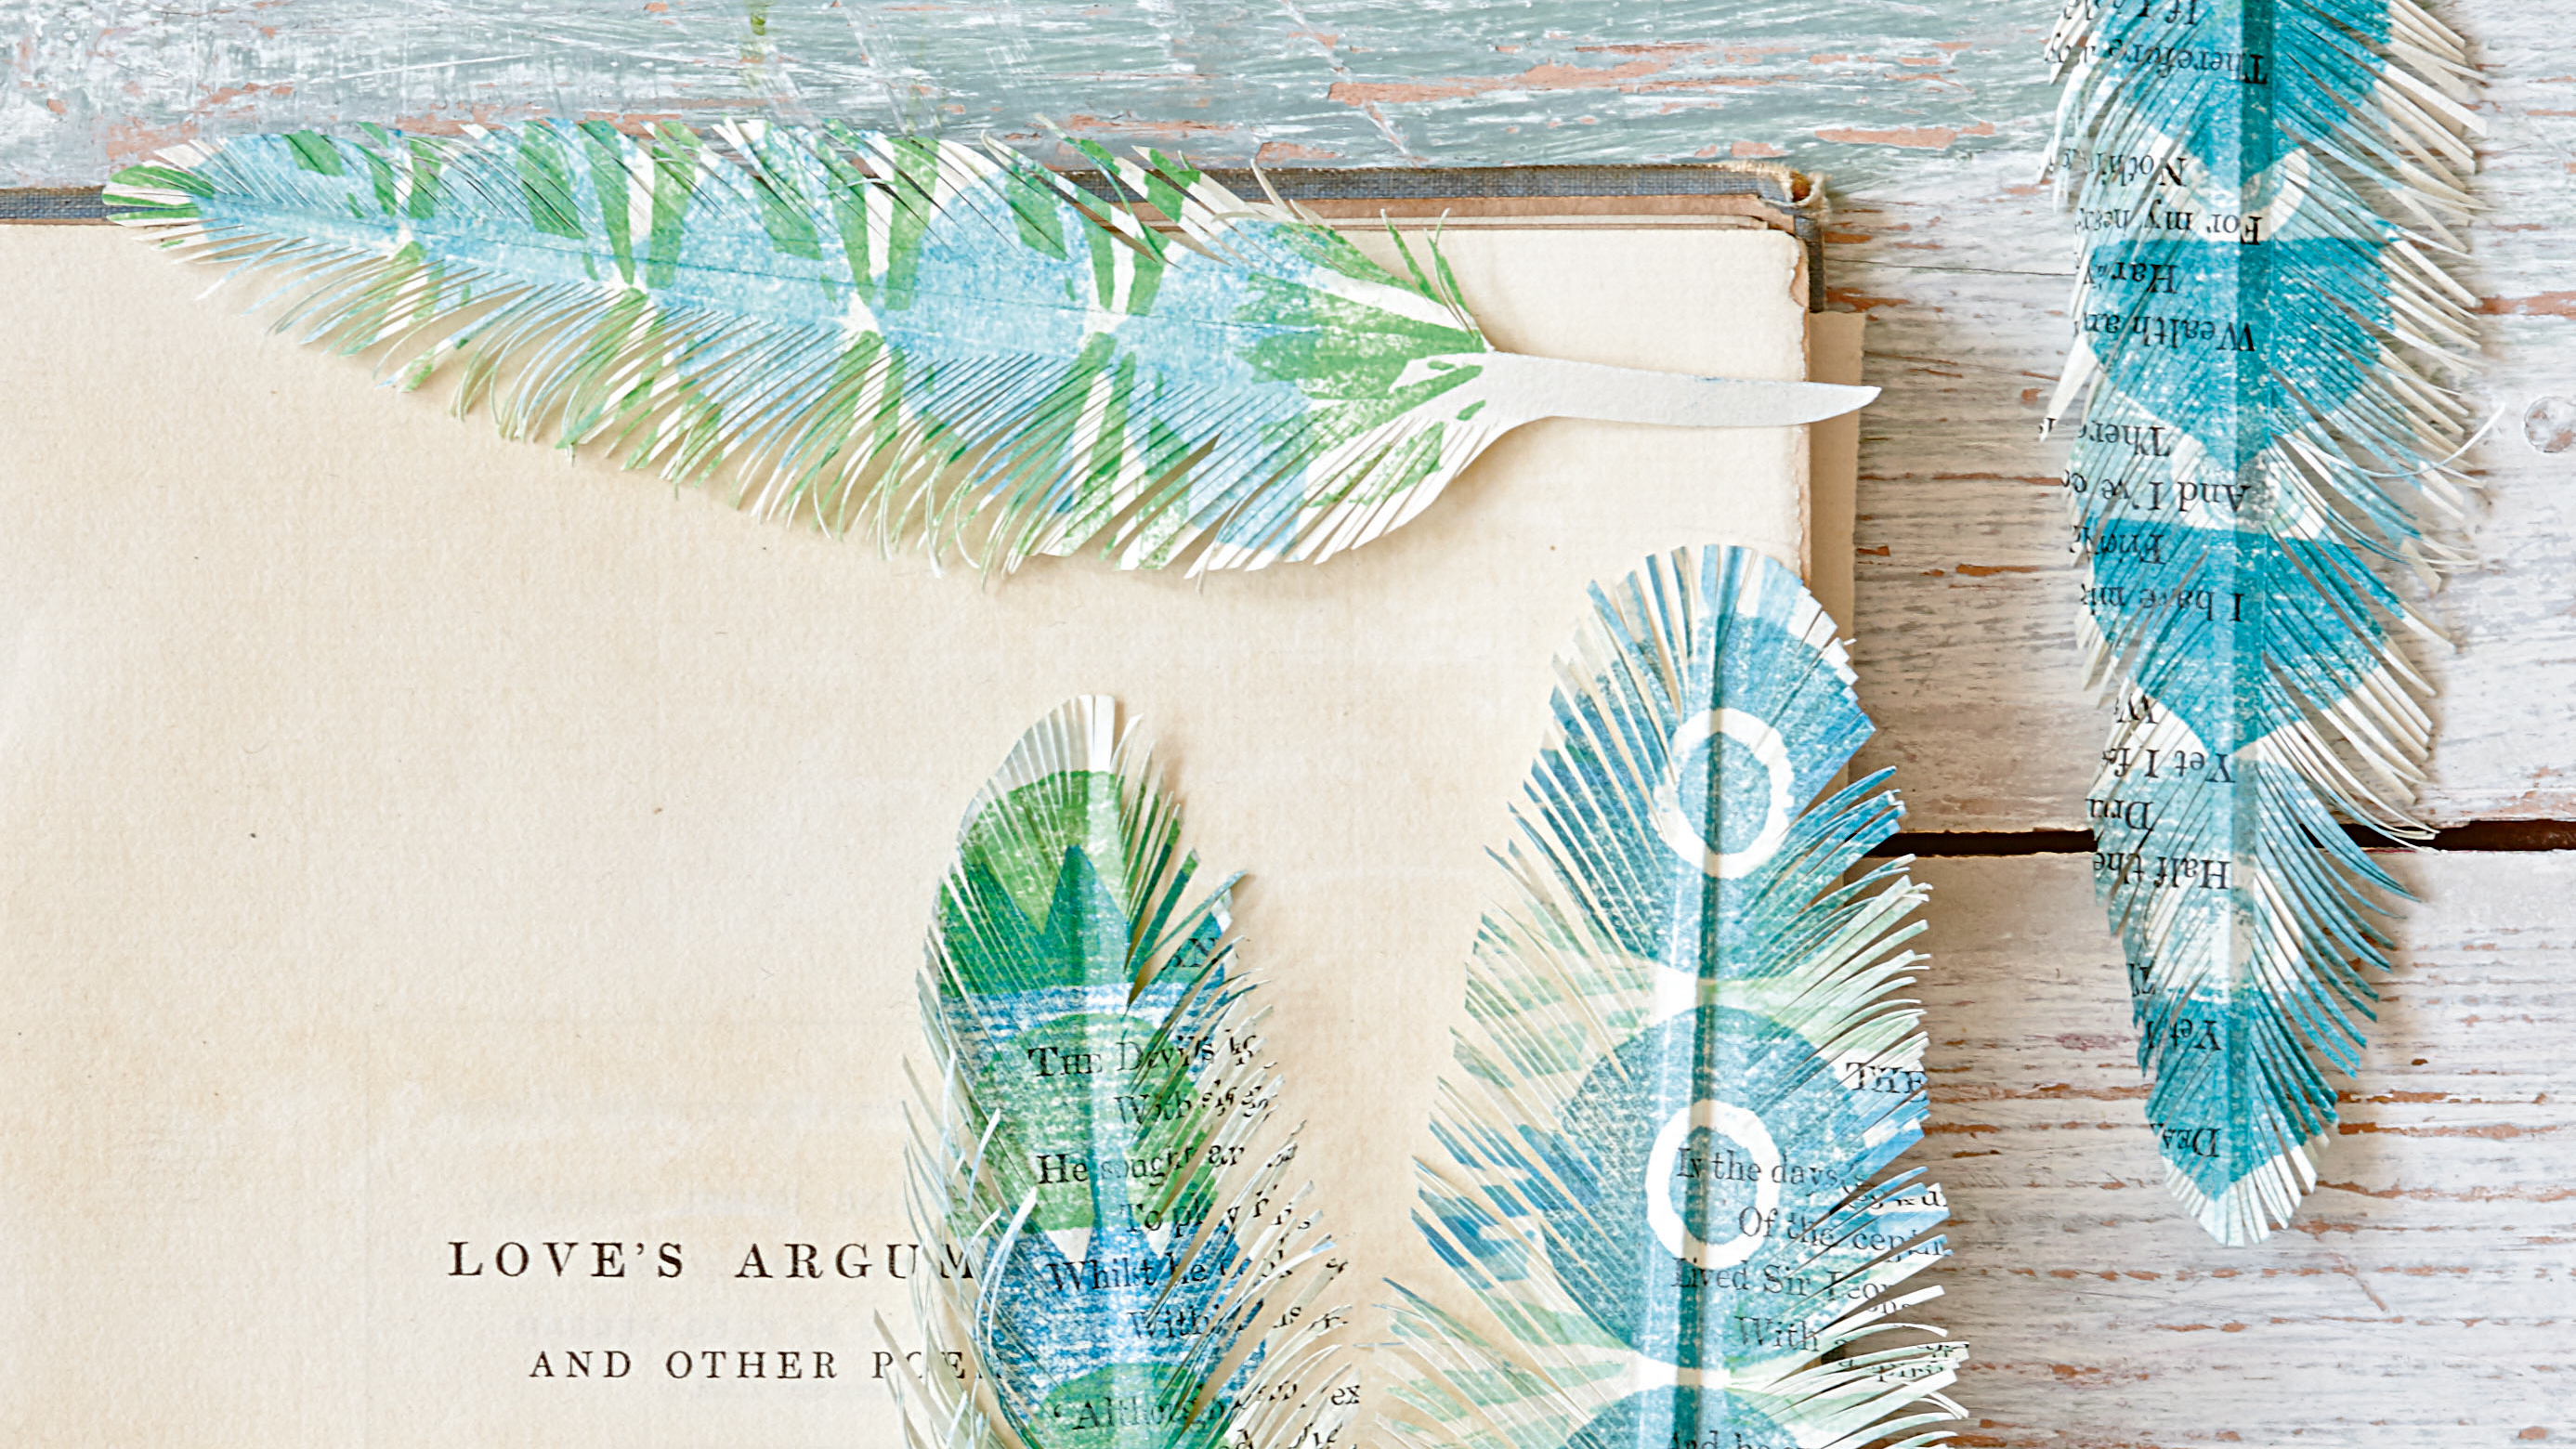

Try a paper craft project that gives great results for very little effort. These fabulous paper feathers take a matter of minutes to make, and you can use materials you already have around your home.
These pretty feathers are made from an old book, but you could use magazines, scraps of wallpaper, prints you don’t have room to hang, or maps, and they would work equally well. Why not make a few and string them up as a garland, or tie a couple together with ribbon and add a name tag to create a place setting at a wedding or a party?
And if you’re looking for more crafts or DIY projects, just head over to our hub page.
Find more paper crafts
This project was taken from Folded Book Art by Clare Youngs, published by CICO Books, and available on Amazon.
You will need:
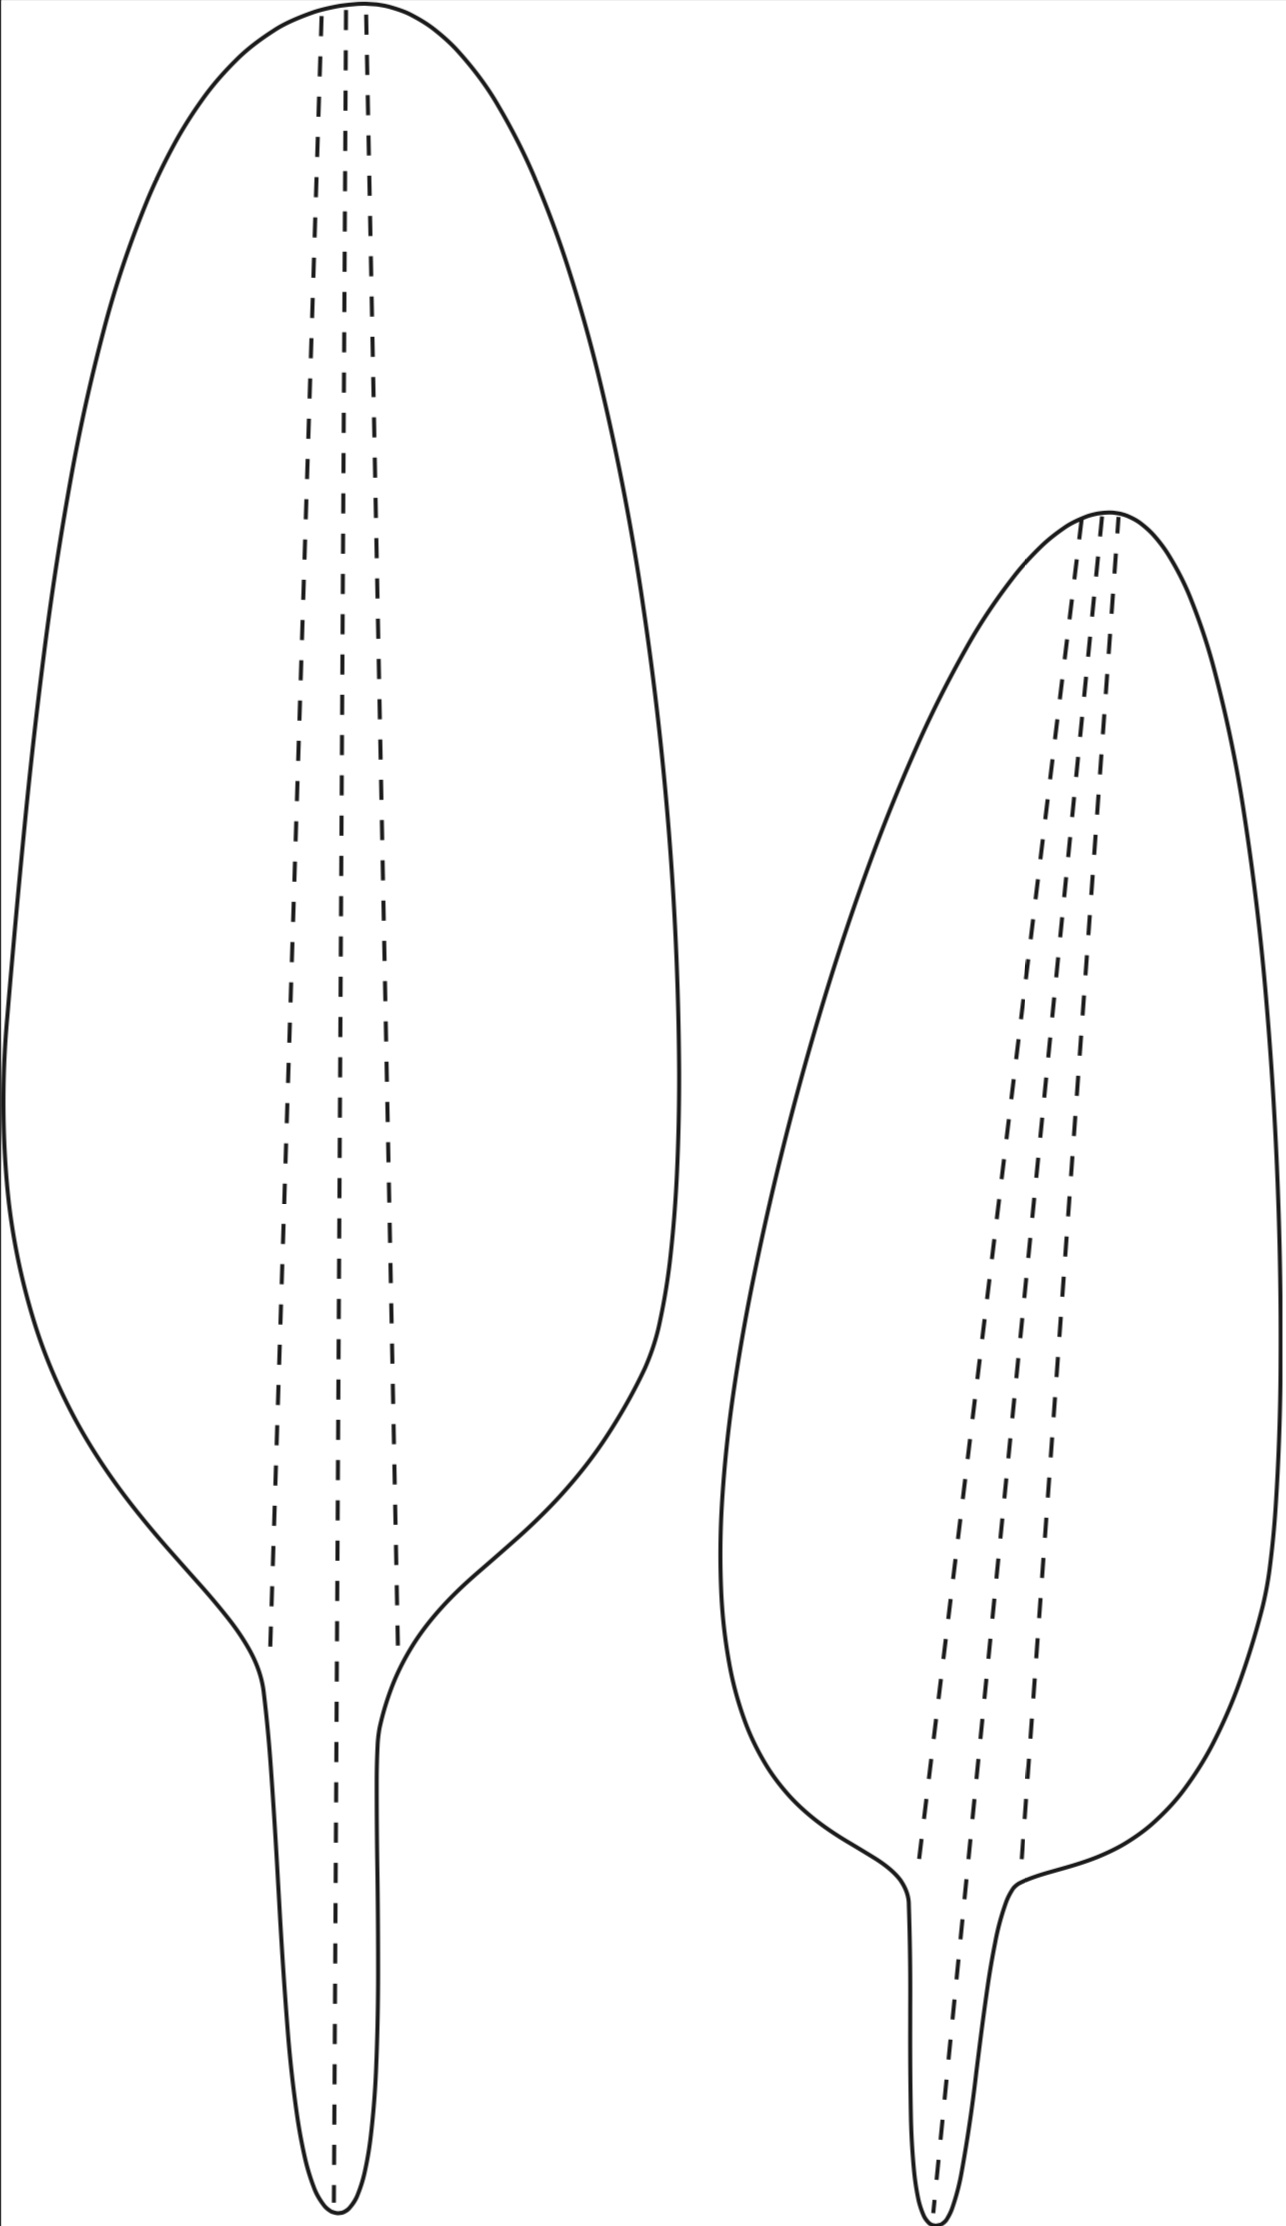
- Templates (you can screenshot the ones at the bottom of this page)
- Tracing paper
- Masking tape
- Pencil
- Scissors
- Rubbers (to create the stamps)
- Craft knife
- Cutting mat
- Ink-stamping pads
- Blunt knife
- Ruler
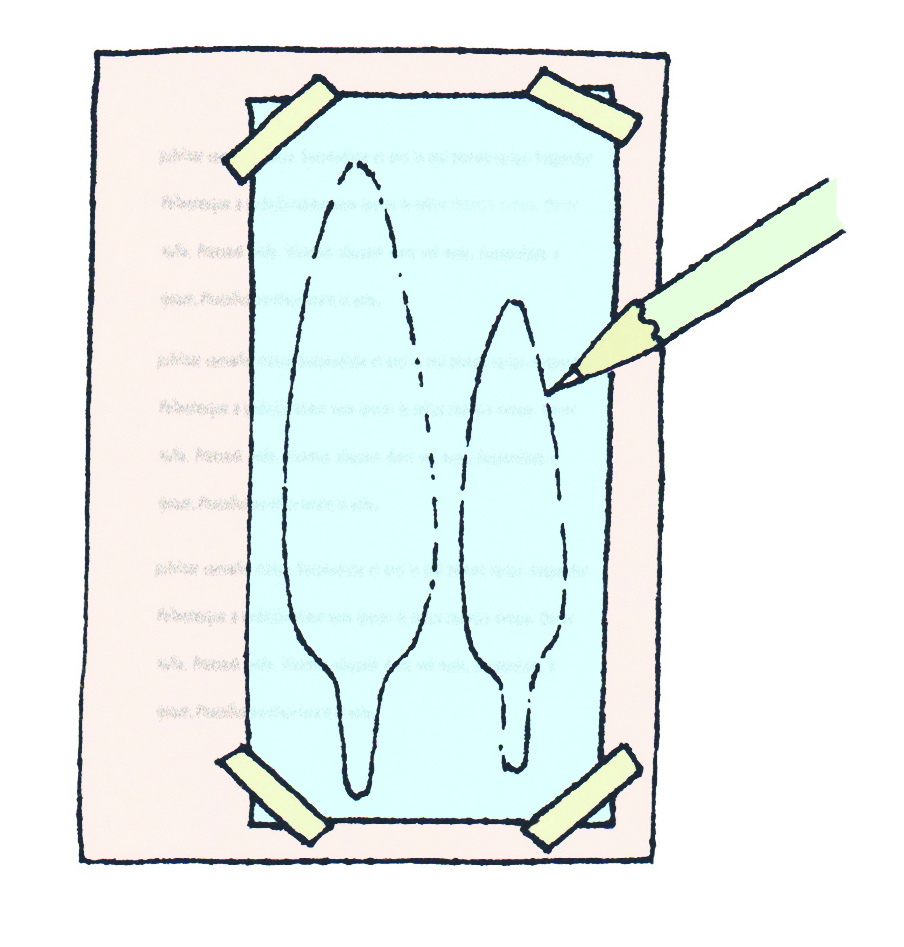
Step one: create your templates
Trace out the shapes for the feathers and transfer them on to your book pages. Then use scissors to cut out the shapes.
Step two: make the stamps
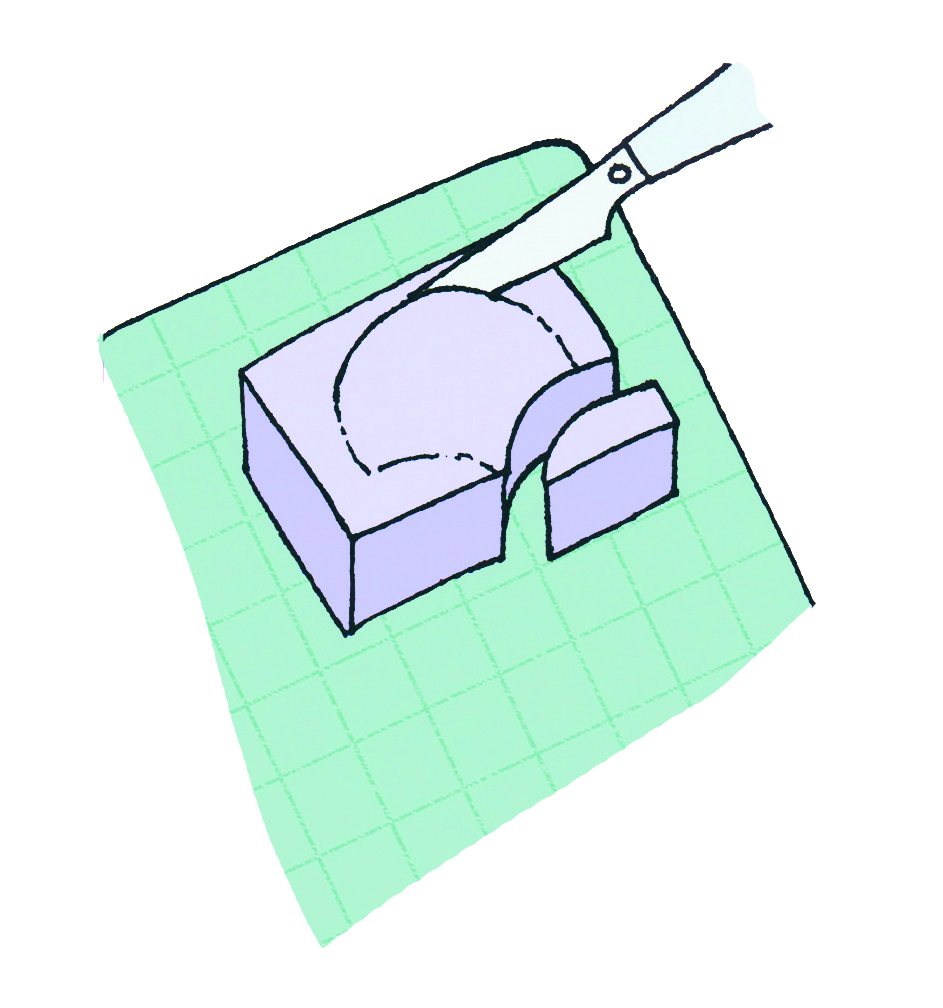
Make a few simple stamps from rubbers by drawing a shape on to each in pencil and cutting the shape out using a craft knife. Protect your work surface with a cutting mat.
Step three: create a pattern on the feathers
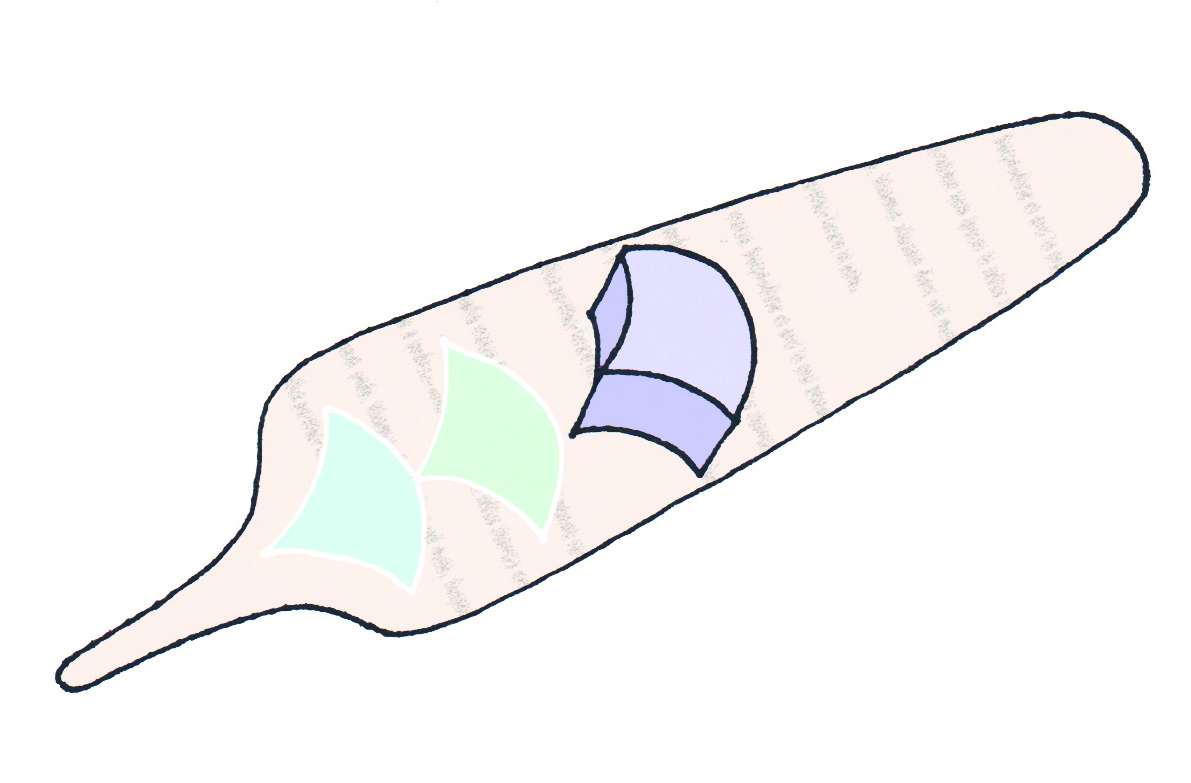
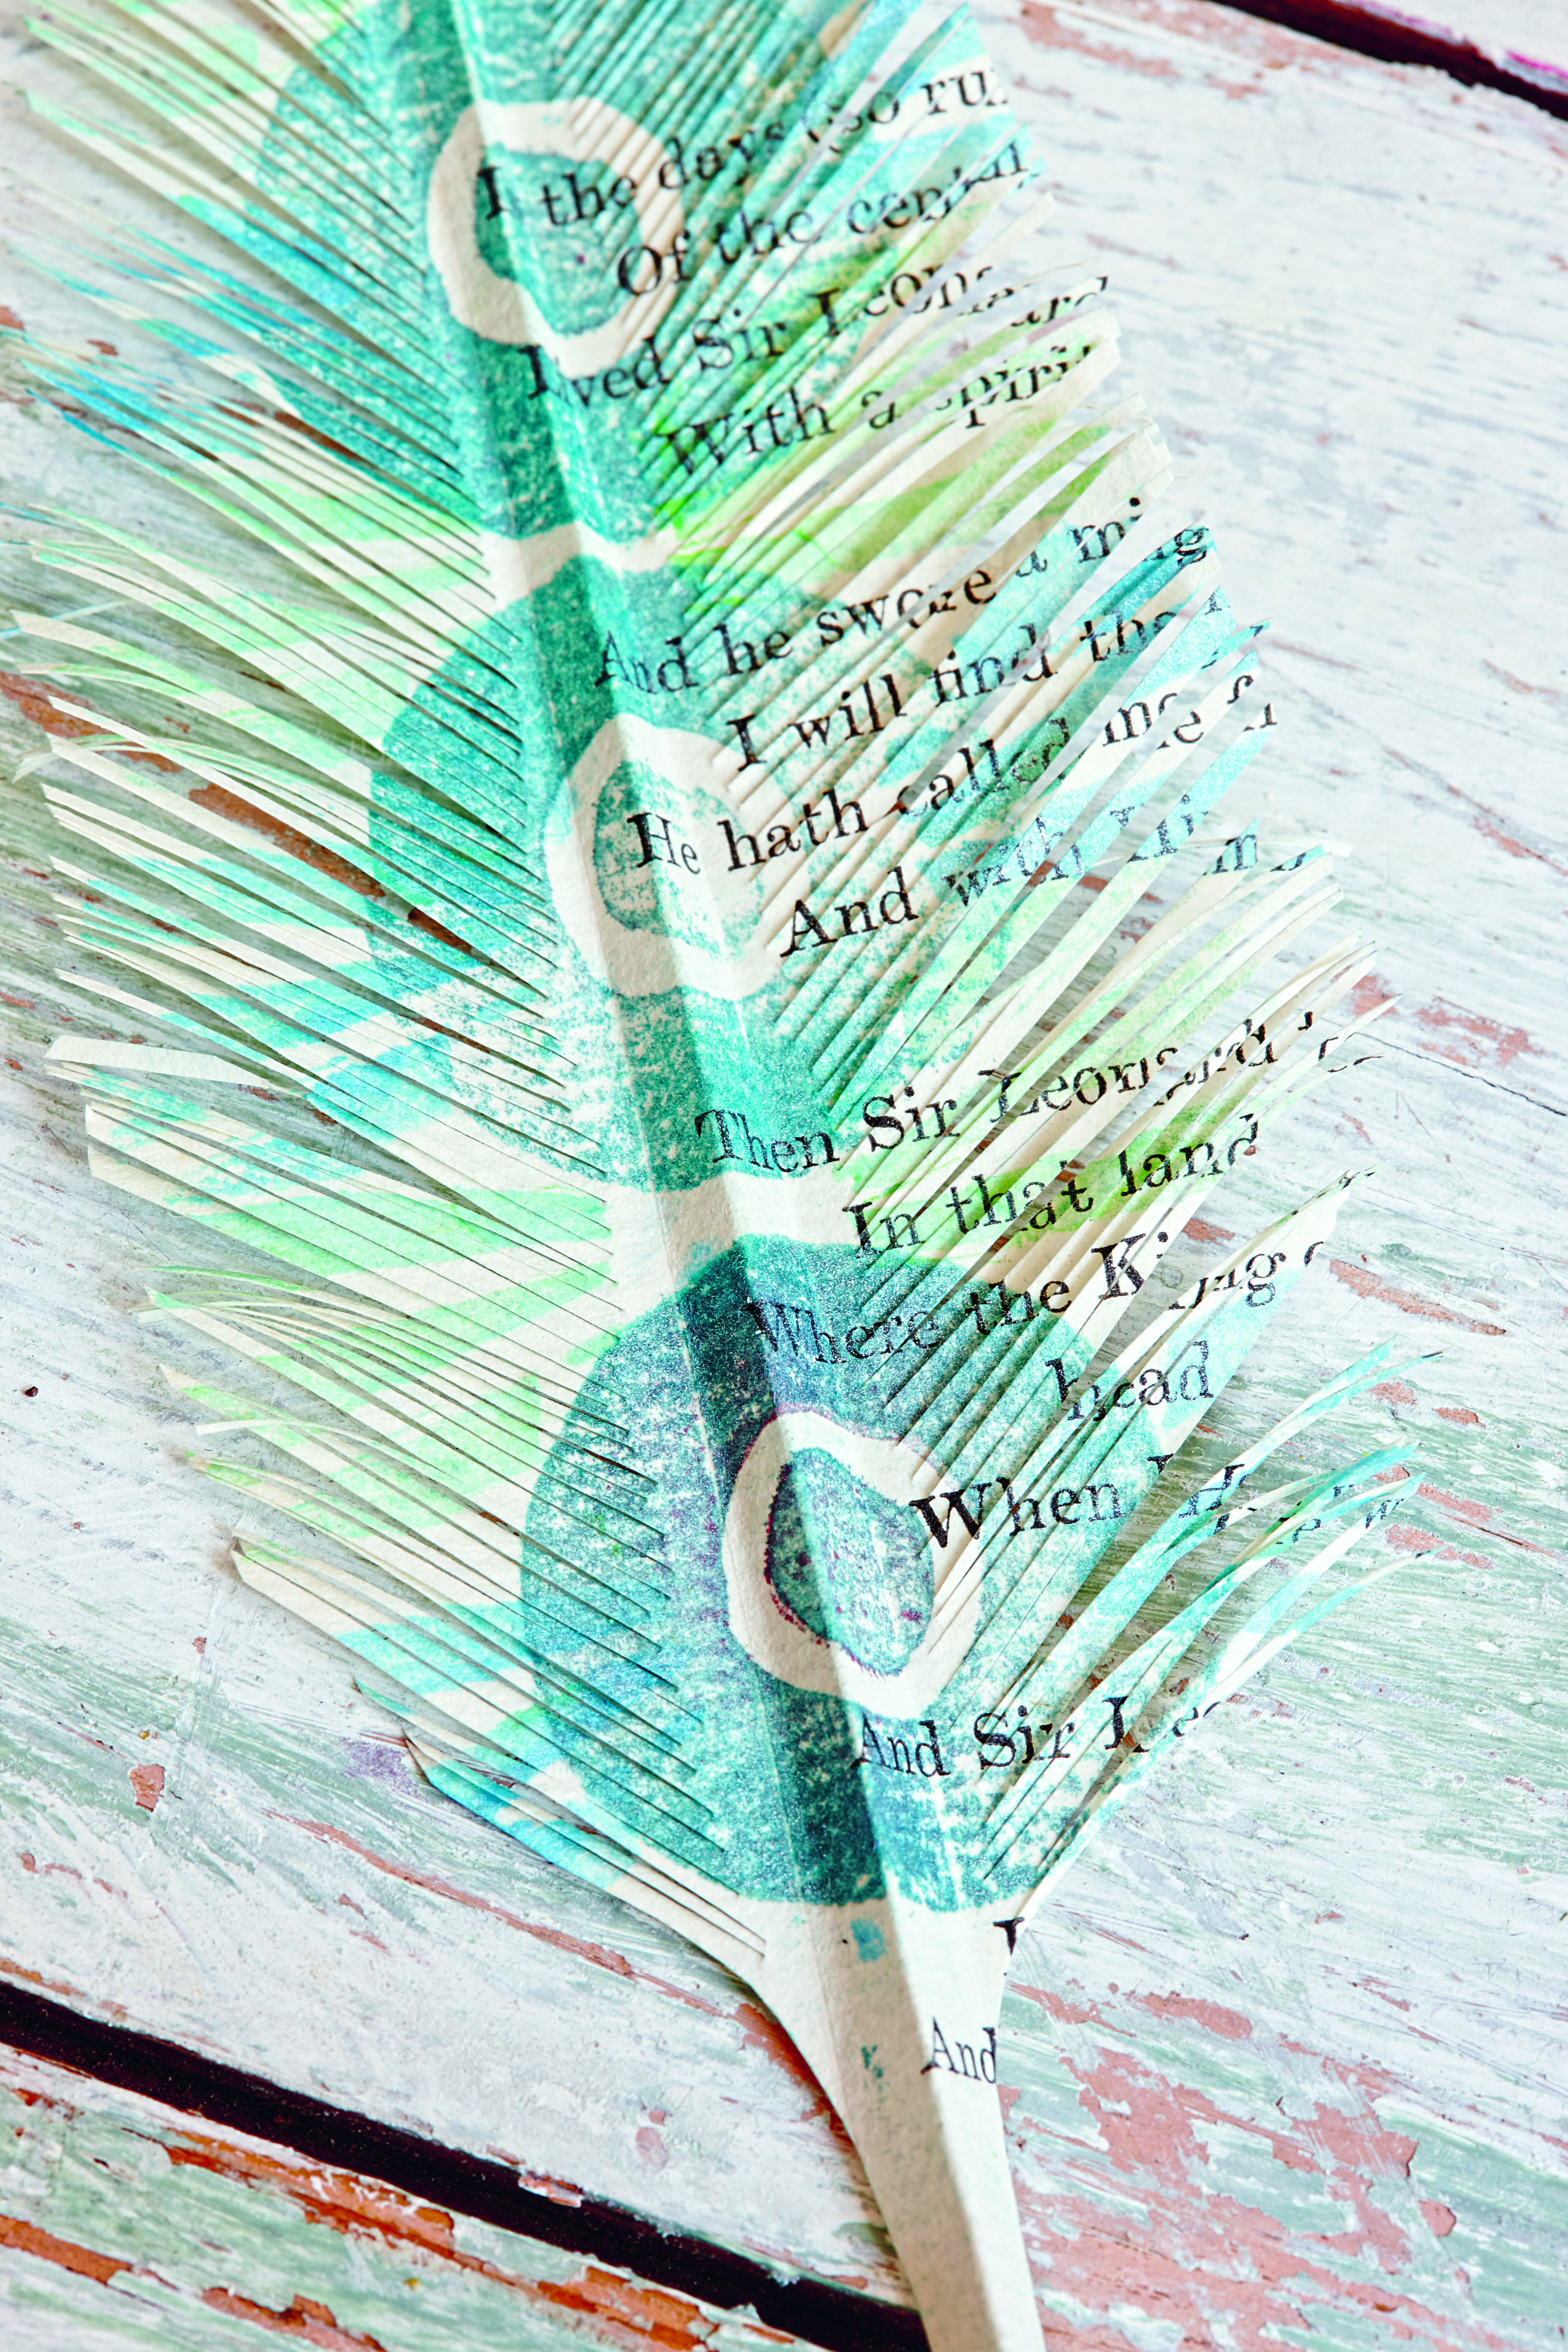
Print repeat patterns down the length of each feather using the ink-stamping pad. You can stick to one colour or use two or three.
Step four: give the feathers some shape
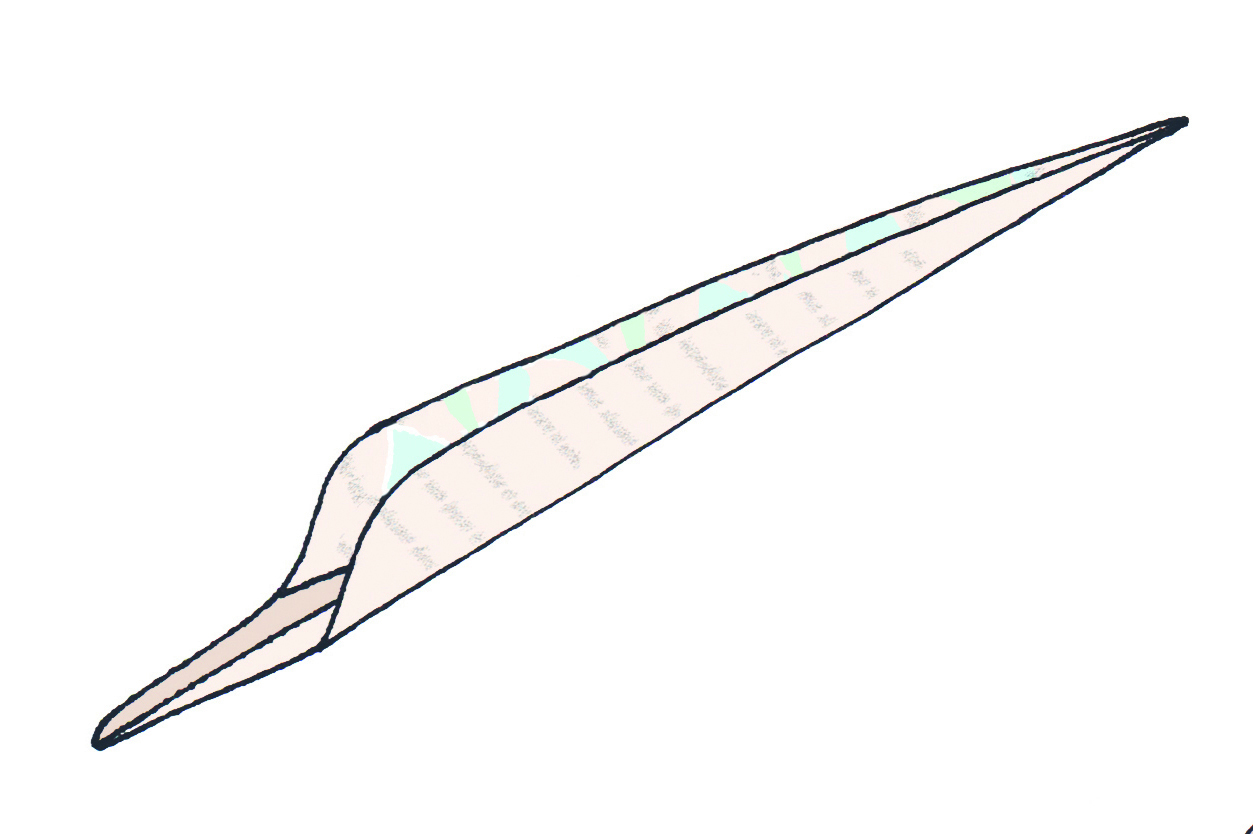
Use a blunt knife and a ruler to make the score lines indicated on the template. First, fold the feather in half along the centre score line, then reverse-fold the two sides along the outer score lines. The feather will lie flat with a raised ridge down the centre. Repeat to make all feathers.
Join our newsletter
Get small space home decor ideas, celeb inspiration, DIY tips and more, straight to your inbox!
Step five: snip the feathered edges
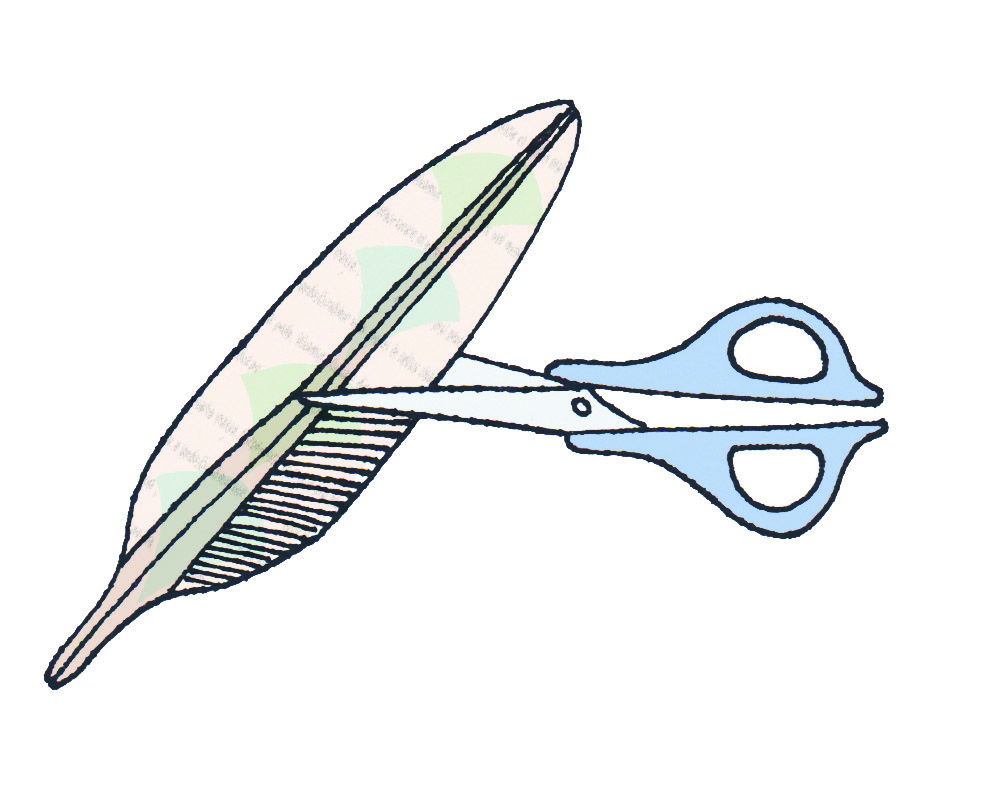
To finish each feather, use scissors to cut very thin snips from the outer edge, towards the centre, stopping short of the outer score lines.
Print out templates:
Get more easy craft ideas:
Hebe joined the Real Homes team in early 2018 as Staff Writer before moving to the Livingetc team in 2021 where she took on a role as Digital Editor. She loves boho and 70's style and is a big fan of Instagram as a source of interiors inspiration. When she isn't writing about interiors, she is renovating her own spaces – be it wallpapering a hallway, painting kitchen cupboards or converting a van.
-
 5 Gen Z and millennial influencers to follow for all things homes and interiors
Need some on-trend home and interior inspo? These are the five millennial and Gen Z influencer accounts I can't stop scrolling for small homes and rentals
By Louise Oliphant Published
-
 8 calming paint colors to create a blissful home sanctuary
Relax, revive and renew with a soothing palette of mindful paint shades.
By Sophie Warren-Smith Published
-
 How one trash can thrifter brought a vintage footstool back to life, for free
See how an innovative NYC-based trash can thrifter brought a vintage bamboo footstool back to life for free
By Camille Dubuis-Welch Published
-
 I transformed my IKEA Kallax unit into a stunning media cabinet
I took a weekend out to transform a basic IKEA Kallax shelving unit into the media cabinet of dreams. Here's how.
By Becks Shepherd Published
-
 How to arrange flowers like a pro: expert advice on creating stunning floral displays
Arrange flowers like a pro with our expert advice. The days of placing your shop-bought flowers in a vase and hoping for the best are over
By Hebe Hatton Last updated
-
 How to hide a TV on the wall: a DIY disguise with art
DIY a disguise for your TV on the wall with art and turn heads in your front room, for all the right reasons
By Claire Douglas Published
-
 10 dorm room ideas to make your place the cutest on campus
Heading to college soon? These dorm room ideas range from sweet styles to savvy solutions...
By Eve Smallman Last updated
-
 How to use peel and stick wallpaper for a major furniture upgrade
Elevate your interiors by using peel and stick wallpaper on furniture for a majorly beautiful, simple and budget-friendly upgrade.
By Dori Turner Published