

Knowing how to hang curtains yourself is one of the most basic DIY jobs you could come across, however, we all know too well that if you skip one part or measure for curtains wrong, the results will not look great and they will by no means set off your room's decor in the right way.
You need to get the fundamentals right, like the window's measurements, the best height for the curtain rod, how wide the panels should be, and so on.
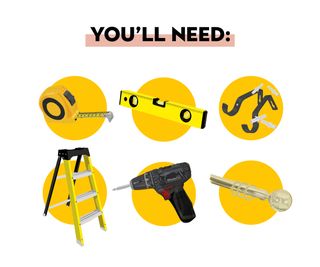
- The best curtains
- A drill
- Pencil
- Level
- Tape measure
- Step ladder
- Curtain pole
- Hardware (if not already included with your curtain pole)
- Wall anchors if your curtains are very heavy
How to hang curtains
Raymond Yang, home decor industry veteran and founder of Deconovo says 'When installing any type of window treatment, it is important to measure the windows accurately. Draw the dimensions of the window. Measure the width and height with a tape measure. You must measure each window separately even if there are multiple windows that appear to be the same size to avoid surprises later. Each dimension should be measured in three places, and you should then record the largest measurement. This is especially important in older homes with handmade moldings.'Here is a full list of the materials and tools you'll need:
1. Decide how you want to mount your curtains
'Before calculating the size of curtain required, you must decide if you want to mount your curtains inside or outside of the frame.' Continues Yang. 'Mounting curtains within the window frame minimizes the size of curtains required and emphasizes any decorative moldings. Mount curtains outside of the window frame if your frames are unattractive or you prefer to cover the molding. This is also the best method of hanging if you want to achieve a blackout effect or if you are installing thermal curtains to help insulate the room.'
Dori Turner of Dori Turner Interiors says, 'Curtains should be allowed to hang on either side of the window when open so the rod should go past the window trim at least 6 inches on both sides.'
So this is where you'll want to install brackets. It's essential the brackets sit in the right place as if they are installed too close to the window trim, your curtains or drapes won't hang correctly and you won't make the most of natural sunlight when there are open either.
So measure out 6" from the window trim and above the window, then mark up where the rod should extend to on each side.
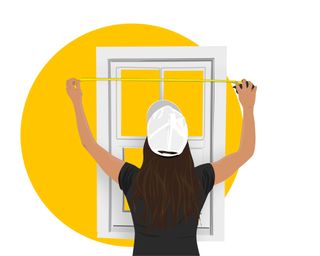
2. Decide on the length of your curtains
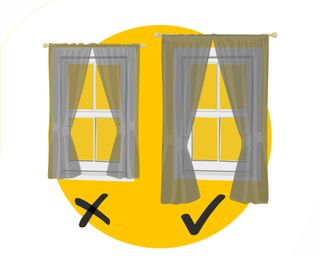
Securing the curtain rod properly is essential and the height at which you do this, depends on the drop/length that you want for your curtains. Most hang curtain rods four to six inches above the window frame to make a space appear bigger.
'Curtains should be installed at least 4 - 6 inches above the window. This draws your eyes up, making the room look and feel bigger.' Adds Turner.
When it comes to the right length, it's down to personal preference or which living room curtain ideas you're trying to recreate of course. Ideally, you'll want your curtains to come just a couple of inches above the ground. If you want your drapes to pool then you can leave them long but not that they will easily pick up dirt and ruin more quickly.
Turner adds 'Do you want the hem of your curtain to hang at the base of the floor or pool at the bottom? The standard size curtain is 84" but unless you have low ceilings you'll want to select 96" or 108" depending on the height of your rod.'
A lovely look is to go 2-3 inches below ceiling level, and have your curtains fall all the way to the floor. Width-wise, you want your curtain panels to be double the width of your windows.
3. Mark up and install your brackets
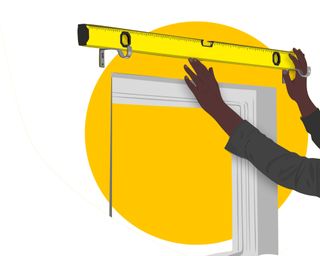
Use a stud finder if you can to determine whether you need wall plugs or not. Though Turner says you should always use them: 'You don't want your rods coming out of the sheetrock!'
Especially if your curtains or drapes are particularly heavy. Mark up where to drill the brackets into the wall with a pencil and ensure the brackets are level on both sides.
4. Attach your curtains to the rod
Remove any finials from your curtain rod then,
For eyelet curtains: You want to make sure the lining isn't showing so ensure the end folds away from the window when threading them onto the rod. And to stop the curtain sliding all the way across the rod, leave the end eyelet outside of the bracket.
For pencil pleats: Secure the cords together at the end then work your way across the curtain panel to gather the material. When it's even, knot the cords on the other side and fold them out of sight. Tail-end down, insert the curtain hooks at even intervals across the curtain panel and repeat on the other panel. Then attach them to the pole rings or set them on the track depending on what you've bought.
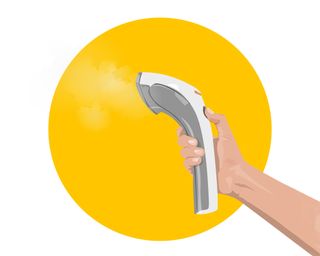
5. Steam your curtains
For an interior designer-esque finish, steam your curtains once they are up. If you don't have one, you can use your best steam iron to give them a once over before you hang them up especially if you've just taken them out of a packet. Make sure you keep them looking good with the latest techniques on how to clean curtains properly.
Mistakes to avoid when hanging curtains yourself
Kelly Marohl, owner and designer of The Greenspring Home blog says that the three most common mistakes when it comes to hanging curtains are:
- Hanging the curtain rod directly above the window
- Hanging the curtain rod at the same width of the window, and/or
- Buying curtains that are too short
'A common mistake is not having the rod wide enough on both sides of the window, so that your curtains are forced to be hanging partially in your window, blocking light and thus making your room feel smaller.' Adds Marohl.
'If you have standard 8 ft ceilings, you’ll want to order 96” curtain panels. If you have 9 ft ceilings, you’ll want to order 108” curtain panels. Both will be slightly long (2” or less) but you can either hem them or let them pool. Do not let them pool unless you have curtains made with high-quality/thick fabric, otherwise, they will not create that gorgeous puddle look you want. Curtains should always be less than an inch above the floor or they should kiss/graze your flooring. They should never be too short. Don’t skimp and use 84” panels, they make the room look so much smaller.'
Join our newsletter
Get small space home decor ideas, celeb inspiration, DIY tips and more, straight to your inbox!

I'm Cam, the former deputy editor of Real Homes who worked on the site from 2020 to 2023. As a renter myself, sharing a home with two friends (and my cat) in London, I know all too well the challenges that this can pose when it comes to creating your perfect setup. As someone who has always loved everything interior design-related, I cannot rest until a home feels right and I am really passionate about helping others get there too, no matter what their living situation, style, or budget may be. It’s not always the easiest to figure out, but the journey is fun and the results are so worth it.
After interior design, travel, art, and photography are my next big passions. When I’m not writing or editing homes content, I’m usually tapping into other creative outlets, exploring galleries in London or further afield, taking photos, scribbling, or drawing!