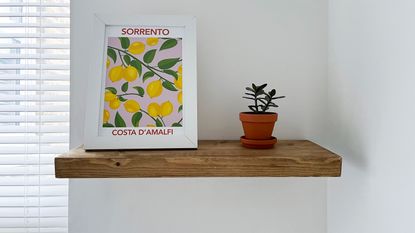

If you want to add more personality to blank walls, learning how to install a floating shelf is a good move. Not only are floating shelves practical for a little extra storage if you live in a small home, but they'll add plenty of visual interest to your space too.
Whether you're hanging yours in a living room, bedroom, or even hallway, as I did for this DIY project, you need to consider the style you want but also the wall type you're working with. It may be drywall, masonry, plasterboard, or another material, so evaluate what you're working with to ensure you have all the materials needed to make this a simple and stress-free job.
How to install a floating shelf step by step
As when hanging a shelf with brackets, you want to check the construction of your wall first, as this will determine what type of fixing you need to use and will ultimately impact which shelf you choose to buy. For a solid brick or masonry wall, you will need wall plugs. Plasterboard or drywall will do best with worm-style fixings/drywall anchor plugs.
You wil need:
1. Floating shelf of choice + brackets
2. Cable detector & stud finder
3. Fixings inc. raw plugs (if not included with your floating shelf)
4. Level
5. Measuring tape: I used a retractable one and a regular
6. Pencil and painter's tape
7. Drill/driver like BLACK+DECKER 20-Volt Cordless 3/8 in Drill/Driver
8. Drill bits (I needed a 10mm)
9. Pliers (if needed to tighten brackets)
10. Hammer
11. Dust sheets, eye protection, and a dust mask
1. Choosing your floating shelf
There are lots of types of floating shelf styles out there. I chose a gorgeous solid wood shelf from eBay for a rustic finish. It's heavy, so I had to consider that and decided to install it on a masonry wall.
Amazon has lots of floating shelf options too if you prefer a style similar to what's in our video.
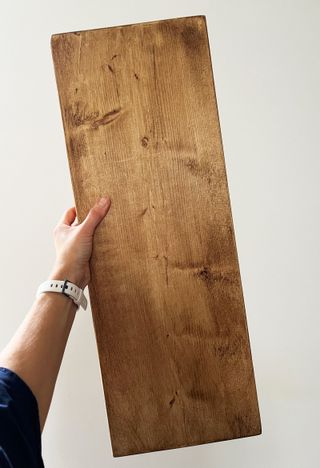
Make sure when selecting your floating shelf that you have the right brackets and wall plugs. My shelf came with all the fixings and instructions, so that was super useful.
If you're working with drywall, resident Real Homes' blogger and DIY guru Claire Douglas recommends: 'When working with drywall, you should always find and use the studs to attach shelves to as this is the safest and most secure method, however, if your shelf is very shallow and only displaying light items like pictures then you might be ok with the appropriate fixings for your wall type.'
2. Ensure the wall is free of cables and pipes
Before drilling any holes, run over the area with your digital detector to check it’s free of any pipes and cables and to mark up any studs using your pencil. This might mean that you have to choose a different wall, but it's important you do not skip this step for safety reasons.

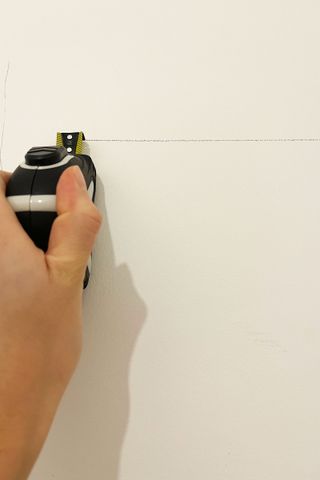
3. Measure up and mark out your fixings
Hold the shelf bracket on the wall at the height you want. Make sure it is straight using your level. Then, using a pencil, mark the fixing hole positions.
Triple check your pencil markings are straight with a level and in line with the fixing holes in your shelf.
Now is the time, if not already done, to prep the area with a dust sheet. Put on your eye protection and a dust mask, especially if you're drilling into brick.
Use a counterpunch/screwdriver and your hammer to make a small dent in the center of each mark where you'll be drilling. This will help stop your drill or screwdriver from slipping.
4. Drilling
This step may differ depending on the shelf you are using and the wall material you are mounting it onto. I used a drill and wall plugs to mount my shelf, and if you have the same set up, you'll want to mark up the length needed for each wall anchor on your drill bit. I was drilling 10mm holes so I marked this off with my painter's tape. This'll prevent you from drilling too deep.
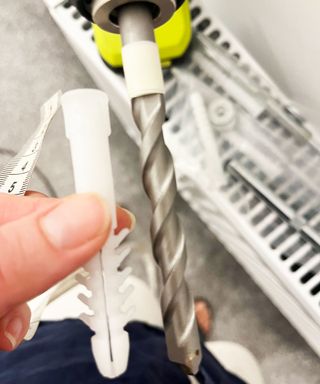
Then drill a hole in the center of each pencil mark. It takes a while with brick but go steady, keeping your drill straight.
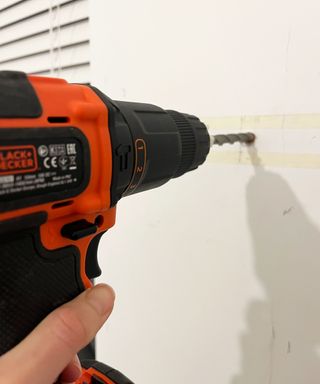
Note: If you are using drywall anchor plugs (the worm-style fixing as seen in our video), cover the marks in tape to stop plaster cracking and screw in your fixings.
5. Fix your brackets in the wall
This all depends on your shelf. With all the holes drilled into the wall, you can tap in your wall plugs with a hammer. Then, you can screw on the bracket.
I had bars to screw in with a washer over the threaded section of the plugs.
If your fitting is similar to the video's, using either a drill or a screwdriver, insert the screws where they are required, making sure the bracket is tight to the wall.
6. Slot the shelf onto the bracket
Next, you can put your shelf into position, securing it onto the bracket(s). Often, you'll find that the underside of the shelf will have fixings where you can insert screws to ensure the shelf doesn’t slide off the bracket.
I ran mine in line with the two bars, slid it in, and tapped it gently toward the wall with my hammer for a snug fit. And, there you have it.
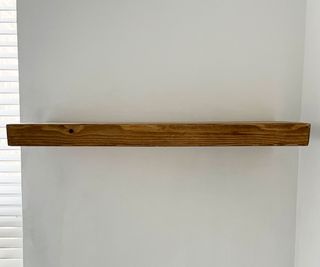
Styling tips for a floating shelf
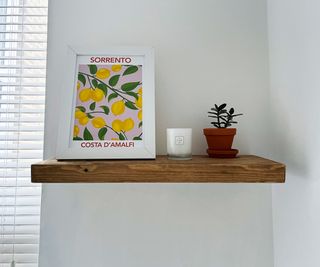
Now, for the best part: dressing your floating shelves. Adding a fun print, cute indoor plant, and your favorite candle makes for a simple but styled finish.
Francesca Sannino, the senior home and garden category manager at eBay UK, notes how floating shelves offer up a great opportunity for decorative open storage. 'Floating shelves are a great place to start if you are new to DIY and a fun way to get creative with storage,' says Sannino. 'We appreciate not all walls and needs are the same, which is why being able to buy bespoke length and width wooden planks is so important.'
Additionally, Sannino adds: 'Mixing and matching varying shelf lengths also allows for a fun aesthetic, and lets you play around with how you display frames, plants, books, or whatever else you might be putting on them.'
The terracotta pot is from eBay as is the Sorrento print and frame. There are so many listings to browse, making it easy to recreate your favorite shelving ideas whatever your style or budget.

If your hanging shelf and wall type can take the weight, adding books and bookends like these marble ones can look very aesthetically pleasing. Trailing plants add a little volume too, which is ideal if your floating shelf is solo like mine. I haven't been able to keep trailing plants alive, so this one is actually a faux pick from Abigail Ahern.
The marble bookends are another eBay find, as is the cute candle. This one is LUX LUZ Fresh fig but you can find similar.
How do floating shelves work?
'Floating shelves use concealed supports that give the effect of the shelf floating while still being securely fixed in place,' elaborates Douglas. 'There are different methods available the most common are strong metal rods that go into both the wall and the shelf providing a secure platform, or mounting brackets which fix flush to the wall and have rod(s) that go into the shelf itself. The longer the shelf is, the more rods you need.'
There are various looks that these units can provide too. 'Narrow picture shelves give the effect of floating and use wall anchors and screws to attach to the wall,' says Douglas. 'These typically hold less weight than "proper" floating shelves, as they are designed for displaying pictures.'
Is it hard to install a floating shelf?
Installing a floating shelf can be a simple DIY, but if you're brand new to tackling these projects, choose your shelf accordingly and know that drilling into masonry is not for the faint-hearted. If you don't feel so confident, consider a lighter shelf that you can position on a plasterboard wall, as that should be easier to drill into. Then, choose a floating shelf with brackets that run across a rod, that way you won't need to install them separately, which will take a little pressure off when it comes to measuring up.
Can you put up floating shelves without drilling?
Putting any type of shelf up without drilling is possible but these can only hold very lightweight items. When it comes to floating shelves, this is even harder because they have a tendency to slant or lean if the internal brackets aren't stable.
Douglas adds, 'I have seen very narrow picture shelves (7-8cm deep) stuck to the wall with no more nails, which works if only very light items are displayed on them but would you want the worry that they might fall down? It’s really not advisable to use glue for shelving.'
She also notes that the proper brackets and fixings are essential for having a sturdy shelf situation.
If you rent (like me), check you are allowed to add this kind of shelving or be prepared to fill the holes and paint over any marks when you leave so that you get your deposit back. Otherwise, I have actually installed these Command Display Floating Ledges and they have held strong for over a year now. All I have on them are some photographs and a very small Diptyque candle, so I have fully respected their weight restrictions and it works. I love the look, and they add a little dimension to what was a blank corner of my very white-walled bedroom.
- With special thanks to eBay UK for the collaboration.
Join our newsletter
Get small space home decor ideas, celeb inspiration, DIY tips and more, straight to your inbox!

I'm Cam, the former deputy editor of Real Homes who worked on the site from 2020 to 2023. As a renter myself, sharing a home with two friends (and my cat) in London, I know all too well the challenges that this can pose when it comes to creating your perfect setup. As someone who has always loved everything interior design-related, I cannot rest until a home feels right and I am really passionate about helping others get there too, no matter what their living situation, style, or budget may be. It’s not always the easiest to figure out, but the journey is fun and the results are so worth it.
After interior design, travel, art, and photography are my next big passions. When I’m not writing or editing homes content, I’m usually tapping into other creative outlets, exploring galleries in London or further afield, taking photos, scribbling, or drawing!