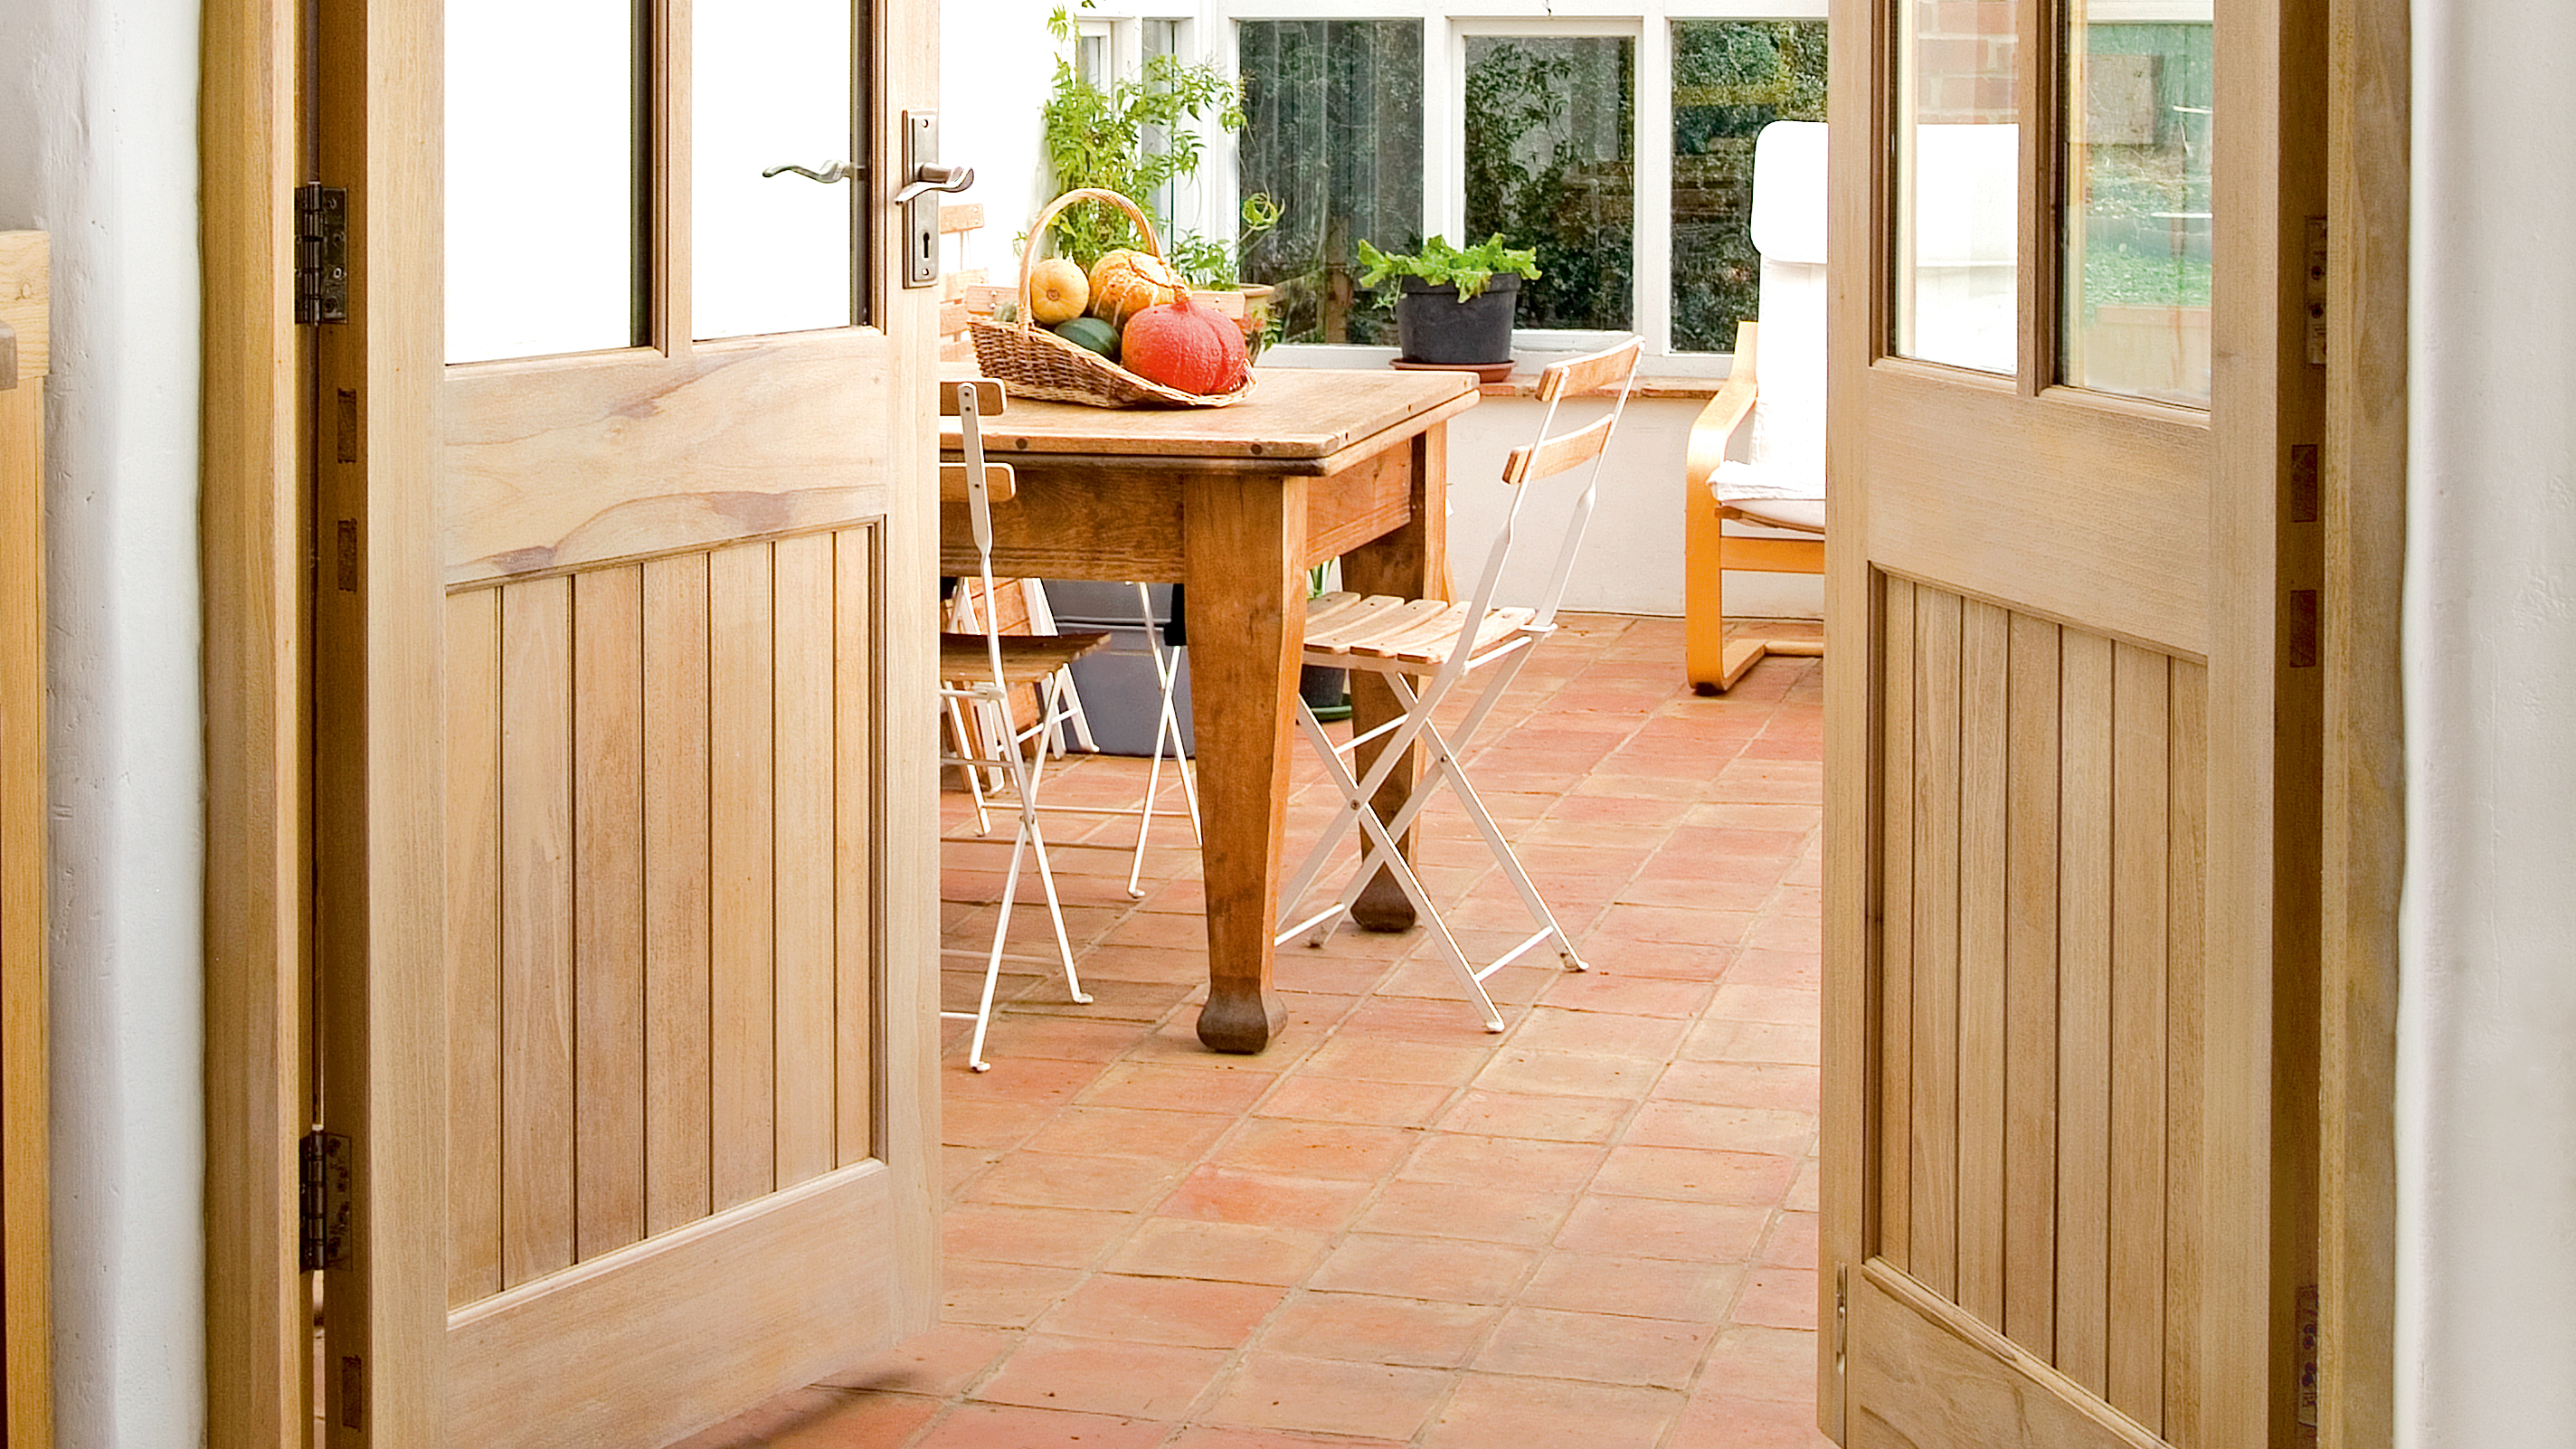
If you're wondering how to lime wood for a white wash effect, you've come to the right place. It works in all kinds of schemes – particularly cottage homes or Scandinavian-style schemes – and is very easy to do with the right preparation and advice.
Liming is a technique that has long been used as a finish on exposed timbers, flooring and furniture. Especially as sometimes after stripping an item, the wood revealed may be disappointing.
This can be improved by applying a limed finish, which is like a white wash that will enhance the overall appearance of the wood, while still highlighting the beauty of the grain. In this project, we lime a pair of timber doors, but the technique can be used on any suitable wood surface.
Decided you would rather paint in solid color instead? Check out the best wood paints for more.
Why should you lime wash wood?
Lime washing maintains the look of natural wood, allowing the grain to shine through. At the same time it adds a layer of protection and interest and is a good solution if you have wood in your home that is not the color your would like it to be. You will need to remove any existing finishes before liming, so that means varish, paint, stain – and previous wax coatings will need taking off. More on this below...
How to lime wood
To lime wash wood, you will need:
- Wood filler and filling knife
- Bronze brush
- Liming wax
- Fine paste wax
- Finishing oil
- Rags for rubbing and polishing
- Glasspaper
- Work gloves
Before you start liming
Liming is easy, but you won't get the best results if you use it in the wrong way or the wrong place.
Prepare the wood
Prior to applying a limed finish, wood must be clean, dry and grease-free, and existing finishes completely removed.
Waxed wood can be scrubbed with a solution of hot water and strong detergent, rinsed with hot water and when dry, wiped over with a rag dampened with white spirit.
If a chemical stripper or caustic bath has been used to remove old paint, ensure that it has been neutralized before you start. Scrub it with a solution of one pint of vinegar added to a bucket of clean water. Finally, take a clean cloth and wipe over with clean water.
Can you lime all types of wood?
It's also worth thinking about the type of wood that you're dealing with.
When used on open-grained wood such as oak, chestnut and ash, liming has a pleasing effect, but it’s not so good with pine. Interesting lime effects can be created on soft woods that may be color-washed or stained before to achieve more of a contrast. Or, you could mix pigment into the lime wax for even more distinctive effects.
What can I lime?
Bear in mind that, as well as being used on furniture, this effect can be used on wood flooring, too. Doors and structural timbers are good candidates also.
How to lime wood
1. Fill and smooth any holes
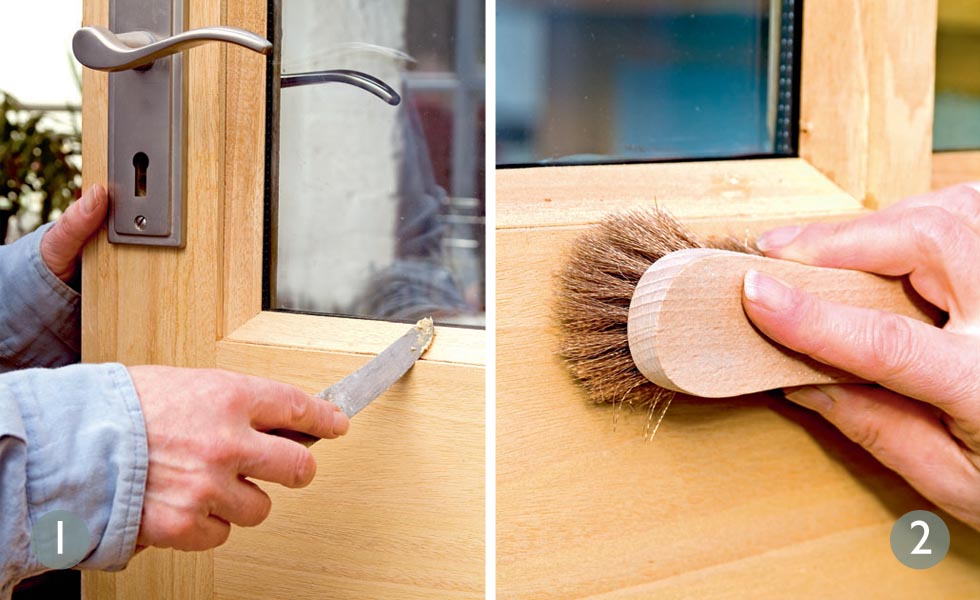
If there are any nail heads showing in the wood, knock them just below the surface and push the wood filler firmly into the holes leaving it slightly proud of the surface. Allow to dry, then smooth flush with glasspaper. To avoid unsightly scratches always sand with the grain. Fill any gaps that may detract from the finished look.
2. Raise the wood grain
To help raise the grain, new wood can be wiped with a damp cloth and allowed to dry. Take a bronze brush and rub vigorously following the direction of the grain. Some woods have a chemical reaction with steel, so avoid using a steel brush. Fragments left can blacken the wood and disfigure the finish.
3. Experiment with the finish
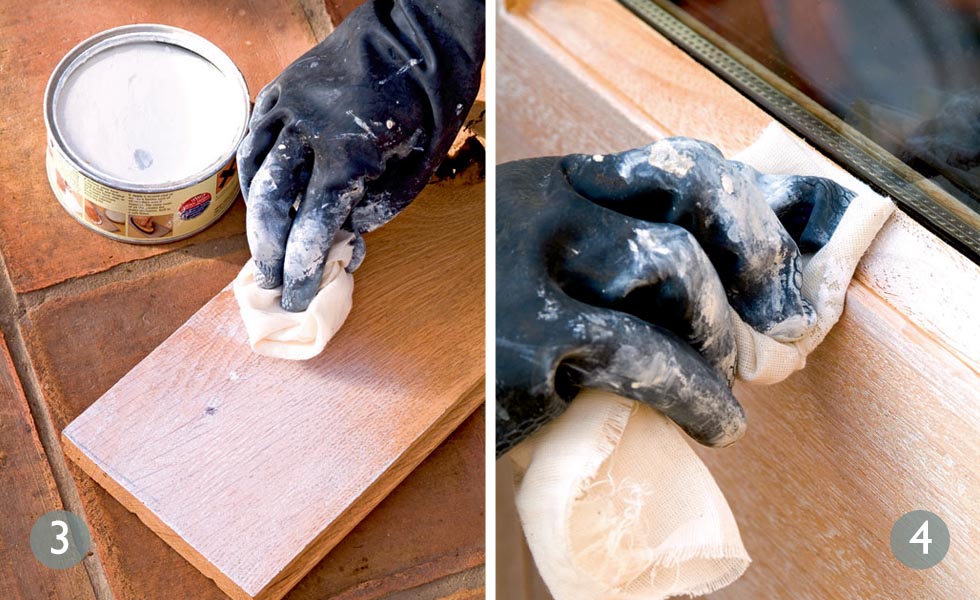
We used some timber offcuts of the doors as test pieces to try out different finishes. You may decide to dye or stain the wood before applying the lime wax, or to add pigment to the liming wax. If you haven’t got any offcuts, test on an area that doesn’t show in the first instance.
4. Apply liming wax to clean wood
Vacuum the wood, adjacent areas and floor to get rid of any sawdust. Wipe over with a tack cloth to remove surface dust. Apply liming wax – we used Liberon Liming Wax – with a rag, working into the grain of the wood. This is best done with a circular motion or following the grain, depending on the type of wood.
5. Rub in wax and remove excess
Did you know?
Applied to exterior wood, lime wax offers some protection against the weather and is believed to discourage attack from wood-boring insects. Inside the home, limed wood has mild antiseptic properties so was traditionally used for hygiene reasons.
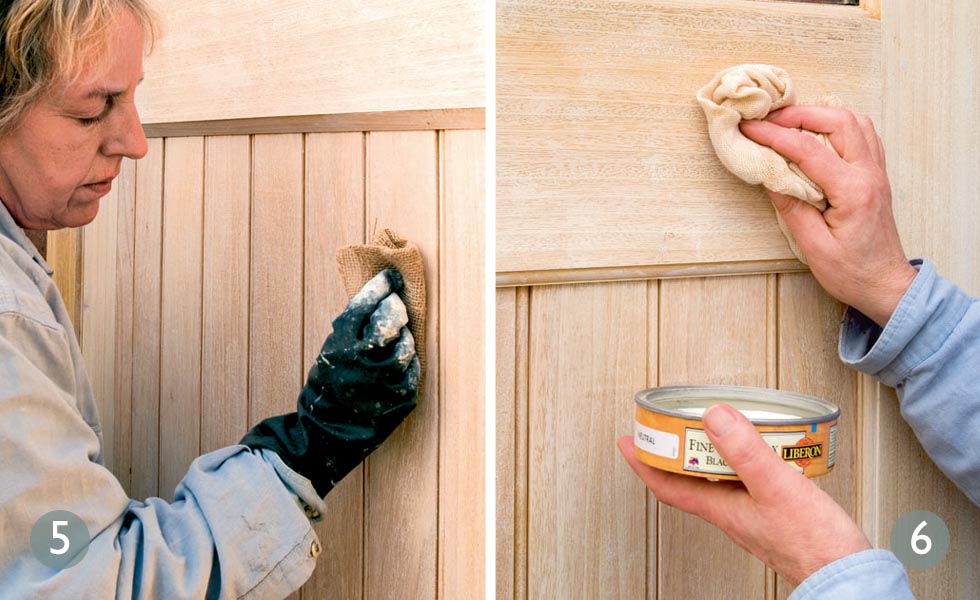
Take a cloth and rub hard to remove most of the excess lime wax lying on the surface. Keep changing the face of the rag as it becomes clogged with wax. At this point – to make the job less strenuous – we used various scouring pads along with toweling rags. A wad of hessian rubbed across the grain proved effective too.
6. Rub on fine paste wax
To remove the white haze that remains on the surface of the wood, apply a fine paste wax, such as Liberon Black Bison Paste Wax, with a clean cotton lint-free cloth. The wax should also help to protect the limed finish and provide good resistance to finger marks and everyday wear and tear.
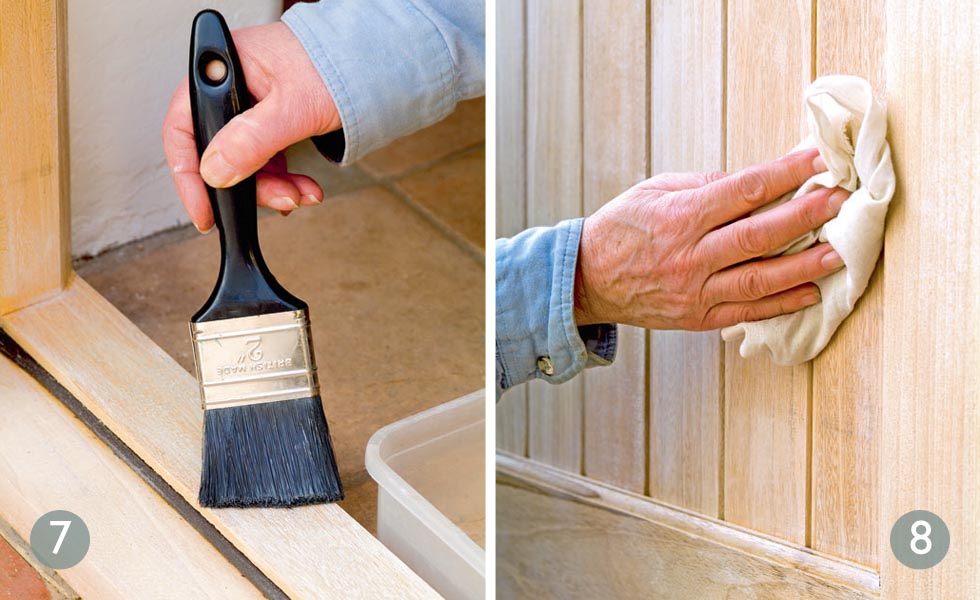
7. Add some waterproofing
For a more durable, water-resistant finish, apply finishing oil to provide a protective coating. We used it on the threshold and applied liberally by brush. Leave it to soak in for 20 minutes, then wipe away any surplus oil – if left to congeal on the surface it will stay sticky and attract dirt and dust.
8. Buff up the doors
Wait for at least five hours for the wax and finishing oil to dry. Take another piece of cotton rag and buff the wood to a soft sheen. A furniture brush is best for this if you are treating a large area. For ongoing care, wipe with a damp cloth to keep the wood fresh, and occasional waxing and buffing will restore the shine.
Know you know how to lime wood, why not get started on the long-awaited project?
More decorating how tos:
Join our newsletter
Get small space home decor ideas, celeb inspiration, DIY tips and more, straight to your inbox!
-
 A $200 fluted panel transformed my drab kitchen in just one weekend
How to install a fluted kitchen panel: A speedy and achievable DIY tutorial even for DIY novices
By Claire Douglas
-
 How to replace a broken staircase spindle in 30 minutes flat
A missing or broken spindle on a staircase is not only unsightly, but it can be a real hazard. This is how to fix it in a few quick steps.
By Kate Sandhu
-
 An IKEA Billy bookcase hack inspired this cute media wall DIY
This cute DIY was inspired by an IKEA Billy bookcase hack and brought a ton of symmetry to an otherwise basic media wall space.
By Camille Dubuis-Welch
-
 Share your small space glow up to win $150 in the Real Homes competition
Show off your creativity and DIY skills to win $150 and for the chance to be featured exclusively in Real Homes magazine
By Camille Dubuis-Welch
-
 This oversized headboard looks designer, and takes 5 steps to DIY
Super simple to DIY, this oversized headboard will give your bedroom space all the designer vibes you could dream of.
By Claire Douglas
-
 How to paint a door and refresh your home instantly
Painting doors is easy with our expert advice. This is how to get professional results on front and internal doors.
By Claire Douglas
-
 My DIY range hood and backsplash build gave my kitchen the perfect farmhouse finish
I craved charm in my kitchen space and adding a custom range hood and shelving was the best move.
By Brooke Waite
-
 How to paint a radiator in 7 steps
Painting radiators properly is all about choosing the right paint and the best process. Get interior designer-worthy results with our how-to.
By Kate Sandhu
