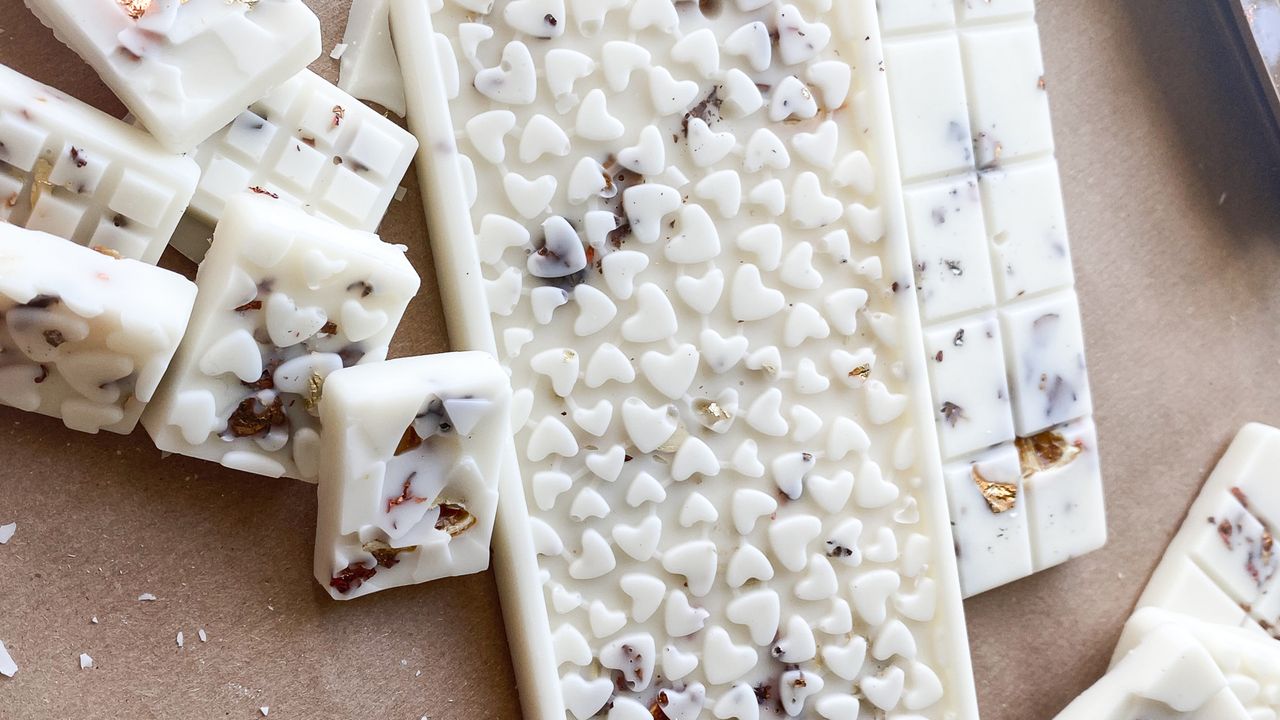

Spending too much on making your home smell great? Learn how to make wax melts. If you're literally burning money on designer candle, diffusers and oil burners – discover how easy and inexpensive it is to create your own wickless tarts.
There are so many advantages to DIYing your own wax tartlettes and we can assure you that once you make wax melts yourself, you'll be using them in your home and as gifts too. For one, they're a lot cheaper than the best home fragrances. Plus, you can make them in bulk, without the plastic wrap that shop-bought scents come packaged in.
Using essential oils and soy wax you can create a budget vegan homeware that is bespoke to the rooms within your home. For example: while lavender-scented melts may be good for the bedroom, zesty citrus oils can help to eliminate food odors in the kitchen, as an alternative to the best air purifier to filter the air of pungent smells.
We spoke to Maria Antoniou, founder of Teddy B candles, who shared a seven-step tutorial for you to make DIY wax melts at home. As you'll see by her pictures below, there's no specialist equipment needed so other than a few one-off buys, you should find everything you need in your kitchen to create the best candles made with your own fair hands.
How to make wax melts
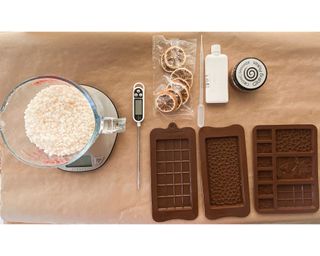
You will need:
- 20 - 35ml essential oil (Maria used orange oil and bergamot oil - both on Amazon)
- 350g wax of your choice (Maria used soy wax which you can buy on Amazon)
- Dried citrus slices (buy on Amazon, or learn how to dry orange slices)
- Gliding flakes (make your wax melts shine with these metallic flakes from Amazon)
- Heatproof glass measuring jug (Maria uses a Pyrex Borosilicate glass version, available on Amazon)
- Saucepan (check out our best saucepan sets)
- Silicone spatula (this everyday essential from OXO at Amazon is great)
- Silicone tray/molds (These decorative molds on Amazon are similar to Maria's)
- Droplet (optional) This glass pipette we found on Amazon is perfect for the job
- Food thermometer (With over 107,000 reviews, this temp checker is hot on Amazon)
- Kitchen scissors
1. Heat water in a saucepan
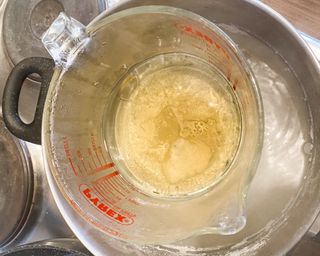
Using your measuring jug, measure out 300ml of water, put this into a saucepan and heat until gently simmering. Alternatively, use your kettle to boil some water and pop this into the saucepan to speed up the process.
2. Melt the wax
Put the wax into your heat-proof glass jug. Place the jug over the simmering water so that it begins to heat up. Use a large silicone spatula to gently stir the wax while it melts.
Real Homes top tip: This process is similar to melting chocolate over a bain-marie, so if you're familiar with doing this when baking, you'll know it's essential that the water does not come into contact with the wax.
3. Prepare your tray/mold
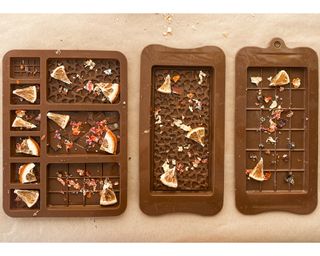
First, make sure your tray/mold is clean. If you're not using new equipment, make sure your container is free of old project wax, dirt and debris. If it's not, give it a rinse and/or clean with washing-up liquid to get rid of anything that might spoil the results of your new project.
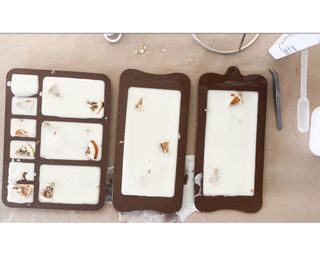
While waiting for your solid wax to melt, prepare your tray/mold and decorate it with slithers of dried fruit (use your kitchen scissors to slice the orange rounds into smaller pieces) and gliding flakes. If you don't have dried fruit or gliding flakes, this is fine. In future, you could use biodegradable glitter and dried flowers.
4. Monitor the temperature of your wax melt
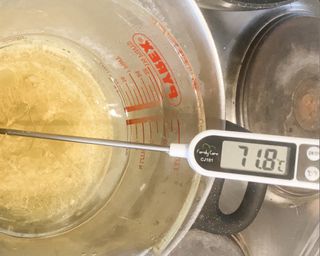
Check the temperature of the wax and at what degrees you should add your essential oil (heat can damage essential oils, so it's important to check the label of the fragranced oil that you are using).
When the desired temperature is reached take your melted wax off the heat, add the essential oil of your choice and stir well using the spatula.
5. Pour the wax into the mold
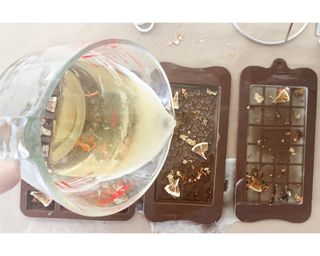
Evenly distribute your wax melt mixture into the silicone tray/mold. If your containers are shallow, you may want to decant the remaining mix into smaller molds or overfill your initial mold and level it off with a butter knife or other leveling tool like a flat icing spatula.
Real Homes top tip: Whether you're an adult making wax melts, or you're supervising a child with this art and craft project – hot wax can scald, so take extra care when pouring the wax into the mold. Though we didn't mention it in the equipment list, it may be worth popping on some heat-resistant gloves from Amazon as a precaution.
6. Leave the tray/mold to cool down
You'll want the wax melt to solidify, so leave it to cool for a couple of hours.
Real Homes top tip: Don't be tempted to put the wax melts in your fridge. As you may already know, putting something hot in this appliance can affect edible items in your refrigerator, creating a warm environmental for germs and bacteria to harbor.
7. Release your DIY wax melts
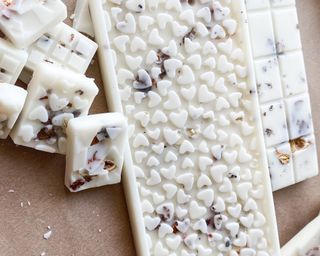
Once cooled, take care to remove the wax melts from your silicone molds. Do this carefully to ensure your DIY wax melts don't snap or break. Light and display in a ceramic wax warmer with a tealight and store any extras in a pouch, in a cool place.
What are wax melts?
Unlike the best oil diffusers, wax melts work in conjunction with an oil burner, so you don't need to plug an electrical appliance into the mains.
'They are basically a scented candle, but different!' explains Emilie de Block, aromatherapy expert and founder of Bio Scents.
'They are pieces of scented wax without a wick, that are melted instead of burned. By melting instead of burning them, the oils are vaporated into the air, fragrancing your room, without burning the oils and burning the wax. So if you're hating the layer of wax on all your furniture, this is your solution!
How do you make DIY wax melts smell stronger?
As you'll see Maria had a lower and higher threshold for the amount of essential oil required to make wax melts. If you want to make a stronger-smelling finished product, use the full 35ml to 350g of wax.
Though be warned, if you've got a family member who has sensitive nasal allergies, you might be wondering 'are essential oils safe to inhale?' In this case, it's best to consult a medical professional first. In most instances where a family member has a very mild intolerance, you can create a fragrance-free melt or reduce the ratio of oil to paraffin, soy wax, beeswax, or rapeseed wax when creating the mix.
Emilie de Block, founder of Bio-Scents says: To make the wax melts smell stronger I would recommend adding a couple of drops of essential oils to the melted wax when you are using the wax melts. Alternatively, look for brands that only use essential oils in their wax melts as they are not only chemical free but the fragrance percentage is usually higher. For instance, ours are +/- 10 grams each and the scent will last about 6-8 hours per piece.
What wax should I use to make DIY wax melts?
'When making homemade scented wax melts, you have several choices for the type of wax to use,' says Stephanie Goldstone, home fragrance buyer, The Fragrance Shop Home
'The purest is beeswax, but it can be expensive. Soy wax is also safe for candles and wax melts and is a good bit cheaper.'
Why is my wax melt bubbling in the burner?
'If your wax starts bubbling, it is because your wax has likely overheated,' warns de Block.
'You'll need to reduce the heat that you are using so I'd recommend trying a smaller tea light. Alternatively it could be that your ceramic oil burner isn't the correct for the wax melts you are using. For instance, because our wax melts are rapeseed wax, their melting point is higher than other waxes like soy and beeswax.'
'Therefore you need to use a small oil burner so that the maximum distance between the cup and the tealight is 5cm - the ones we produce and sell ensure this! If your oil burner is bigger or higher, you'll need to place the tealight on something to bring the flame closer to the cup - or if it's too small your wax melts will burn and overheat.'
Join our newsletter
Get small space home decor ideas, celeb inspiration, DIY tips and more, straight to your inbox!

Hi, I'm the former acting head ecommerce editor at Real Homes. Prior to working for the Future plc family, I've worked on a number of consumer events including the Ideal Home Show, Grand Designs Live, and Good Homes Magazine. With a first class degree from Keele University, and a plethora of experience in digital marketing, editorial, and social media, I have an eye for what should be in your shopping basket and have gone through the internal customer advisor accreditation process.
-
 How install a washing machine step–by–step
Here’s how to install a washing machine like a pro, in under an hour.
By Kate Sandhu Published
-
 How to make a coffee table by shopping your home
With this handy guide you'll have a chic and useful coffee table in an hour using left over bits from around your home!
By Kate Sandhu Published
-
 How to make homemade candles: Create DIY scented candles using soy wax
If you'd like to learn how to make homemade candles with soy wax, we've got the perfect DIY scented candle how-to that's super easy to create and takes just one hour
By Jasmine Gurney Last updated
-
 How to get rid of carpet beetles: 13 natural ways to get rid of bugs and larvae
Find out how to get rid of carpet beetles naturally, and without calling out pest control
By Anna K. Cottrell Published
-
 How to reuse a candle jar: 10 ways to upcycle your wax containers
Love candles but not the glass waste? Learn how to reuse a candle jar with these creative DIY home accessories
By Christina Chrysostomou Last updated
-
 7 expert-approved essential oil recipes aromatherapists use in their homes
Discover essential oil recipes that experts approve of to assist with hair growth, concentration, sleep hygiene and much more
By Christina Chrysostomou Published
-
 How to make twisted candles – TikTok's must-have candle style
Twisted candles are flaming 'hot' right now. Get in the know and glow with our simple DIY guide.
By Sophie Warren-Smith Published
-
 Organizing a garage – 10 things you should never do
Organizing a garage is easy when you know how. We've asked professional organizers what to do – and more importantly, what not to do.
By Kaitlyn McInnis Last updated
