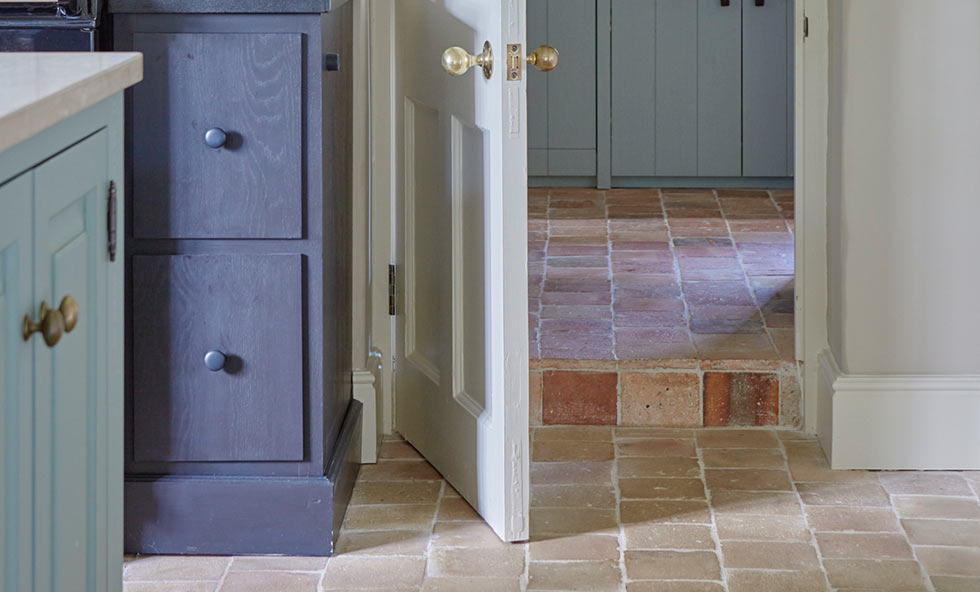
Want to know how to clean terracotta floor tiles? Beautifully rustic terracotta is a great choice for rural and period properties, and has a lovely, textured and warm feel underfoot. It does become prone to stains and watermarks over time, as well as succumbing to damp and mould. Find out how to restore your terracotta tiles to their former glory.
If cleaning terracotta tiles is part of a bigger renovation project, find out everything about renovating a house in our expert guide. Find more cleaning tips, advice and step by steps on our dedicated hub page.
What are terracotta tiles?
Terracotta refers to a type of ceramic pottery, which is made using the kiln firing technique. Made from red clay, terracotta is characterised by its natural, unglazed finish.
When terracotta is used to make floor tiles, this can lead to problems over time, including staining and mould, because the unglazed finish leaves the material porous. You can apply a glaze to your terracotta tiles, but this will alter the finish and feel of the tile.
Test the porosity of your terracotta tiles
Test your terracotta tiles for porosity by placing water in the middle of a tile. If, after 15 minutes, the water has soaked into the floor, the tiles will need to be impregnated with boiled linseed oil. This will darken the tiles a little so, to get an idea of the finished colour, wet the tiles to assess the effect.
How to seal terracotta tiles
As these tiles have been laid on top of a damp-proof membrane it’s safe to apply a floor sealer that will merely require sweeping or vacuuming to prevent dirt and grit becoming ingrained. An occasional wipe with a damp mop will freshen up the finish – check every year whether your tiles are becoming porous again.
To choose the best mop, consult our guide to the best mops for tiles.
Related articles: How to choose floor tiles | How to clean and seal stone flooring
How to clean and seal terracotta floor tiles
You will need:
- Stone floor cleaner
- Scrubbing brush
- Mop and bucket
- Vacuum cleaner
- Boiled linseed oil and paintbrush
- Oil-based Floor sealer
- Knee pads
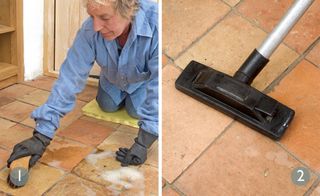
1. Scrub away any dirt
Use a solution of 25 per cent stone floor cleaner in a bucket of warm water. Apply lightly with a mop or sponge. Leave to work for 15 minutes or so, then give the floor a good scrub. On stubborn stains apply the product neat. Wipe off dirt and grease and rinse with warm water. Use an old towel or dry mop to dry the surface.
2. Prepare the tiles for oiling
Allow the tiles to dry thoroughly before applying the oil. I left the floor for three days, putting down dust sheets to protect it from spills. I then vacuumed the floor paying particular attention to the grouting and any nooks and crannies that might be harbouring dust that could spoil the finished floor.
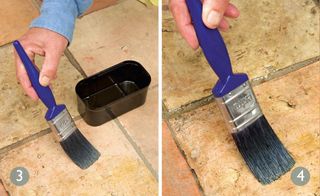
3. Apply boiled linseed oil
Boiled linseed oil is the traditional finish for these unglazed tiles and gives a soft sheen. To encourage the oil to be absorbed into the tiles leave the can in a warm place overnight and choose a warm dry day or put some heating on a few hours beforehand. Apply the oil liberally with a paintbrush.
4. Redistribute any excess oil
Wait for about 20 minutes and check whether there are pools of linseed oil lying on the surface. If there are, take your brush and go over the floor redistributing the surplus oil. When you’ve finished wipe the brush on a rag to take off as much oil as possible and clean with white spirit.
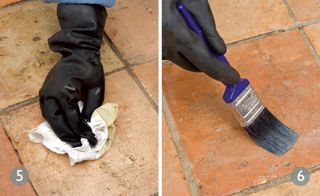
5. Leave to dry before a second coat
After another 20 minutes take some rags and wipe away any oil that remains on the surface. If this is allowed to remain it will congeal, stay sticky and attract dirt and dust. Leave the tiles for at least eight hours before applying a second coat. Oily rags can pose a fire risk. Lay them outside to dry before disposing of them.
6. Seal with a protective finish
Wait at least 24 hours before applying a protective coat of stone floor sealer using a brush. Make sure that the product is oil rather than water-based, as a water-based product won’t be suitable for applying over the oiled tiles. The choice of a colour enhancer seal brings out the warm clay tones.
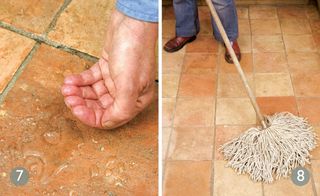
7. Test the floor again for watertightness
After eight hours, test whether the tiles are still porous by spilling a few drops of water on to the floor. After 10 minutes check whether the beads are still proud or whether they have slumped. If the tiles are absorbing rather than resisting the water, apply a second coat of finish. Leave for 24 hours before using the floor.
8. How to maintain terracotta floor tiles
The finish will be water and grease resistant, but still take the time to wipe up food and drink spills as they occur. Vacuum or sweep the floor regularly so that dirt cannot become ingrained. Occasionally wipe the floor with a damp mop. Carry out a water droplet test once a year and reapply boiled linseed oil if necessary.
More flooring expertise:
- Restoring and cleaning encaustic floor tiles
- How to prep and tile a floor
- Best tile cleaner: 6 smart picks to spruce up your tiling
Join our newsletter
Get small space home decor ideas, celeb inspiration, DIY tips and more, straight to your inbox!
-
 5 Gen Z and millennial influencers to follow for all things homes and interiors
Need some on-trend home and interior inspo? These are the five millennial and Gen Z influencer accounts I can't stop scrolling for small homes and rentals
By Louise Oliphant Published
-
 8 calming paint colors to create a blissful home sanctuary
Relax, revive and renew with a soothing palette of mindful paint shades.
By Sophie Warren-Smith Published
-
 How one trash can thrifter brought a vintage footstool back to life, for free
See how an innovative NYC-based trash can thrifter brought a vintage bamboo footstool back to life for free
By Camille Dubuis-Welch Published
-
 I transformed my IKEA Kallax unit into a stunning media cabinet
I took a weekend out to transform a basic IKEA Kallax shelving unit into the media cabinet of dreams. Here's how.
By Becks Shepherd Published
-
 How to arrange flowers like a pro: expert advice on creating stunning floral displays
Arrange flowers like a pro with our expert advice. The days of placing your shop-bought flowers in a vase and hoping for the best are over
By Hebe Hatton Last updated
-
 How to hide a TV on the wall: a DIY disguise with art
DIY a disguise for your TV on the wall with art and turn heads in your front room, for all the right reasons
By Claire Douglas Published
-
 10 dorm room ideas to make your place the cutest on campus
Heading to college soon? These dorm room ideas range from sweet styles to savvy solutions...
By Eve Smallman Last updated
-
 How to use peel and stick wallpaper for a major furniture upgrade
Elevate your interiors by using peel and stick wallpaper on furniture for a majorly beautiful, simple and budget-friendly upgrade.
By Dori Turner Published