
Having the odd book by your bed or on a coffee table is good, but having DIY bookshelves in your home is even better. It makes you look classy, smart, and sophisticated and gives your little one's rooms lots of character.
In contrast to an off-the-shelf design, DIY bookshelves ideas can be completely customized to your color scheme. Plus, from an architectural point of view, you're not limited to a shelf or boxed format.
So whether you like a thriller or romantic novel, the best bookshelves and wall shelves are easier and cheaper to copy than you'd expect. From glam white and gold designs to princessy pastel models, display your literary collection in style. We promise you're more likely to pick them up when they're looking so good, at eye-level and in easy reach.
1. Erin's ultra modern pipework bookshelf
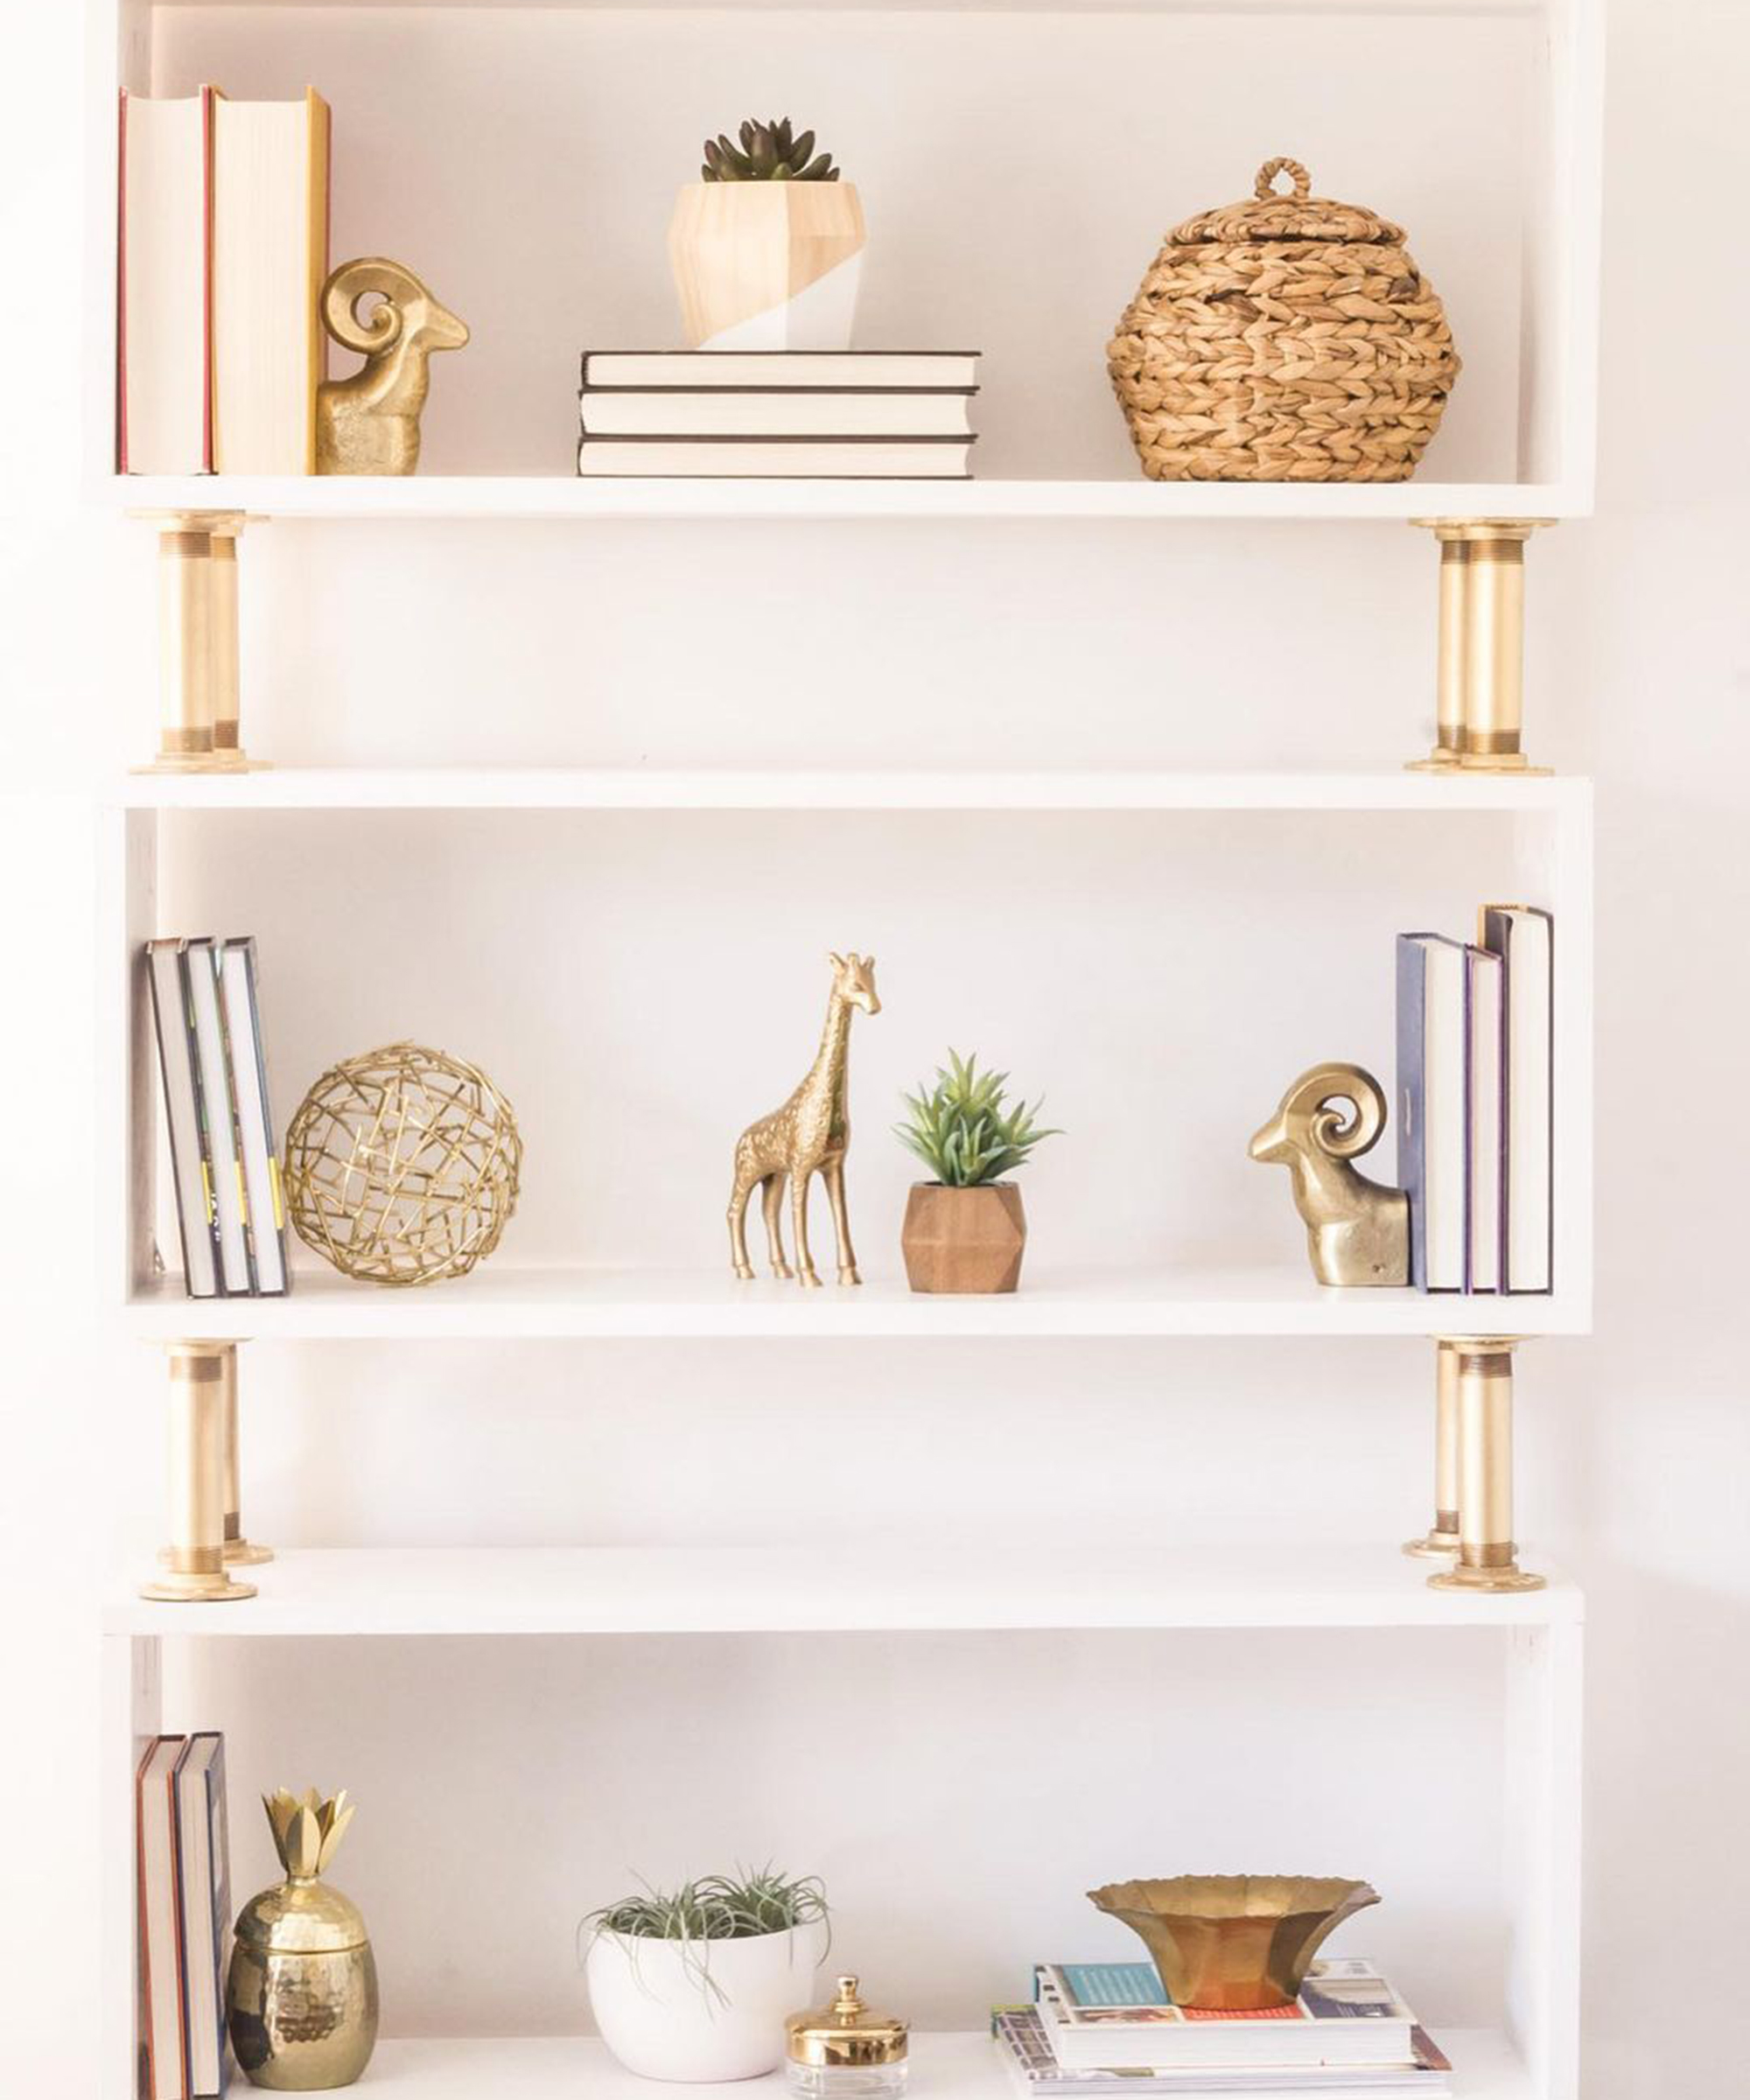
'This DIY gold pipe bookshelf was a fun (and easy) project I did for the boys’ playroom at their dad’s house. I like how the gold gives it a little glam spin on the traditional industrial pipe shelf,' says Erin Spain aka @erinspainblog, mum and DIY blogger and YouTuber. Inspired? Here's how tp get this book storage idea in your own space.
You will need:
- 1×12 boards
- Pocket hole jig
- 1 1/4” pocket hole screws
- Drill/driver
- Countersinking drill bit
- 2” wood screws
- Sander
- Paint or stain
- (12) 6” long 1” thick threaded steel pipe pieces
- (24) 1” steel pipe flanges
- 1/2″ construction screws
- Acetone
- Latex gloves
- Rusty metal spray primer
- Gold spray paint
- Wood filler
- Putty knife
- Tack cloth (optional)
- Sanding block
- Furniture paste wax
- Cheesecloth
- White lint-free cotton cloths or old t-shirt
How to:
- Cut your 1×12 boards to the following dimensions: 6 pieces at 3’ long each and 6 pieces at 12” long each. Then I gave everything a good sanding with my random orbit sander.
- Next, drill 3 pocket holes in one of the short ends of 6 of my short 1×12 pieces. These will be the ends of your bookshelf.
- Attach the ends to the long pieces of 1×12 using 1 1/4” pocket hole screws. We're working upside down, so this long piece will be the top of each shelf so we will flip it over later.
- After the “tops” had been attached to the sides or ends of the shelves, attach the bottom (we’re working upside down) by pre-drilling holes with a countersinking drill bit and then attaching it using 2-inch wood screws. You want to use pocket hole screws on the top side so when we flip it over, the screws won’t be visible from the top.
- After everything is attached, patch over the knots in the wood using wood filler.
- I painted it with Behr Marquee paint and primer in one in the color White 52. I do typically use a separate stain-blocking primer but for this, I didn’t bother.
- While the paint is drying, clean all of the pipe pieces and flanges with acetone to remove any residue – do this outside or in a very well-ventilated area!
- Prime the pipes and flanges with Rustoleum rusty metal primer, then, once dried, spray paint them with metallic gold spray paint.
- While the spray paint is drying, seal the shelves with some furniture paste wax. You can use polyacrylic or water-based polyurethane too, just whatever you prefer. When I apply paste wax, I use cheesecloth, and I dip it in and coat it well, and then fold it over and apply it through a layer of cheesecloth. Then I wait about 20 minutes and buff it with a clean cotton cloth. An old t-shirt works great for this or you can buy a package of cotton rags at home depot.
- Screw the pipe into the flanges using the 1/2″ construction screws, then flip the bottom shelf over and attached the first pipes to serve as the legs.
- Repeat the process until all three shelves are attached.
2. Ruth's dollhouse reno
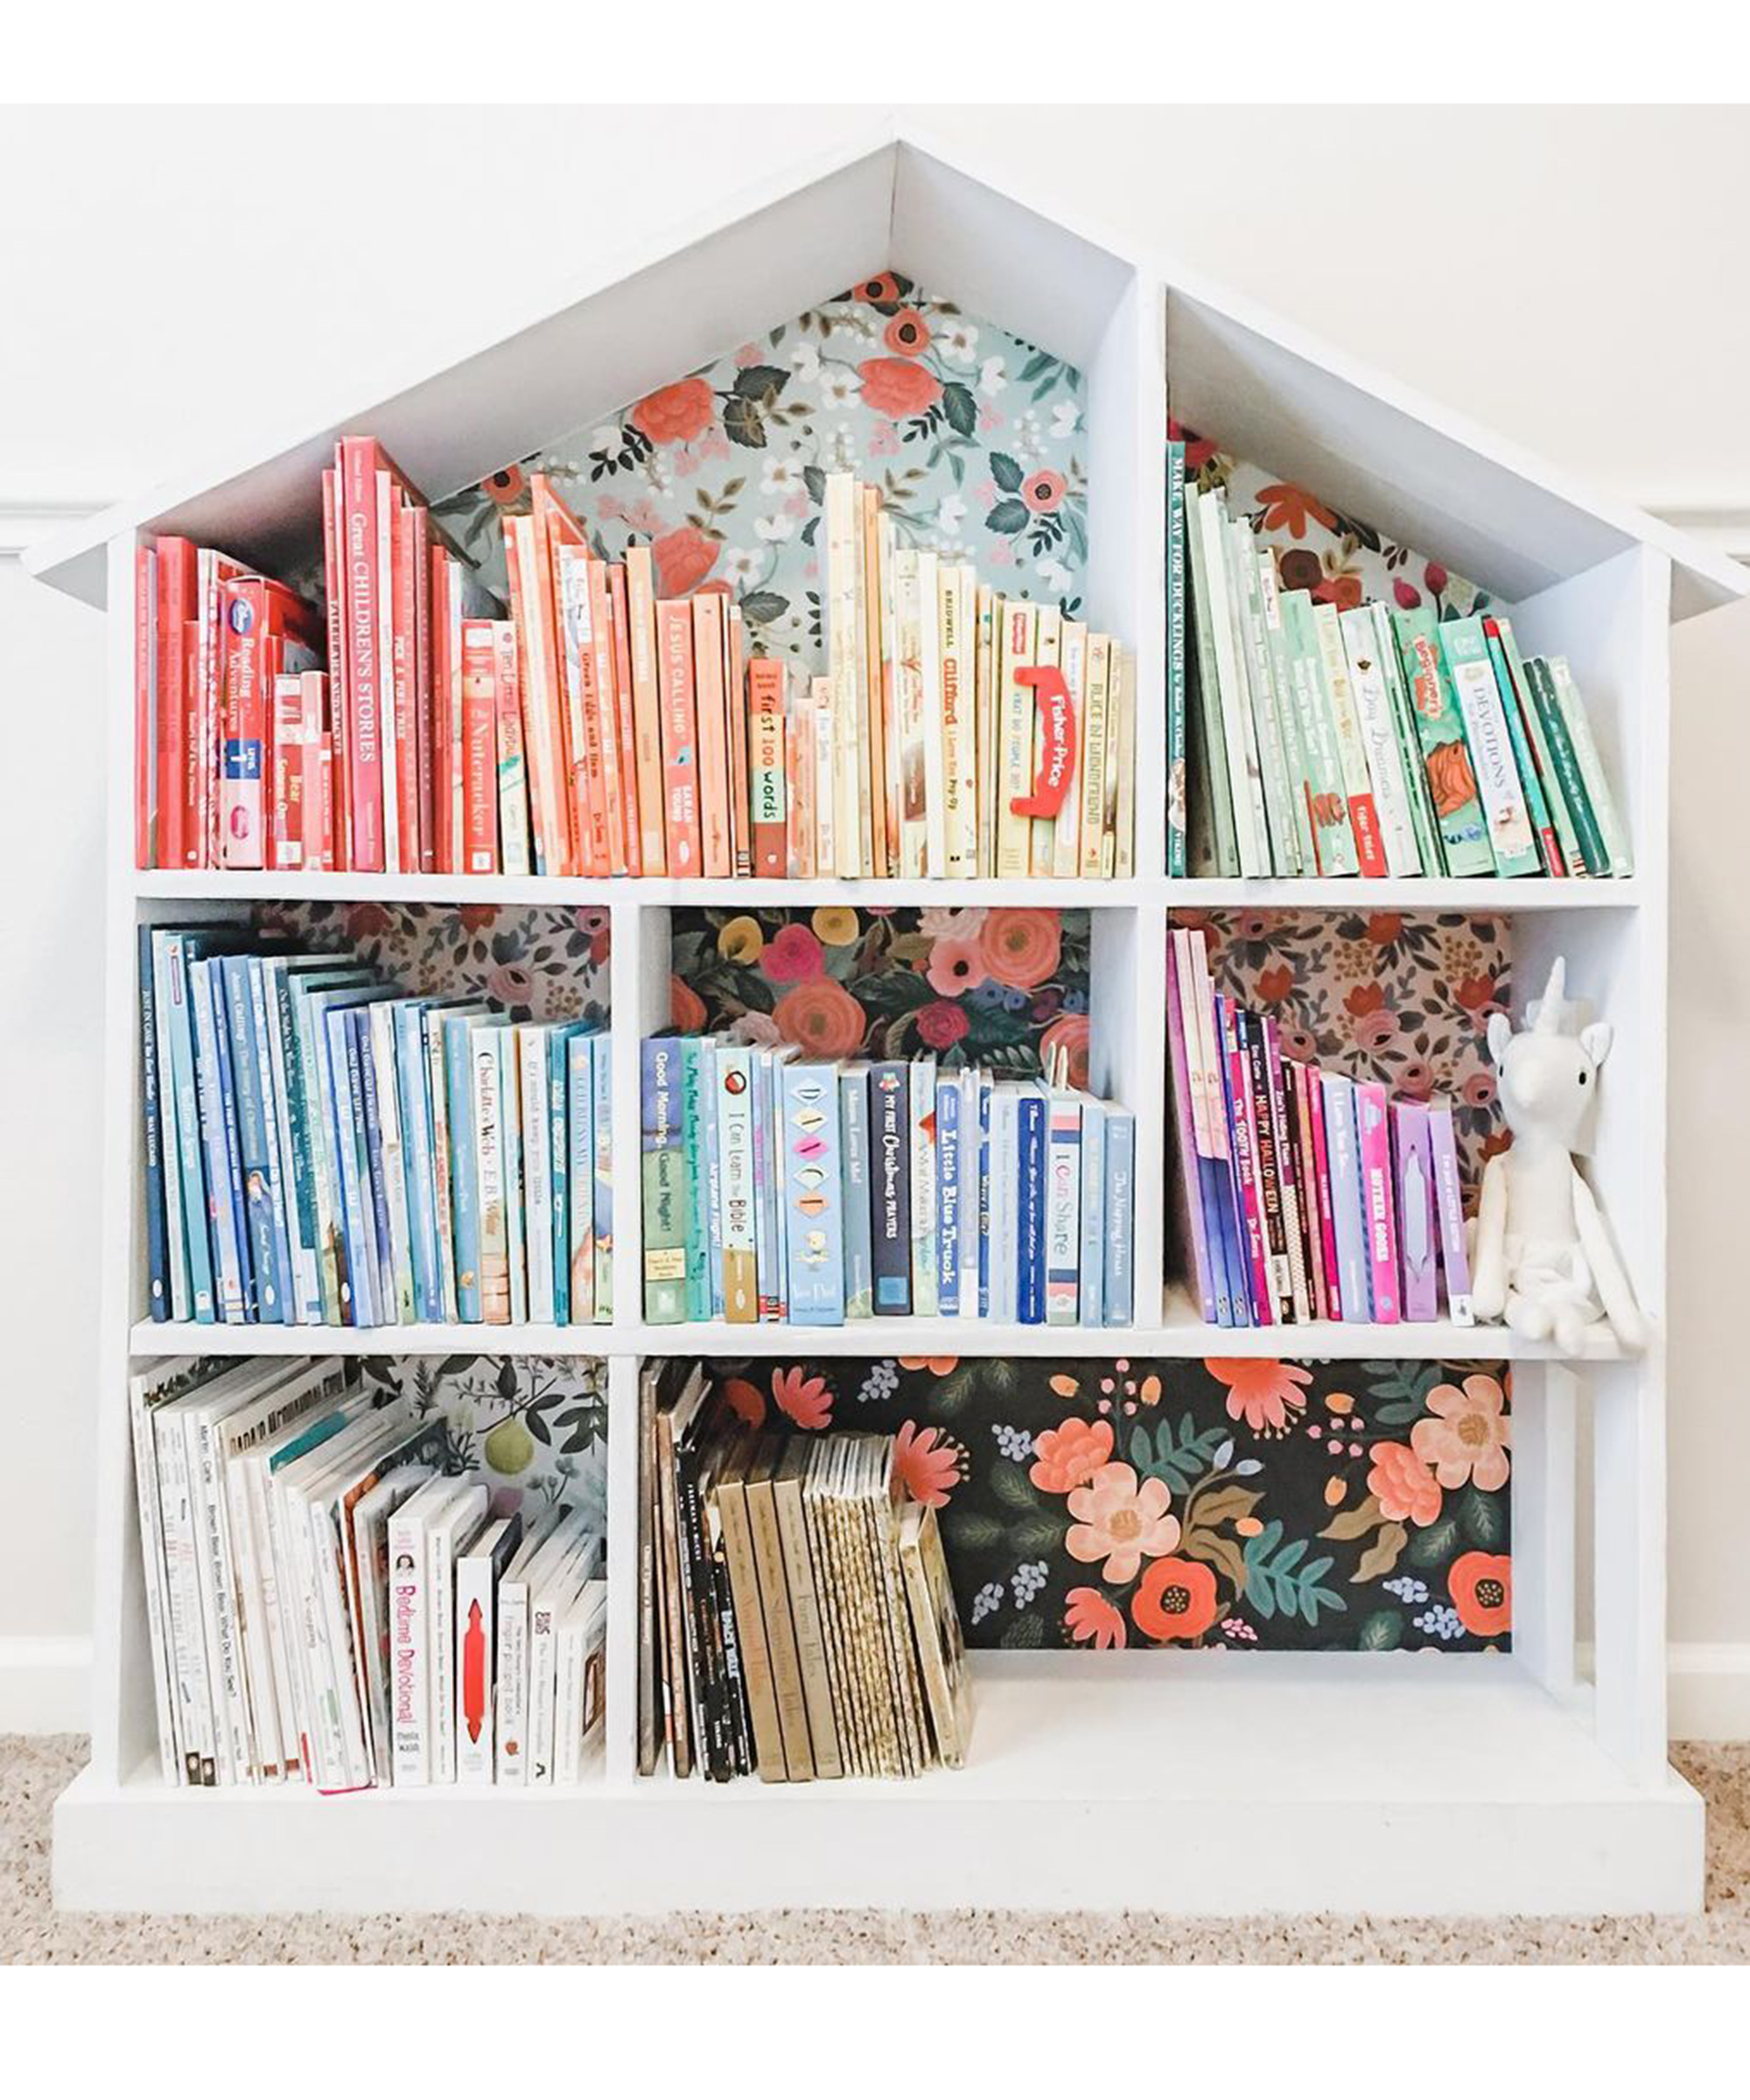
This DIY bookshelf is the perfect upcycle for your little girls' bedroom – particularly if they've grown out of playing with dollies and figurines. We love the way mom, Lindsey Bukhair aka @ofgraceandruth has used a variety of scrap wallpapers as the backdrop of the white dollhouse and color-coordinated the books for added interest.
3. Elisha's Ikea Billy bookshelf hack
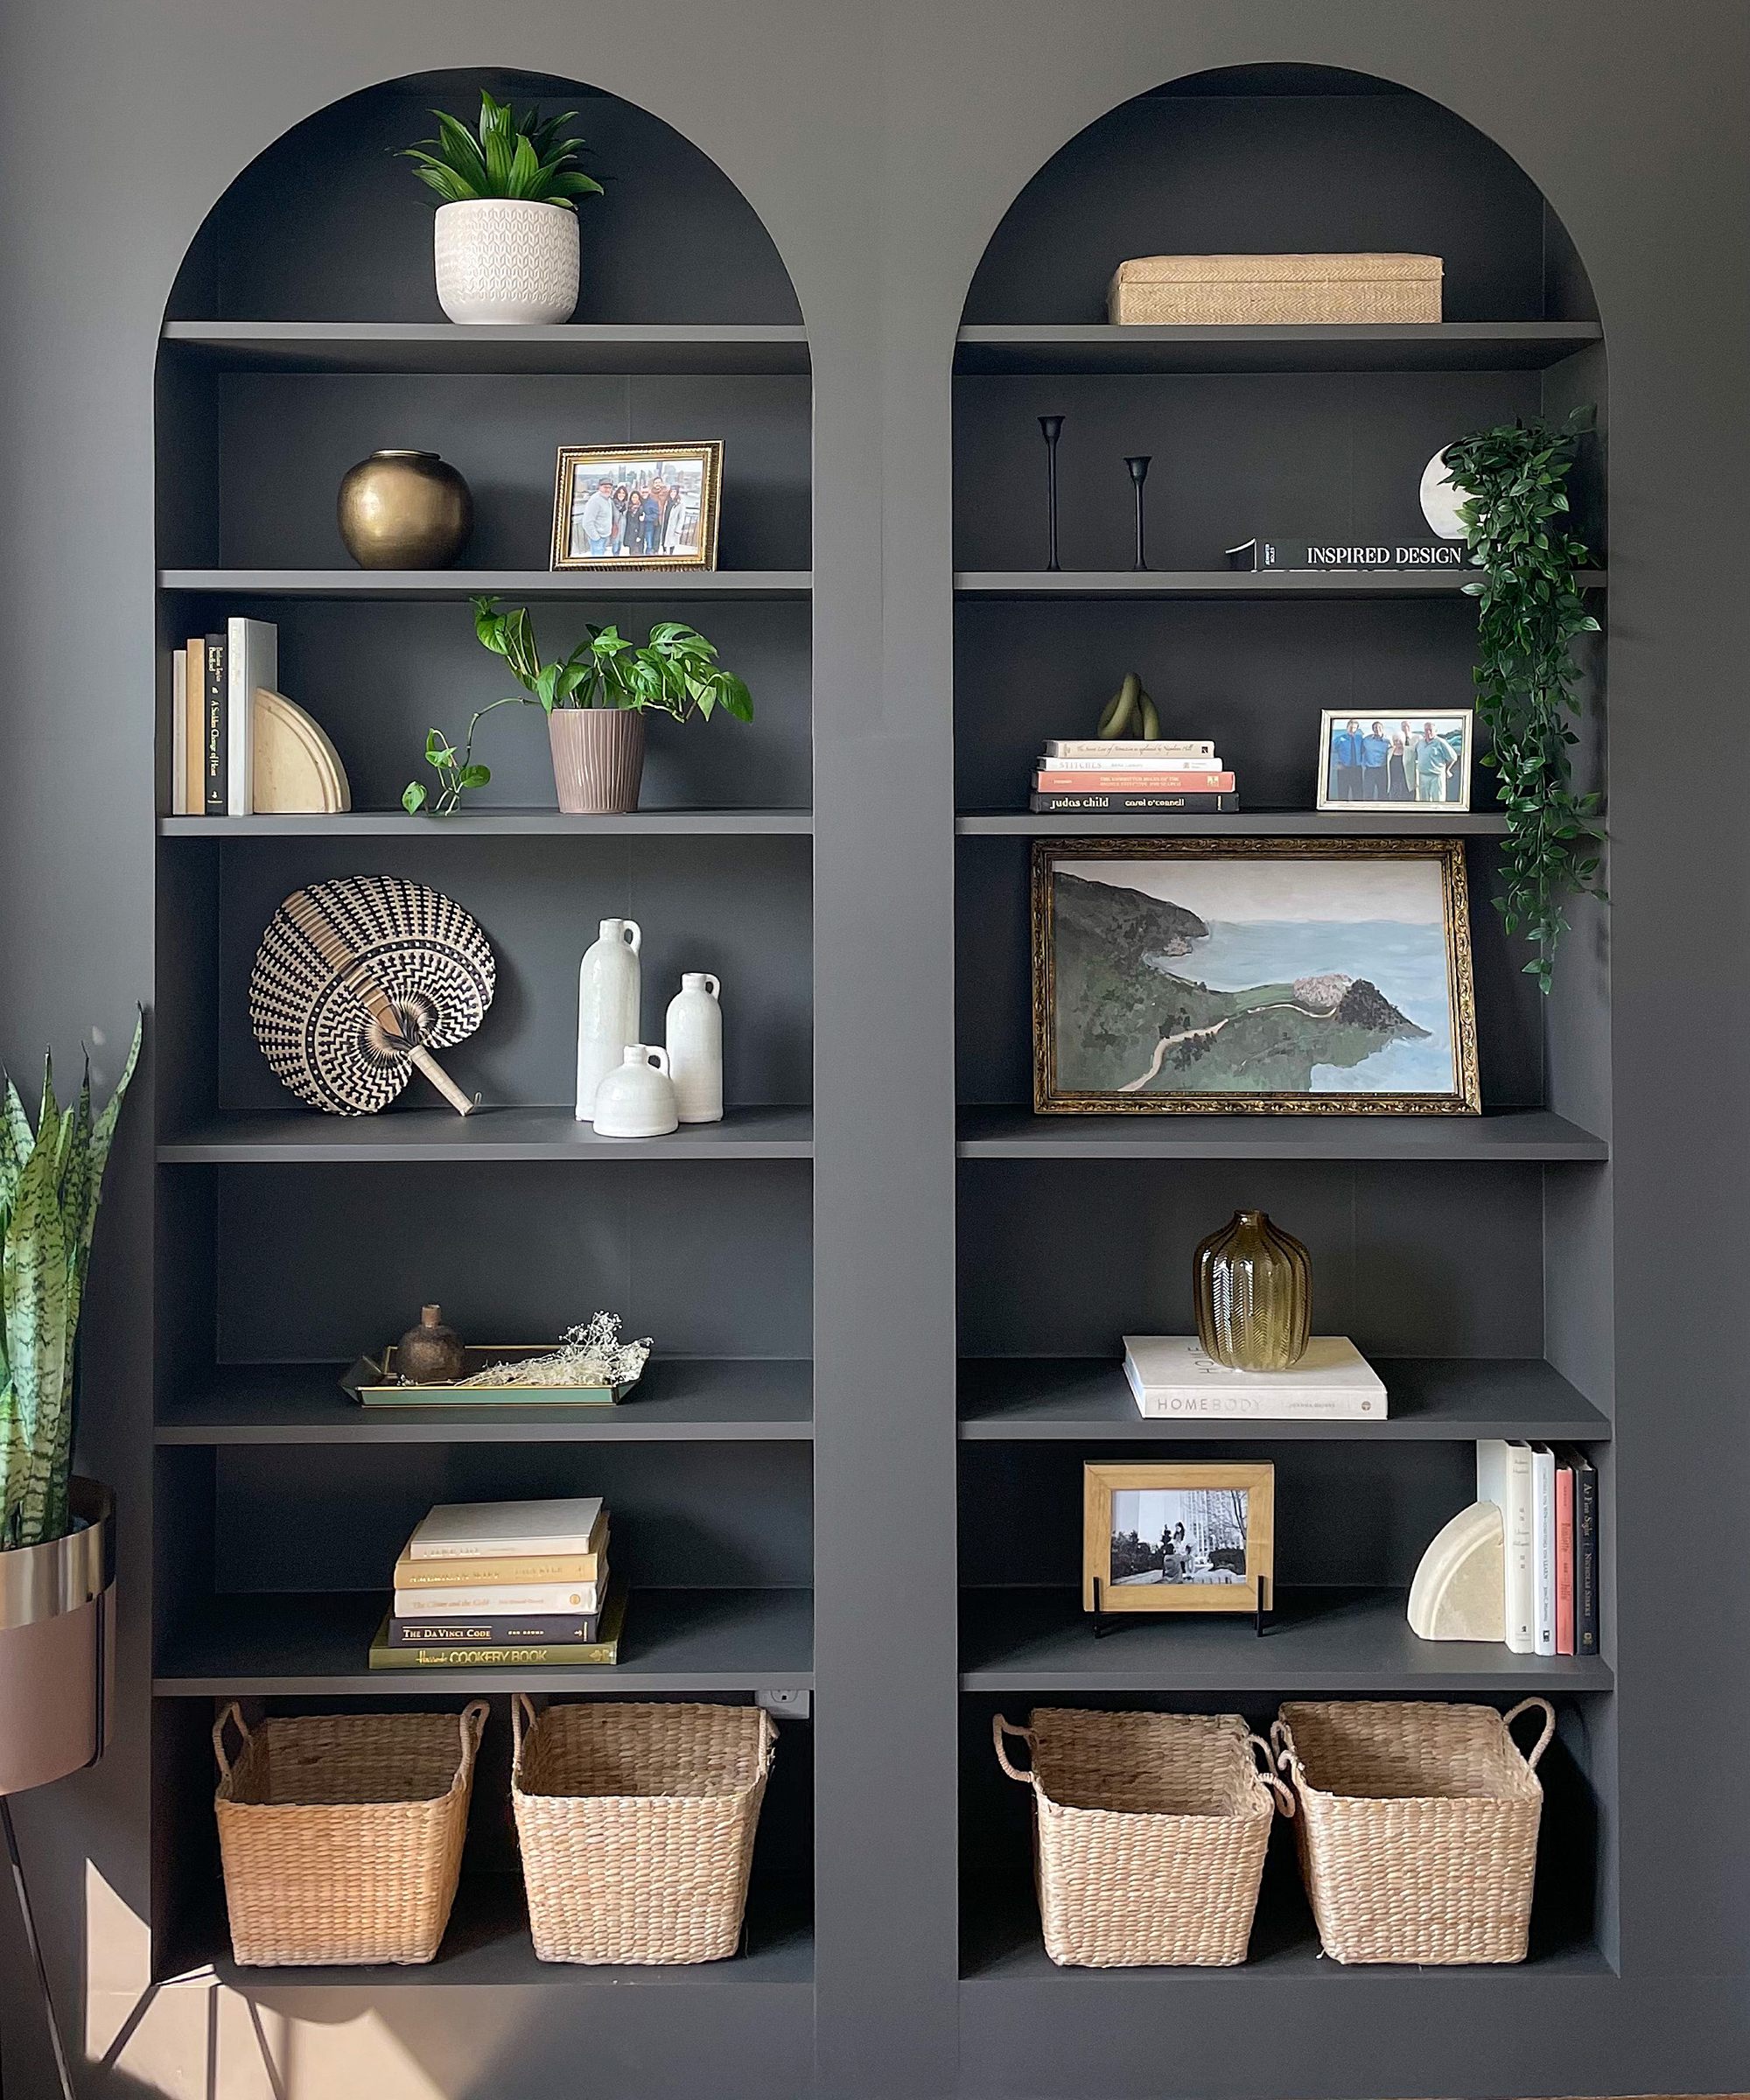
How gorgeous is this living room design feature? If you love the look of built-in shelving (and who doesn’t?) but you don’t want to spend a small fortune, this is the DIY project for you. Elisha at @ouraesthetic_abode has transformed two bargain Ikea Billy bookcases into something that looks incredibly high-end. We chatted to her to share how she did it.
You will need:
- Two planks of wood
- Electric drill
- 2 x Ikea Billy bookcases
- Wooden braces
- Pencil
- String
- Hand or electric saw
- Caulk
- Sandpaper
- Vacuum
- Wood primer
- Plywood
- Wood paint in a color of your choice
How to:
- Lay two planks of wood on the ground against your wall and drill them into the floor. Ensure the depth of this is the same as the depth of your bookcase.
- Position your bookcase and up your sturdiness by connecting them by drilling blocks of wooden braces at every shelf level
- Drill a plank of wood onto the outer and upper sides of each bookcase and attach wooden braces for extra sturdiness
- Use a pencil and string to draw an arch shape onto large pieces of plywood. Measure out a rectangle shape for the bottom. Measure draw and cut the surrounding areas so your wall is completely covered
- Saw and position the pieces of plywood
- Smooth any edges and disguise holes with caulk
- Scuff, sand, vacuum, and prime your shelves and plywood before painting on two coats in a color of your choice.
- Style up your shelves to your heart’s content
4. Use this Ikea crate hack – or create your own
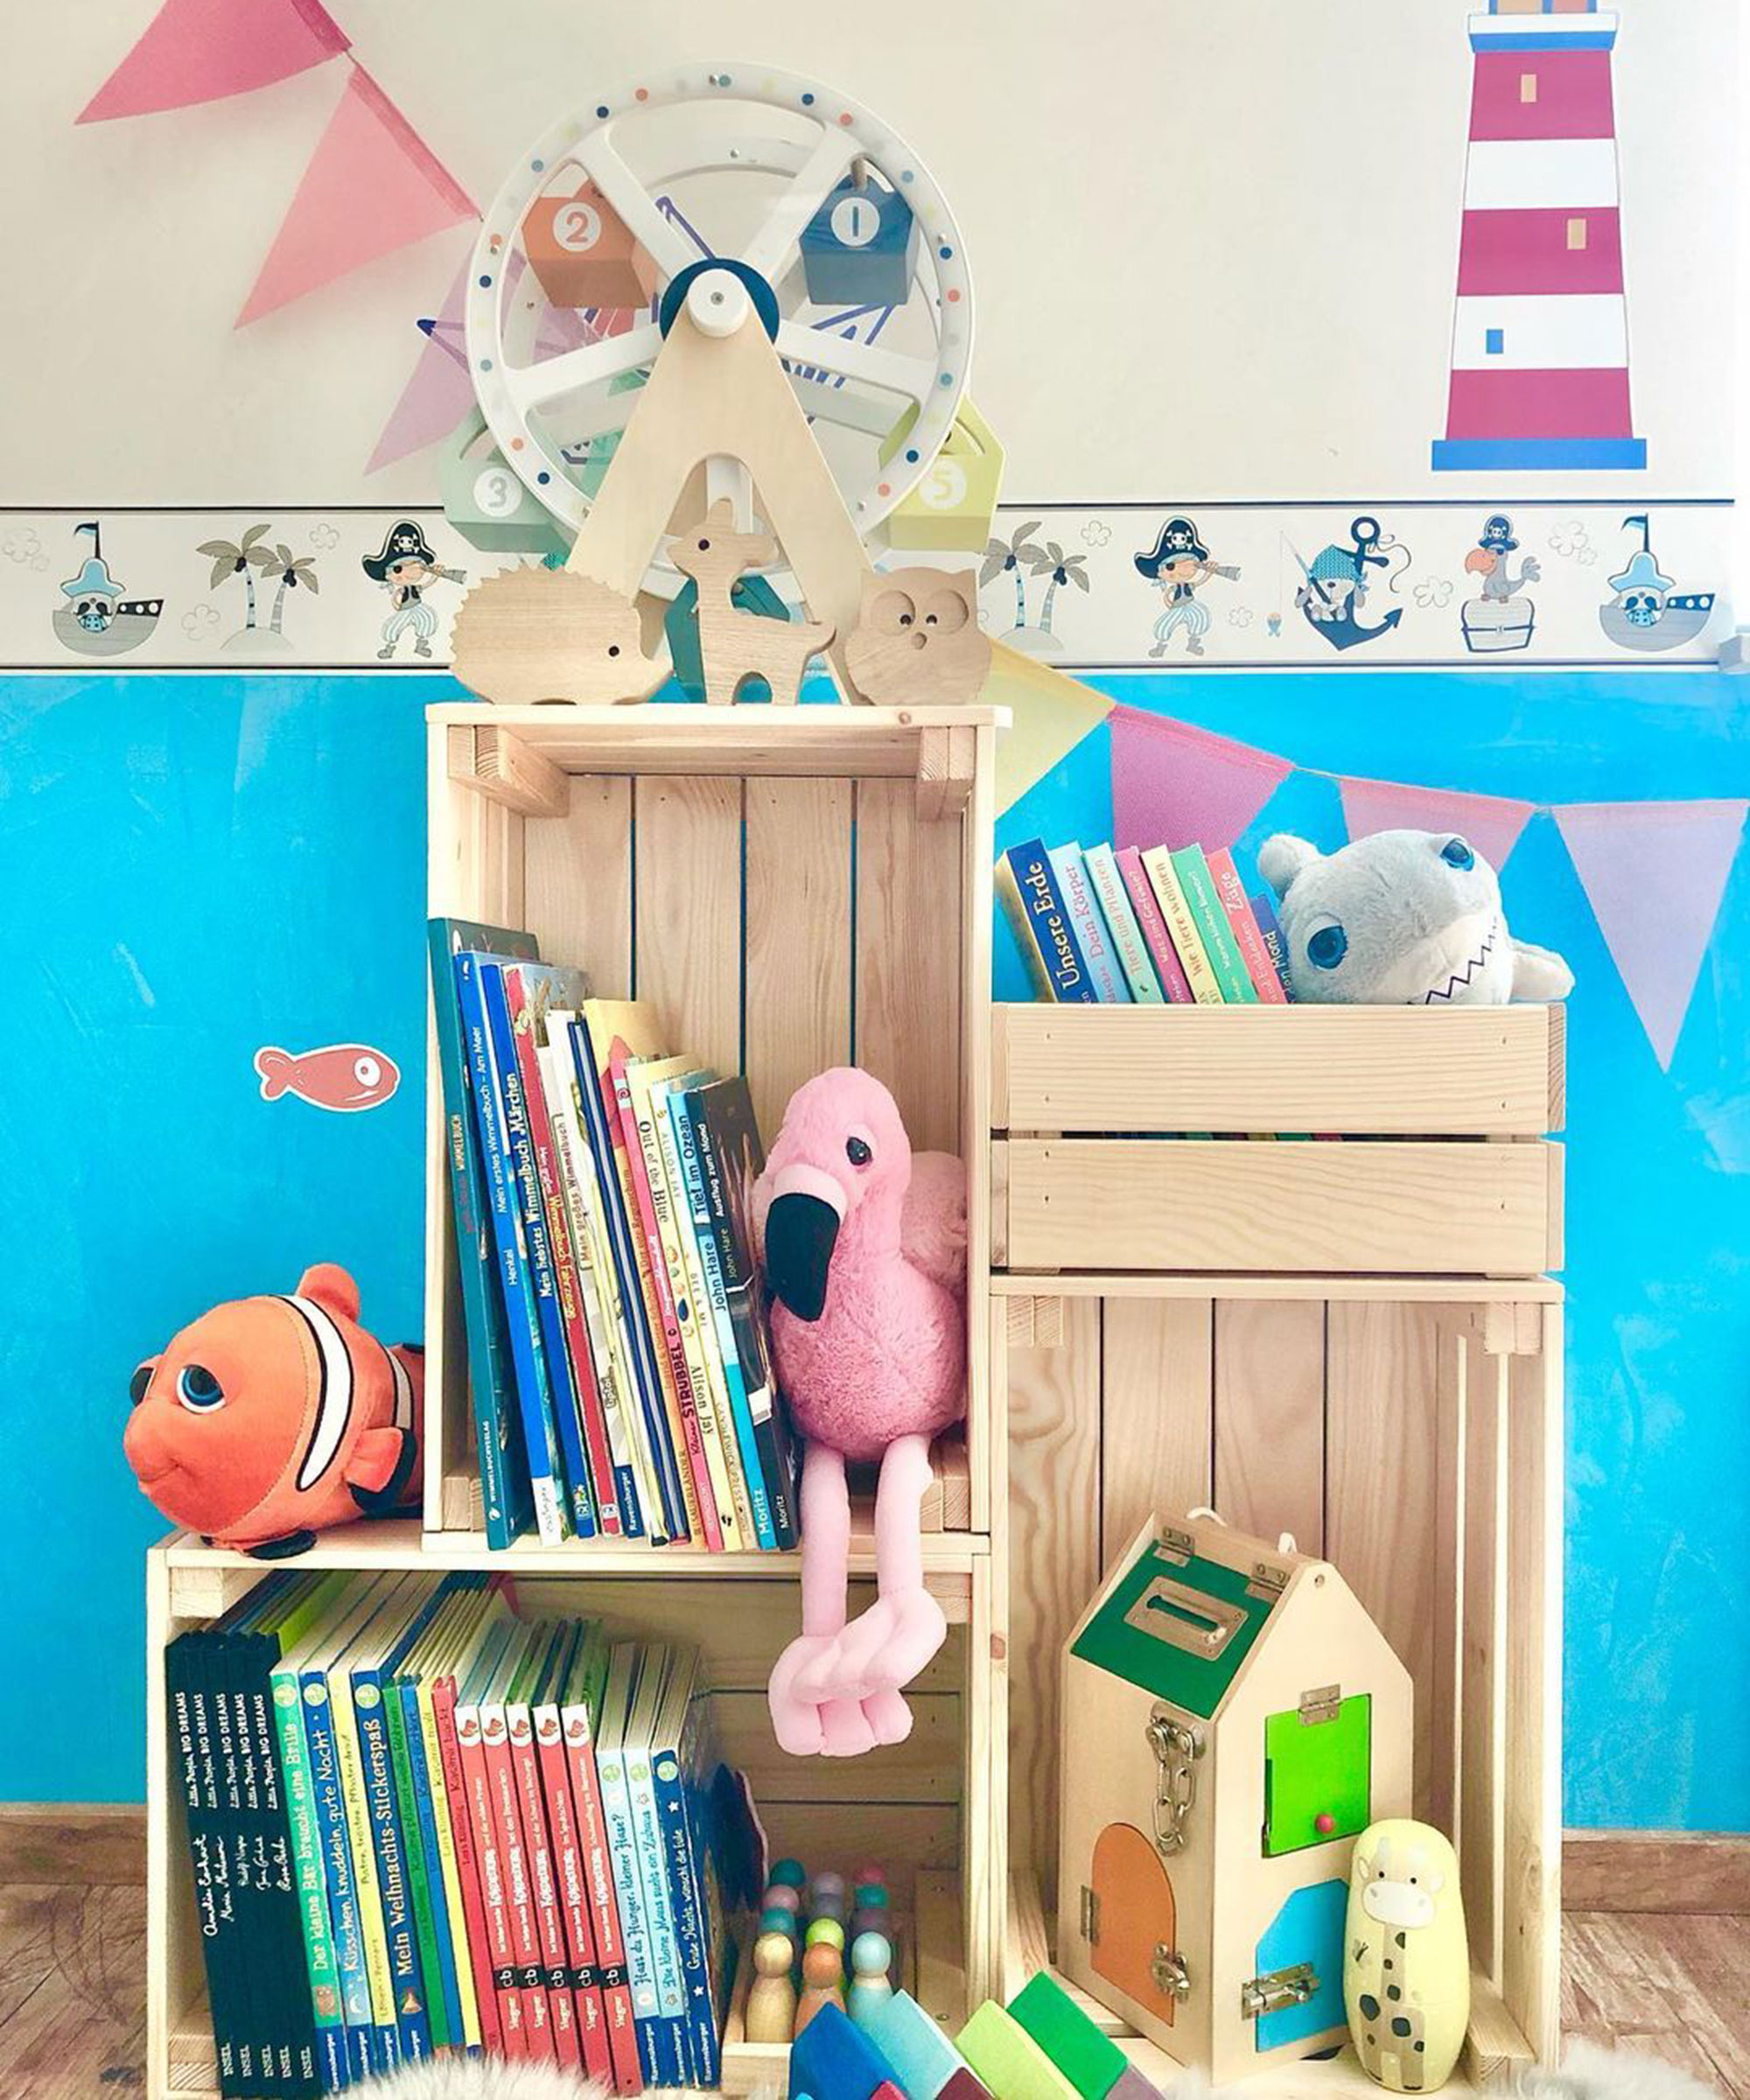
Ikea is always a great starting point for a DIY bookshelf. Its products are affordable, accessible, and easy to assemble, so it's no surprise that one homeowner used them to create a shelf for her children's book collection. Alternatively, if you can't access the Swedish retailer – don't sweat. The same or similar idea can be fashioned from some wooden fruit crates for a more rustic aesthetic for your kids' bedroom.
'Do you know this sticky Kisterln from Ikea?' asks Doris Marie aka @buchwergerl, a mum and psychologist from Austria.
'I must say I love these boxes. They are practical, you can store toys quickly and everywhere and you can build a shelf out of them. Of course, there is no limit to the imagination here!'
You will need:
- 3 x large Ikea KNAGGLIG boxes (46x31x25 cm)
- 1x small Ikea KNAGGLIG boxes (23x31x15 cm)
- Electric screwdriver
- Screws
How to:
- Take three large and a one small box and secure them together using the electric screwdriver or hammer and nails, as shown in the image.
- Attach them to the wall. You can do this with wall brackets or by screwing the unit into the wall itself, making sure to avoid any pipes or electrical wires, or outlets.
5. Carly VandenEnde's cute DIY bookshelves
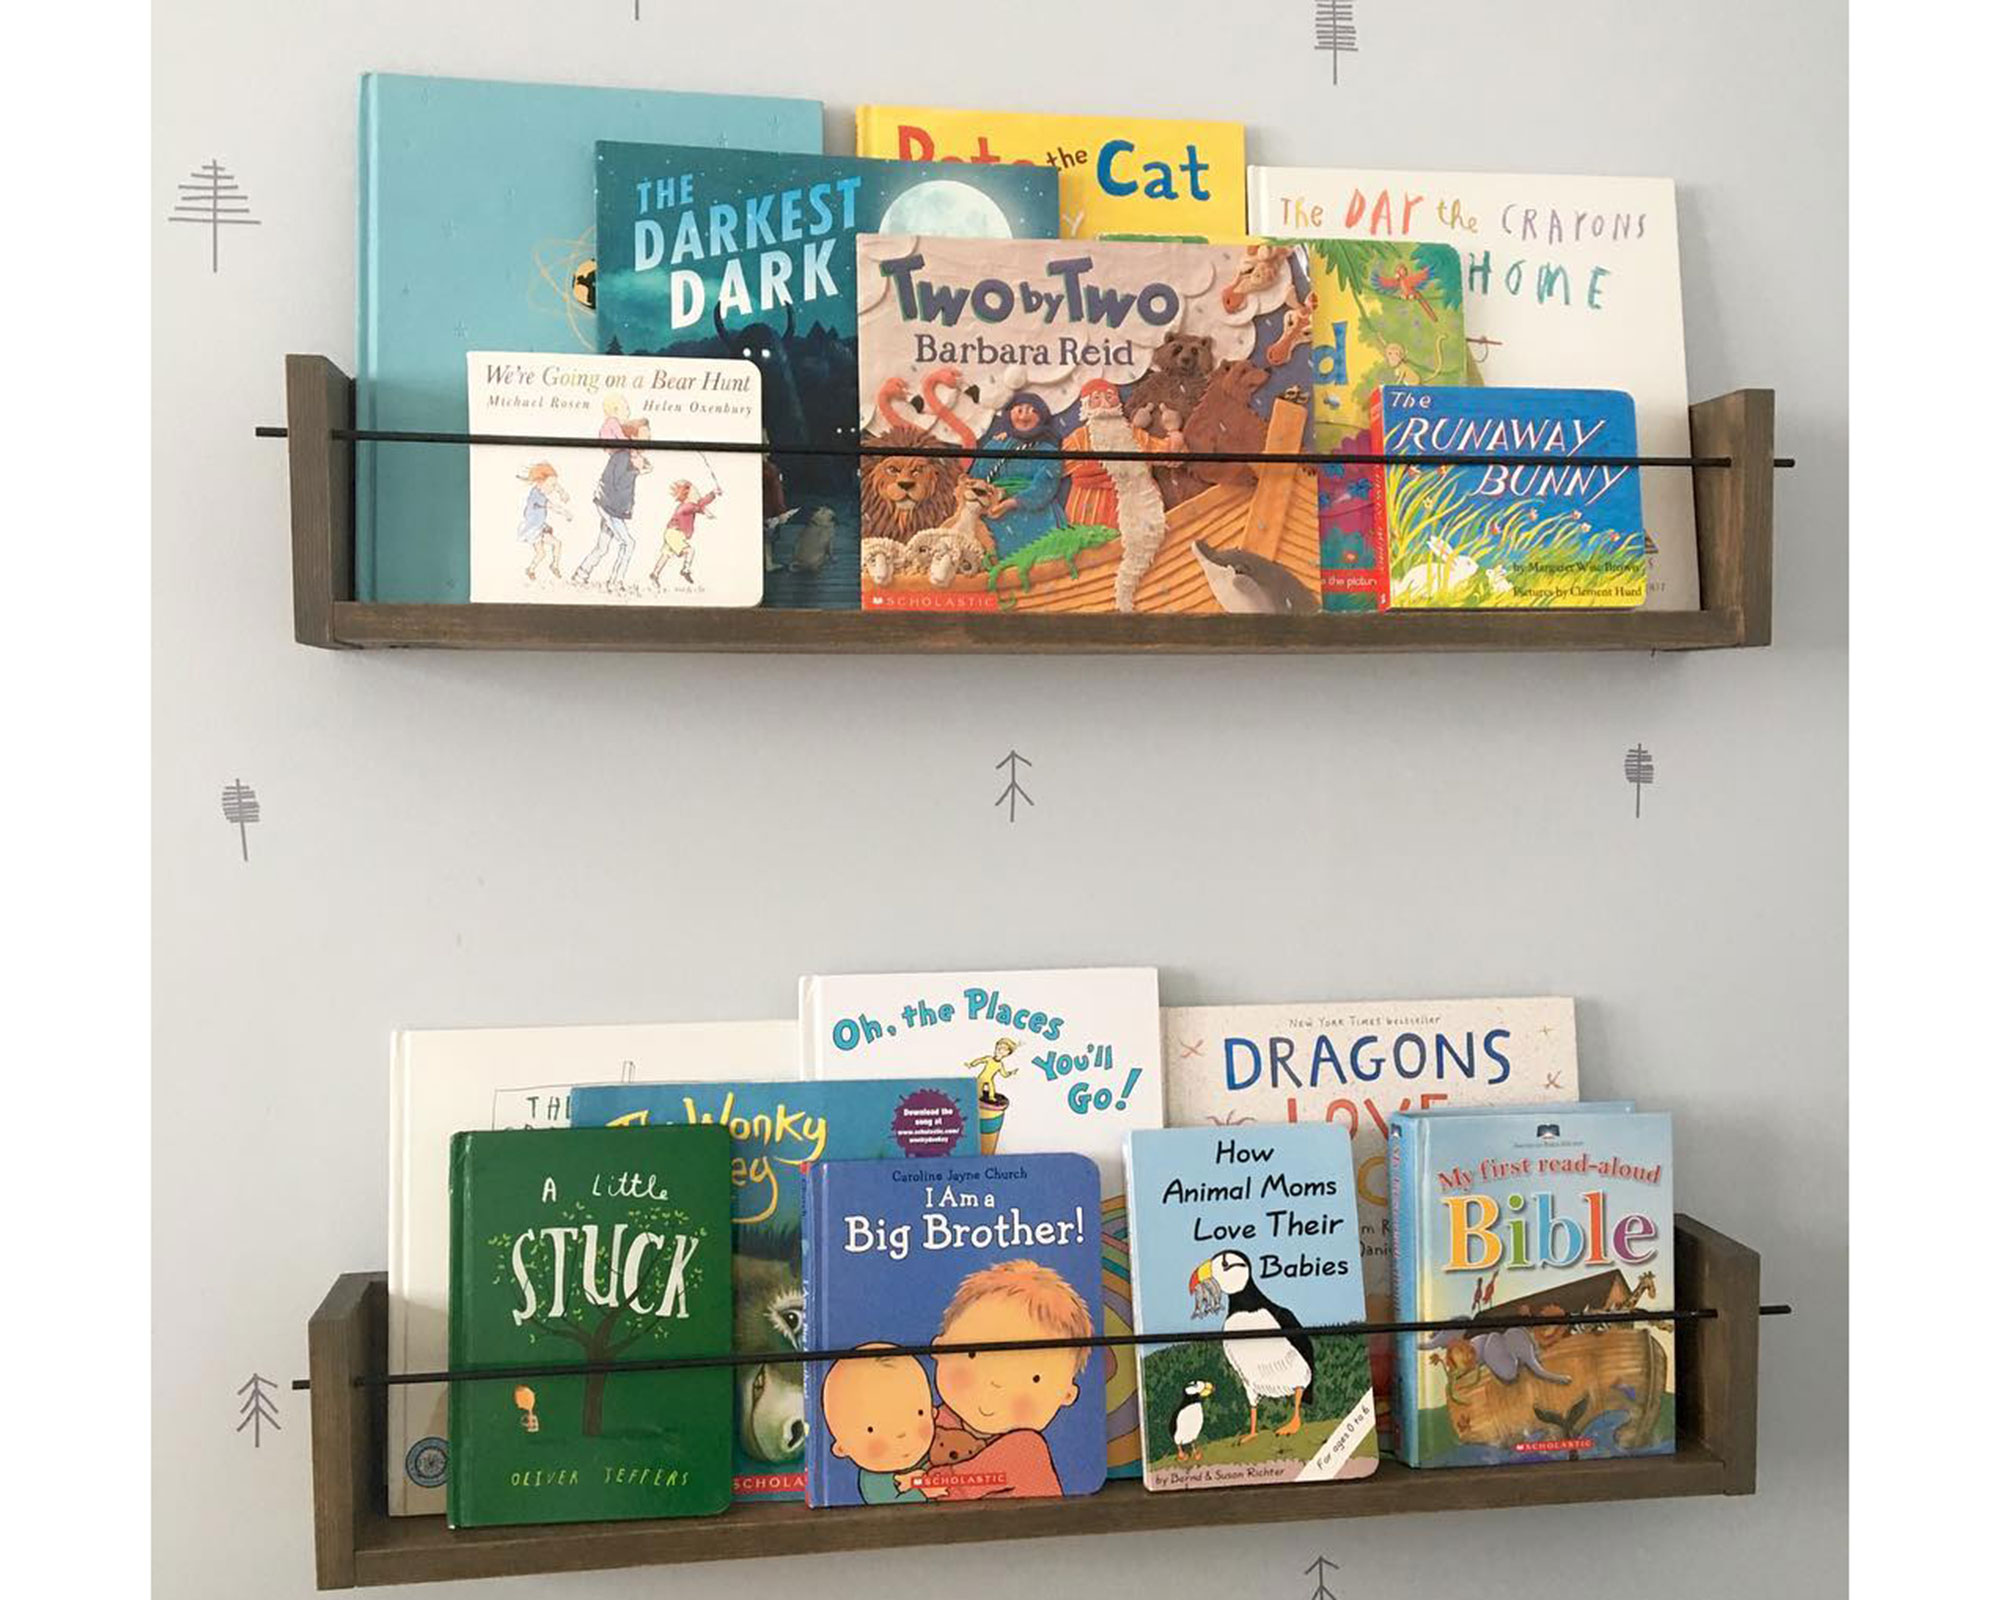
'A couple of years back I made cube nightstands to contain his growing collection of books, but found they were always scattered across the floor because they were tough to access,' says Carly VandenEnde aka @carlyende, mom of three, college professor, and DIY enthusiast.
'With only a 1x3 and 1/8” steel rod (less than $10/shelf) and about 1 hour of work, I put these together. Super simple DIY and this 4 year old and his momma are pumped! Let’s hope those books stay on the shelf now.'
6. Noreen's after work bookshelf project
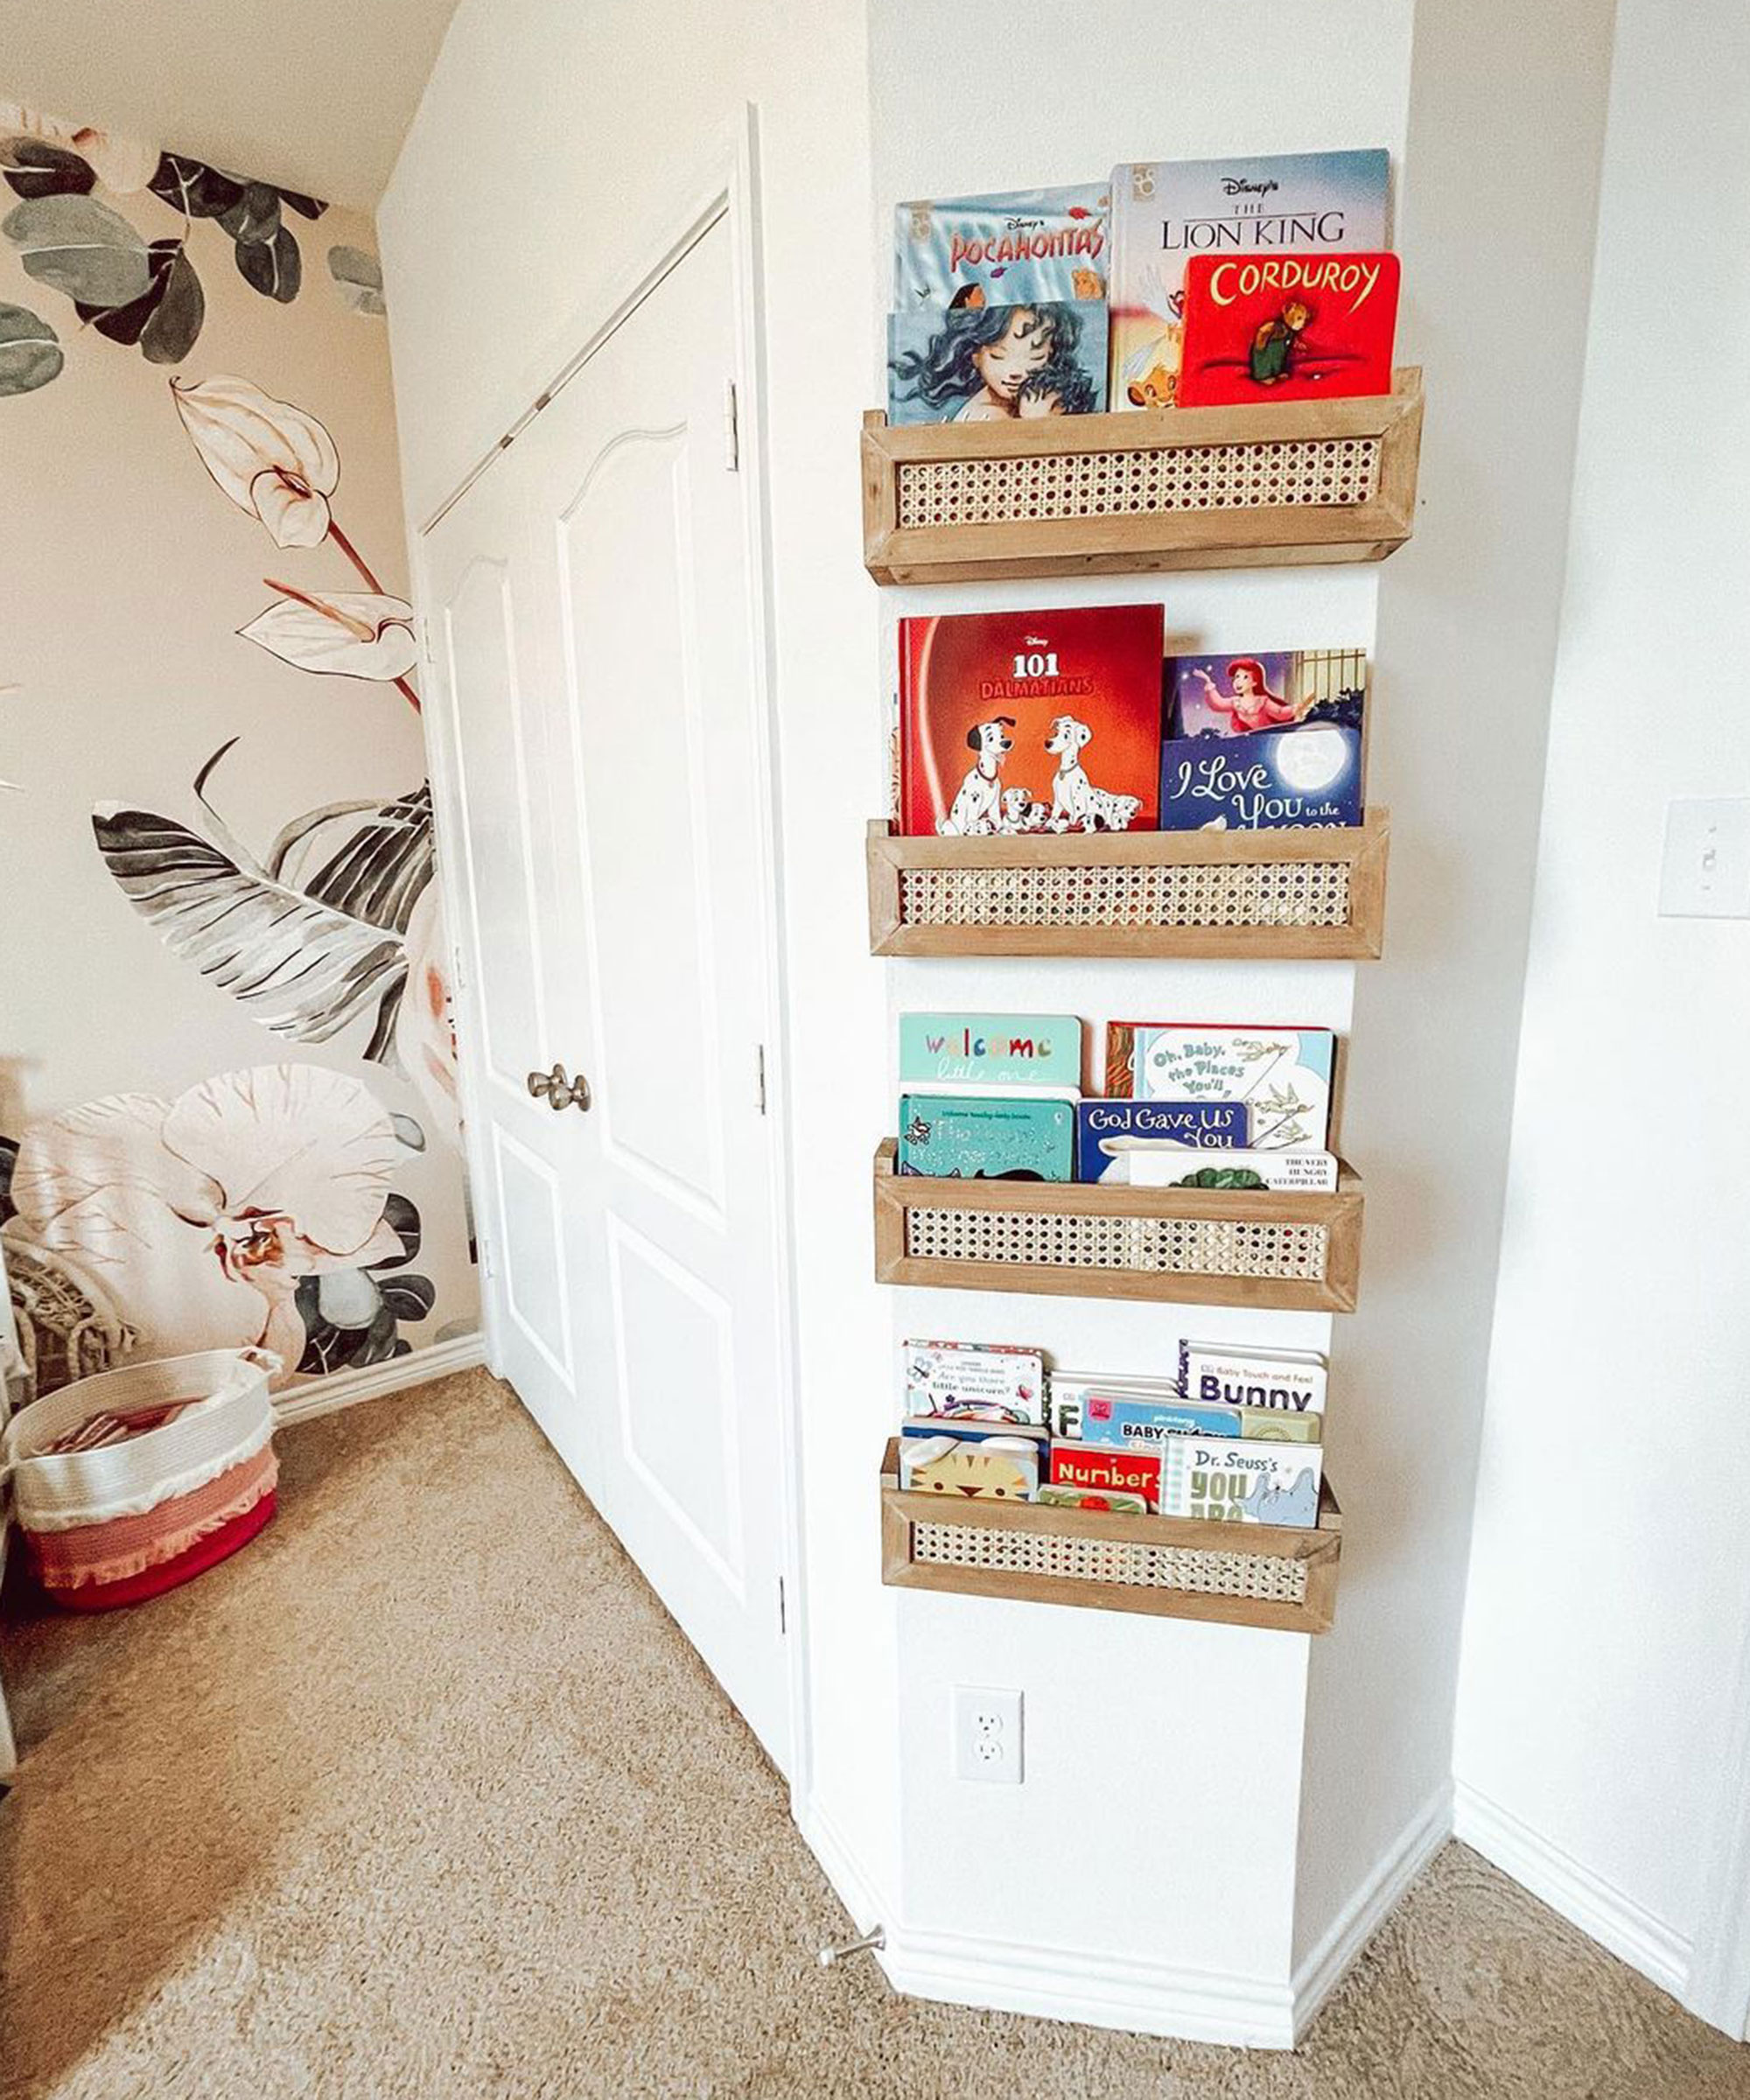
Despite its popularity in the seventies, you're never too young to inject a bit of bohemian flair into your bedroom. These DIY bookshelves give this space a retro feel without making it feel outdated. And, they add interest to what would otherwise be an awkward area of the room.
'These bookshelves are so easy to do!' admits Noreen aka @ouraesthetic_nest
'Even as a working momma! It took me about 3 days (after work and between meetings) to complete these cute bookshelves. I think in total, I spent $75 on supplies to complete this project!'
You will need:
- 1x3s
- Trim
- Cane webbing
- Staple gun
7. Anika Gandhi's rotating bookshelf
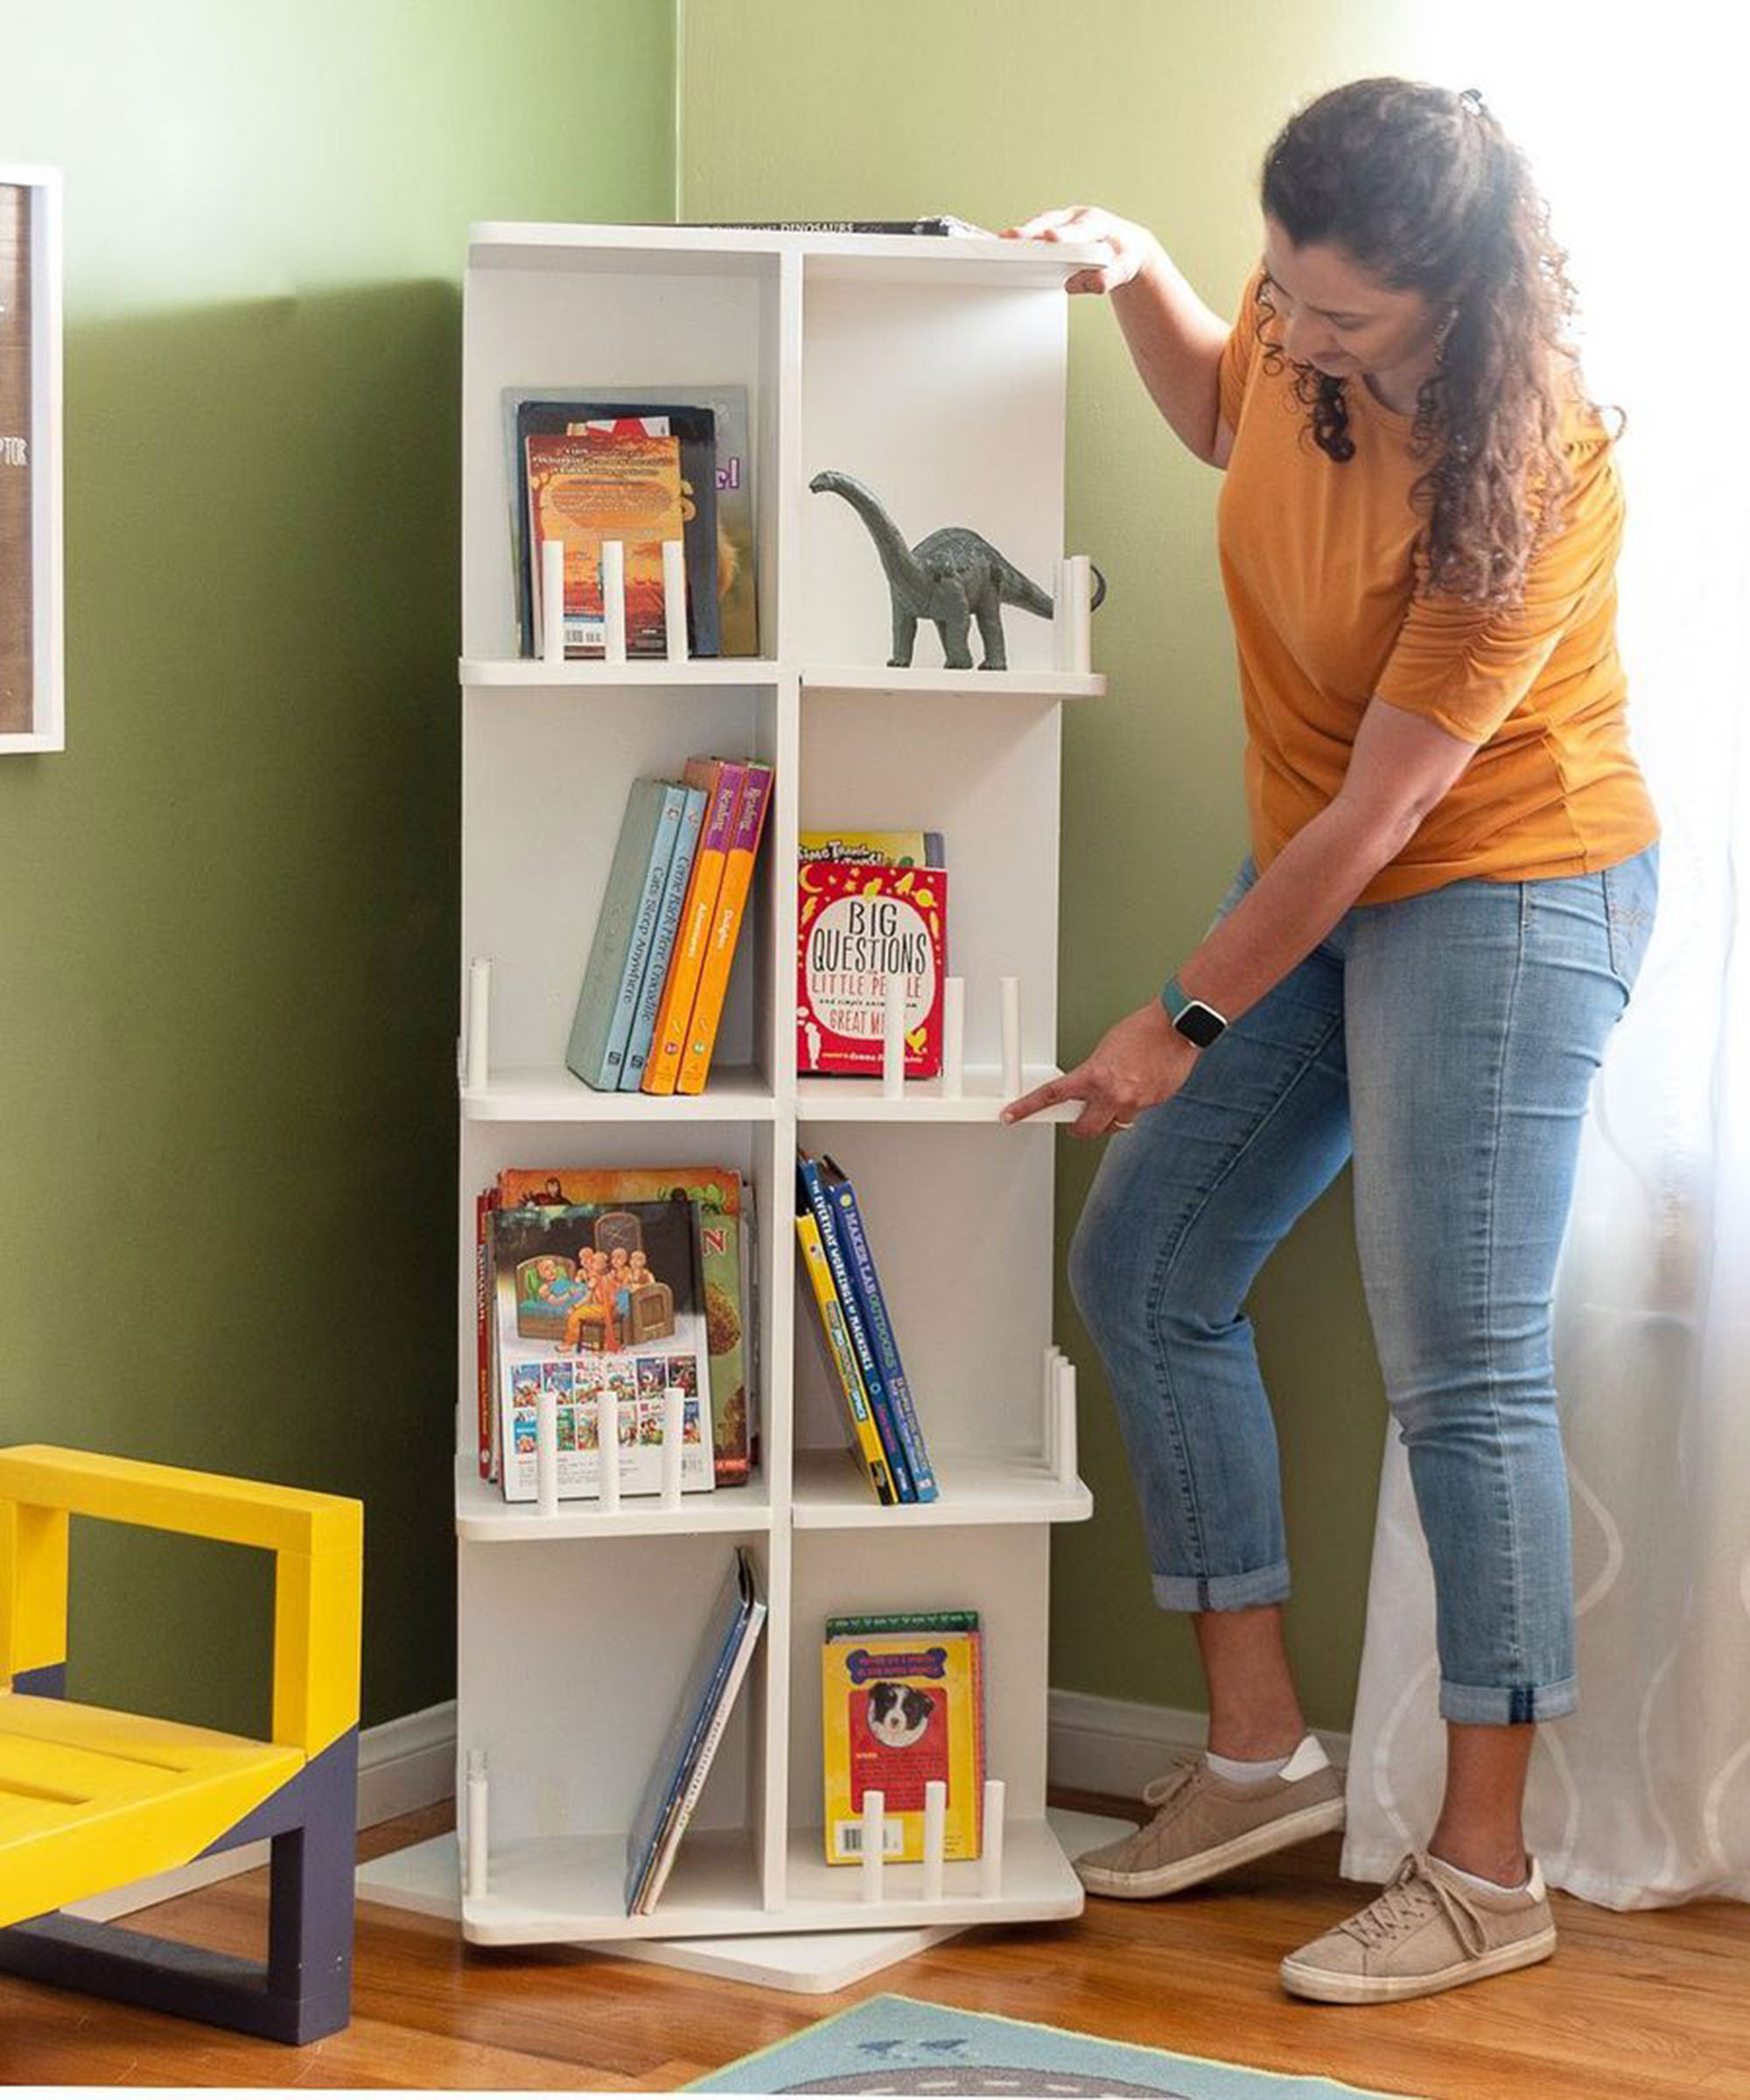
Having a kid that's obsessed with books as much as Roald Dahl's Matilda can be a blessing and a curse. After all, if your wall space is limited or they have a small bedroom, the space can quickly become cluttered. This rotatable DIY bookshelf not only uses vertical space but kids can also be fascinated by the 360-degree spinnable feature.
'My son’s room has turned into an explosion of books!' explains Anika Gandhi.
'He graduated from early reader books all the way to big chapter books but we never upgraded his book storage. The books had completely outgrown the current storage solutions and definitely needed a change.'
'We needed a large bookcase but I didn’t want to build a huge bookcase that would accommodate all his books for the next few years but would also not be a beast in his room. Instead, I decided to build this revolving bookcase.'
'This bookcase has shelves on four sides, sits nicely in a corner, and doesn’t take up a lot of space. It has a total of over 13′ of storage space, making it easy to categorize and arrange books if needed.'
'This is a fairly simple build and took me about two afternoons to put it together. It is built with plywood and attached using pocket hole joinery. I used birch plywood because my goal was to paint it but you can also stain it and use plywood with a nice veneer.'
8. Ellissa's scalloped shelves
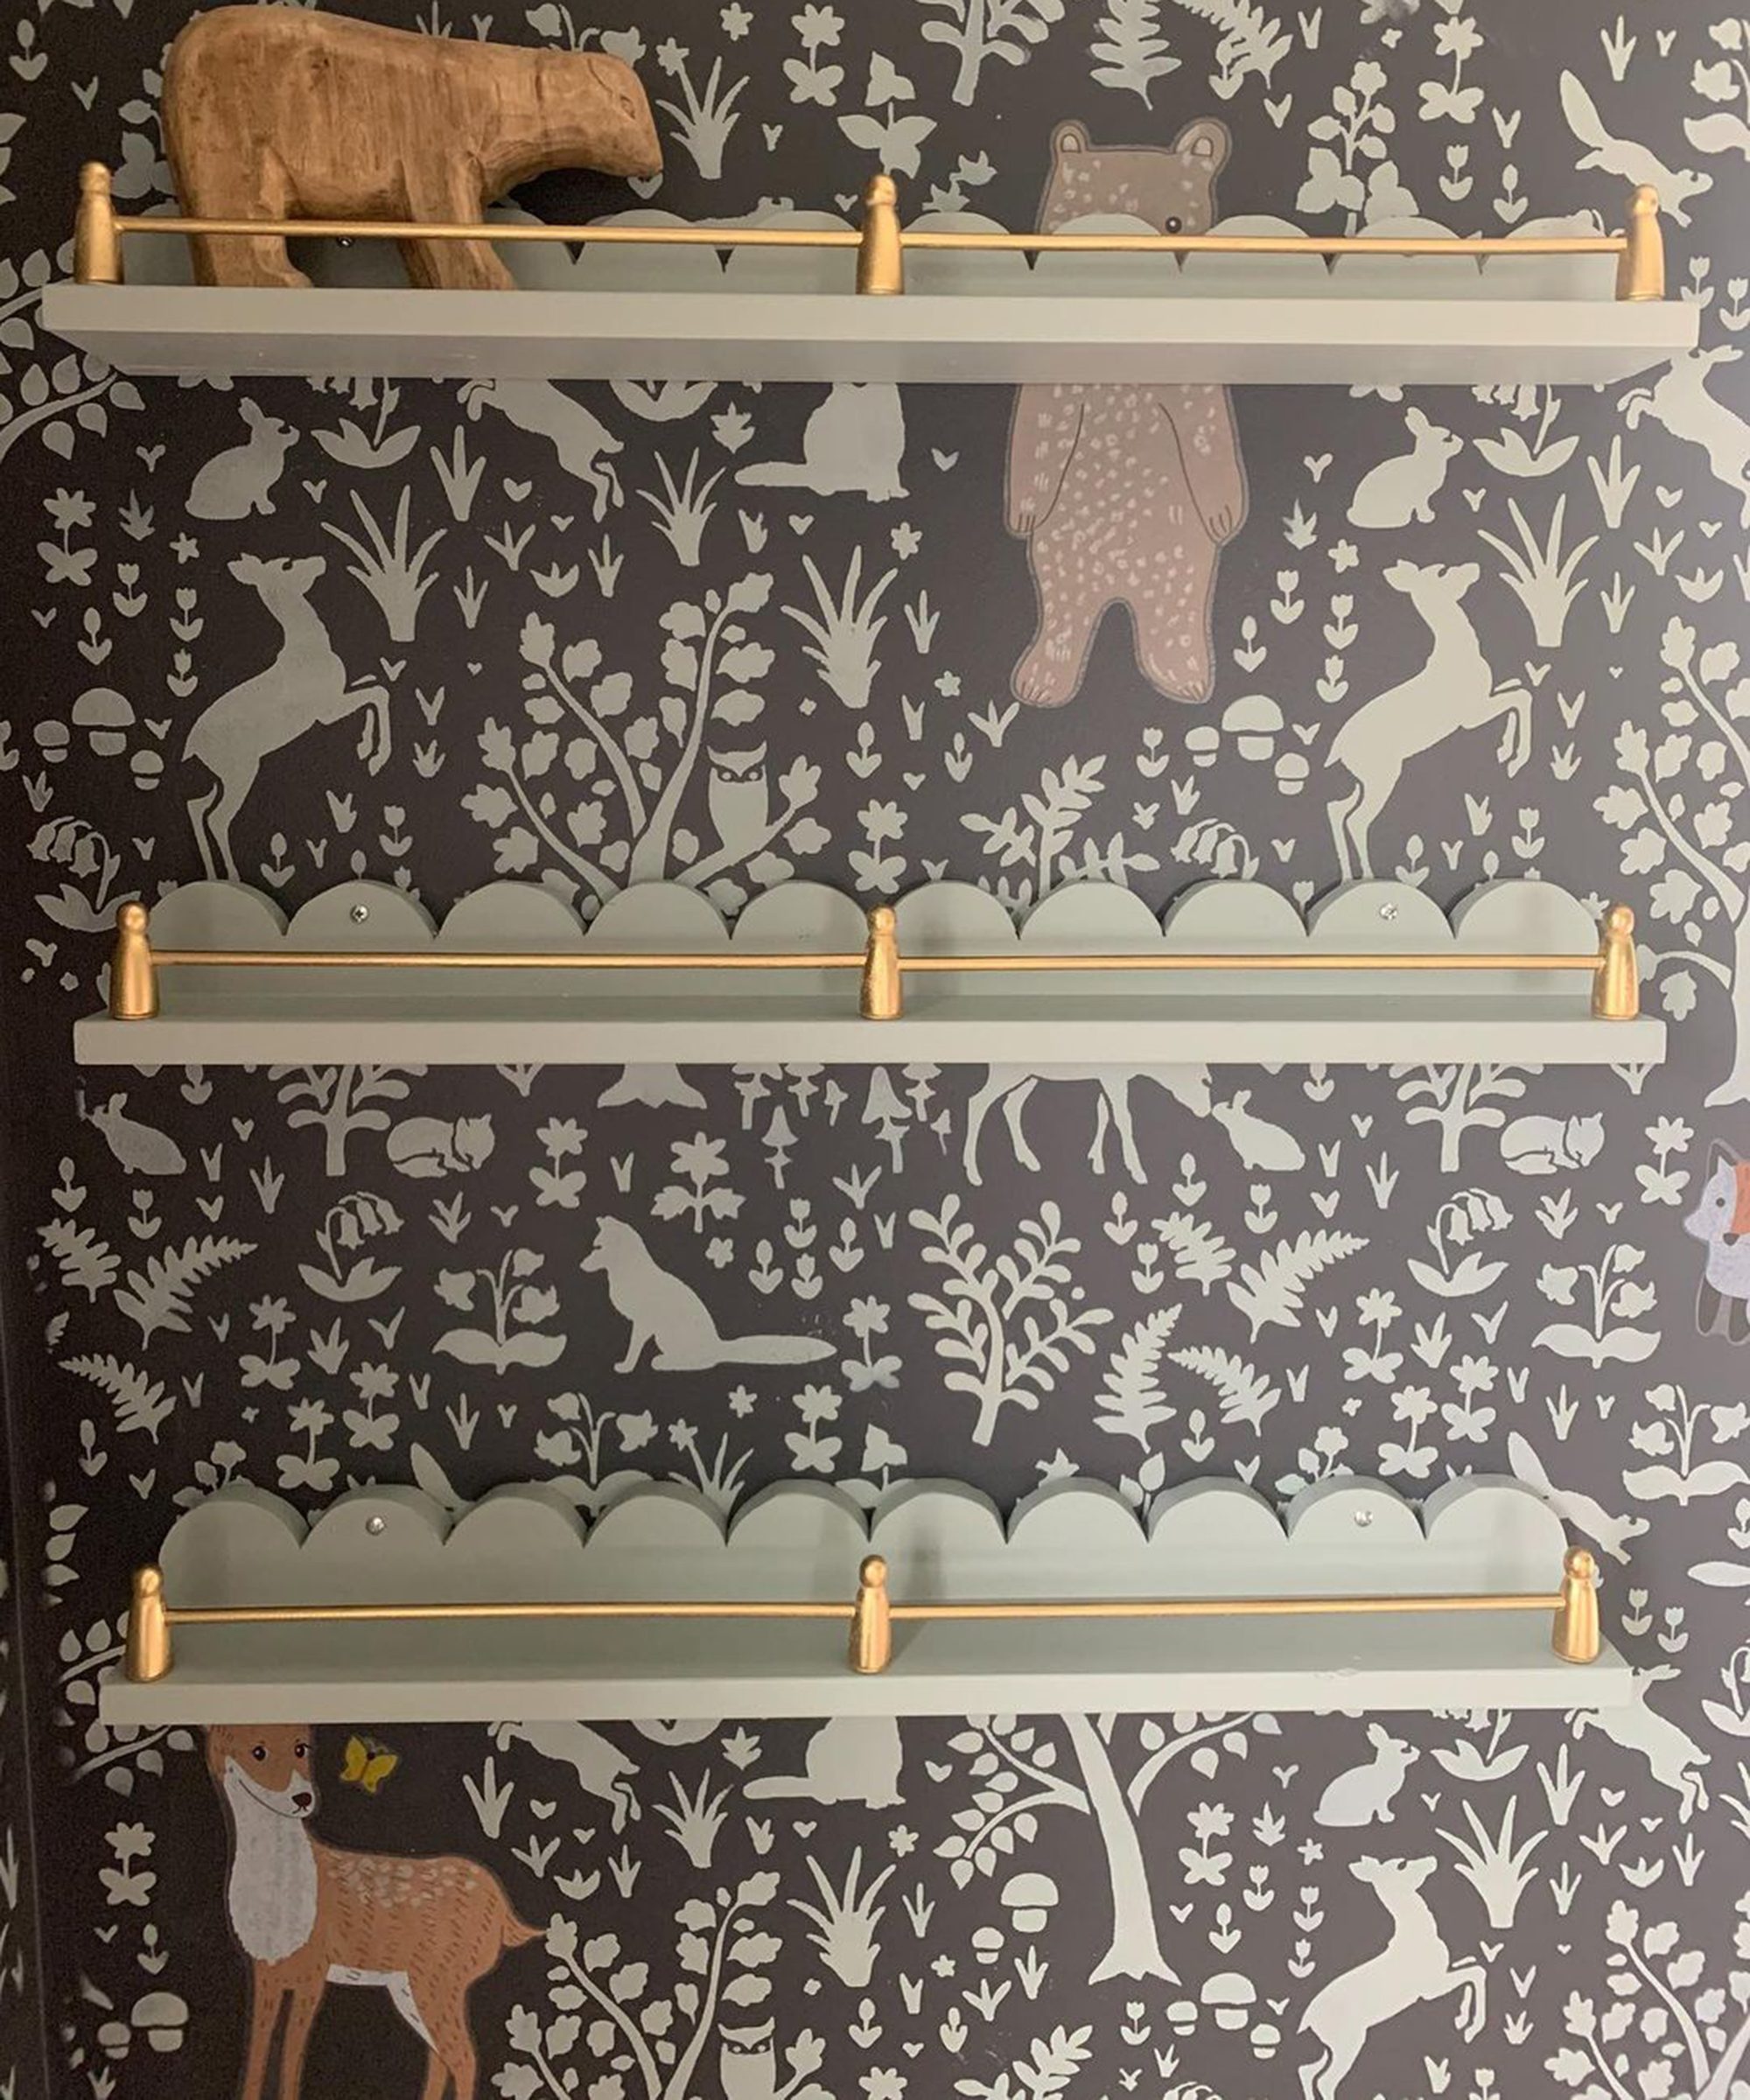
Books are an amazing resource, not only as an educational tool but as a pastime to unleash creativity and imagination. We particularly love these DIY bookshelves in a nursery room, along with the woodland wallpaper backdrop to create a forest luxe feel.
'I’m SO happy I decided to experiment with the details of these DIY bookshelves!' says Ellissa, aka @railviewhome.
'I am obsessed and now I don’t want to add books and cover them up.'
9. Jess's enchanting DIY bookshelf
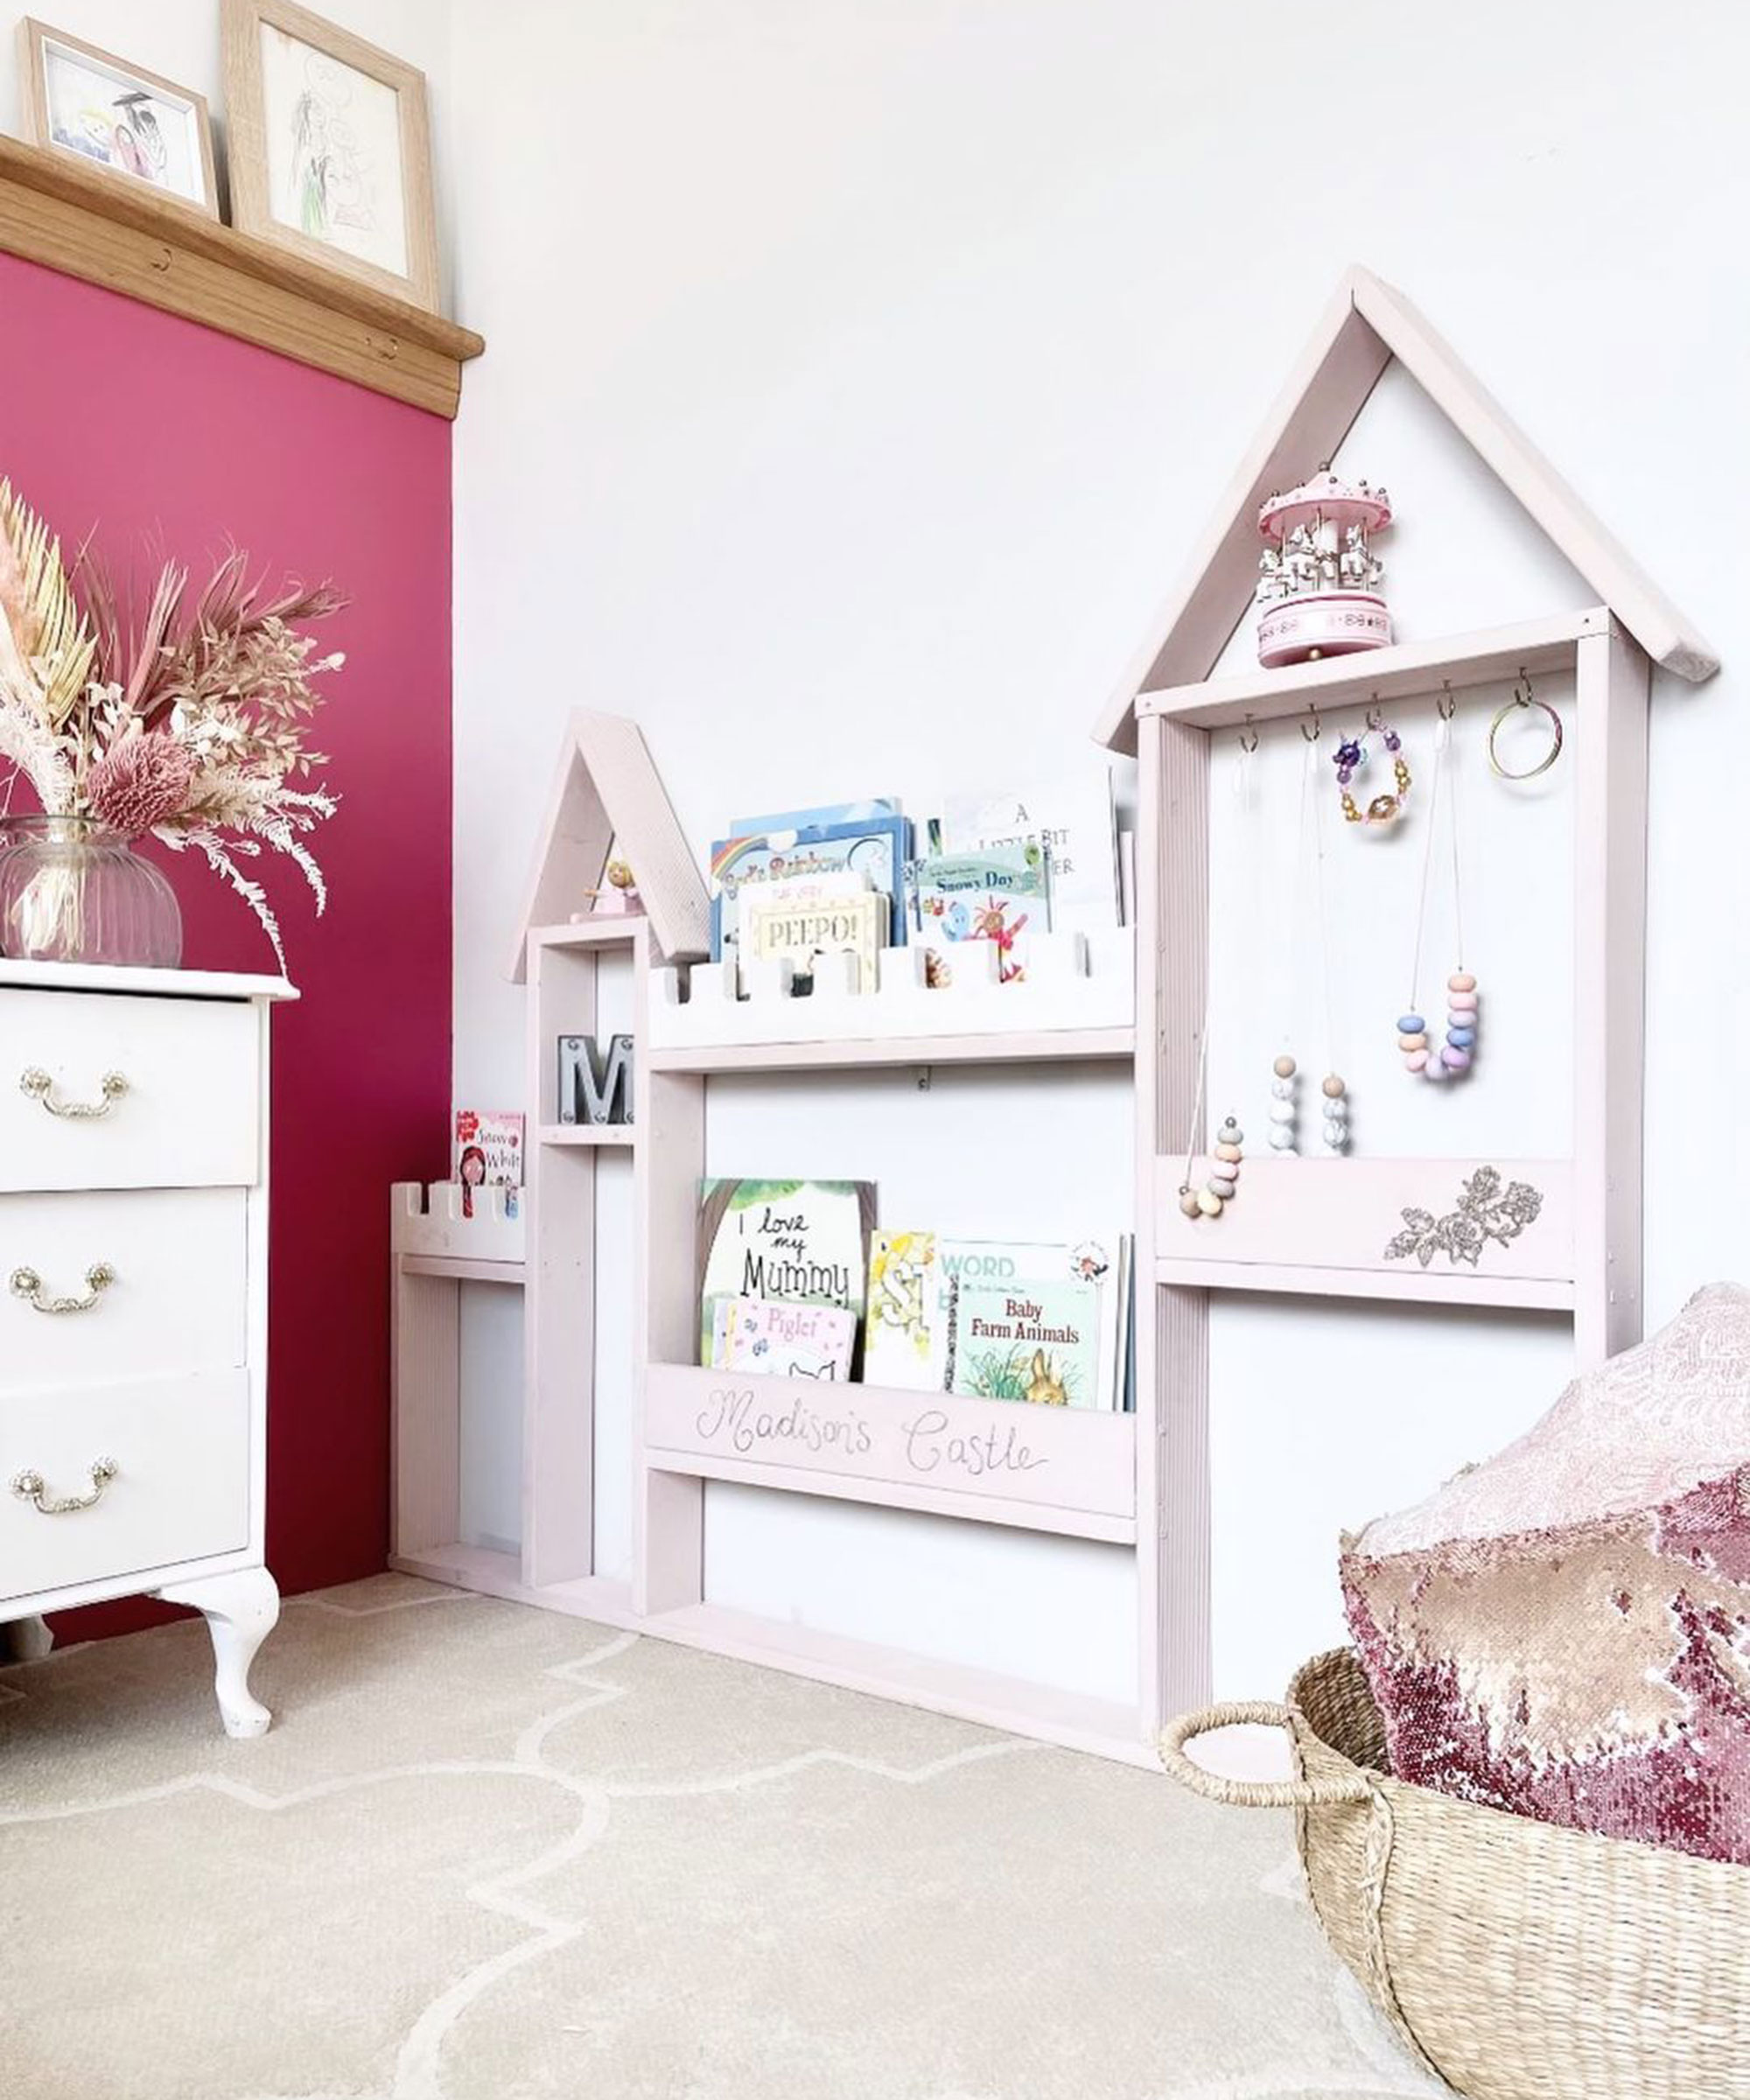
Marvelously majestic, this pink castle DIY bookshelf is perfect for your little princess or prince. Paint in pastel pink for a soft feminine feel, or go regal with a royal blue hue. Why not add extra charm with wood paints that have a glitter pigment for that magical moment?
You will need:
- Electric or manual saw
- Pine decking material
- Measuring tape or ruler
- A Jigsaw
- Screws
- Hammer
- Electric screwdriver
- Small hooks (optional)
- Wood primer
- Pastel pink wood paint
How to:
- Using an electric or manual saw, cut a length of 90x 22mm pine decking to the preferred length of bookshelf - this will be the base.
- Cut shorter lengths of pine decking to the desired height to form the walls, shelves and the pocket/front piece for the shelves.
- Measure, mark and cut angle on roof top pieces to ensure the two pieces join
- Measure and mark the crenels on the top front timber pieces.
- Using a jigsaw, cut out the crenels.
- Layout all completed pieces into position and start attaching together and to the base piece with screws, pre-drilling to prevent the timber from splitting.
- Prime and paint completed bookshelf.
- Add small hooks for jewellery storage if desired.
10. Jodi's bookshelf wall
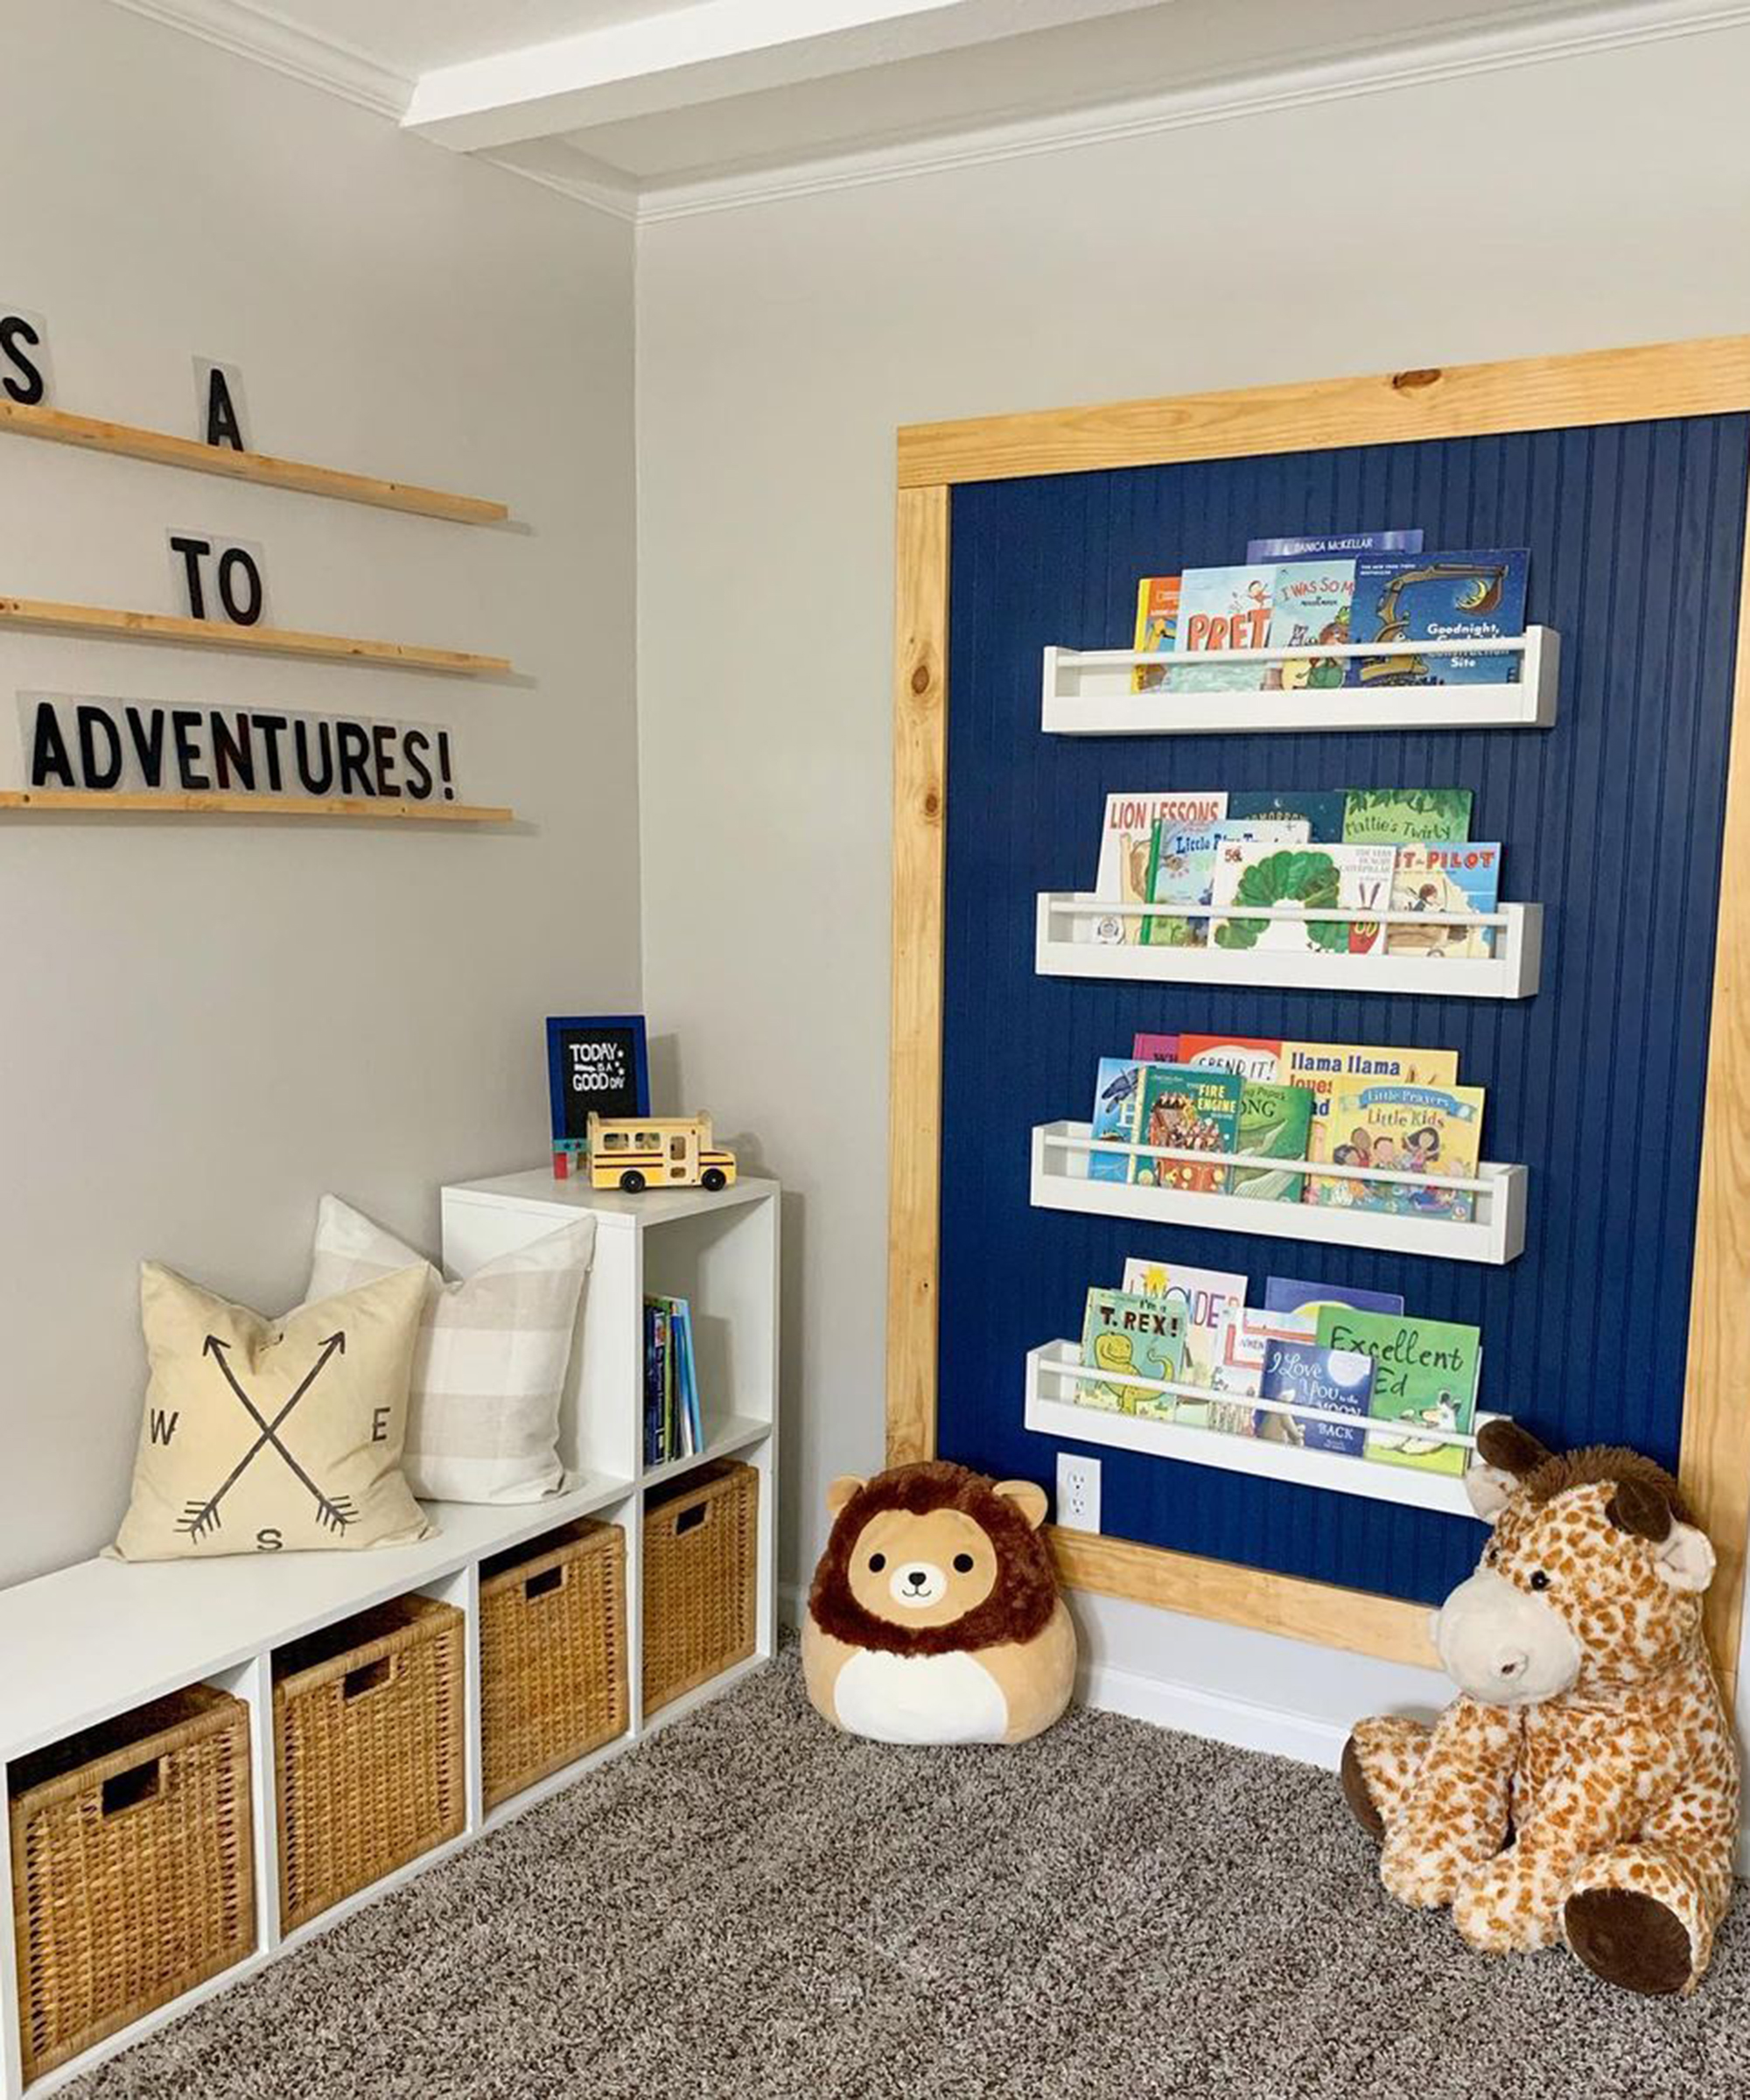
'I wanted a unique bookshelf in my son’s room. After shopping around and not finding exactly what I was looking for, my husband and I decided to build one from scratch putting together a few ideas that inspired me,' says Jodi aka @southern_styleandhome.
You will need:
- Circular saw
- 1/4" beadboard
- 1x4" pine wood for frame
- 1x4" for bookshelves
- Miter saw
- Wood glue
- Finishing nails
- Dowel rod
- Wood primer
- Wood paint in a color of your choice
- Wood stain in a color of your choice
- 4-inch screws
How to:
- Start out by measuring how big you want the beadboard backdrop and pine frame to be around the bookshelf. Jodi used a circular saw to cut 1/4” beadboard down to fit inside the framing.
- Jodi and her husband used 1x4” pine for the frame and cut out a quarter-inch thick and 1-inch deep groove to make a frame around and overlap the beadboard. Next, they found a picture of bookshelves they liked and measured the size that worked for us.
- They then used a table saw to cut the width of the 1x4” pine to our desired size. After, they used a miter saw to cut them all to the correct lengths. Then they used wood glue and finishing nails to put these pieces together.
- Lastly, they used a miter saw to cut a dowel rod to fit across the front for style and stability. They used wood glue and a finishing nailer to attach this in place through the sides. Next they used primer and paint on the beadboard and shelves and stain on the wooden frame. Finally, use 4-inch screws to attach the bookshelves to the studs in the wall. This ensures that heavy books will not tear the shelves out of the drywall.'
11. Ute bookshelf
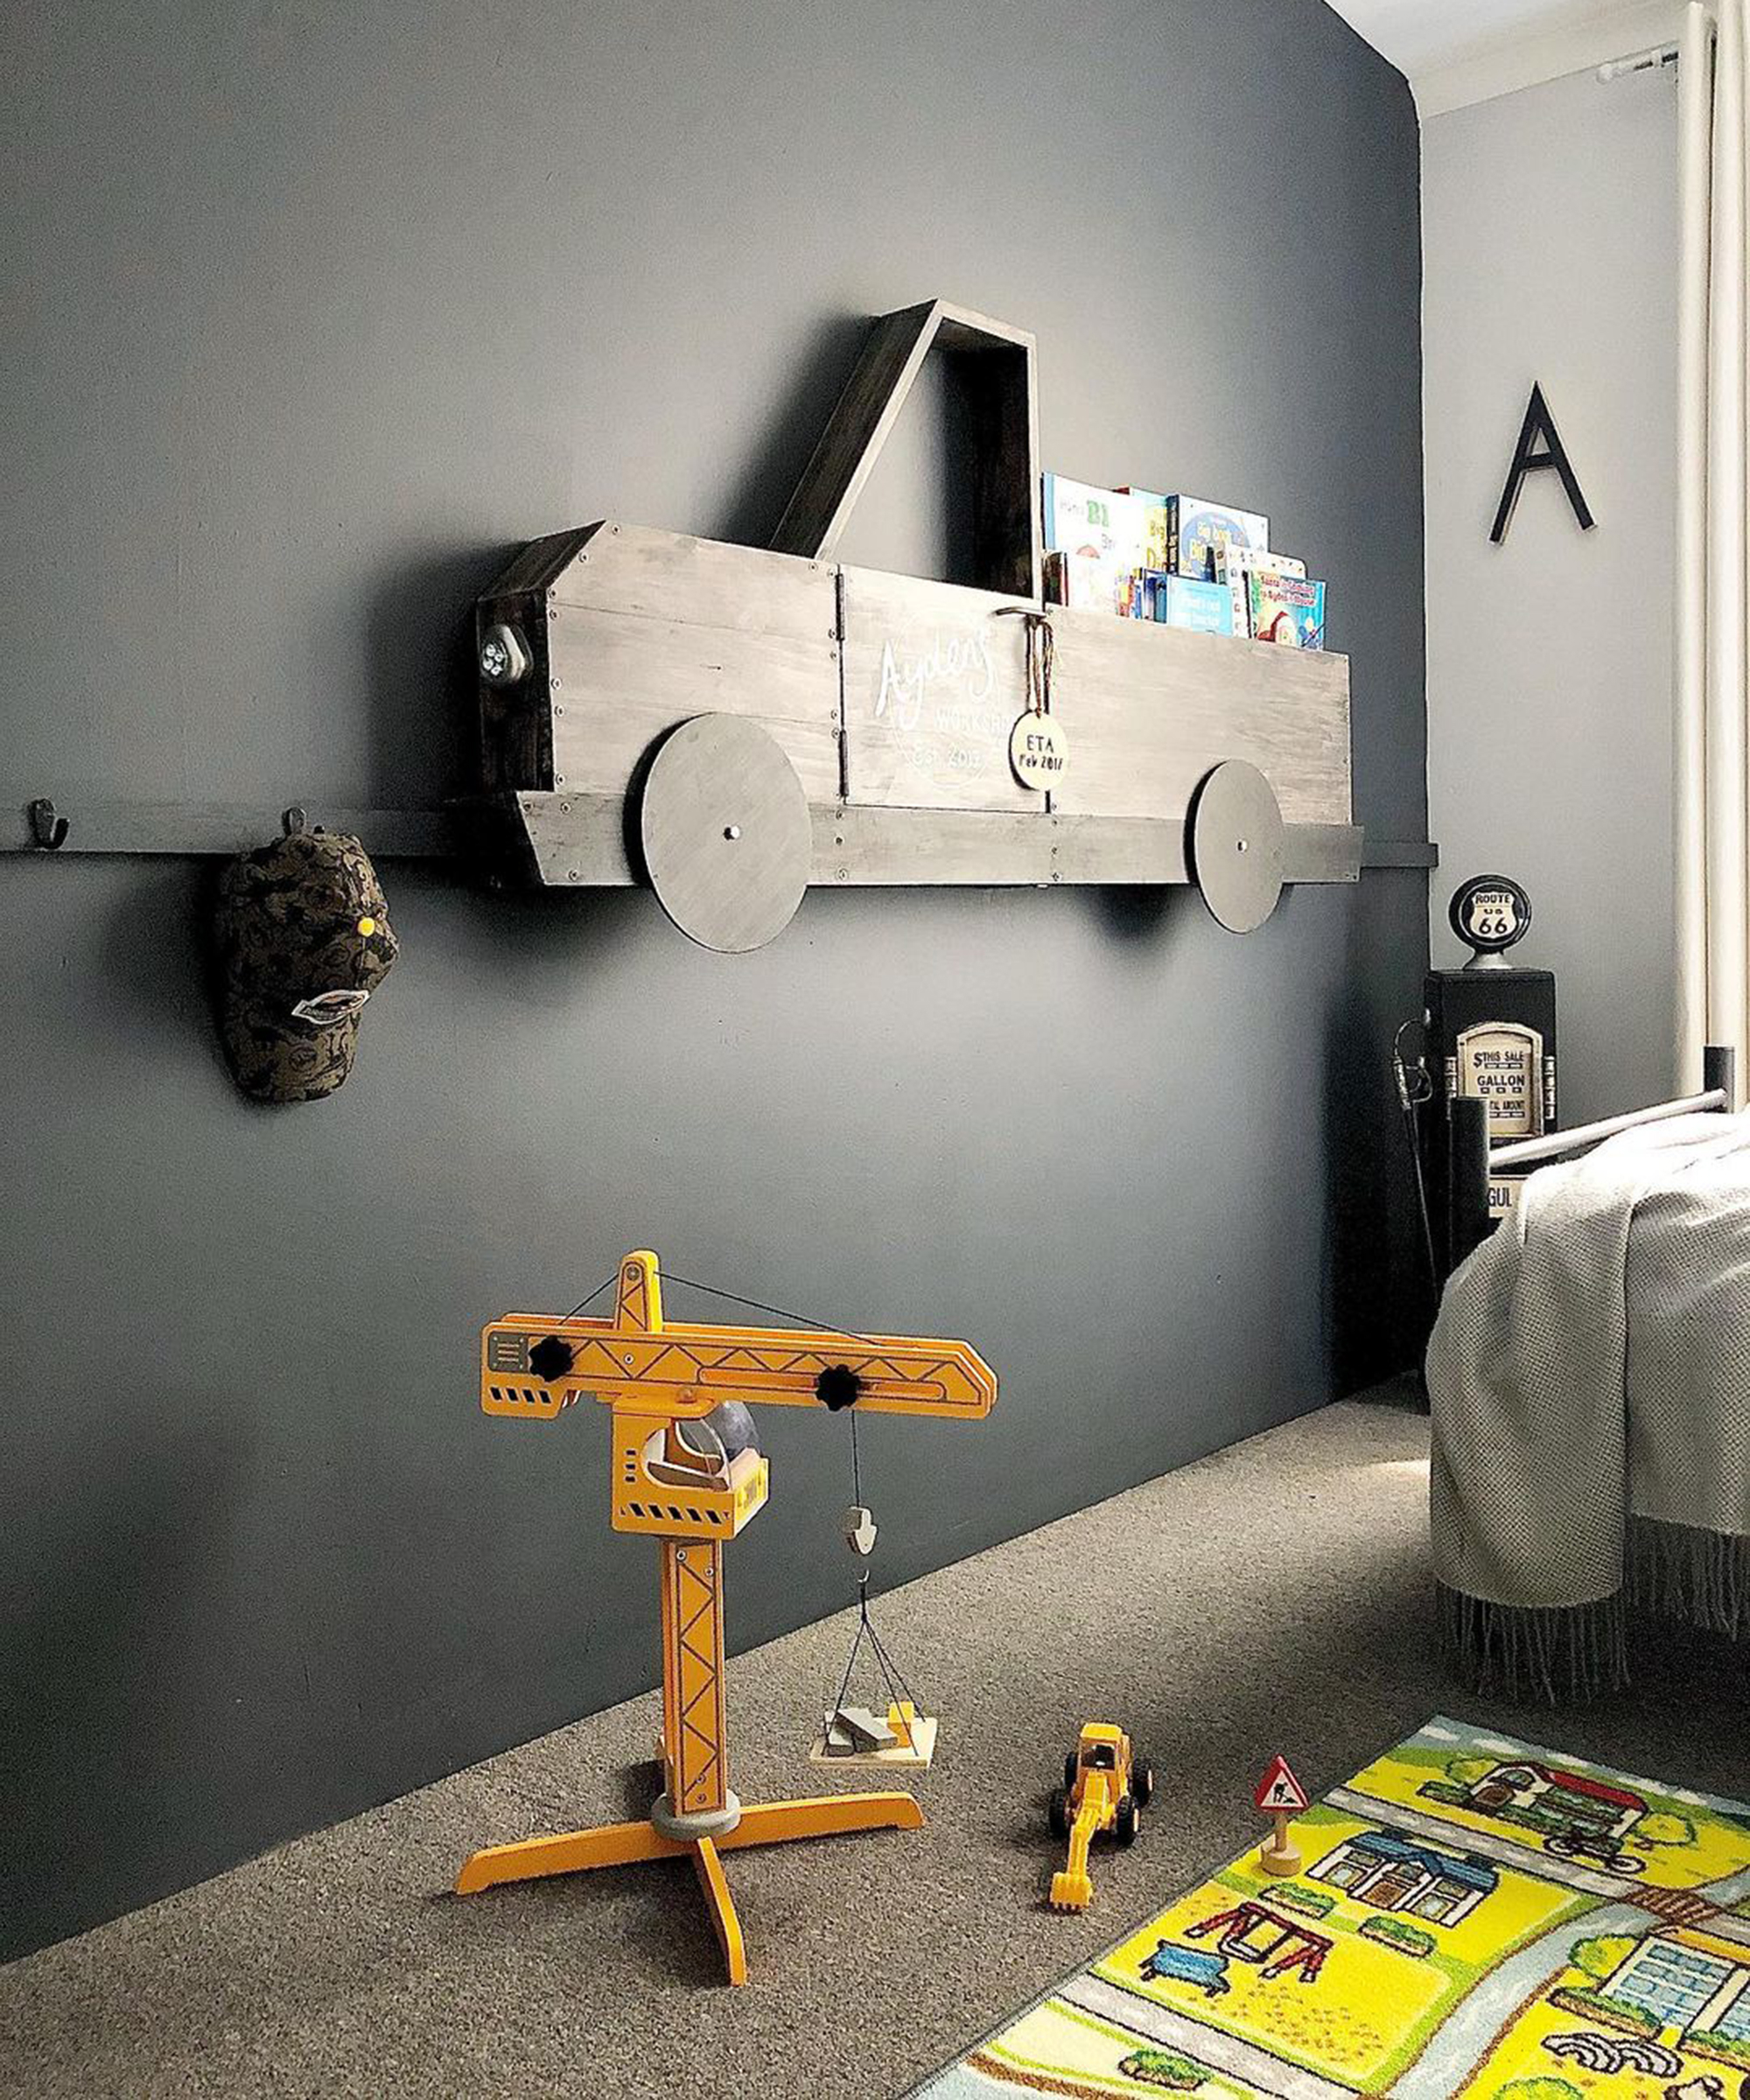
DIY bookshelves don't have to be boring as this utility-vehicle-shaped shelf shows. Perfect for little tykes who are into their cars and trucks, this terrific idea can even come with headlights for added interest. So put the pedal to the metal and get down to your hardware store. This boys' room idea may even rev up his interest in books if he's glued to electronic gadgets.
You will need:
- Pine decking
- Electric saw
- Timber pieces
- Screws or wood glue
- Wood paint or wood stain
- Electric screwdriver
- MDF placemats
- Push button battery lights (optional)
How to:
- Measure space for the desired length of the bookshelf.
- Using 90 x 22mm pine decking, cut pieces with an electric saw to make an outline frame of the car (the 22mm side face down), including 2 vertical pieces for the outline of the door. Leave out the top piece of the ute tray to allow books to be put in.
- Measure and cut an extra timber piece to fit snug in the space between the frame of the right of the door and the back of the ute (this will be the shelf the books will sit on.
- Attach all pieces of the frame together using screws and/or wood glue. Pre-drill to prevent the wood from splitting.
- Measure, cut, and attach pine decking to cover the bottom, front and back of the ute, placing boards flat down and attaching to the frame with screws (leave the area of door and window void)
- Measure the space for the door allowing a gap for hinges (leave window void)
- Cut and lay timber pieces flat, attach together with wood glue - clamp until dried.
- Once dried, add hinge and attach the door to the inside of the door frame
- Measure, cut, and attach timber pieces onto the frame on the inside of the door space to create shelf storage.
- Paint or stain ute for the desired look
- Measure and drill holes for door handle then attach
- Paint two round MDF placemats and drill a hole in the middle
- Mark and drill two holes into the bottom panel of the ute
- Place a long bolt through the hole of each wheel (placemats) then place a nut behind the wheel (allowing some room for the wheel to spin. Slide the bolt through the hole in the ute panel and place a second nut behind it and tighten.
- Add push button battery lights to front and back of the ute for extra wow factor
Are bookshelves outdated?
Not at all. In fact, many trendy furniture retailers are now encouraging us to create a home library to better organize best-sellers and top reads.
'Perhaps the most important thing when creating your reading nook is having a space where you can keep your reading materials. That might just be the one or two books you are reading or it could be your entire bookshelf. But having your reading matter close by is a great way to encourage you to sit down, even for a few minutes, and delve into the pages.' says Kelly Collins, head of creative and in-house interior designer at Swyft
Join our newsletter
Get small space home decor ideas, celeb inspiration, DIY tips and more, straight to your inbox!

Hi, I'm the former acting head ecommerce editor at Real Homes. Prior to working for the Future plc family, I've worked on a number of consumer events including the Ideal Home Show, Grand Designs Live, and Good Homes Magazine. With a first class degree from Keele University, and a plethora of experience in digital marketing, editorial, and social media, I have an eye for what should be in your shopping basket and have gone through the internal customer advisor accreditation process.
-
 What is color drenching? Interior designers love this bold trend
If you're curious about color drenching, our interior designers explain what it is, how to do it, and what to shop to bring it into your home
By Sophie Warren-Smith
-
 7 spring home decor ideas to refresh your home for the season
These spring home decor ideas from interior designers are perfect for brightening up any dull apartment or living space for the new season ahead
By Eve Smallman
-
 How to hang a wreath on a door (without damaging it)
Hang a wreath on a door or mantel without damaging it with our simple tips and tricks. Use some ribbon or adhesive hooks to to pretty up your pad
By Niamh Quinn
-
 Before & After: 2 basic bookcases get a modern makeover
Talented furniture flipper shares how to refinish a cheap basic bookcase and turn it into a modern piece, sure to turn heads.
By Camille Dubuis-Welch
-
 How to hang pictures and fill wall space with art
Knowing how to hang pictures on the wall, with or without nails, will let you decorate your space with art and stunning prints in no time.
By Camille Dubuis-Welch
-
 How to dry flowers: 4 simple ways to preserve blooms
Tired of throwing away a bunch of beautiful blooms? Learn how to dry flowers so they last forever
By Sophie Warren-Smith
-
 How to hide a TV on the wall: a DIY disguise with art
DIY a disguise for your TV on the wall with art and turn heads in your front room, for all the right reasons
By Claire Douglas
-
 How to measure for curtains: a DIY guide for beautifully-dressed windows
Learning how to measure curtains correctly involves working out the ideal dimensions. Here, we drop it like it's hot
By Emily Shaw